
Related Manuals for Strong SRT 7501


Summary of Contents for Strong SRT 7501
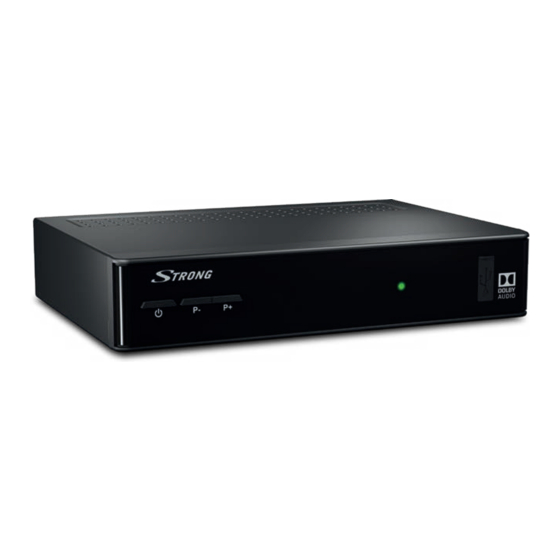
- Page 1 Digitaler High Definition Satelliten Receiver SRT 7501 Bedienungsanleitung User Manual...
- Page 4 HOTLINE 0820 400 150 support_at@strong.tv Geliefert von STRONG Austria Vertreten durch STRONG Ges.m.b.H. Franz-Josefs-Kai 1 1010 Wien, Österreich Email: support_at@strong.tv 13 Apr 2018 17:31...
- Page 5 Licenses THIS PRODUCT IS LICENSED UNDER THE AVC PATENT PORTFOLIO LICENSE FOR THE PERSONAL AND NONCOMMERCIAL USE OF A CONSUMER TO (i) ENCODE VIDEO IN COMPLIANCE WITH THE AVC STANDARD (“AVC VIDEO”) AND/OR (ii) DECODE AVC VIDEO THAT WAS ENCODED BY A CONSUMER ENGAGED IN A PERSONAL AND NON-COMMERCIAL ACTIVITY AND/OR WAS OBTAINED FROM A VIDEO PROVIDER LICENSED TO PROVIDE AVC VIDEO.
-
Page 6: Table Of Contents
8.0 TROUBLESHOOTING 9.0 TECHNICAL SPECIFICATIONS STRONG declares that this item complies with the basic requirements and other relevant regulations of directives CE 2004/108/EC and 73/23/EC, RoHS 2002/95/EC Subject to alterations. In consequence of continuous research and development technical specifications, design and appearance of products may change. -
Page 7: Introduction
1.0 INTRODUCTION 1.1 Safety Instructions Read all of the instructions before operating the device. Keep these instructions well for later use. Only use attachments/accessories specified or provided by the manufacturer (such as the „ „ exclusive supply adapter, battery etc.). Please refer to the information on the product enclosure for electrical and safety information „... -
Page 8: Storage
„ „ the SCART/HDMI connections are well shielded and from good quality. The user manual available on our website www.strong.tv provides complete instructions for installing and using this receiver. The following symbols will serve as follows. WARNING Indicates warning information. -
Page 9: Usage Of External Usb Devices
„ Always make backups of data on your USB storage device before using it with this receiver. STRONG will not take responsibility for any loss of information or circumstances caused by loss of information. For a proper performance with this receiver your USB device must be formatted to FAT32. -
Page 10: Remote Control
6. Power adapter To connect to the original included main power adapter (Input 100 ~240V 50~60Hz/ Output 12 V DC/ 1,5 A 2.5 Remote Control Fig. 3 1. q Switches the receiver On/Standby 2. ! Mutes audio output of the receiver in every mode incl. videotext, the symbol will not be shown within menu mode 3. -
Page 11: Inserting The Batteries
2.6 Inserting the batteries Fig. 4 NOTE: The batteries must not be recharged, disassembled, electrically short- circuited, be mixed or used with other types of batteries. 2.7 Using the remote control Fig. 5 NOTE: The remote control will not operate if its path is blocked or affected by bright/stroboscopic light. -
Page 12: Starting Up For The First Time
4.0 STARTING UP FOR THE FIRST TIME Ensure that your satellite signal is of good quality and that all connections are properly setup. In case of difficulties or questions, please ask your local dealer or service hotline for assistance. It is recommended to follow the First Time Installation step by step. -
Page 13: Quick Guide To Using Your Receiver
5.0 QUICK GUIDE TO USING YOUR RECEIVER We at STRONG understand that you can't wait to enjoy your new HD receiver. The following quick guide will make you familiar with the basic operation of this device. We do, however, advice you to read the full manual on our website www.strong.tv to get the best performance from your STRONG HD receiver. -
Page 14: Operation
6.0 OPERATION In viewing mode, several features are available to make watching TV a true pleasure. This chapter describes these features. Please also read chapter 7.0 to get familiar with the menu of your new receiver. 6.1 Changing channels Your new receiver is equipped with three ways to change channels. 1. -
Page 15: Info Banner
6.1.4 Using the button In order to quickly switch between your most preferred channels, use 9 to view the list of Recently watched channels. This list contains up to 30 of the most recently watched channels. As this list is temporary it will be recreated each time after you switch on your receiver. -
Page 16: Changing The Video Settings
NOTE: DVB subtitles on Astra 19.2 are currently available on different German channels: Das Erste HD, ZDF HD, 3sat HD, arteHD, WDR HD and other popular channels. If you switch the Subtitles Display to On, the according subtitles will be displayed automatically in case of availability for this channel/movie. -
Page 17: Main Menu
The detailed description of the timer functions can be found in chapter 7.3.4 Timer. NOTE: Availability of EPG data depends on broadcast and can be displayed for up to 7 days. If you are opening the EPG just after the receiver was switched on or changed to another transponder we recommend to wait for a short moment in order to collect the data. - Page 18 7.1.2 Motor Setting If you are using DiSEqC 1.2 or USALS, you can install satellites which are received by a motorised dish. For the correct installation and positioning of your motor, we recommend the support/advice of a professional and experienced installer. Here you can configure the motor type and set the motor position for a satellite that you want to receive.
- Page 19 7.1.3 Channel Search In this menu, you can perform an automatic, network or transponder search. You can also search for channels on all installed satellites. Use the pq buttons to highlight the desired item and use t u to change the settings. Satellite: Here you will find a list of satellites, only select a satellite/s which is available in your installation or have been configured previously.
-
Page 20: Channels
7.1.3.1 Edit, add or delete transponders In this submenu, you can edit transponders. Use pq to navigate. Use the 0~9 buttons to enter the desired/changed frequency. Frequency: Use the 0~9 buttons to enter the required symbol rate. Symbol Rate: Use the t u buttons to change the polarization. Polarization: Select pq Save to accept or Cancel to discard the changes. - Page 21 The Move functions allows you to move one or multiple channels. In the Program List, select the channel(s) you want to move with OK. They will appear one by one in the Selected column and you can already define the sequence with the appropriate selection(s). After you are finished with the selection of channels to be moved, use pq and P+/P- to select the new position in the Program List where the channels should be moved to and press the YELLOW Move key.
-
Page 22: Settings
protection or EPG-based age restrictions, you must enter your PIN-Code according to your settings. Press OK to open the options listed below. PIN-Code Change: Use 0 ~ 9 to enter the old PIN-Code. Old PIN-Code: Use 0 ~ 9 to enter the new PIN-Code. New PIN-Code: Press the 0~9 buttons to confirm your new PIN-Code. - Page 23 7.3.2 System Settings In this menu, you can adjust the video parameters according to the connected TV, while general settings are also available. HDMI Resolution: This allows you to set the resolution for your HDMI output. If your TV does not support the newly set value, the screen turns black.
-
Page 24: Multimedia
7.3.3 Time Settings In this menu, you can adjust settings for the time and date Time Settings: Select Auto to automatically synchronize the time and time zone, or Manual to set the time manually. Timezone: The time zone can be adjusted in manual Time Settings. This setting is only available when you set the time to Manual. - Page 25 Press OK on this icon to go back to the main directory from a selected subdirectory. Press OK on this icon to move from a selected subdirectory to the next directory. Displays a folder. Press OK on this icon to open it. ...
-
Page 26: Update
7.5.2 OTA Software Update With the OTA (Over The Air) function, you can search for software updates via satellite. Ask your STRONG dealer or visit our website www.strong.tv for more information. Only in the case of an available update and appropriate handling the option will be available in the menu. - Page 27 7.6.1 Product Status The product status shows the current status of entitlements by operator. Each product is marked with date and duration. 7.6.2 Smart Card Status In this menu, you will find specific information about your inserted, valid smart card. 7.6.3 Service Status This menu provides information about the decryption status.
-
Page 28: Troubleshooting
If the receiver does not work properly after checking it, please contact your local service line or STRONG dealer. Alternatively you can send a support mail via our website: www.strong.tv. NEVER open or disassemble your receiver. This may cause a dangerous situation and will void the warranty. -
Page 29: Technical Specifications
Symptom Cause Remedy The USB storage device Formatted incorrectly. Format USB device by PC to FAT 32. is not working properly. Bigger sized HDD connected. Bigger size HDD or HDDs with more partitions might need longer time to be USB 1.1/3.0 device connected. detected. - Page 30 Smartkarten Einschub Number of slots: Standard: ISO 7816 Irdeto Version: SoftCell v3.22 System und Speicherkapazität Main processor: MSD5029 Anschlüsse SAT IN HDMI TV SCART Digital audio S/PDIF coaxial USB port 2.0, type A 5 V/800 mA (max.) DC main power (12 V/1.5 A) Allgemeine Daten Power supply: 100 - 240 V AC 50/60 Hz...
Need help?
Do you have a question about the SRT 7501 and is the answer not in the manual?
Questions and answers