Table of Contents
Advertisement
Advertisement
Table of Contents

Related Manuals for Strong SRT 7007


Summary of Contents for Strong SRT 7007
- Page 1 Digital HD Satellite Receiver SRT 7007 User Manual Instrukcja obsługi Inhaltsverzeichnis Upute za korištenje Indice Felhasználói kézikönyv Índice Kullanıcı Kılavuzu Manual do Utilizador Руководство пользователя Uživatelská příručka Посібник користувача Používateľská príručka...
- Page 4 Supplied by STRONG & Co, Japan Represented by STRONG Ges.m.b.H. Franz-Josefs-Kai 1 1010 Vienna Austria Email: support_at@strong.tv 21 Jul 2016 15:28...
- Page 5 Your receiver is delivered with USB multimedia support. After downloading the software for recording via USB from the website www.strong.tv, the receiver can be upgraded to support the recording and Timeshift function via USB. This user manual describes the full functionality including the recording function and may not be applicable if the software for recording via USB has not yet been installed.
-
Page 6: Table Of Contents
TAbLE of ConTEnTs 1.0 InsTruCTIon 1.1 Safety Instructions 1.2 Storage 1.3 Equipment Set-up 1.4 Accessories 1.5 Usage of external USB devices 2.0 Your rECEIvEr 2.1 PIN code default: 0000 2.2 Front and side panel 2.3 Rear panel 2.4 Remote Control 2.5 Installing the batteries 2.6 Using the remote control 3.0 ConnECTIons... -
Page 7: Instruction
1.0 InsTruCTIon 1.1 safety Instructions Do noT InsTALL Your rECEIvEr: In a closed or poorly ventilated cabinet; directly on top of or under any other „ „ equipment; on a surface which might obstruct the ventilation slots. Do noT EXPosE ThE rECEIvEr or ITs ACCEssorIEs: To direct sunlight or any other equipment that generates heat;... -
Page 8: Equipment Set-Up
„ the receiver. Always make backups of data on your USB storage device before using it with this receiver. STRONG will not take responsibility for any loss of information or circumstances caused by loss of information. STRONG cannot guarantee the playback of all files although extensions are listed, as it „... -
Page 9: Your Receiver
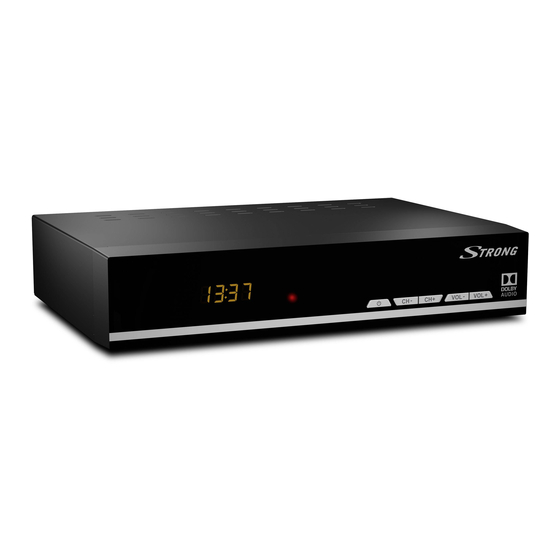
*This user manual describes the full functionality including the recording function and may not be applicable if the software for recording via USB has not yet been installed. 2.0 Your rECEIvEr 2.1 PIn code default: 0000 2.2 front and side panel Fig. - Page 10 8. AuDIo Displays the audio selection menu with selections for available languages and audio modes 9. Info Press once to display channel number/name and current/coming information. Press twice to display detailed event information. Press again to get back to viewing mode 10.
-
Page 11: Installing The Batteries
*This user manual describes the full functionality including the recording function and may not be applicable if the software for recording via USB has not yet been installed. 2.5 Installing the batteries Fig. 4 Remove the battery cover from the remote control and put 2x AAA size batteries inside the compartment. -
Page 12: Connecting Multiple Fixed Lnbs Using A Diseqc Switch
3.3 Connecting multiple fixed Lnbs using a DisEqC switch Fig. 8 a), Connect the LNBs of your fixed antenna to the inputs of a DiSEqC switch b), Connect the output or “to receiver” connector of the DiSEqC switch to the SAT IN connector on your receiver. -
Page 13: Dish Setup
5.0 QuICk GuIDE for usInG Your rECEIvEr We at STRONG understand that you can’t wait to enjoy your new HD receiver. The following quick guide will make you familiar with the basic operation of this device. We do, however, advice you to read the full manual to get the best performance from your STRONG HD receiver. -
Page 14: Operation
Choose channels with p/q. Alternatively, you can also enter the channel number with the 0~9 buttons on the remote control or press ok in viewing mode to display the channel list. The volume can be adjusted with tu. 6.0 oPErATIon In viewing mode, several features are available to make watching TV a true pleasure. -
Page 15: Selection Of Audio Language
info of current and following programmes and technical details about the current channel. Press Info again or to close the information. You can change the on-screen duration of the info banner in the System menu. Please refer to section 7.5 for more details. -
Page 16: Favourite Channels
noTE Availability of EPG data depends on broadcast. booking a programme from EPG Select a programme as described above. Press ok when you have selected a programme. This will lead you to the Timer (Schedule) menu. All details are already filled in for you. Save the timer with ok. To display the list of booked events just press the bLuE button while being in viewing mode or Info while being in the EPG. - Page 17 2. Select your favourite programme by p/q and press ok to switch to it. 3. Now in viewing mode you can select channels from the chosen favourite group only by pressing p/q. If you want to change to the main channel list, press ok in viewing mode and then press 4 and select All TV list.
-
Page 18: Picture
3. To store the changes and exit the menu, press . 7.1.2 EPG (Electronic Programme Guide) Please refer to section 6.8 above. 7.1.3 sort Here you can sort your channels in the following orders: Default Sort the channels in the original order By Encrypt Sort the channels from free to scrambled By Frequency... -
Page 19: Channel Search
3. 576i: for PAL system TV. 4. 576p: for PAL system TV. 5. 720p: for NTSC or PAL system TV. 6. 1080i: for NTSC or PAL system TV. 7. 1080p: for NTSC or PAL system TV. You can change the video resolution directly from viewing mode by pressing the GrEEn button on the remote control. - Page 20 DisEqC 1.2 DiSEqC 1.2 is a protocol for motor-driven dishes, the dish/motor-combination itself needs to be aligned due South (North for Southern hemisphere) at its reference position at 0°. It is possible to manually search and store every satellite individually. Refer to the manual of your motor-drive for more detailed information.
-
Page 21: Channel Scan
If your dish is physically obstructed to the East or West (example by a wall), you can limit its moving range by pressing the rED button to Set Limit to prevent it hitting the obstruction. Use: Press tu for moving West/East. Press the opposite tu to stop moving. Move Continue: Press tu for moving West/East in 0.3°... - Page 22 the scan process has been completed, all found channels will be stored and the receiver will switch to the first found channel. Multi-Transponder Scan: Select the transponders you want to scan with the ok button. The selected transponders will be marked with the z symbol. Press bLuE for Scan. A window with scan settings will be displayed.
-
Page 23: Time And Date Settings
SatCR can only work in combination with an optional multi-output (max. 8) satellite splitter and a SatCR LNB, example STRONG type SRT L780 (max. 4 users). Note: SatCR cannot be combined with any other DiSEqC function. SatCR systems are mainly installed by professional experts. -
Page 24: Option
7.4 Time and date settings Press MEnu and select Time. The menu provides options to adjust the time and date settings. Press p/q to select an option and tu to adjust the setting. Press to exit the menu. Time Offset : Select Auto for automatic time and date updates from live signal or Manual for entering them manually. -
Page 25: System Settings
Download the required update file for your receiver model from the support page on our website www.strong.tv or contact your local dealer. Unzip the file on your computer, if necessary, and copy it to root folder of your USB storage device. -
Page 26: Usb
**STRONG cannot guarantee the playback of video files although extensions are listed here, as the correct playback depends on codec used, data bit rate and resolution as well. Please consult the STRONG Hotline in your country to get more details. - Page 27 During playback, following functions are available: u or ok: Start playback of the selected file. To pause/resume playback and 3 to stop it. To rewind or forward playback in x2, x4, x8, x16 and x32 speed. When it has 5 6: fast rewound to the beginning, playback of the current file will be resumed.
-
Page 28: Photo Configure
Info again or . Use the bLuE button and enter the time moment you want to jump to with the 0~9 buttons, then press ok to confirm. With the 5 6 buttons you can rewind or forward playback in x2, x4, x8, x16 and x32 speed. When it has fast rewound to the beginning, playback of the current file will be resumed. - Page 29 WArnInG The format function will delete all data and information from your USB device or selected partition. STRONG will not take any responsibility for damaged or lost data on the USB device. If you have multiple partitions on your storage device, select the partition you would like to format and press ok to continue.
-
Page 30: Troubleshooting
If the receiver does not work properly after ing it, please contact your local Service line or STRONG dealer. Alternatively you can send a support mail via our website: www.strong.tv. NEVER open or disassemble your receiver. This may cause a dangerous situation and will void the warranty. -
Page 31: Specifications
The default password is 0000 Password forgotten Contact the local Service Hotline or send an email to our support via www.strong.tv The external USB HDD does The power consumption is Connect an extra power supply not start. too high. - Page 32 Audio playback: MP3, Flac* Picture view: JPG, BMP* *STRONG cannot guarantee the playback of files although extensions are listed, as it depends on codec used, data bit rate and resolution (all MPEG codec formats are supported). Connectors SAT IN RJ-45 – Ethernet USB 2.0 port: 5 V/800 mA (max.) supported...
Need help?
Do you have a question about the SRT 7007 and is the answer not in the manual?
Questions and answers