
Related Manuals for Foster KS 7151 010


Summary of Contents for Foster KS 7151 010
- Page 1 Questo manuale d’istruzione è fornito da trovaprezzi.it. Scopri tutte le offerte per Foster KS 7151 010 cerca il tuo prodotto tra le migliori offerte di Forni Forno Micro+Grill cod.7151010...
- Page 2 Indice: Italiano p. 2 English p. 23 Français p. 45 Deutsch p. 66 p. 87 Español Nederlan ds p. 108...
-
Page 3: Forno A Microonde
Forno a microonde MANUALE D’ISTRUZIONI MODEL:AG928B8Z MODELLO: 7151010 Leggere attentamente queste istruzioni prima di usare il Read these instructions carefully before using your microwave oven,and keep it carefully. vostro microonde, conservarle con cura. Se le seguenti If you follow the instructions, your oven will provide you with istruzioni verranno seguite, il vostro forno vi garantirà... - Page 4 PRECAUZIONI PER EVITARE LA POSSIBILE ESPOSIZIONE PRECAUTIONS TO AVOID POSSIBLE EXPOSURE A UNA QUANTITÀ ECCESSIVA DI ENERGIA A MICROONDE TO EXCESSIVE MICROWAVE ENERGY (a) Non provare a usare questo forno con lo sportello (a) Do not attempt to operate this oven with the door aperto, dato che potrebbe provocare delle esposizioni open since this can result in harmful exposure to leggere ad energia a microonde.
-
Page 5: Important Safety Instructions
ISTRUZIONI IMPORTANTI DI SICUREZZA IMPORTANT SAFETY INSTRUCTIONS ATTENZIONE WARNING 1. ATTENZIONE: se lo sportello o le guarnizioni dello sportello 1. WARNING: If the door or door seals are damaged, the sono danneggiate, non è possibile usare il forno fino alla oven must not be operated until it has been repaired by riparazione da parte di una persona competente. -
Page 6: Read Carefully And Keep For Future Reference
risultare in un processo di ebollizione eruttiva ritardata, prestare 9. Microwave heating of beverages can result in quindi attenzione nel maneggiare il contenitore. delayed eruptive boiling, therefore care must be taken 10. Il contenuto di biberon e cibi per neonati in barattoli di vetro when handling the container. - Page 7 Per ridurre il rischio di incidenti per persone To Reduce the Risk of Injury to Persons Grounding Installation Installazione messa a terra DANGER PERICOLO Consultare un elettricista Consult a qualified qualificato o un membro del Rischio di scosse elettriche. electrician or serviceman Electric Shock Hazard personale di servizio se le Toccare alcune delle parti...
- Page 8 PULIZIA CLEANING Assicurarsi che l’applicazione sia Be sure to unplug the staccata dalla fonte di alimentazione. appliance from thepower 1. Pulire l’interno del forno, dopo l’uso, con un panno supply. leggermente umido. 1. Clean the cavity of the oven after using with a slightly damp 2.
-
Page 9: Materials To Be Avoided In Microwave Oven
Materiali che si possono usare nel forno a microonde Materials you can use in microwave oven Utensili Osservazioni Utensils Remarks Browning dish Follow manufacturer’s instructions. The bottom of browning dish must be Piatto per rosolare Seguire le istruzioni del produttore. Il fondo del piatto deve rimanere almeno 5 mm al di at least 3/16 inch (5mm) above the turntable. - Page 10 IMPOSTARE IL VOSTRO FORNO SETTING UP YOUR OVEN Nomi delle parti del forno e accessori Names of Oven Parts and Accessories Rimuovere il forno e tutti i materiali dal cartone e dalla cavità del forno. Remove the oven and all materials from the carton and oven cavity. Il vostro forno vi sarà...
- Page 11 Installazione e connessione Installation and connection 1. Questo prodotto è destinato esclusivamente a un uso domestico. 1.This appliance is only intended for domestic use. 2. Questo prodotto è destinato esclusivamente a 2.This oven is intended for built-in use only. It is not intended un’installazione da incasso.
-
Page 12: Istruzioni Per L'installazione
Istruzioni per l’installazione Installation Instructions Leggere attentamente il presente manuale prima di procedere Please Read the Manual Carefully Before Installation con l’installazione Please note Nota Electrical connection Connessione elettrica The oven is fitted with a plug and must only be connected to a properly installed earthed socket. - Page 13 Vite Screw Staffa Bracket...
- Page 14 B. Preparare il vano di incasso 1. Leggere le istruzioni riportate sulla SAGOMA PER IL FONDO DEL VANO e appoggiare la sagoma sul piano inferiore del vano. SAGOMA PER IL FONDO DEL VANO NOTA: È ESTREMAMENTE IMPORTANTE LEGGERE E SEGUIRE LE ISTRUZIONI PER L’INSTALLAZIONE PRIMA DI PROCEDERE.
- Page 15 C. Installare il forno 4. Installare il forno nel vano - Assicurarsi che la parte posteriore del forno sia fissata tramite staffa. - Non incastrare o piegare il cavo di potenza. staffa bracket 5. Aprire lo sportello, fissare il forno nel vano con una vite sul foro di installazione. 5.
-
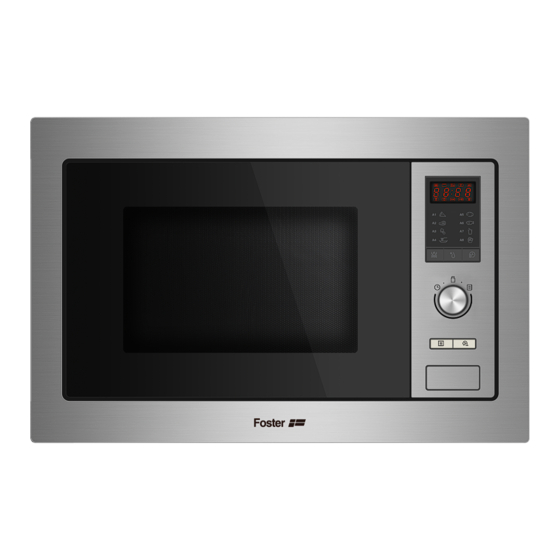
Page 16: Control Panel
Pannello di controllo Control panel... - Page 17 ", the minute figures will flash. " to finish clock setting. ":" will flash, and the time will light. et, it would not function when powered. minute figures, the input time should be within 0--59. Operation Instructions Operation Instructions Istruzioni di utilizzo of clock setting, if you press "...
- Page 18 Nota: la quantità di passi per la regolazione del tempo del cambio di codice è come Note: the step quantities for the adjustment time of the coding switch are as follow: descritta di seguito: 0---1 : 5 seconds 0---1 min 5 secondi 1---5 : 10 seconds...
- Page 19 will go back to the previous status automatically. " to finish clock setting. ":" will flash, and the time will light. t set, it would not function when powered. ss of clock setting, if you press " ", the oven Stop/Clear 2.
-
Page 20: Menu Automatico
ctions " twice to select clock function, the hour figures will flash. e previous status automatically. he hour figures, the input time should be within 0--23. is electrified, the screen will display "0:00", buzzer will ring once. 7. Kitchen Timer (Timer) 7. - Page 21 La lista dei menu: The menu chart: Menu Menu Peso Schermo Display Weight 200 g 200 g Pizza Pizza 400 g 400 g 250 g 250 g 350 g 350 g Meat Carne 450 g 450 g 200 g 200 g 300 g 300 g Vegetable...
-
Page 22: Microwave Cooking
e minute figures, the input time should be within 0--59. 2) Turn " " to adjust the hour figures, the input time should be within 0--23. " to finish clock setting. ":" will flash, and the time will light. electrified, the screen will display "0:00", buzzer will ring once. 3) Press "... - Page 23 Ricerca dei guasti Trouble shooting Normale Il forno a microonde interferisce La ricezione di TV e radio potrebbe subire delle con la ricezione della TV interferenze se si sta usando il microonde. È simile all’interferenza di altri piccoli elettrodomestici, come il mixer, l’aspirapolvere o il ventilatore elettrico.
-
Page 24: Microwave Oven
Microwave Oven INSTRUCTION MANUAL MODEL: 7151010 Read these instructions carefully before using your microwave oven, and keep it carefully. If you follow the instructions, your oven will provide you with many years of good service. SAVE THESE INSTRUCTIONS CAREFULLY... -
Page 25: Precautions To Avoid Possible Exposure To Excessive Microwave Energy
PRECAUTIONS TO AVOID POSSIBLE EXPOSURE TO EXCESSIVE MICROWAVE ENERGY (a) Do not attempt to operate this oven with the door open since this can result in harmful exposure to microwave energy. It is important not to break or tamper with the safety interlocks. (b) Do not place any object between the oven front face and the door or allow soil or cleaner residue to accumulate on sealing surfaces. -
Page 26: Important Safety Instructions Warning
IMPORTANT SAFETY INSTRUCTIONS WARNING To reduce the risk of fire, electric shock, injury to persons or exposure to excessive microwave oven energy when using your appliance, follow basic precautions, including the following: 1. Read and follow the specific:"PRECAUTIONS TO AVOID POSSIBLE EXPOSURE TO EXCESSIVE MICROWAVE ENERGY". - Page 27 6. WARNING: It is hazardous for anyone other than a competent person to carry out any service or repair operation that involves the removal of a cover which gives protection against exposure to microwave energy. 7. WARNING: Liquids and other foods must not be heated in sealed containers since they are liable to explode.
- Page 28 16.Only use the temperature probe recommended for this oven.(for ovens provided with a facility to use a temperature-sensing probe.) 17.The microwave oven must be operated with the decorative door open. (for ovens with a decorative door.) 18.This appliance is intended to be used in household and similar applications such as: -staff kitchen areas in shops, offices and other working environments;...
-
Page 29: Read Carefully And Keep For Future Reference
23. The microwave oven is intended to be used built-in. 24. Steam cleaner is not to be used. 25. Surface of a storage drawer can get hot. 26. WARNING: The appliance and its accessible parts become hot during use. Care should be taken to avoid touching heating elements. -
Page 30: To Reduce The Risk Of Injury To Persons
To Reduce the Risk of Injury to Persons Grounding Installation DANGER Consult a qualified electrician or serviceman Electric Shock Hazard if the grounding instructions Touching some of the are not completely internal components can understood or if doubt exists cause serious personal as to whether the appliance injury or death. -
Page 31: Utensils Caution
CLEANING Be sure to unplug the appliance from the power supply. 1. Clean the cavity of the oven after using with a slightly damp cloth. 2. Clean the accessories in the usual way in soapy water. 3. The door frame and seal and neighbouring parts must be cleaned carefully with a damp cloth when they are dirty. -
Page 32: Materials You Can Use In Microwave Oven
Materials you can use in microwave oven Utensils Remarks Aluminum foil Shielding only. Small smooth pieces can be used to cover thin parts of meat or poultry to prevent overcooking. Arcing can occur if foil is too close to oven walls. The foil should be at least 1 inch (2.5cm) away from oven walls. -
Page 33: Names Of Oven Parts And Accessories
SETTING UP YOUR OVEN Names of Oven Parts and Accessories Remove the oven and all materials from the carton and oven cavity. Your oven comes with the following accessories: Glass tray Turntable ring assembly Instruction Manual A) Control panel B) Turntable shaft C) Turntable ring assembly D) Glass tray E) Observation window... -
Page 34: Installation And Connection
Installation and connection 1.This appliance is only intended for domestic use. 2.This oven is intended for built-in use only. It is not intended for counter-top use or for use inside a cupboard. 3. Please observe the special installation instructions. 4.The appliance can be installed in a 60cm wide wall- mounted cupboard. -
Page 35: Installation Instructions
Installation Instructions Please Read the Manual Carefully Before Installation Please note Electrical connection The oven is fitted with a plug and must only be connected to a properly installed earthed socket. The socket must only be installed and the connecting cable must only be replaced by a qualified electrician, and in accordance with the appropriate regulations. - Page 37 " " " a PN:261800316968...
- Page 38 C .Install the oven 4. Install the oven to the cabinet - Make sure the back of the oven is locked by mounting plate . - Do not trap or kink the power cord. Mounting Plate 5. Open the door, fix the oven to the cabinet with Screw , at the installation hole. Screw Installation Hole...
- Page 40 Operation Instructions 1. Clock Setting When the microwave oven is electrified, screen will display "0:00", buzzer will ring once. 1) Press " " twice to select clock function, the hour figures will flash. Kitchen Timer/Clock 2) Turn " " to adjust the hour figures, the input time should be within 0--23. 3) Press "...
- Page 41 3. Grill or Combi. Cooking Micro wave/Grill/Combi. Micro wave/Grill/Combi. Press " " once, the screen will display"P100",and press Micro wave/Grill/Combi. Micro wave/Grill/Combi. repeatedly or turn the " " to choose the power you want, " " w ill displ ay for each a dded and "P100","P80"...
- Page 42 6. Defrost By Time 1) Press " " twice, and the oven will display "dEF2". eight/Time Defrost 2) Turn " " to select the defrost time. The MAX time is 95 minutes. 3) Press " " to start defrosting.The defrost power is P30 , and Start/+30Sec./Confirm it will not be changed.
- Page 43 The menu chart: Menu Display Weight 200 g Pizza 400 g 250 g 350 g Meat 450 g 200 g 300 g Vegetable 400 g 50g(with 450 cold water) Pasta 100g(with 800 ml cold water) 200 g 400 g Potato 600 g 250 g 350 g...
- Page 44 9. Multi-section cooking At most 2 sections can be set for cooking. In multi-section cooking, if one section is defrosting, then defrosting shall be placed in the first section automatically. Example: If you want to defrost food for 5 minutes and then cook with 80% microwave power for 7 minutes, operate it as the following: 1) Press "...
-
Page 45: Troubleshooting
Trouble shooting It is forbidden to run the unit without any food inside. It is very dangerous. According to Waste of Electrical and Electronic Equipment (WEEE) directive, WEEE should be separately collected and treated. If at any time in future you need to dispose of this product please do NOT dispose of this product with household waste. -
Page 46: Four À Micro-Ondes
Four à micro-ondes MANUEL D’INSTRUCTIONS MODEL:AG928B8Z MODÈLE: 7151010 Lisez attentivement ces instructions avant d’utiliser votre Read these instructions carefully before using your microwave oven,and keep it carefully. four à micro-ondes et conservez-les soigneusement. Si If you follow the instructions, your oven will provide you with vous respectez les instructions suivantes, votre four vous many years of good service. - Page 47 PRÉCAUTIONS À PRENDRE POUR ÉVITER PRECAUTIONS TO AVOID POSSIBLE EXPOSURE L’EXPOSITION À UNE QUANTITÉ EXCESSIVE TO EXCESSIVE MICROWAVE ENERGY D’ÉNERGIE MICRO-ONDES (a) Do not attempt to operate this oven with the door (a) Ne pas essayer d’utiliser ce four avec la porte ouverte, open since this can result in harmful exposure to car cela pourrait provoquer des expositions nocives à...
-
Page 48: Consignes De Sécurité Importantes
CONSIGNES DE SÉCURITÉ IMPORTANTES IMPORTANT SAFETY INSTRUCTIONS ATTENTION WARNING 1. ATTENTION : Si la porte ou les joints de la porte sont 1. WARNING: If the door or door seals are damaged, the endommagés, ne pas utiliser le four jusqu’à ce qu’une oven must not be operated until it has been repaired by personne compétente les ait réparés. -
Page 49: Read Carefully And Keep For Future Reference
l’appareil et laisser la porte fermée, de façon à étouffer 9. Microwave heating of beverages can result in d’éventuelles flammes. delayed eruptive boiling, therefore care must be taken 9. Le réchauffement par micro-ondes de certaines boissons when handling the container. peut résulter en un processus d’ébullition éruptive retardée, 10.The contents of feeding bottles and baby food jars faire donc attention en manipulant le récipient. - Page 50 Pour réduire le risque de blessure de personnes To Reduce the Risk of Injury to Persons Grounding Installation Installation de mise à la terre DANGER DANGER En cas de mauvaise Consult a qualified compréhension des Risque d’électrocution. electrician or serviceman Electric Shock Hazard instructions ou de doute Le contact avec certains...
- Page 51 NETTOYAGE CLEANING S’assurer que l’appareil est débranché Be sure to unplug the de la source d’alimentation. appliance from thepower 1. Après l’utilisation, nettoyer l’intérieur du four à l’aide d’un supply. chiffon légèrement humide. 1. Clean the cavity of the oven after using with a slightly damp 2.
- Page 52 Matériaux utilisables dans le four à micro-ondes Materials you can use in microwave oven Ustensiles Remarques Utensils Remarks close to oven walls. The foil should be at least 1 inch (2.5cm) away from oven walls. Aluminum foil Shielding only. Small smooth pieces can be used to cover thin parts of Plat à...
- Page 53 INSTALLATION DU FOUR SETTING UP YOUR OVEN Noms des composants et accessoires du four Names of Oven Parts and Accessories Extraire le four et tout le matériel de la boîte en carton et de la cavité du four. Remove the oven and all materials from the carton and oven cavity. Le four est doté...
-
Page 54: Installation And Connection
Installation et raccordement Installation and connection 1. Cet appareil est destiné uniquement à un usage domestique. 1.This appliance is only intended for domestic use. 2. Ce four est destiné uniquement à être installé par encastrement. 2.This oven is intended for built-in use only. It is not intended Il n’est pas destiné... -
Page 55: Instructions D'installation
Instructions d’installation Installation Instructions Prière de lire attentivement le manuel avant l’installation Please Read the Manual Carefully Before Installation Remarque Please note Branchement électrique Electrical connection The oven is fitted with a plug and must only be connected to a properly installed earthed Le four est doté... - Page 56 Screw Support Bracket...
- Page 57 B. Préparation du compartiment 1. Lire les instructions sur le GABARIT INFÉRIEUR DU COMPARTIMENT et placer le gabarit sur le fond du compartiment. GABARIT INFÉRIEUR DU COMPARTIMENT NOTE : IL EST FONDAMENTAL DE LIRE ET DE SUIVRE LES INSTRUCTIONS D’INSTALLATION AVANT DE PROCÉDER À...
-
Page 58: Installation Du Four
C. Installation du four 4. Installer le four dans le compartiment - S’assurer que l’arrière du four soit bloqué par le support. - Ne pas coincer ni entortiller le câble d’alimentation. support bracket 5. Ouvrir la porte, fixer le four au compartiment avec la vis au niveau du trou d’installation. 5. -
Page 59: Control Panel
Panneau de contrôle Control panel... -
Page 60: Instructions De Fonctionnement
set, it would not function when powered. he minute figures, the input time should be within 0--59. s of clock setting, if you press " ", the oven Stop/Clear Operation Instructions previous status automatically. " to finish clock setting. ":" will flash, and the time will light. Operation Instructions Instructions de fonctionnement 1. - Page 61 Note : les pas de réglage du temps du commutateur de codage sont les suivants : Note: the step quantities for the adjustment time of the coding switch are as follow: 0---1 : 5 seconds 0---1 min : 5 secondes 1---5 : 10 seconds 1---5 min...
- Page 62 will go back to the previous status automatically. " to finish clock setting. ":" will flash, and the time will light. ot set, it would not function when powered. ess of clock setting, if you press " ", the oven Stop/Clear 2.
-
Page 63: Menu Automatique
" twice to select clock function, the hour figures will flash. Clock he previous status automatically. uctions the hour figures, the input time should be within 0--23. 7. Minuterie 7. Kitchen Timer ", the minute figures will flash. Clock n is electrified, the screen will display "0:00", buzzer will ring once. uctions Kitchen Timer/Clock (1) Press "... - Page 64 Liste des menus : The menu chart: Menu Menu Poids Affichage Display Weight 200 g 200 g Pizza Pizza 400 g 400 g 250 g 250 g 350 g 350 g Meat Viande 450 g 450 g 200 g 200 g 300 g 300 g Vegetable...
- Page 65 " to finish clock setting. ":" will flash, and the time will light. 2) Turn " " to adjust the hour figures, the input time should be w s electrified, the screen will display "0:00", buzzer will ring once. set, it would not function when powered. 3) Press "...
-
Page 66: Recherche Des Pannes
Recherche des pannes Trouble shooting Normal Le four à micro-ondes interfère La réception de la télévision et de la radio est susceptible avec la réception de la de subir des interférences lorsque le four à micro-ondes est télévision. en marche. Ceci est semblable aux interférences d’autres petits appareils électroménagers, comme les mixeurs, les aspirateurs ou les ventilateurs électriques. - Page 67 Mikrowellenherd BENUTZERANLEITUNG MODEL:AG928B8Z MODELL:7151010 Lesen Sie sorgfältig die nachstehenden Anweisungen, bevor Read these instructions carefully before using your microwave oven,and keep it carefully. Sie Ihren Mikrowellenherd in Betrieb nehmen und bewahren If you follow the instructions, your oven will provide you with Sie diese Anleitung gut auf.
- Page 68 VORSICHTSMASSNAHMEN ZUM VERMEIDEN MÖGLICHER PRECAUTIONS TO AVOID POSSIBLE EXPOSURE AUSSETZUNG AN ÜBERMÄSSIGE MIKROWELLENENERGIE TO EXCESSIVE MICROWAVE ENERGY (a) Versuchen Sie nicht, diesen Ofen bei geöffneter Tür zu (a) Do not attempt to operate this oven with the door betreiben, da dies zu schädlicher Mikrowellenexposition führen kann. open since this can result in harmful exposure to Es ist wichtig, die Sicherheitsverriegelungen nicht zu beschädigen.
-
Page 69: Important Safety Instructions
WICHTIGE SICHERHEITSHINWEISE WARNUNG IMPORTANT SAFETY INSTRUCTIONS WARNING 1. WARNUNG: Falls die Türe oder die Türdichtungen beschädigt sind, darf der Herd erst nach Reparatur durch 1. WARNING: If the door or door seals are damaged, the entsprechendes Fachpersonal wieder benutzt werden. oven must not be operated until it has been repaired by 2. Warnung: Für Laien bzw. ungeschultes Personal ist es a competent person. gefährlich, irgendwelche Service- oder Reparaturarbeiten 2. Warning: It is hazardous for anyone other than a durchzuführen, die ein Entfernen der Abdeckung competent person to carry out any service or repair erforderlich machen, die Schutz gegen das Einwirken von... - Page 70 Flammen zu vermeiden. 9. Microwave heating of beverages can result in 9. Das Erhitzen von Getränken kann zu verzögertem, eruptivem delayed eruptive boiling, therefore care must be taken Hochkochen der Flüssigkeit führen – behandeln Sie Behälter when handling the container. von Flüssigkeiten daher immer mit besonderer Vorsicht. 10.The contents of feeding bottles and baby food jars 10 Um die Gefahr von Verbrennungen zu vermeiden, sollte shall be stirred or shaken and the temperature checked der Inhalt von Milchfläschchen und Babynahrungsgläschen before consumption, in order to avoid burns.
- Page 71 Zur Reduzierung von Verletzungsrisikos für Personen To Reduce the Risk of Injury to Persons Grounding Installation Erdungsinstallation GEFAHR Ziehen Sie einen qualifizierten DANGER Consult a qualified Elektriker oder Wartungstechniker Elektrische Stromschlaggefahr electrician or serviceman Electric Shock Hazard zu Rate, wenn Sie die Das Berühren einiger der if the grounding instructions Touching some of the Erdungsanweisungen nicht internen Komponenten kann zu...
- Page 72 REINIGUNG CLEANING Achten Sie darauf, das Gerät von der Be sure to unplug the Stromversorgung zu trennen. appliance from thepower 1. Reinigen Sie den Ofen nach Gebrauch mit einem leicht feuchten supply. Tuch. 1. Clean the cavity of the oven after using with a slightly damp 2.
- Page 73 Materialien, die Sie im Mikrowellenherd verwenden können Materials you can use in microwave oven Utensilien Bemerkungen Utensils Remarks Aluminum foil oven walls. Shielding only. Small smooth pieces can be used to cover thin parts of meat or poultry to prevent overcooking. Arcing can occur if foil is too Browning dish Follow manufacturer’s instructions.
- Page 74 INSTALLATION DES OFENS SETTING UP YOUR OVEN Benennung der Ofenteile und des Zubehörs Names of Oven Parts and Accessories Entfernen Sie den Ofen und alle Materialien aus dem Karton und der Ofenkammer. Remove the oven and all materials from the carton and oven cavity. Ihr Ofen wird mit folgendem Zubehör geliefert: Your oven comes with the following accessories: Glasschale Glass tray Turntable ring assembly...
-
Page 75: Installation And Connection
Installation und Anschluss Installation and connection 1. Dieses Gerät ist nur für den häuslichen Gebrauch bestimmt. 1.This appliance is only intended for domestic use. 2. Dieser Ofen ist nur für den Einbau vorgesehen. Es ist nicht für den Einsatz 2.This oven is intended for built-in use only. It is not intended auf einer Arbeitsplatte oder im Innern eines Schranks vorgesehen. for counter-top use or for use inside a cupboard. 3. B itte beachten Sie die speziellen Installationsanweisungen. -
Page 76: Installation Instructions
Installationsanweisungen Installation Instructions Bitte lesen Sie die Anleitung vor der Installation aufmerksam! Please Read the Manual Carefully Before Installation Bitte beachten Sie Please note den elektrischen Anschluss Electrical connection The oven is fitted with a plug and must only be connected to a properly installed earthed Der Ofen ist mit einem Stecker ausgestattet und darf nur an eine ordnungsgemäß... - Page 77 Schraube Screw Halteklammer Bracket...
- Page 78 B. .Bereiten Sie den Schrank vor 1. Lesen Sie die Anleitung auf der UNTERSCHRANK-SCHABLONE, legen Sie die Schablone auf die untere Ebene des Schrankes. UNTERSCHRANK-SCHABLONE HINWEIS: ES IST SEHR WICHTIG, DIE ANWEISUNGEN IN DER INSTALLATIONSANLEITUNG VOR DER INSTALLATION ZU LESEN UND ZU BEACHTEN. Diese Schablone wird verwendet, um die Löcher "a" des Schrankbodens anzubringen.
- Page 79 C. Installieren Sie den Ofen 4. Installieren Sie den Ofen im Schrank - Stellen Sie sicher, dass die Rückseite des Ofens mit der Halterung verriegelt ist. - Das Stromkabel darf weder eingeklemmt noch abgeknickt werden. Halteklammer bracket 5. Öffnen Sie die Herdtür und befestigen Sie den Herd mittels der Schraube an der 5. Open the door, fix the oven to the cabinet with Screw , at the installation hole. Installationsöffnung.
-
Page 80: Control Panel
Bedienungstafel Control panel... -
Page 81: Kochen Mit Der Mikrowelle
" to finish clock setting. ":" will flash, and the time will light. chen Timer/Clock ", the minute figures will flash. set, it would not function when powered. ss of clock setting, if you press " ", the oven Stop/Clear Operation Instructions Betriebsanweisungen "... - Page 82 Hinweis: die Zeiteinheiten der Einzelschritte für die Zeiteinstellung über den Note: the step quantities for the adjustment time of the coding switch are as follow: Kodierschalter lauten wie folgt: 0---1 : 5 seconds 0 - 1 Min. 5 Sekunden 1---5 : 10 seconds 1 - 5 Min. : 10 Sekunden 5---10 min : 30 seconds 10---30 min 5 - 10 Min.
- Page 83 will go back to the previous status automatically. " to finish clock setting. ":" will flash, and the time will light. hen Timer/Clock clock is not set, it would not function when powered. ng the process of clock setting, if you press " ", the oven Stop/Clear 2.
- Page 84 oven is electrified, the screen will display "0:00", buzzer will ring once. o the previous status automatically. " twice to select clock function, the hour figures will flash. er/Clock ion Instructions just the hour figures, the input time should be within 0--23. 7. Küchen-Timer 7.
- Page 85 Die Speisetabelle: The menu chart: Menu Menü Gewicht Display Display Weight 200 g 200 g Pizza Pizza 400 g 400 g 250 g 250 g 350 g 350 g Meat Fleisch 450 g 450 g 200 g 200 g 300 g 300 g Vegetable Gemüse...
- Page 86 n Instructions " to adjust the minute figures, the input time should be within 0--59. 2) Turn " " to adjust the hour figures, the input time shou 9. Mehrfachprogrammierung " to finish clock setting. ":" will flash, and the time will light. hen Timer/Clock owave oven is electrified, the screen will display "0:00", buzzer will ring once.
-
Page 87: Troubleshooting
Fehlerbehebung Trouble shooting Normal Mikrowellenherd interferiert mit Der Radio- und Fernsehempfang kann gestört TV-Empfang werden, wenn der Mikrowellenofen in Betrieb ist. Es ist vergleichbar mit der Interferenz von kleinen elektrischen Geräten, wie Mixer, Staubsauger und elektrischer Ventilator. Das ist normal. Schwaches Ofenlicht Beim Mikrowellenkochen mit niedriger Leistung kann das Ofenlicht schwächer werden. Das ist normal. Dampf sammelt sich an der Beim Kochen kann Dampf aus dem Essen kommen. Tür, heiße Luft tritt aus den Der größte Teil wird aus den Entlüftungsöffnungen Lüftungsschlitzen... -
Page 88: Horno Microondas
Horno microondas MANUAL DE INSTRUCCIONES MODEL:AG928B8Z MODELO: 7151010 Lea detenidamente las instrucciones antes de utilizar este Read these instructions carefully before using your microwave oven,and keep it carefully. horno microondas y consérvelo con cuidado. Si sigue las If you follow the instructions, your oven will provide you with instrucciones, este horno le brindará... - Page 89 PRECAUCIONES QUE DEBEN ADOPTARSE PARA PRECAUTIONS TO AVOID POSSIBLE EXPOSURE EVITAR LA POSIBLE EXPOSICIÓN A UNA ENERGÍA TO EXCESSIVE MICROWAVE ENERGY DE MICROONDAS EXCESIVA (a) Do not attempt to operate this oven with the door (a) No intente poner en funcionamiento este horno con la open since this can result in harmful exposure to puerta abierta;...
-
Page 90: Important Safety Instructions
ADVERTENCIA IMPORTANTE SOBRE IMPORTANT SAFETY INSTRUCTIONS INSTRUCCIONES DE SEGURIDAD WARNING 1. ADVERTENCIA: Si la puerta o los cierres de la puerta 1. WARNING: If the door or door seals are damaged, the están estropeados, no debe usar el horno hasta que una oven must not be operated until it has been repaired by persona cualificada lo haya reparado. -
Page 91: Read Carefully And Keep For Future Reference
tenga mucho cuidado al manipular el recipiente. 9. Microwave heating of beverages can result in 10. Debe agitar o mezclar los contenidos de biberones y delayed eruptive boiling, therefore care must be taken frascos de comida para bebés y controlar la temperatura de los when handling the container. - Page 92 Para reducir el riesgo de lesiones a personas To Reduce the Risk of Injury to Persons Grounding Installation Instalación de puesta a tierra DANGER PELIGRO Si no comprende Consult a qualified completamente las Peligro de descargas electrician or serviceman Electric Shock Hazard instrucciones de la conexión eléctricas Tocar algunos de los if the grounding instructions...
- Page 93 LIMPIEZA CLEANING Asegúrese de que ha desenchufado Be sure to unplug the el aparato de la toma de corriente. appliance from thepower 1. Limpie el equipo después de cada uso con un paño supply. ligeramente húmedo. 1. Clean the cavity of the oven after using with a slightly damp 2.
- Page 94 Materiales adecuados para microondas Materials you can use in microwave oven meat or poultry to prevent overcooking. Arcing can occur if foil is too close to oven walls. The foil should be at least 1 inch (2.5cm) away from Utensilios Notas Utensils Remarks...
- Page 95 CONFIGURACIÓN DEL HORNO SETTING UP YOUR OVEN Nombres de las piezas y accesorios del horno Names of Oven Parts and Accessories Retire el horno y todos los materiales de la caja y la cavidad del horno. Remove the oven and all materials from the carton and oven cavity. El horno se suministra con los siguientes accesorios: Your oven comes with the following accessories: Bandeja de vidrio...
-
Page 96: Instalación Y Conexión
Instalación y conexión Installation and connection 1. Este aparato está destinado exclusivamente a un uso doméstico. 1.This appliance is only intended for domestic use. 2. Este horno solo puede instalarse empotrado. No ha sido diseñado 2.This oven is intended for built-in use only. It is not intended para instalarse en una encimera ni en el interior de una alacena. -
Page 97: Instrucciones De Instalación
Instrucciones de instalación Installation Instructions Lea el manual atentamente antes de la instalación Please Read the Manual Carefully Before Installation Tenga en cuenta Please note Conexión eléctrica Electrical connection The oven is fitted with a plug and must only be connected to a properly installed earthed El horno está... - Page 98 Tornillo Screw Soporte Bracket...
- Page 99 B.Prepare el armario 1. Lea las instrucciones de la PLANTILLA DEL ARMARIO INFERIOR, ponga la plantilla en la superficie inferior del armario. PLANTILLA DEL ARMARIO INFERIOR NOTA: ES MUY IMPORTANTE LEER Y SEGUIR LAS INSTRUCCIONES DE INSTALACIÓN ANTES DE LA INSTALACIÓN. Esta plantilla se utiliza para localizar los orificios de soporte inferiores del armario “a”.
-
Page 100: Instalación Del Horno
C. Instalación del horno 4. Instale el horno en el armario - Asegúrese de que la parte posterior del horno esté fijada mediante el soporte. - No atrape ni doble el cable de alimentación. soporte bracket 5. Abra la puerta, ajuste el horno al armario mediante un tornillo, en el orificio de instalación. 5. -
Page 101: Control Panel
Panel de mandos Control panel... -
Page 102: Instrucciones De Funcionamiento
", the minute figures will flash. " to finish clock setting. ":" will flash, and the time will light. et, it would not function when powered. minute figures, the input time should be within 0--59. of clock setting, if you press " ", the oven eration Instructions Stop/Clear... - Page 103 Nota: las cantidades graduales para la hora de ajuste del interruptor de codificación son: Note: the step quantities for the adjustment time of the coding switch are as follow: 0---1 : 5 seconds 0---1 min 5 segundos 1---5 : 10 seconds 1---5 min : 10 segundos 5---10 min...
-
Page 104: Descongelación Por Tiempo
will go back to the previous status automatically. " to finish clock setting. ":" will flash, and the time will light. set, it would not function when powered. s of clock setting, if you press " ", the oven Stop/Clear 2. -
Page 105: Menú Automático
tions " twice to select clock function, the hour figures will flash. s of clock setting, if you press " ", the oven Stop/Clear previous status automatically. hour figures, the input time should be within 0--23. electrified, the screen will display "0:00", buzzer will ring once. 7. - Page 106 La lista de los menús: The menu chart: Menu Menú Peso Pantalla Display Weight 200 g 200 g Pizza Pizza 400 g 400 g 250 g 250 g 350 g 350 g Meat Meat 450 g 450 g 200 g 200 g 300 g 300 g...
-
Page 107: Cocción Multifase
minute figures, the input time should be within 0--59. 2) Turn " " to adjust the hour figures, the input time should be within 0--23. " to finish clock setting. ":" will flash, and the time will light. ectrified, the screen will display "0:00", buzzer will ring once. 3) Press "... -
Page 108: Troubleshooting
Localización de averías Trouble shooting Normal El horno microondas interfiere Cuando el microondas está funcionando puede interferir con la recepción de la señal de con la recepción de radio y televisión. Es similar a la televisión. interferencia de aparatos eléctricos pequeños como licuadoras, aspiradoras y ventiladores eléctricos. - Page 109 Magnetronoven INSTRUCTIEHANDLEIDING MODEL:AG928B8Z MODEL:7151010 Lees de instructies aandachtig alvorens de magnetronoven Read these instructions carefully before using your microwave oven,and keep it carefully. te gebruiken en bewaar ze met zorg. Wanneer de instructies If you follow the instructions, your oven will provide you with opgevolgd worden, zult u jarenlang plezier beleven aan uw many years of good service.
- Page 110 VOORZORGSMAATREGELEN OM MOGELIJKE PRECAUTIONS TO AVOID POSSIBLE EXPOSURE BLOOTSTELLING AAN EXCESSIEVE TO EXCESSIVE MICROWAVE ENERGY MAGNETRONENERGIE TE VOORKOMEN (a) Do not attempt to operate this oven with the door (a) Probeer niet de oven met open deur te gebruiken omdat u open since this can result in harmful exposure to dan blootgesteld kan worden aan schadelijke magnetronenergie.
-
Page 111: Belangrijke Veiligheidsvoorschriften
BELANGRIJKE VEILIGHEIDSVOORSCHRIFTEN IMPORTANT SAFETY INSTRUCTIONS WAARSCHUWING WARNING 1. WAARSCHUWING: Als de deur of de afdichtingen 1. WARNING: If the door or door seals are damaged, the beschadigd zijn, mag de oven niet gebruikt worden tot hij oven must not be operated until it has been repaired by gerepareerd is door een vakbekwaam persoon. - Page 112 trek de stekker uit het stopcontact en houd de ovendeur dicht 9. Microwave heating of beverages can result in om eventuele vlammen te smoren. delayed eruptive boiling, therefore care must be taken 9. Het verwarmen in de magnetronoven van dranken kan when handling the container.
- Page 113 Het risico op persoonlijk letsel verlagen To Reduce the Risk of Injury to Persons Grounding Installation De installatie aarden GEVAAR DANGER Raadpleeg een Consult a qualified Gevaar voor elektrische gekwalificeerd elektricien of electrician or serviceman Electric Shock Hazard schokken Door enkele interne onderhoudstechnicus als de if the grounding instructions Touching some of the...
- Page 114 REINIGING CLEANING Controleer of het apparaat eerst van het Be sure to unplug the elektriciteitsnet losgekoppeld wordt. appliance from thepower 1. Reinig de binnenkant van de oven na gebruik met een licht supply. vochtige doek. 1. Clean the cavity of the oven after using with a slightly damp 2.
- Page 115 Materialen die in de magnetronoven gebruikt kunnen worden Materials you can use in microwave oven Keukengerei Opmerkingen Utensils Remarks Browning dish Follow manufacturer’s instructions. The bottom of browning dish must be Ovenschaal voor Volg de instructies van de fabrikant. De onderkant van de ovenschaal moet zich braden en bakken at least 3/16 inch (5mm) above the turntable.
- Page 116 UW OVEN INSTELLEN SETTING UP YOUR OVEN Namen van ovenonderdelen en -accessoires Names of Oven Parts and Accessories Haal de oven en alle materialen uit het karton en uit de ovenruimte zelf. Remove the oven and all materials from the carton and oven cavity. Bij uw oven zijn de volgende accessoires geleverd: Your oven comes with the following accessories: Glazen schaal...
-
Page 117: Installatie En Aansluiting
Installatie en aansluiting Installation and connection 1. Dit apparaat is alleen bedoeld voor huishoudelijk gebruik. 1.This appliance is only intended for domestic use. 2. Deze oven is alleen bedoeld om ingebouwd gebruikt te worden. 2.This oven is intended for built-in use only. It is not intended Hij is niet bedoeld om ergens bovenop te staan of om in een kast for counter-top use or for use inside a cupboard. -
Page 118: Instructies Voor De Installatie
Instructies voor de installatie Installation Instructions Lees vóór de installatie met aandacht de handleiding Please Read the Manual Carefully Before Installation Let op Please note Elektrische aansluiting Electrical connection The oven is fitted with a plug and must only be connected to a properly installed earthed De oven is uitgerust met een stekker en hoeft slechts aangesloten te worden op socket. - Page 119 Schroef Screw Beugel Bracket...
- Page 120 B.Maak het meubel gereed 1. Lees de instructies op de KASTBODEM-SJABLOON en leg de sjabloon op de bodemplaat van de kast. KASTBODEM-SJABLOON OPM.: HET IS HEEL BELANGRIJK OM VÓÓR DE INSTALLATIE DA AANWIJZINGEN IN DE INSTALLATIE-INSTRUCTIES TE LEZEN EN TE VOLGEN. Deze sjabloon wordt gebruikt voor de locatie van beugelgaten “a”...
- Page 121 C.Installeer de oven 4. Installeer de oven in het meubel - Controleer of de achterkant van de oven door de beugel vergrendeld wordt. - Klem of knik de stroomkabel niet. beugel bracket 5. Open de deur, zet de oven met de schroef in het installatiegat vast op de kast. 5.
- Page 122 Bedieningspaneel Control panel...
-
Page 123: Koken Met De Magnetron
", the minute figures will flash. " to finish clock setting. ":" will flash, and the time will light. ot set, it would not function when powered. he minute figures, the input time should be within 0--59. Operation Instructions ess of clock setting, if you press " ", the oven Stop/Clear Operation Instructions... - Page 124 Opm.: de stappen voor de instellingstijd van de codeerschakelaar zijn als volgt: Note: the step quantities for the adjustment time of the coding switch are as follow: 0---1 : 5 seconds 0---1 min 5 seconden 1---5 : 10 seconds 1---5 min : 10 seconden 5---10 min : 30 seconds...
- Page 125 will go back to the previous status automatically. " to finish clock setting. ":" will flash, and the time will light. /Clock not set, it would not function when powered. ocess of clock setting, if you press " ", the oven Stop/Clear 2.
- Page 126 ructions " twice to select clock function, the hour figures will flash. o the previous status automatically. e hour figures, the input time should be within 0--23. en is electrified, the screen will display "0:00", buzzer will ring once. 7. Kookwekker 7.
- Page 127 De menutabel: The menu chart: Menu Menu Gewicht Weergave Display Weight 200 g 200 g Pizza Pizza 400 g 400 g 250 g 250 g 350 g 350 g Meat Meat 450 g 450 g 200 g 200 g 300 g 300 g Vegetable Vegetable...
- Page 128 the minute figures, the input time should be within 0--59. 2) Turn " " to adjust the hour figures, the input time should be within 0-- " to finish clock setting. ":" will flash, and the time will light. Clock n is electrified, the screen will display "0:00", buzzer will ring once.
- Page 129 Probleemoplossing Trouble shooting Normaal De magnetronoven verstoort De radio- en TV-ontvangst kunnen verstoord worden de TV-ontvangst als de magnetronoven werkt. Dit is net als voor kleine elektrische apparaten, zoals een mixer, een stofzuiger of een elektrische ventilator. Dit is normaal. De ovenverlichting dimt.
- Page 130 Foster S.p.A. via m.s. Ottone, 18/20 – 42041 Brescello (re) – italy www.fosterspa.com - info@fosterspa.com servizio post-vendita: tel. +39 0522-684450, fax +39 0522-686019, service@fosterspa.com servizio ricambi: tel. + 39 0522-684300, fax + 39 0522-684300...
Need help?
Do you have a question about the KS 7151 010 and is the answer not in the manual?
Questions and answers