
Subscribe to Our Youtube Channel
Related Manuals for Grandstream Networks GSGVC3202


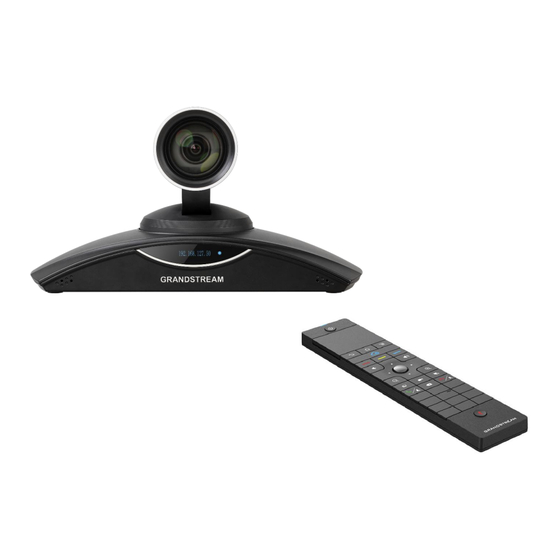
Summary of Contents for Grandstream Networks GSGVC3202
- Page 1 Grandstream Networks, Inc. GVC3200/GVC3202 Video Conference System for Android User Guide...
- Page 2 Grandstream Networks, Inc. is not permitted. The latest electronic version of this guide is available for download here: http://www.grandstream.com/support Grandstream is a registered trademark and Grandstream logo is trademark of Grandstream Networks, Inc. in the United States, Europe and other countries. CAUTION Changes or modifications to this product not expressly approved by Grandstream, or operation of this product in any way other than as detailed by this guide, could void your manufacturer warranty.
- Page 3 FCC Caution Any Changes or modifications not expressly approved by the party responsible for compliance could void the user's authority to operate the equipment. This device complies with part 15 of the FCC Rules. Operation is subject to the following two conditions: (1) This device may not cause harmful interference, and (2) this device must accept any interference received, including interference that may cause undesired operation.
- Page 4 GNU GPL INFORMATION GVC3200/GVC3202 firmware contains third-party software licensed under the GNU General Public License (GPL). Grandstream uses software under the specific terms of the GPL. Please see the GNU General Public License (GPL) for the exact terms and conditions of the license. Grandstream GNU GPL related source code can be downloaded from Grandstream Web site from: http://www.grandstream.com/sites/default/files/Resources/gvc32xx-gpl.tar.gz P a g e...
-
Page 5: Table Of Contents
Table of Contents DOCUMENT PURPOSE ....................16 CHANGE LOG ......................17 Firmware Version 1.0.3.64 ........................17 Firmware Version 1.0.3.62 ........................17 Firmware Version 1.0.3.51 ........................17 Firmware Version 1.0.3.49 ........................17 Firmware Version 1.0.3.46 ........................17 Firmware Version 1.0.3.45 ........................17 Firmware Version 1.0.3.38 ........................ - Page 6 Remote Control ............................ 33 Remote Control Keys and Touchpad .................... 33 Capturing Screenshot Using the Remote Control ................ 36 Using the Remote Control ......................36 Using Mouse & Keyboard ........................36 OLED Screen ............................37 Using the LED Indicator ........................38 Status Icons ............................
- Page 7 Preset ..............................53 Add Preset ............................ 53 Edit Preset ............................ 53 Delete Preset ..........................54 Apply Preset ..........................54 Initial Position ..........................54 Camera Parameters Configurations ....................55 PERIPHERAL ....................... 57 External USB Device ........................... 57 Using USB Mouse/Keyboard ......................57 Using USB Storage Device ......................
- Page 8 Conference ............................65 Device Layout ..........................65 Initiating Conference ........................65 Answering an Incoming Call in Conference ................. 66 Conference Management ......................66 Invite Members to Conference ..................... 69 Removing Member from Conference ................... 70 Conference Control........................70 Pause Conference ........................70 Conference Layout ........................
- Page 9 ADDITIONAL FUNCTIONS ..................88 GVC Remote Client Application ......................88 BlueJeans ............................90 APPLICATIONS ......................91 Contacts ............................... 91 Add Contact ..........................92 Search Contacts ........................... 95 Manage Contacts .......................... 95 Groups ............................96 LDAP contacts ............................. 98 LDAP Settings..........................99 Search LDAP Contacts .......................
- Page 10 Browser .............................. 115 Sync Local Schedule with Google Calendar ..................115 Custom App on Home Screen ......................121 Uninstall Application ........................... 122 GS MARKET ....................... 123 Search Apps ............................123 Download and Install Apps ........................ 123 Update Apps ............................123 IPVIDEOTALK ......................
- Page 11 Call Page ............................140 Making a Call ..........................141 Conference Control........................141 Contacts Page ........................... 142 Contacts ............................142 Groups ............................144 Schedule ............................. 145 Call History ..........................146 LDAP ............................146 Device Control Page .......................... 147 Video Control ..........................147 Audio Control ..........................
- Page 12 Table of Tables Table 1: GVC3200/GVC3202 Technical Specifications................22 Table 2: GVC3200/GVC3202 Package List ....................25 Table 3: GVC3200/GVC3202 Front Panel ....................26 Table 4: GVC3200 Back Panel ........................27 Table 5: GVC3202 Back Panel ........................29 Table 6: GVC3200/GVC3202 Optional Equipment List ................30 Table 7: GVC3200/GVC3202 Remote Control Keys ..................
- Page 13 Figure 8: Soft Keyboard - English Input Method ..................40 Figure 9: English Input Method – Capslock ....................40 Figure 10: Soft Keyboard - Symbols and Numbers ..................40 Figure 11: Soft Keyboard - More Symbols and Numbers ................40 Figure 12: GVC3200/GVC3202 Home Screen ...................
- Page 14 Figure 50: GVC3200/GVC3202 Remote Control Application on Android Device ........89 Figure 51: GVC3200/GVC3202 Contacts Screen..................91 Figure 52: GVC3200/GVC3202 Add New Contact Screen ................. 92 Figure 53: GVC3200/GVC3202 Import Contacts Screen ................93 Figure 54: GVC3200/GVC3202 Download Contacts Screen ..............94 Figure 55: GVC3200/GVC3202 Export Contacts Screen ................
- Page 15 Figure 92: Message Indicator for IPVideoTalk Application ................ 128 Figure 93: IPVideoTalk Account Settings ....................129 Figure 94: Current Plan used and its expiration time ................129 Figure 95: Manually start Scheduled Meeting................... 131 Figure 96: Reminder prompt for preparation before starting the webinar ..........132 Figure 97: Hand up - IPVideoTalk ......................
-
Page 16: Document Purpose
DOCUMENT PURPOSE This User Guide describes the basic concept and tasks necessary to use and configure your GVC3200/GVC3202. This document covers the topics of device installation, making basic conference calls and using basic call features. To learn the advanced features and configurations, please visit http://www.grandstream.com/support download the latest "GVC3200/GVC3202 Administration Guide". -
Page 17: Change Log
CHANGE LOG This section documents significant changes from previous versions of GVC3200/GVC3202 user manuals. Only major new features or major document updates are listed here. Minor updates for corrections or editing are not documented here. Firmware Version 1.0.3.64 • No major changes. Firmware Version 1.0.3.62 •... -
Page 18: Firmware Version 1.0.3.38
Firmware Version 1.0.3.38 • Added cloud recording control for IPVideoTalk meetings or webinars [Start Cloud Recording] • Added an option to allow GVC to leave meeting itself when pressing "End" button [End Conference] • Added a notification to inform users “The meeting will be ended in 5 minutes” during an IPVT meeting if the subscribed IPVT plan on GVC device is expiring [End Meeting Reminder] Firmware Version 1.0.3.24 •... -
Page 19: Firmware Version 1.0.1.65
Firmware Version 1.0.1.65 • Added ability to choose any configured preset as initial position in the drop-down menu in addition to “Default” and “Latest Position”. [Initial Position] • Added an icon to indicate network unstable condition on the upper left of the call screen, which means current network condition is not good enough for the video call using the selected resolution/bit rate. -
Page 20: Firmware Version 1.0.1.48
Firmware Version 1.0.1.48 • Separated Add Preset section and Edit Preset section. Edit Preset section has renamed preset information added. [Add Preset] [Edit Preset] • Added PIN Code support during conference. [PIN Code] • Added FECC support during conference. [FECC - Camera Control in Conference] •... -
Page 21: Welcome
WELCOME Thank you for purchasing Grandstream GVC3200/GVC3202 Android Video Conferencing System. This document introduces the LCD settings, web UI settings and advanced configurations of GVC3200/GVC3202. To learn the basic configuration and how to use GVC3200/GVC3202, please visit http://www.grandstream.com/support to download the latest "GVC3200/GVC3202 User Guide". GVC3200/GVC3202 is a ground-breaking solution that offers small-to-medium businesses a revolutionary video conferencing system with unprecedented flexibility and the power of support for multiple popular video conferencing protocols and platforms right out of the box. -
Page 22: Product Overview
PRODUCT OVERVIEW Table 1: GVC3200/GVC3202 Technical Specifications Specification Description SIP RFC3261, BFCP, TIP (pending), RTP/RTCP, HTTP/HTTPS, ARP, ICMP, DNS (A record, SRV, NAPTR), DHCP, PPPoE, SSH, TFTP, NTP, STUN, LLDP-MED, LDAP, Protocols/ TR-069, 802.1x, TLS, SRTP, TCP/IP/UDP, IPv6, FEC, FECC, H.323, Q.931, H.224, Standards H.281, H.225.0, H.239, H.241, H.245, H.460.18 and H.460.19 1/3”... - Page 23 BFCP, people video (up to 1080p@30fps) + content video (up to 1080p@15fps, Dual-Stream 720p@30fps) Audio Features AEC, ANS, AGC, PLC, CNG/VAD FEC, dynamic display layout, picture-in-picture, picture-outside-picture, digital caption Video Features (pending) Bridge SIP calls with any Android VoIP apps such as Skype, Skype for Business, Platform Bridging Google Hangouts and more Hold, transfer, forward (unconditional/no-answer/busy), call park/pickup, 9-way...
-
Page 24: Safety Compliances
Temperature and Operation: 0°C to 40°C, Storage: -10°C to 60°C, Humidity: 10% to 90% Non- Humidity condensing FCC: Part 15 (CFR 47) Class B; UL 60950 (power adapter), Part 15C, Part 15E.407, Part 2.1091 CE: EN55022 Class B, EN55024, EN61000-3-2, EN61000-3-3, EN60950-1, Compliance EN62479, RoHS, EN301893, EN62311 RCM: AS/NZS CISPR22/24;... -
Page 25: Installing Gvc3200/Gvc3202
INSTALLING GVC3200/GVC3202 Equipment Package Content GVC3200/GVC3202 package contains the following items: Table 2: GVC3200/GVC3202 Package List Name For GVC3200 For GVC3202 GVC3200/GVC3202 Main Case External USB Speakerphone (GAC2500) Remote Control (4 AAA batteries) 12V Universal Power Adapter with power cable 1.5m Ethernet Cable 5m USB Extension Cable 1.5m HDMI Cable... -
Page 26: Connecting Gvc3200/Gvc3202
Connecting GVC3200/GVC3202 Figure 1: GVC3200/GVC3202 Front Panel Table 3: GVC3200/GVC3202 Front Panel Name Explanation Camera 70°(W)*- 6.3°(T) field of view Vertical Rotating +/-23° tilt Stent Horizontal Rotating +/-90° pan Platform Power on / Normal Running: Green Standby: Flash red LED Indicator Shutdown: Red Pressing any key on the remote control - Green light flashes once. -
Page 27: Table 4: Gvc3200 Back Panel
Figure 2: GVC3200 Back Panel Table GVC3200 Back Panel Name Explanation VGA Input Interface Connect to VGA input devices. Connect to HDMI input devices. HDMI Input Interface Note: The HDMI input interface has higher priority than the VGA interface when both interfaces are connected. Connect to HDMI display devices. -
Page 28: Figure 3: Gvc3202 Back Panel
External USB Connect to external speakerphone. Speaker/MIC Jack USB Interface Connect to USB cable or USB storage device. Network Interface Connect to LAN port. Connect to power adapter. The arrow indicator on the power Power Interface adapter should face upwards when the power adapter is plugged ... -
Page 29: Table 5: Gvc3202 Back Panel
Table GVC3202 Back Panel Name Explanation VGA Input Interface Connect to VGA input devices. Connect to HDMI input devices. HDMI Input Interface Note: The HDMI input interface has higher priority than the VGA interface when both interfaces are connected. Connect to HDMI display devices. Note: There are 2 HDMI output ports. -
Page 30: Table 6: Gvc3200/Gvc3202 Optional Equipment List
Table 6: GVC3200/GVC3202 Optional Equipment List Device Name Number Explanation To display video conference view, for example, high 1 (minimum), HDMI definition TV. The HDMI display device is connected Display 2 or to HDMI output interface 1/2 for GVC3202 or 1/2/3 Device 3 (supported on GVC3200) for GVC3200. -
Page 31: Figure 4: Gvc3200 Back Panel Connection Diagram
----------------------------------------------------------------------------------------------------------------------------- --------------- Note: For detailed instructions about installing GVC3200/GVC3202 on wall mount and etc., please refer to the GVC3200/GVC3202 quick installation guide on www.grandstream.com. ------------------------------------------------------------------------------------------------------------------- ------------------------- A sample of GVC3200 back panel connection is shown below: Figure 4: GVC3200 Back Panel Connection Diagram The following figure shows multiple GVC3200/GVC3202 devices deployed with other VoIP/network devices for video conference and collaboration. -
Page 32: Connecting Gac2500 To Gvc3200/Gvc3202
Figure 5: Deploy GVC3200/GVC3202 with Other Devices Connecting GAC2500 to GVC3200/GVC3202 GAC2500 is included in GVC3200/GVC3202 package to be used as the external speaker. There are two ways to connect the GAC2500 to GVC3200/GVC3202. • Via USB Connection The GAC2500 comes with a micro-USB cable. The cable should be connected between SPKR port on GVC3200/GVC3202 and Micro-USB port on GAC2500. -
Page 33: Getting To Know Gvc3200/Gvc3202
GETTING TO KNOW GVC3200/GVC3202 Remote Control Remote Control Keys and Touchpad Figure 6: GVC3200/GVC3202 Remote Control Table 7: GVC3200/GVC3202 Remote Control Keys Icon Name Explanation Input number 1-9 and letters. The letter input using digital keys will not be displayed as letter, 1, 2, 3, 4…9 Digital Keys but it can be used to search for contacts in Call interface. - Page 34 Mute GVC3200/GVC3202 in conference. Mute/DND Press the MUTE key to enable/disable DND mode when GVC3200/GVC3202 is in idle. Enable/Disable presentation function to send presentation to all members in the conference. Enable/Disable presentation function to show presentation Presentation on displayed device which is connected to HDMI output 1 as projection when GVC3200/GVC3202 is in standby...
- Page 35 Input * in input field. Used as "." when dialing direct IP call. For example, 192.168.40.5. */Record Start/stop recording in camera control mode. Start/stop recording in a call. Input "#" in input field. Used as ":" when dialing direct IP Cal e.g., 192.168.40.5:5060.
-
Page 36: Capturing Screenshot Using The Remote Control
Capturing Screenshot Using the Remote Control To capture a screenshot on GVC3200/GVC3202, the users can press the red shortcut key and blue shortcut key at the same time for about 3 seconds. The screenshot picture will be saved in the internal storage of GVC3200/GVC3202. -
Page 37: Oled Screen
➢ Bring up the drop-down list when clicking on a combo box ➢ Switch input methods in the input box, tap on the corresponding buttons on the soft keyboard to input characters • Double left clicks on the soft keyboard can switch to "Always use upper case" in English input method. -
Page 38: Using The Led Indicator
Using the LED Indicator GVC3200/GVC3202 LED indicator is located next to the OLED. It can be used to notify the users with current status of the device. Please refer to the status description below. Table 9: GVC3200/GVC3202 LED Indicator Status Descriptions LED Indicator Status Descriptions Solid Green... -
Page 39: Using The Onscreen Keyboard
It will navigate the users to the corresponding app. The following table lists the main status icons used on GVC3200/GVC3202. Table 10: GVC3200/GVC3202 Status Icons Descriptions Icon Descriptions Icon Descriptions Icon Descriptions Missed Call Ongoing call Auto answer is enabled Trying to connect to the Ethernet is connected Ethernet is disconnected... -
Page 40: Numbers And Symbols
Figure 8: Soft Keyboard - English Input Method to switch Caps Lock: Tap on Figure 9: English Input Method – Capslock Numbers and Symbols To input numbers and symbols, tap on button default keyboard switch numbers/symbols. Tap on for more numbers/symbols. Figure 10: Soft Keyboard - Symbols and Numbers Figure 11: Soft Keyboard - More Symbols and Numbers P a g e... -
Page 41: Home Screen
Home Screen GVC3200/GVC3202 Home screen displays the icons for users to easily access applications, camera, schedule, call, IPVideoTalk menu, contacts, settings and custom applications. Press the Left/Right keys on the GVC3200/GVC3202 remote control to navigate. If there is no activity on main screen, the icons will be hidden and the video local loopback is displayed. Press OK button on the GVC3200/GVC3202 remote control to bring up the icons to display again. -
Page 42: Connecting To Network And Devices
CONNECTING TO NETWORK AND DEVICES GVC3200/GVC3202 supports a variety of network connections (Ethernet, Wi-Fi) and device connections, including USB, SD card and Bluetooth devices. When the GVC3200/GVC3202 boots up for the first time, a setup wizard will guide the users to pair and connect the remote control to GVC3200/GVC3202 and get started with the basic configurations. -
Page 43: Using Ipv6
Plug the Ethernet cable into the LAN port on the back of GVC3200/GVC3202. Go to LCD menu→Settings→Network→Ethernet→IPv4 Settings. Tap on "Address Type" to select DHCP, Static IP or PPPoE as the address type. ➢ For DHCP, save the setting and GVC3200/GVC3202 should be able to get IP address from the DHCP server in the network. -
Page 44: Turning Wi-Fi On/Off
Figure 14: GVC3200 Add Wi-Fi Screen Turning Wi-Fi On/Off Once Wi-Fi is turned on, GVC3200 will automatically start the scanning within the range. A list of Wi-Fi networks will be displayed as scanning result. Tap on the SSID and enter the correct password information to connect to the selected Wi-Fi network. -
Page 45: Pairing Gvc3200/Gvc3202 With A Bluetooth Device
Pairing GVC3200/GVC3202 with a Bluetooth Device Before connecting GVC3200/GVC3202 with other Bluetooth device, users must pair them first. They will stay paired afterwards unless they are manually unpaired. To pair Bluetooth device: On the LCD display device, go to Settings→Network→Bluetooth. Press button on the remote control and select "Search for devices". -
Page 46: Using Bluetooth Remote Control
Figure 15: GVC3200/GVC3202 Bluetooth - Paired Device If the connection is lost between the Bluetooth device and GVC3200/GVC3202, go to LCD menu→Settings→Network→Bluetooth and click on the device name under “Paired devices” again to reconnect. Using Bluetooth Remote Control Users could use GVC3200/GVC3202 Bluetooth remote control that comes with the GVC3200/GVC3202 packaging to control and configure a GVC3200/GVC3202. -
Page 47: Transfer Files With Bluetooth
If the user needs to pair a different remote control to GVC3200/GVC3202, please follow the methods below: Method 1: Connect a second remote control to GVC3200/GVC3202 and both remote controls can be used at the same time 1. When remote control A is paired and connected to GVC3200/GVC3202, go to GVC3200/GVC3202 and click "Search for devices". -
Page 48: Using Bluetooth Headset
Using Bluetooth Headset Once the Bluetooth headset is connected with GVC3200/GVC3202, it will automatically use Bluetooth headset for calls. By default, the ringing tone will be generated in Bluetooth headset when there is an incoming call. If the user would like to have the ringing tone generated in GVC3200/GVC3202 internal ringer as well, please select enable "Always Ring Internal Ringer"... -
Page 49: Table 11: Gvc3200/Gvc3202 Vpn File Parameters
Figure 17: GVC3200/GVC3202 VPN Validation Screen Fill in correct username and password to connect to VPN. If GVC3200/GVC3202 is connected to VPN successfully, icon will be shown in the top status bar; if the connection is failed, a prompt box will pop up to remind users whether to reconnect to VPN. If icon displays in the top status bar, please check whether if your VPN configuration is correct. -
Page 50: Vlan Settings
VLAN Settings Access GVC3200/GVC3202 home screen, go to Applications→Settings→Network→VLAN to configure VLAN settings on GVC3200/GVC3202. Table 12: GVC3200/GVC3202 VLAN Configuration Parameters Parameters Descriptions Assigns the VLAN Tag of the Layer 2 QoS packets for LAN port. The default value is Layer 2 QoS Note: 802.1q/VLAN Tag... -
Page 51: Table 14: Gvc3200/Gvc3202 802.1X Mode Parameters
Table 14: GVC3200/GVC3202 802.1x Mode Parameters Parameters Descriptions Allows the user to enable/disable 802.1x and configure 802.1x mode. The default 802.1x Mode setting is disabled. Identity Enter the Identity information for 802.1x mode. MD5 Password Enter the MD5 Password for 802.1x mode. CA Certificate Upload the CA certificate for 802.1x mode. -
Page 52: Camera
CAMERA Users could set preset, configure camera parameters, start recording and make screenshots on camera screen. There are 3 ways to access camera screen: • Click on icon on home screen. • Press key on the remote control. • Select on home screen to access Applications, then click on GVC3200/GVC3202 camera screen has the following options: •... -
Page 53: Preset
Preset Add Preset Users can create and save maximum of 24 camera presets, with each preset storing the camera position and focal length. Follow the steps below to add preset: Access camera screen and press the red shortcut key on the remote control to access preset screen. Figure 19: GVC3200/GVC3202 Add Preset Screen Select the preset window and press the blue shortcut key on the remote control to access the editing screen. -
Page 54: Delete Preset
Delete Preset Access the preset editing screen, select preset and press the red shortcut key on GVC3200/GVC3202 remote control to delete it. Apply Preset If you have already set preset on camera, you can apply preset via one of the following two ways: •... -
Page 55: Camera Parameters Configurations
Camera Parameters Configurations Press the yellow shortcut key on GVC3200/GVC3202 remote control to bring out camera parameters setting screen as shown below. Refer to the table below and configure the parameters using navigation keys on the remote control. Figure 21: GVC3200/GVC3202 Camera Parameters Setting Screen Table 15: GVC3200/GVC3202 Camera Parameters Parameters Descriptions... - Page 56 This is used to display accurate images. Users could set to "Manual" or "Auto". • When set to "Auto", the device will adjust parameters automatically according to the current environment. White Balance • When set to "Manual", the device will disable "Auto" mode. Press "OK" key to access manual setting screen, and adjust red or blue gain manually for better white balance.
-
Page 57: Peripheral
PERIPHERAL External USB Device GVC3200/GVC3202 USB interface could be connected with a USB mouse, a USB keyboard, or a USB storage device. Using USB Mouse/Keyboard When a USB mouse is plugged into GVC3200/GVC3202, users could see the cursor on the screen, move the cursor to perform operations. -
Page 58: Microphone And Speaker
Microphone and Speaker GVC3200/GVC3202 is equipped with a built-in microphone. Alternatively, you can connect external audio devices to GVC3200/GVC3202 as audio input/output sources. It is recommended to use the external speaker that comes with your GVC3200/GVC3202 package for better compatibility. If the external speaker supports Bluetooth, users could also pair and connect the speaker to the GVC3200/GVC3202 via Bluetooth. -
Page 59: Making Phone Calls
MAKING PHONE CALLS Account GVC3200/GVC3202 comes with one IPVideoTalk account, supports one configurable SIP account registration, one H.323 account and one Blue Jeans account. Please enable the IPVideoTalk account, or register SIP account to a SIP server before making calls. The following figure shows the SIP account is registered successfully (account icon is green). -
Page 60: Dialing A Number Directly
• Press the red shortcut key on the GVC3200/GVC3202 remote control to bring up call mode setting screen, set call mode to Call or IP call. • Press the yellow shortcut key to set call type to Audio or Video. •... -
Page 61: Dialing A Number Via Call History
Dialing a Number via Call History On the LCD display device, access Applications on home screen and access call history by selecting the icon The LCD will display all call history types. Navigate in the call history list by selecting the call history category. -
Page 62: Paging/Intercom
Paging/Intercom Before placing paging/intercom, please make sure the callee has paging/intercom enabled so that it can answer the paging/intercom call automatically. To make paging/intercom call: Access the dial screen on GVC3200/GVC3202. Enter the number to dial followed by *74. Please refer to Call Features for more details. Press the yellow shortcut key on the remote control to select "Audio Call"... -
Page 63: Figure 26: Gvc3200/Gvc3202 Single Incoming H.323 Call Screen
Figure 26: GVC3200/GVC3202 Single Incoming H.323 Call Screen Select "Video Answer" or “Pick up” to answer the call with both video and audio, "Audio Answer" to answer the call with audio only, or "Reject" to reject the call. When there is an incoming call during an active call, users will hear a call waiting tone with the LCD displaying the caller name and ID for the incoming call. -
Page 64: Call Hold
----------------------------------------------------------------------------------------------------------------------------- --------------- Note: By default, answering a call during an active call will automatically add this party into the conference. ----------------------------------------------------------------------------------------------------------------------------- --------------- Call Hold During an active call, press HOLD button to put the call on hold. • On the LCD display, click on to resume the call. -
Page 65: Missed Call
• button When GVC3200/GVC3202 is in idle screen, users can press on the remote control to turn on/off DND. • When GVC3200/GVC3202 is in an active call, users could turn on/off DND in call screen→MORE options. This will not affect the current call, and it will take effect starting from the next incoming call. •... -
Page 66: Answering An Incoming Call In Conference
• From Call Screen: 1. Access the call screen, enter the number in the text box or select members from the list below. 2. Press on the remote control or click on button on the screen to dial out. • From Schedule: For more details, please refer to section Schedule. -
Page 67: Table 16: Gvc3200/Gvc3202 Call Screen Bottom Menu Icons
On the bottom of the call screen, users will see a list of icons for menu options. This menu will be automatically hidden if there is no operation in 5 seconds. Press any key to bring up the menu options again. Here are the functions for each icon. - Page 68 Turn on/off presentation. HDMI IN or VGA IN must be plugged in first. When HDMI IN or VGA IN is plugged in to GVC3200/GVC3202, after the user selects “Presentation”, the user can select mode “Auto” or “PC” to display presentation. •...
-
Page 69: Invite Members To Conference
• Users could press the red/blue/yellow shortcut keys on the remote control to input DTMF, view notifications and view status. • During an active conference call, if there is a new member joining conference, an outgoing call failed or a member hanging up, there will be a prompt box on the left side of the conference screen showing notifications. -
Page 70: Removing Member From Conference
Removing Member from Conference To remove a member from the conference, click on the DELETE icon conference screen. Select the member from the member list and press "OK" key to delete Conference Control Tap on to make operations such as mute, disable sound, camera control and suspend video. The conference control screen is as shown below: Figure 29: GVC3200/GVC3202 Conference Control Screen Use Up/Down navigation keys on GVC3200/GVC3202 remote control to select conference member. -
Page 71: Conference Layout
--------------------------------------------------------------------------------------------------- ----------------------------------------- Note: 1. The new incoming call will be rejected if the conference is paused. 2. The presentation will be displayed normally when the conference is paused. -------------------------------------------------------------------------------------------------------------------------------------------- Conference Layout During a video conference, users can customize screen layout when using multiple connected HDMI outputs, to specify particular video feeds to be displayed on each screen. -
Page 72: Presentation Sharing
• When solo mode meeting layout is set: Users could specify a pane to display a certain participant. • When Speaker mode meeting layout is set: Users could specify a pane to display a certain participant. The speaker can view all participants video images, and the participants can only view the speaker’s video image. -
Page 73: Conference Recording
Figure 34: GVC3200/GVC3202 3-Way Conference with Presentation ----------------------------------------------------------------------------------------------------------------------------- --------------- Note: When both HDMI IN interface and VGA IN interface are connected, GVC3200/GVC3202 will only display the device connected to HDMI IN port. ------------------------------------------------------------------------------------------------------------------------ -------------------- Conference Recording During a video conference, recording feature is supported on the GVC3200/GVC3202, including video and presentation shared by GVC3200/GVC3202, or IPVideoTalk WebRTC clients. -
Page 74: Figure 35 : Web Ui Conference Recording
Figure 35 : Web UI Conference Recording For more details about local recording, please refer to Recording. For more details about cloud / IPVideoTalk recording, please refer to the chapter IPVIDEOTALK. 1. Press on the GVC3200/GVC3202 remote control or the recording icon on bottom menu to start recording. -
Page 75: Participants List
Participants List Users could check all participants in the current IPVideoTalk meeting. If the meeting host does not allow the participants to check all members, the participants cannot see all members in the meeting. During IPVideoTalk meeting, click on “Conf control” and GVC320x will show all participants in the current IPVideoTalk meeting, including all participants with all types of clients. -
Page 76: Enabling Dnd During Conference
Enabling DND During Conference When DND is enabled during conference, the new incoming calls will be blocked. On the conference screen, use GVC3200/GVC3202 remote control to click on MORE button and select "DND". The icon will be displayed on conference screen if the device is set to DND mode. To disable DND, select DND mode again and press "OK"... -
Page 77: Figure 38: Gvc3200/Gvc3202 Call Screen→More→Pin Code
Figure 38: GVC3200/GVC3202 Call Screen→More→PIN Code 2. Enter the PIN Code to lock the conference call. If it’s empty, the conference call is not locked. Click on OK to confirm. Figure 39: Enter PIN Code to Lock Conference 3. Now the conference call is locked. If someone wants to join the conference call by calling this GVC3200/GVC3202, the same PIN code will be required to be entered before the call goes through. -
Page 78: Third Party Applications
3. On the GVC3200/GVC3202 caller’s call screen bottom menu, select MORE→Open DTMF. Then input the DTMF with PIN code followed by #. Figure 40: Input PIN Code from DTMF to Join Conference 4. The GVC3200/GVC3202 caller joins the conference call after entering correct PIN code in DTMF. Third Party Applications GVC3200/GVC3202 runs Android Operating System and calls using certain apps can be mixed with the SIP call so that they can be brought into the same conference on GVC3200/GVC3202. -
Page 79: Fecc - Camera Control In Conference
GVC3200/GVC3202 supports video mixing so that the remote SIP party can receive video feed from Skype. This currently only works when there is only one SIP/H.323 line in the call, and the Skype application must be downloaded from GS Market on the GVC3200/GVC3202. Here are the steps to use this feature: 1. -
Page 80: End Conference
4. Use UP/DOWN/OK navigation keys on the GVC3200/GVC3202 remote control to select the remote party, e.g., GVC-LAB in the above figure. This will bring up camera control interface. 5. On the GVC3200/GVC3202 remote control, press the navigation keys and zoom in/zoom out buttons on trackpad to adjust remote camera. -
Page 81: Power Off During A Conference Call
Figure 43: End Meeting Reminder Power Off During a Conference Call During the meeting, if the user presses Power ON/OFF button, a new dialog will be prompted that allows user to end the current call and shutdown GVC320x immediately. Choose “Power off” to end the conference call and power off the GVC320x immediately, or choose “Power off when idle”... -
Page 82: View Conference Details
Figure 45: GVC3200/GVC3202 Schedule Screen Follow one of the ways below to access schedule conference screen: • On the home screen, click on CONFERENCE button • On the home screen, click on APPLICATION button and select • Users will see the scheduled conferences (after the current time) in the schedule screen. Select one conference entry to view details. -
Page 83: Add Scheduled Conference
Add Scheduled Conference Follow the steps below to add a scheduled conference: On the home screen, select to access schedule screen. On GVC3200/GVC3202 remote control, press the yellow shortcut key to create a new conference. Figure 47: GVC3200/GVC3202 Add Conference Screen Fill in conference name, members, start time, conference duration and etc. -
Page 84: Edit Scheduled Conference
Auto Join It is used to configure whether PIN code is required when the scheduled Conference for members join the conference. If enabled and the scheduled conference has PIN Scheduled code configured, the scheduled members will automatically answer the call Members without PIN without PIN code required. -
Page 85: Delete Scheduled Conference
Delete Scheduled Conference Follow the steps below to delete the existing scheduled conference: Access schedule screen and select the conference entry users would like to delete. Press the MENU key on the remote control, and select "Delete". Voicemail When there is a new voicemail, voice mail icon will show up as a notification in the status bar. -
Page 86: Call Features
Call Features The GVC3200/GVC3202 support traditional and advanced telephony features including caller ID, caller ID with caller Name, call waiting, call forward and etc for the SIP account. Before using the following feature code, please make sure "Enable Call Features" option is set to "Yes" under web GUI→Settings→SIP→Call page. - Page 87 Send Caller ID (for all subsequent calls). • Dial *31. Disable Call Waiting. • Dial *50. Enable Call Waiting. • Dial *51. Block Caller ID (per call). • Dial *67 followed by the phone number. Send Caller ID (per call). •...
-
Page 88: Additional Functions
ADDITIONAL FUNCTIONS GVC Remote Client Application Besides using GVC3200/GVC3202 Bluetooth remote control in the package, users could also download the Grandstream GVC Remote Client application, and install it on an Android device. GVC3200/GVC3202 remote control application is used via Bluetooth protocol. Follow the steps below to install the remote control application: Remote for Android... -
Page 89: Figure 50: Gvc3200/Gvc3202 Remote Control Application On Android Device
After pairing and connecting the remote control application, users can use the keys and options on the Android device touch screen to control GVC3200/GVC3202. Figure 50: GVC3200/GVC3202 Remote Control Application on Android Device • Tap on button at the upper right corner to access settings screen as the left figure shows above. •... -
Page 90: Bluejeans
BlueJeans GVC3200/GVC3202 has built-in BlueJeans access for users to dial BlueJeans calls. Follow the steps below: On the LCD dial screen, press the blue shortcut key on GVC3200/GVC3202 remote control to switch call mode from SIP Call to BlueJeans Call. When the call mode shows BlueJeans, input Blue Jeans conference ID and conference password. -
Page 91: Applications
APPLICATIONS GVC3200/GVC3202 provides built-in applications such as Contacts, Call History, File Manager, Browser and etc. Users could also download the apps from GS market to install on GVC3200/GVC3202. Contacts GVC3200/GVC3202 Contacts app helps users to easily store and manage phone numbers and contacts information. -
Page 92: Add Contact
Press the red shortcut key on the remote control to delete contacts. • Edit Press the yellow shortcut key on the remote control to edit contacts. • Press the blue shortcut key on the remote control to access New Contact screen, fill in contact information and press the yellow shortcut key on the remote control to save it. -
Page 93: Table 20: Gvc3200/Gvc3202 Import Contacts Parameters
Batch Import Contacts Import function allows users to batch import contacts. The phonebook with compatible format needs to be saved to the storage devices like SD card/USB flash drive and plugged into GVC3200/GVC3202. Press the MENU key on Contacts screen, and select "Import" to access Import Contacts screen. Figure 53: GVC3200/GVC3202 Import Contacts Screen Configure parameters and select the path to save the imported file. -
Page 94: Table 21: Gvc3200/Gvc3202 Download Contacts Parameters
Download Contact GVC3200/GVC3202 supports downloading phonebook from the file server to batch add contacts. The default file name that GVC3200/GVC3202 looks for is "phonebook.xml". The phonebook XML file should be placed under the file server directory for GVC3200/GVC3202 to retrieve. GVC3200/GVC3202 supports vcard/xml/csv file format. -
Page 95: Search Contacts
File Encoding Select the encoding format for the XML contact file. Time Intervals Configure the time interval to download XML contact file. Configure the HTTP/HTTPS username for phone book downloading if it’s required by HTTP/HTTPS Username the server. Configure the HTTP/HTTPS password for phone book downloading if it’s required by HTTP/HTTPS Password the server. -
Page 96: Groups
Figure 55: GVC3200/GVC3202 Export Contacts Screen Configure parameters as shown in table below and select the directory to save the exported file. Press the yellow shortcut key to export the file. Table 22: GVC3200/GVC3202 Export Contacts Parameters Parameters Descriptions File Encoding Select the encoding format for XML contact file. -
Page 97: Figure 56: Gvc3200/Gvc3202 Groups Screen
Figure 56: GVC3200/GVC3202 Groups Screen • Call Press on GVC3200/GVC3202 remote control to call the first 8 members in a group to initiate a conference. • Rename (red shortcut key) It is used to rename a group. • Delete (yellow shortcut key) It is used to delete a group. -
Page 98: Ldap Contacts
Figure 57: GVC3200/GVC3202 Add Group Screen Input a group name and tap on "OK" to add a new group. Go to Contacts Screen to find the group you just added and access it. Press the red shortcut key on the remote control to access Groups editing screen. Select the contacts users would to add to this group. -
Page 99: Ldap Settings
Here is the main interface of LDAP contacts. Figure 58: LDAP Contacts Interface LDAP Settings Before starting using LDAP on GVC3200/GVC3202, the users must configure the LDAP settings first. Press the Blue shortcut key on the GVC3200/GVC3202 remote control to access LDAP settings, or the users can configure it under GVC3200/GVC3202 web UI→Contacts→LDAP page. - Page 100 It is used to configure the bind "Password" for querying LDAP servers. Password The field can be left blank if the LDAP server allows anonymous binds. It is used to configure the "name" attributes of each record which are returned in the LDAP search result. This field allows the users to configure multiple space separated name attributes.
- Page 101 It is used to configure the maximum number of results to be returned Max Hits by the LDAP server. If set to 0, server will return all search results. The default setting is 50. It is used to configure the interval (in seconds) for the server to process Search Timeout (ms) the request and client waits for server to return.
-
Page 102: Figure 59: Ldap Settings Example In Web Ui
Figure 59: LDAP Settings Example in Web UI P a g e GVC3200/GVC3202 User Guide Version 1.0.3.64... -
Page 103: Search Ldap Contacts
Search LDAP Contacts After configuring LDAP settings, the users could search contacts in LDAP Contacts main interface. In the following example, the users could enter number or name in the Search field. The LDAP result will be displayed dynamically when the key word is entered. Figure 60: Search LDAP Contacts If the user presses the Green Call button on the GVC3200/GVC3202 remote control, the... -
Page 104: Figure 61: Add Ldap Search Result To Local Contacts
Figure 61: Add LDAP Search Result to Local Contacts • Batch Add Press the yellow shortcut key on the GVC3200/GVC3202 remote control, then select the checkbox for multiple search results to be added into local contacts. Press the yellow shortcut key again and the following prompt will pop up. -
Page 105: Call History
Call History Call History provides users access to phone's recent call records. Users can view all records, or select different categories for incoming calls, outgoing calls, missed call and conference. To access Call History, go to Home screen→Applications→select Figure 63: GVC3200/GVC3202 Call History Screen Click on a record in the call history and press to dial out this number directly. -
Page 106: Add Contact From Call History
Figure 64: GVC3200/GVC3202 Call History Details ----------------------------------------------------------------------------------------------------------------------------- --------------- Note: Call history displays all Blue Jeans conference call histories as well. Press "OK" key or to dial out directly, and there is no need to input the password again. However, if the conference does not exist or the password has been changed, the re-dial will fail. -
Page 107: Delete Call History
Figure 65: GVC3200/GVC3202 Add Contact Screen Select existing contact or press the blue shortcut key on GVC3200/GVC3202 remote control to access edit screen. Fill in contact information and press the yellow shortcut key on the remote control to save the contact. Delete Call History 1. -
Page 108: Copy File
Copy File To copy the file from GVC3200/GVC3202 to USB/SD storage device: Insert USB/SD storage device into USB port on GVC3200/GVC3202. It will take a few seconds for GVC3200/GVC3202 to prepare the connection. The USB storage icon will show up on the status bar. Go to Home screen→Applications→File Manager. -
Page 109: Rename File
Rename File 1. Go to Home screen→Applications→File Manager. 2. Open the target folder. 3. Press the yellow shortcut key and select the file. 4. Press MENU key on GVC3200/GVC3202 remote control and select "Rename". 5. Input the new file name in the pop out dialog and press "OK" key to save. Press on GVC3200/GVC3202 remote control to cancel the operation. -
Page 110: Save Path
Save Path Users can change the default save path for recording to internal storage, a plugged SD card or USB storage device: 1. Go to Home screen→Applications→Recording. on remote control and select “Settings”. 2. Press the MENU key 3. Plug in external SD card or USB storage device, and select the Recording Save Path. Figure 67: GVC3200/GVC3202 Default Save Path Note: •... -
Page 111: Figure 68: Applications→Setup Wizard
Figure 68: Applications→Setup Wizard Users can follow the steps using the remote control to setup fields, skip, return, or confirm the action. Setup wizard tool is useful to lead users to check and configure the GVC3200/GVC3202 settings such as language, accounts, interface status and etc. Figure 69: Interface Detection P a g e GVC3200/GVC3202 User Guide... -
Page 112: Backup
Backup Backup Data GVC3200/GVC3202 BACKUP application is used to back up data or import backup files to restore data. It can be accessed from Home screen→Applications→Backup. The default screen will list available backup files (if any) and backup options. Figure 70: GVC3200/GVC3202 Backup App GVC3200/GVC3202 supports manual backup and automatic backup: •... -
Page 113: Figure 71: Gvc3200/Gvc3202 Automatic Backup Screen
Figure 71: GVC3200/GVC3202 Automatic Backup Screen Note: Using firmware 1.0.3.24 and above, users have also the option to choose which commonly used apps need to be backed up, such as contacts, call history. Figure 72: Backup Commonly Used Apps P a g e GVC3200/GVC3202 User Guide Version 1.0.3.64... -
Page 114: Restore Backup Data
Restore Backup Data Select one backup data and press "OK" key to access restore screen, select data and press the blue shortcut key to restore the backup data. Figure 73: GVC3200/GVC3202 Restore Backup Data Screen Set Backup Path Press the MENU key and select "Settings" on backup screen to access settings screen, set backup path and go back to save automatically. -
Page 115: Browser
Figure 74: GVC3200/GVC3202 Diagnosis Screen Browser Users could browse web page, view news and watch video via the built-in GVC3200/GVC3202 Browser. On home screen, select Application→Browser • Slide up or down with slide gesture to scroll the screen. • Zoom in/out the page via zoom gesture. •... -
Page 116: Figure 75: Lcd Menu→Settings→System→Accounts
Please follow the steps below to set up Google Calendar sync with GVC3200/GVC3202 schedule: 1. Open Google Calendar on GVC3200/GVC3202. 2. Once Google Calendar is successfully installed and opened on GVC3200/GVC3202, it should automatically sign in using the same Google account in step 2. 3. -
Page 117: Figure 76: Select The Google Account Used For Sign-In
Figure 76: Select the Google Account Used for Sign-In 5. Click on the checkbox for “Calendar” to enable calendar sync for this Google account. Figure 77: Enable Calendar Sync for the Google Account 6. On GVC3200/GVC3202 LCD menu→Schedule, click on the upper right MENU icon→Settings. P a g e GVC3200/GVC3202 User Guide Version 1.0.3.64... -
Page 118: Figure 78: Gvc3200/Gvc3202 Schedule→Settings
Figure 78: GVC3200/GVC3202 Schedule→Settings 7. Enable Google Calendar by selecting the checkbox for the Google account. Set the sync interval, e.g., Every 5 mins. Figure 79: Enable Google Account for Schedule and Set Sync Interval Now your GVC3200/GVC3202 has Google account successfully associated with schedule. The scheduled conference from GVC3200/GVC3202 or Google Calendar can sync with each other. -
Page 119: Figure 80: Creating New Event In Google Calendar
• To schedule meeting using Google Calendar and then sync up on GVC3200/GVC3202 schedule 1. When creating a new event in Google Calendar, please enter “GVC” in “Where” option. 2. Then enter meeting members in “Description” option. The meeting members should be in the format: Number<Email><Account>. -
Page 120: Figure 81: Google Calendar Event Synced In Schedule
Figure 81: Google Calendar Event Synced in Schedule • To schedule meeting on GVC3200/GVC3202 and then sync up with Google Calendar On GVC3200/GVC3202 LCD idle screen (or web UI→Contacts)→Schedule, select the Google account as the “Related Account” and fill up other details to schedule the conference using Google account. The created conference will be synced up in Google Calendar. -
Page 121: Custom App On Home Screen
Custom App on Home Screen Users could add one app to the home screen for easy access. GVC3200/GVC3202 only supports custom one app on home screen. The new app will overwrite the older one. On the Home screen, click on "Custom Home App" and select one app. Press "OK" key to confirm. The system will go back to Home screen automatically and users could find the app has already been added. -
Page 122: Uninstall Application
Figure 84: Move App to SD card • To move the app back to the GVC320x internal storage, users could click “Move to device” on the detailed information page for the app on GVC320x LCD→Settings→System→Apps page. Figure 85: Move App to Device Storage Uninstall Application The applications (except the system applications) on GVC3200/GVC3202 can be uninstalled. -
Page 123: Gs Market
GS MARKET GVC3200/GVC3202 provides access to apps directly via built-in GS market. Users could download the apps from the market and install to GVC3200/GVC3202. Search Apps On GVC3200/GVC3202 Home screen, click on Applications→GS Market Users could view the apps by category, or input key words and click on SEARCH icon to search the app. Figure 86: GVC3200/GVC3202 GS Market Download and Install Apps •... -
Page 124: Ipvideotalk
IPVIDEOTALK The GVC3200/GVC3202 has a built-in IPVideoTalk account that requires the user to activate it before using it. The IPVideoTalk application provides an interface for the user to manage this service on the GVC3200/GVC3202, e.g., view enterprise directory contacts, check and reply to notices from IPVideoTalk server as well as change IPVideoTalk settings. -
Page 125: Meeting List
Meeting List Users can view all the scheduled meetings by selecting “Meeting list”, this will take the user to the meetings list page where all the scheduled conferences are listed. Call Users can select “Call” in order to directly go to the dial page. Contacts The contacts are managed centrally in the server side. -
Page 126: Notices
• Press the red shortcut key on the GVC3200/GVC3202 remote control to refresh the directory. • Press the yellow shortcut key on the GVC3200/GVC3202 remote control to search contacts in the directory. • Press the blue shortcut key on the GVC3200/GVC3202 remote control to select entries and make a batch call to multiple contacts in the directory. -
Page 127: Figure 91: Ipvideotalk Application→Notices: Message Prompt
Click on “Notices” to access the messages. Use the navigations keys/OK keys on the GVC3200/GVC3202 remote control to select and read the messages. For the messages that requires user’s reply, a prompt will pop up for the users to make a selection. Figure 91: IPVideoTalk Application→Notices: Message Prompt When IPVideoTalk plan is about to expire or already expired, a message will appear on the bottom of GVC3200/GVC3202 LCD home screen. -
Page 128: Settings
If there are new incoming messages for the IPVideoTalk account, users will see indicator icon on the top status bar. Also on the upper right corner of the IPVideoTalk application icon in Application menu, users will see the number of new messages displayed. Figure 92: Message Indicator for IPVideoTalk Application Settings In the IPVideoTalk application, click on “Settings”... -
Page 129: Figure 93: Ipvideotalk Account Settings
Figure 93: IPVideoTalk Account Settings Users can check as well the current IPVideoTalk Plan used on the GVC320x and its expiration date. Please, refer to the following figure: Figure 94: Current Plan used and its expiration time P a g e GVC3200/GVC3202 User Guide Version 1.0.3.64... -
Page 130: Join An Ipvideotalk Meeting
Join an IPVideoTalk Meeting Users can join an IPVideoTalk meeting by dialing the host GVC3200/GVC3202’s IPVideoTalk ID or meeting ID. Please note only after meeting starts, GVC3200/GVC3202 can use this method to join the conference as a participant. • Dialing host GVC3200/GVC3202’s IPVideoTalk ID to join an active meeting •... -
Page 131: Manually Start Ipvideotalk Tip
“The number you dialed is joining another meeting”. Participant GVC of an active IPVideoTalk meeting cannot be added to another meeting. Manually Start IPVideoTalk Tip If a meeting is scheduled from IPVideoTalk Web Portal, then the meeting will sync to host GVC3200/GVC3202 device LCD→Schedule interface. -
Page 132: Conference Control
Figure 96: Reminder prompt for preparation before starting the webinar For more information about your IPVideoTalk services, settings, how to manage accounts and schedule meetings, please check IPVideoTalk user manual from http://www.ipvideotalk.com Conference Control Hand Down/Up in IPVideoTalk Meeting If GVC320x joins an IPVideoTalk meeting as a participant and the host is any WebRTC client, the participant could click on button on GVC320x LCD→Call screen to raise hand to attract attention from host that he/she wants to be unmuted or needs any help. -
Page 133: Figure 99: Hand Down/Ipvideotalk
The raised hand could be put down by participant itself or WebRTC host. • Participant GVC320x could hand down itself by clicking on button again. Figure 99: Hand down/IPVideotalk • WebRTC Host could put down GVC’s hand. Figure 100: Hand down by Host – IPVideoTalk The host GVC320x can put down some participant’s raised hands or all the participants raised hands: •... -
Page 134: Share Local Camera
Figure 102: Lower all the participants hands Share Local Camera During IPVT meetings, WebRTC host can request the GVC attendees to share their camera, once the request is being sent, a GVC user can either reject or accept the request for the camera to be shared. •... -
Page 135: Mute Participants
WebRTC host can also stop the camera feed of a GVC attendee to prevent it from uploading its local video streaming to IPVideoTalk Server. Figure 105: Stop Camera Sharing The Host GVC320x can stop the camera feed of a participant sharing his camera by accessing “Conf Control”... -
Page 136: Stop Video Upload
Stop Video Upload Under GVC320x LCD→Call Screen→Conf Control→Me (Host), users could prevent the GVC320x from uploading local video streaming to IPVideoTalk server during an IPVideoTalk meeting by clicking on icons: : Other participants will not receive any video streaming from this GVC320x, and it will switch to 1-way video. -
Page 137: Figure 109 : Start Cloud Recording
Figure 109 : Start Cloud Recording There will be an icon shown on the left upper corner of host GVC as well as all other participants to indicate the cloud recording is in progress, the screen and record button will also show as follow: Figure 110 : Recording Users can at any time stop the recording by clicking the record button and press: Users could log in to IPVideoTalk Enterprise web portal →... -
Page 138: Gvc3200/Gvc3202 Web Ui Features
GVC3200/GVC3202 WEB UI FEATURES GVC3200/GVC3202 embedded Web server responds to HTTP/HTTPS GET/POST requests. Embedded HTML pages allow users to configure the application device through a Web browser such as Mozilla Firefox, Google Chrome and etc. Accessing GVC3200/GVC3202 Web GUI The IP addres of GVC3200/GVC3202 displays on OLED display screen on the front panel. -
Page 139: Saving Changes
Saving Changes When changing any setting on GVC3200/GVC3202 web UI, users need to submit them by pressing the SAVE button on the bottom of the page, and then, click the Apply button on the top of the page to apply the configuration changes. -
Page 140: Toolbar
Toolbar The web UI tool bar is on the upper right corner of the web UI page. Figure 113: GVC3200/GVC3202 Web UI Tool Bar • It is used to turn on/off DND mode. Once it is enabled, the DND text will turn into red and all incoming calls will be rejected. -
Page 141: Making A Call
Making a Call Enter phone number in input box, and select call mode, tap on button to dial out; or, select one call history entry in the list below and click on to dial out. Conference Control When making a new call, initiating a conference or receiving an incoming call, the conference screen will pop up as shown below. -
Page 142: Contacts Page
Figure 116: GVC3200/GVC3202 Web UI - Conference Control Contacts Page This page lists Contacts, Schedule and Call History. Contacts Users could search/add/delete/edit contacts on web page. The operations will be synchronized and can be viewed from LCD as well. The web UI contacts page is as shown below. P a g e GVC3200/GVC3202 User Guide Version 1.0.3.64... -
Page 143: Figure 117: Gvc3200/Gvc3202 Web Ui - Contacts
Figure 117: GVC3200/GVC3202 Web UI - Contacts • Click on next to the contact to dial the contact. • Click on “More” to open more options such as export, import and download contact. • Select "Import" option and users will find import screen on the right. Refer to chapter Batch Import Contacts for more details. -
Page 144: Groups
Groups GVC3200 supports up to 9-way video conference and GVC3202 supports up to 3-way video conference, including the GVC3200/GVC3202 itself. For GVC3200, if there are more than 8 conference members, only the first 8 members in the group will be dialed; For GVC3202, if there are more than 2 conference members, only the first 2 members in the group will be dialed. -
Page 145: Schedule
Schedule Conference can be scheduled, edited and deleted from web UI. See figure below. Please refer to chapter Schedule for more details for each option. Figure 119: GVC3200/GVC3202 Web Page - Schedule • Click on and users will find Add Schedule screen on the right. Click on “Save” after configuring the schedule. -
Page 146: Call History
Call History From web UI, users could also access Call history, which is synchronized with the call history from LCD. Figure 120: GVC3200/GVC3202 Web UI - Call History The call history details will be displayed on the right side when there is one entry selected. Users can also move the cursor to the call history time to add this call to schedule by clicking on , or dial out immediately by clicking on... -
Page 147: Device Control Page
Device Control Page Video Control Users could add preset and manipulate PTZ control on this page. • Move the cursor to one configured preset to preview preset. • Click one preset to apply the preset. • Click the un-configured preset, and adjust via the PTZ control panel on the right, then save the configurations. - Page 148 Notification Select device notification ringtone from the dropdown list. Ringtone Select the audio device that the GVC3200/GVC3202 will use for audio input and output during call or playing media. The options are “Auto”, “Bluetooth”, “USB” and “HDMI”. • Auto GVC3200/GVC3202 will automatically detect whether any USB, Bluetooth or HDMI devices are connected.
- Page 149 Busy Tone: Users can configure busy tone which will be heard if the callee is busy or on DND. The default value: f1=480@-24,f2=620@-24,c=500/500; Reorder Tone: Users can configure reorder tone which will be heard when the call fails to be established such as wrong account number is dialed, or the call is timed out.
-
Page 150: Rescue Mode
RESCUE MODE When users power cycle the GVC3200/3202 device during upgrading process, the device can be recovered by the “Rescue Mode”. a. The Rescue Mode will be triggered on next rebooting when users power cycle the GVC3200/3202 device during upgrading process as the figure shows below: Figure 122: Rescue Mode b. -
Page 151: Figure 124: Rescue Mode - Network Disconnected
Figure 124: Rescue Mode - Network disconnected 1. Select “SD Card”. Users could insert SD card with GVC32XX_rescue.bin firmware file to upgrade the GVC320x device. The device will be upgraded automatically via SD card. 2. Select “Manual”. Please make sure that the Ethernet cable is plugged into the GVC320x device, and users need to configure the Internet Settings in the device to upgrade the GVC320x device. -
Page 152: Factory Reset
FACTORY RESET Users could reset GVC3200/GVC3202 to factory settings via the following ways: Reset via local GUI, via Web page, via the reset hole on the back panel of GVC3200/GVC3202. Factory reset will delete configuration info and syslog info. -------------------------------------------------------------------------------------------------------------------------------------------- Warning: 1. -
Page 153: Reset Via Web Ui
Reset via Web UI Log in GVC3200/GVC3202 Web UI→Maintenance→Upgrade, the "Factory Reset" option is on the bottom of the page. Figure 127: GVC3200/GVC3202 Web UI - Factory Reset Click the "Reset" button to bring up the prompt box as shown below. Click "OK" to reboot the device, and restore factory settings. -
Page 154: Experiencing Gvc3200/Gvc3202
EXPERIENCING GVC3200/GVC3202 Please visit our website: http://www.grandstream.com to receive the most up-to-date updates on firmware releases, additional features, FAQs, documentation and news on new products. We encourage you to browse our product related documentation, FAQs and User and Developer Forum answers to your general questions.
Need help?
Do you have a question about the GSGVC3202 and is the answer not in the manual?
Questions and answers