Grandstream Networks GVC3200 User Manual
Video conferencing system for android
Hide thumbs
Also See for GVC3200:
- User manual (146 pages) ,
- Administration manual (94 pages) ,
- Quick installation manual (52 pages)

Related Manuals for Grandstream Networks GVC3200


Summary of Contents for Grandstream Networks GVC3200
- Page 1 Grandstream Networks, Inc. GVC3200 Video Conferencing System for Android User Guide...
-
Page 2: Table Of Contents
WARRANTY ............................15 INSTALLING GVC3200 ................17 EQUIPMENT PACKAGE CONTENT ....................17 CONNECTING GVC3200 ........................18 GETTING TO KNOW GVC3200 ............... 23 REMOTE CONTROL ........................... 23 USING THE REMOTE CONTROL ....................25 USING MOUSE & KEYBOARD ......................26 OLED SCREEN ........................... 26 USING THE LED INDICATOR ...................... - Page 3 MISSED CALL ............................. 53 CALL FORWARD ..........................54 CONFERENCE ............................ 54 DEVICE LAYOUT ......................... 54 INITIATING CONFERENCE ......................54 ANSWERING AN INCOMING CALL IN CONFERENCE ............. 54 CONFERENCE MANAGEMENT ....................55 Firmware Version 1.0.1.5 GVC3200 User Guide Page 2 of 103...
- Page 4 DIAGNOSIS ............................86 BROWSER ............................87 CUSTOM APP ON HOME SCREEN ....................87 UNINSTALL APPLICATION ......................... 87 GS MARKET .................... 89 SEARCH APPS ............................ 89 DOWNLOAD AND INSTALL APPS ...................... 89 Firmware Version 1.0.1.5 GVC3200 User Guide Page 3 of 103...
- Page 5 UPDATE APPS ............................ 90 GVC3200 WEB UI FEATURES ..............91 ACCESSING GVC3200 WEB GUI ...................... 91 SAVING CHANGES ..........................92 DEFINITIONS ............................92 TOOLBAR ............................93 CALL PAGE ............................93 MAKING A CALL .......................... 94 CONFERENCE CONTROL ......................94 CONTACTS PAGE ..........................95 CONTACTS ..........................
- Page 6 Table 18 GVC3200 Download Contacts Parameters .................. 74 Table 19 GVC3200 Export Contacts Parameters ..................76 Table 20 GVC3200 Web Access ......................... 93 Table 21 GVC3200 Web UI - Audio Control Parameters ................100 Firmware Version 1.0.1.5 GVC3200 User Guide...
- Page 7 Figure 7 GVC3200 English Input Method - Capslock ................. 29 Figure 8 GVC3200 Soft Keyboard - Symbols and Numbers ..............29 Figure 9 GVC3200 Soft Keyboard - More Symbols and Numbers ............. 29 Figure 10 GVC3200 Home Screen ......................30 Figure 11 GVC3200 Add Wi-Fi Screen .......................
- Page 8 Figure 53 GVC3200 Web UI – Groups ....................... 97 Figure 54 GVC3200 Web Page - Schedule ....................98 Figure 55 GVC3200 Web UI - Call History ....................99 Figure 56 GVC3200 Web UI - Video Control .................... 100 Firmware Version 1.0.1.5...
-
Page 9: Gvc3200 User Guide
Only major new features or major document updates are listed here. Minor updates for corrections or editing are not documented here. FIRMWARE VERSION 1.0.1.5 This is the initial version. Firmware Version 1.0.1.5 GVC3200 User Guide Page 8 of 103... -
Page 10: Welcome
The GVC3200 sports an innovative, patent-pending embedded MCU that supports up to 9-way conferencing with local mixing between SIP and other protocols. The GVC3200 sets a new bar for enterprise class video conferencing solutions by offering industry-leading flexibility, interoperability, system compatibility, application richness and ease of use. - Page 11 User Manual, could void your manufacturer warranty. Warning: Please do not use a different power adaptor with the GVC3200 as it may cause damage to the products and void the manufacturer warranty.
- Page 12 This equipment complies with FCC radiation exposure limits set forth for an uncontrolled environment. This equipment should be installed and operated with minimum distance 20cm between the radiator & your body. -------------------------------------------------------------------------------------------------------------------------------------------- Firmware Version 1.0.1.5 GVC3200 User Guide Page 11 of 103...
- Page 13 This page intentionally left blank Firmware Version 1.0.1.5 GVC3200 User Guide Page 12 of 103...
-
Page 14: Product Overview
Interoperable with 3rd party SIP-based video conferencing solutions (such as Cisco, Polycom, and Huawei) using BFCP and TIP (pending) 3 x HDMI output, 1x VGA/HDMI input Table 1 GVC3200 Technical Specifications Specification Description SIP RFC3261, BFCP, TIP (pending), RTP/RTCP, HTTP/HTTPS, ARP, ICMP, DNS... - Page 15 Layer 2 QoS (802.1Q, 802.1p) and Layer 3 (ToS, DiffServ, MPLS) QoS User and administrator level passwords, MD5 and MD5-sess based authentication, Security 256-bit AES encrypted configuration file, TLS, 128/256-bit SRTP, HTTPS, 802.1x media access control Firmware Version 1.0.1.5 GVC3200 User Guide Page 14 of 103...
-
Page 16: Safety Compliances
WARRANTY If the GVC3200 phone is purchased from a reseller, please contact the company where the device is purchased for replacement, repair or refund. If the phone is purchased directly from Grandstream, please contact Grandstream Support for a RMA (Return Materials Authorization) number before the product is returned. - Page 17 This page intentionally left blank Firmware Version 1.0.1.5 GVC3200 User Guide Page 16 of 103...
-
Page 18: Installing Gvc3200
INSTALLING GVC3200 EQUIPMENT PACKAGE CONTENT The GVC3200 package contains the following items: Table 2 GVC3200 Package List Name Number GVC3200 Main Case External USB Speakerphone Remote Control (a pair of AAA batteries) 12V Universal Power Adapter with power cable 1.5m Ethernet Cable 5m USB Extension Cable 1.5m HDMI Cable... -
Page 19: Connecting Gvc3200
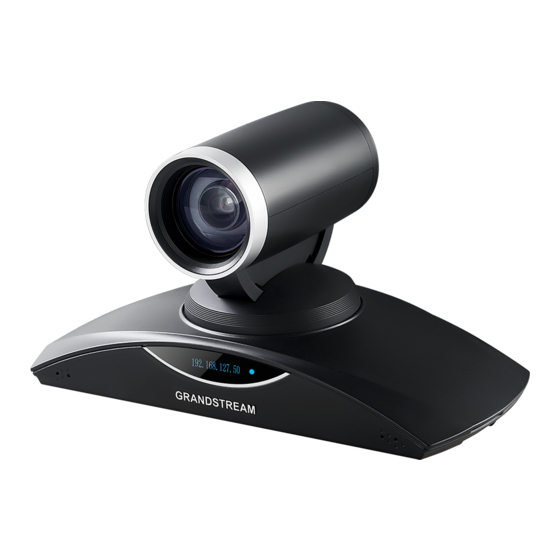
CONNECTING GVC3200 Figure 1 GVC3200 Front Panel Table 3 GVC3200 Front Panel Name Explanation 1/3" 2 Megapixel CMOS ① Camera 70°(W)*- 6.3°(T) field of view Vertical Rotating ② +/-23° tilt Stent Horizontal Rotating ③ +/-90° pan Platform Power on / Normal Running: Green Standby: Flash red ④... -
Page 20: Table 4 Gvc3200 Back Panel
1, 2 and 3. When there is only 1 HDMI output, it must use HDMI output 1. Connect HDMI port 2 and then HDMI port 3 if you have additional display devices. The GVC3200 will not work correctly if connecting HDMI port 2 or 3 without HDMI port 1 connected. -
Page 21: Table 5 Gvc3200 Optional Equipment List
Power Interface adapter should face upwards when the power adapter is plugged When the GVC3200 is powered up, use a small pin to press the button one time to reboot. When powering up GVC3200, long press the button for 4 to ⑨... - Page 22 Plug in the power adapter into the power supply interface. Power up the GVC3200. ----------------------------------------------------------------------------------------------------------------------------- --------------- Note: For detailed instructions on installing the GVC3200 on wall mount and etc., please refer to the GVC3200 quick installation guide in www.grandstream.com. -------------------------------------------------------------------------------------------------------------------------------------------- A sample GVC3200 back panel connection is shown below.
-
Page 23: Figure 3 Gvc3200 Back Panel Connection Diagram
Figure 3 GVC3200 Back Panel Connection Diagram The following figure shows multiple GVC3200s deployed with other VoIP/network devices for video conference and collaboration. Figure 4 GVC3200 Deploy GVC3200 with Other Devices Firmware Version 1.0.1.5 GVC3200 User Guide Page 22 of 103... -
Page 24: Getting To Know Gvc3200
Call interface. For example, typing 5 (JKL), 6 (MNO), 4 (GHI), 6 (MNO) can look for John if existed in GVC3200 contacts. Camera Switch to PTZ control mode during call or idle status. - Page 25 Input * in input field. Used as "." when dialing direct IP call. e.g., 192.168.40.5. */Record Start/stop recording in camera control mode. Start/stop recording in a call. Firmware Version 1.0.1.5 GVC3200 User Guide Page 24 of 103...
-
Page 26: Using The Remote Control
USING THE REMOTE CONTROL The remote control is connected to the GVC3200 via Bluetooth and it’s already pre-paired when the user receives the GVC3200 package. Before using the remote control, please make sure: 1. A pair of AAA batteries is correctly installed on the back of the remote control. -
Page 27: Using Mouse & Keyboard
If the remote control fails to pair and connect to the GVC3200, please follow the steps below to troubleshoot: Check the battery polarity when placed into the battery case. Make sure the batteries are placed in the correct direction in the remote control. -
Page 28: Using The Led Indicator
USING THE LED INDICATOR The GVC3200 LED indicator is located next to the OLED. It can be used to notify the users with current status of the device. Please refer to the status description below. -
Page 29: Using The Onscreen Keyboard
Unknown Wi-Fi Wi-Fi signal strength USING THE ONSCREEN KEYBOARD ENGLISH KEYBOARD This is the default keyboard on the GVC3200. The GVC3200 English keyboard supports multiple languages input methods. Users could tap on to switch among different languages. See figure below. -
Page 30: Numbers And Symbols
Tap on for more numbers/symbols. Figure 8 GVC3200 Soft Keyboard - Symbols and Numbers Figure 9 GVC3200 Soft Keyboard - More Symbols and Numbers Firmware Version 1.0.1.5 GVC3200 User Guide Page 29 of 103... -
Page 31: Home Screen
If there is no activity on main screen, the icons will be hidden and the video local loopback is displayed. Press the OK button on the GVC3200 remote control to bring up the icons to display again. Figure 10 GVC3200 Home Screen Firmware Version 1.0.1.5... -
Page 32: Connecting To Network And Devices
Go to LCD menu->Settings->Network->Ethernet->IPv4 Settings. Tap on "Address Type" to select DHCP, Static IP or PPPoE as the address type. For DHCP, save the setting and the GVC3200 should be able to get IP address from the DHCP server in the network. -
Page 33: Turning Wi-Fi On Or Off
Figure 11 GVC3200 Add Wi-Fi Screen TURNING WI-FI ON OR OFF Once Wi-Fi is turned on, GVC3200 will automatically start the scanning within the range. A list of Wi-Fi networks will be displayed as scanning result. Tap on the SSID and enter the correct password information to connect to the selected Wi-Fi network. -
Page 34: Turning Bluetooth On Or Off
On the LCD display device, go to Settings->Network->Bluetooth. Tap on the green switch next to the GVC3200 device on the top row to turn on/off Bluetooth. Please note the Bluetooth needs to be turned on in order to use the remote control. -
Page 35: Using Bluetooth Remote Control
3. Select "Search for devices". 4. On the remote control you would like to pair with the GVC3200, press "OK" and digit 5 keys at the same time for about 5 seconds. Firmware Version 1.0.1.5 GVC3200 User Guide... -
Page 36: Transfer Files With Bluetooth
By default, the ringing tone will be generated in Bluetooth headset when there is an incoming call. If the user would like to have the ringing tone generated in the GVC3200 internal ringer as well, please select enable "Always Ring Internal Ringer" under GVC3200 web UI->Settings->Call Features. -
Page 37: Figure 13 Gvc3200 Always Ring Internal Ringer Screen
Users can add VPN using different protocols (PPTP, L2TP/IPSec PSK, L2TP/IPSec RSA, IPSec Xauth PSK, IPSeXauth RSA and IPSec Hybrid RSA). Follow the steps below to set up VPN. Access GVC3200 home screen, go to Applications ->Settings ->Network->VPN; Tap on "Add VPN file" to access configuration page as shown below;... -
Page 38: Table 10 Gvc3200 Vpn File Parameters
Figure 15 GVC3200 VPN Validation Screen Fill in correct username and password to connect to VPN. If the GVC3200 is connected to VPN successfully, icon will be shown in the top status bar; if the connection is failed, a prompt box will pop up to remind users whether to connect again. If icon displays in the top status bar, please check whether your VPN configuration is correct. -
Page 39: Table 11 Gvc3200 Vlan Configuration Parameters
Assigns the priority value of the Layer 2 QoS packets. The default value is 0. 802.1p Priority LLDP SETTINGS Access GVC3200 home screen, go to Applications ->Settings ->Network->LLDP to configure LLDP settings on the GVC3200. Table 12 GVC3200 LLDP Configuration Parameters... -
Page 40: Table 13 Gvc3200 802.1X Mode Parameters
IP Precedence, Diff-Serv or MPLS. The Default value is 48; 802.1X MODE Access GVC3200 home screen, go to Applications ->Settings ->Network->802.1X Mode. By default 802.1X is disabled. Selecting 802.1X mode to "EAP-MD5", "EAP-TLS5" or "EAP-PEAP" to turn on 802.1X. - Page 41 This page intentionally left blank Firmware Version 1.0.1.5 GVC3200 User Guide Page 40 of 103...
-
Page 42: Figure 16 Gvc3200 Camera Screen
Select on home screen to access Applications. Then click on The GVC3200 camera screen has the following options: Press recording button on the remote control to start or stop local recording. Press the red shortcut button on the remote control to edit preset. -
Page 43: Figure 17 Gvc3200 Add Preset Screen
Access camera screen and press the red shortcut key on the remote control to access preset screen. Figure 17 GVC3200 Add Preset Screen Select the preset window and press the blue shortcut key on the remote control to access the editing screen. -
Page 44: Table 14 Gvc3200 Camera Parameters
Press the yellow shortcut key on the remote control to bring out camera parameter setting screen as shown below. Refer to the table below and configure the parameters using navigation keys on the remote control. Figure 18 GVC3200 Camera Parameters Setting Screen Table 14 GVC3200 Camera Parameters Parameters Descriptions Firmware Version 1.0.1.5... - Page 45 The GVC3200 has 4 built-in mode as well as "Manual" for customization. When set to "Manual", press the "OK" key to access each setting to configure sharpness, contrast, saturation and brightness. Sharpness: Higher sharpness brings higher screen clarity. The object displayed on the screen has more sharpen edge.
-
Page 46: Peripheral
4. Users could view, copy and paste files by using the USB storage device. SD CARD Insert your SD card into SD card slot at the back of the GVC3200. Please make sure the SD card is inserted with right direction on GVC3200. -
Page 47: Microphone And Speaker
GVC3200 is equipped with a built-in microphone; alternatively, you can connect external microphone arrays or other audio devices to the GVC3200 as audio input sources. Before using the GVC3200, connect the required audio input devices to the GVC3200 and set audio input parameters. The GVC3200 supports one speaker output. -
Page 48: Figure 19 Gvc3200 Sip Account
MAKING PHONE CALLS ACCOUNT The GVC3200 comes with one IPVideoTalk Pro account, supports one account registration and one BlueJeans account. Please enable the IPVideoTalk Pro account, or register SIP account to a SIP server before making calls. The following figure shows the account is successfully registered (account icon is green). -
Page 49: Figure 20 Gvc3200 Call Screen
Figure 20 GVC3200 Call Screen Press the red shortcut key on the remote control to bring up call mode setting screen, set call mode to Call, Paging or IP call. Press the yellow shortcut key to set call type to Audio or Video. -
Page 50: Redial
------------------------------------------------------------------------------------------------------------------------------------------- - Note: 1. By default, the GVC3200 allows users to press # key as SEND key. This behavior can be disabled via option "Use # as Dial Key" under web GUI. 2. When entering initials or full spellings of a name that exists in the contact, this contact will show in the dropdown list. -
Page 51: Direct Ip Call
DIRECT IP CALL Direct IP Call allows GVC3200 and another VoIP device to talk to each other in an ad-hoc fashion without a SIP proxy. VoIP calls can be made between these two if: Both GVC3200 and VoIP phone have public IP addresses ... -
Page 52: Figure 21 Gvc3200 Single Incoming Call Screen
When the device is in idle and there is an incoming video call, the device will show the call screen as below. Figure 21 GVC3200 Single Incoming Call Screen Select "Video Answer" to answer the call with both video and audio, "Audio Answer" to answer the call with audio only, or "End"... -
Page 53: Figure 22 Gvc3200 New Incoming Call Screen
Figure 22 GVC3200 New Incoming Call Screen Users could select "Audio" to answer with audio only, "Video" to answer with video and audio, or "End" to reject the call. ----------------------------------------------------------------------------------------------------------------------------- --------------- Note: By default, answering a call during an active call will automatically add this party into the conference. -
Page 54: Mute Local Audio
This will not affect the current call and it will take effect starting from the next incoming call. At any time, the user could log in GVC3200 web UI and click on “DND” on the top tool bar of the web page to turn on/turn off DND. -
Page 55: Call Forward
CONFERENCE DEVICE LAYOUT The GVC3200 supports up to 9-way conference. The GVC3200 can be the host to initiate a conference or join other conferences as a member. The user can connect multiple HDMI output devices for conference. HDMI 1 interface is the primary output when plugging in multiple HDMI display devices. -
Page 56: Figure 23 Gvc3200 3-Way Conference
Log in GVC3200 web GUI and go to Settings page->Account->Call Settings and set "Auto-answer" option to "Yes". All incoming calls will be automatically answered. If it’s a video call, it will be answered with video as well. If "Auto Answer" is set to No, the user will need manually select to answer with video, audio or reject the call using the remote control on the LCD prompt. - Page 57 Presentation. Turn on/off presentation. HDMI IN or VGA IN must be plugged in first. More. Bring up more options including mixing video with Third party applications (only available when the application is installed on GVC3200), view call details, set DND, open DTMF and switch mainstream and sub stream.
-
Page 58: Table 15 Gvc3200 Conference Member Status Descriptions
Table 15 GVC3200 Conference Member Status Descriptions Icons Descriptions The current line is in an audio call. The current line is in a video call. The current line is being muted. The current line is not connected. The operations toolbar on the bottom of the video conference screen will be automatically hidden if there is no operation in 5 seconds. -
Page 59: Figure 24 Gvc3200 Conference Control Screen
Figure 24 GVC3200 Conference Control Screen Use Up/Down navigation keys on the remote control to select conference member; Use Left/Right navigation keys on the remote control to make operations, press the "OK" key to CONFIGURE, press the "OK" key again to cancel. E.g. Tap on... -
Page 60: Figure 25 Gvc3200 3-Way Conference With Presentation
Press the "OK" key on the remote control and the presentation will be sent to remote parties as substream. The following figure shows 3 TVs used for GVC3200. The one on the top shows presentation, the two on the bottom show remote party video. - Page 61 GVC3200. -------------------------------------------------------------------------------------------------------------------------------------------- Note: GVC3200 only support save the recording file to the external SD card, if not detected external SD card or the SD card is full when pressing the recording key , the recording will be failed. ---------------------------------------------------------------------------------------------------------------------------------- ---------- CALL DETAILS Users could view audio and video details of the conference members.
-
Page 62: Figure 26 Gvc3200 Call Details Screen
Figure 26 GVC3200 Call Details Screen TURNING ON DND IN CONFERENCE When DND is enabled during conference, the new incoming calls will be blocked. On the conference screen, use the remote control to click on MORE button and select "DND";... - Page 63 ----------------------------------------------------------------------------------------------------------------------------- --------------- Note: When the call is mixed, the GVC3200 bridge and the remote party using the app can see video from all parties. The remote SIP party can only see video from the GVC3200 bridge. All parties can hear each other.
-
Page 64: Figure 27 Gvc3200 Schedule Screen
If the GVC3200 is the conference host, ending the conference will disconnect all the members from the conference. If the conference member hangs up the call, it will be disconnected from the conference but other parties in the conference will stay in the conference. -
Page 65: Figure 28 Gvc3200 Conference Details Screen
Users could view scheduled conference details after the current time. Select one conference and press the "OK" key on the remote control to view conference details. Figure 28 GVC3200 Conference Details Screen ADD SCHEDULED CONFERENCE Follow the steps below to add a scheduled conference: On the home screen, select to access schedule screen. -
Page 66: Table 16 Gvc3200 Add Conference Parameters
Configure whether to remind users in advance. A prompt dialog box will pop up on Reminder Time the GVC3200 screen 10 minutes before the conference starts. Auto Answer For Configure whether to answer the call from the conference member automatically. If Conference the call is not from the conference member, it will not be answered automatically. -
Page 67: Edit Scheduled Conference
Access the dial screen and input voicemail access number. Press on the remote control or click on on the call screen to dial into the voicemail box. Follow the Interactive Voice Response (IVR) for the message retrieval process. Firmware Version 1.0.1.5 GVC3200 User Guide Page 66 of 103... -
Page 68: Figure 30 Gvc3200 Voice Mail Application
Users could also go to Home screen->Applications and click on "Voice Mail" to access the voicemail box. The number of new voicemail messages will be shown on the voice mail app icon as well. See figure below. Figure 30 GVC3200 Voice Mail Application Firmware Version 1.0.1.5 GVC3200 User Guide... - Page 69 This page intentionally left blank Firmware Version 1.0.1.5 GVC3200 User Guide Page 68 of 103...
-
Page 70: Figure 31 Gvc3200 Remote Control Application On Android Device
Bluetooth protocol. Follow the steps below to install the remote control application: Download the GVC Remote. app for GVC3200 from GS Market and install it on your Android device. Open GVC Remote. app on the Android device and access settings screen. -
Page 71: Bluejeans
BLUEJEANS The GVC3200 has built-in BlueJeans access for users to dial BlueJeans calls. Follow the steps below: On the LCD dial screen, press the blue shortcut key on the remote control to switch call mode from SIP Call to BlueJeans. -
Page 72: Figure 32 Gvc3200 Contacts Screen
APPLICATIONS GVC3200 provides built-in applications such as like Contacts, Call History, FileManager, Browser and etc. Users could also download the apps from GS market or Google Play to install on the GVC3200. CONTACTS GVC3200 Contacts app helps users to easily store and manage phone number and contact information. -
Page 73: Figure 33 Gvc3200 Add New Contact Screen
ADD SINGLE CONTACT Follow the steps below to add one single contact. Press the blue shortcut key on the remote control to access New Contact screen. Figure 33 GVC3200 Add New Contact Screen Enter contact information. Firmware Version 1.0.1.5 GVC3200 User Guide... -
Page 74: Table 17 Gvc3200 Import Contacts Parameters
Import function allows users to batch import contacts. The phonebook with compatible format needs to be saved to the storage devices like SD card/USB flash drive and plugged into the GVC3200. Press the MENU key on Contacts screen and select "Import" to access Import Contacts screen. -
Page 75: Table 18 Gvc3200 Download Contacts Parameters
GVC3200 supports downloading phonebook from the file server to batch add contacts. The default file name the GVC3200 looks for is "phonebook.xml". The phonebook XML file should be placed under the file server directory for the GVC3200 to retrieve. The GVC3200 supports vcard/xml/csv file format. -
Page 76: Search Contacts
Fill in the server URL or IP address to download the XML contact file to the device. SEARCH CONTACTS In the Contacts app, the users could input keyword to search in the dialog. GVC3200 will automatically display contacts items related to the search keyword. Fuzzy search and precise search are both supported. -
Page 77: Table 19 Gvc3200 Export Contacts Parameters
Press the MENU key on Contacts screen to bring up the Export Contacts screen. Figure 36 GVC3200 Export Contacts Screen Configure parameters as shown in table 19 and select the directory to save the exported file. Press the yellow shortcut key to export the file. -
Page 78: Figure 37 Gvc3200 Groups Screen
Figure 37 GVC3200 Groups Screen Call Press on the remote control to call the first 8 members in a group to initiate a conference. Rename (red shortcut key) Rename group. Delete (yellow shortcut key) Delete group. ... -
Page 79: Figure 38 Gvc3200 Add Group Screen
Figure 38 GVC3200 Add Group Screen Input group name and tap on "OK" to add a new group. Go to Contacts Screen to find the group you just added and access it. Press the red shortcut key on the remote control to access Groups editing screen. -
Page 80: Figure 39 Gvc3200 Call History Screen
Figure 39 GVC3200 Call History Screen Click on a record in the call history and press to dial out this number directly. Press the "OK" key on the remote control can view call details for this number. Figure 40 GVC3200 Call History Details Firmware Version 1.0.1.5... -
Page 81: Figure 41 Gvc3200 Add Contact Screen
Press the blue shortcut key to bring up the dialog box. Confirm to add contacts. Figure 41 GVC3200 Add Contact Screen Select existing contact or press the blue shortcut key on the remote control to access edit screen. Fill in contact information and press the yellow shortcut key on the remote control to save. -
Page 82: Delete Call History
COPY FILE To copy the file from the GVC3200 to USB/SD storage device: Insert USB/SD storage device into USB port on the GVC3200. It will take a few seconds for the GVC3200 to prepare the connection. The USB storage icon will show on the status bar. -
Page 83: Delete File
RECORDING GVC3200 recording application is used for the storage of call recording files in video conferencing. You can play, export, lock/unlock, send, rename or delete these recordings, etc. The recording screen is as shown below. -
Page 84: Figure 42 Gvc3200 Recording Screen
BACKUP BACKUP DATA GVC3200 BACKUP application is used to backup data or import backup files to restore data. The backup screen is as shown below. Tap on MENU key and select "Refresh" to import the backup file in external Firmware Version 1.0.1.5... -
Page 85: Figure 43 Gvc3200 Backup Screen
GVC3200. Figure 43 GVC3200 Backup Screen GVC3200 supports manual backup and automatic backup. Press the red shortcut key on backup screen to access new backup screen, select data and press the blue shortcut key to start backup. -
Page 86: Figure 44 Gvc3200 Automatic Backup Screen
RESTORE BACKUP DATA Select one backup data and press the "OK" key to access restore screen, select data and press the blue shortcut key to restore the backup data. Figure 45 GVC3200 Restore Backup Data Screen Firmware Version 1.0.1.5 GVC3200 User Guide... -
Page 87: Figure 46 Gvc3200 Diagnosis Screen
Insert SD card or USB flash disk before set backup path. -------------------------------------------------------------------------------------------------------------------------------------------- DIAGNOSIS When troubleshooting the GVC3200, users could go to GVC3200 home screen->APPLICATIONS- >Diagnosis. Tap on the option and follow the instructions on each function to perform for Camera Test, Remote Control Key Test, Bulid-in Speaker Test and etc. -
Page 88: Browser
Press the MENU key to open the menu bar for more operations. CUSTOM APP ON HOME SCREEN Users could add one app to the home screen for easy access. The GVC3200 only supports custom one app on home screen. The new app will overwrite the older one. - Page 89 This page intentionally left blank Firmware Version 1.0.1.5 GVC3200 User Guide Page 88 of 103...
-
Page 90: Figure 47 Gvc3200 Gs Market
GS MARKET GVC3200 provides direct access to apps via built-in GS market app. Users could download the apps from the market and install to the GVC3200. SEARCH APPS In the GVC3200 Home screen, click on Applications->GS Market . The users could view the apps by category, or input key words and click on SEARCH icon to search. -
Page 91: Update Apps
UPDATE APPS The GVC3200 will automatically detect if there is new version available for the installed apps to upgrade when the network connection is normal. User can view the relevant information and update apps on the Installed screen. Firmware Version 1.0.1.5... -
Page 92: Figure 48 Gvc3200 Web Gui - Login
To access the GVC3200 Web GUI: Connect the computer to the same network as GVC3200. Make sure GVC3200 is turned on and shows its IP address on OLED display screen. Open a Web browser on your computer. Enter GVC3200’s IP address in the address bar of the browser, e.g.: http://192.168.124.111. -
Page 93: Saving Changes
Web page, users must reboot the GVC3200 for the changes to take effect. DEFINITIONS This section describes the 6 options in the GVC3200 Web GUI. Please view Settings, Maintenance and Status specifications in Administration Guide. ... -
Page 94: Table 20 Gvc3200 Web Access
Select the display language for the web UI. Logout Log out from the web UI. CALL PAGE GVC3200 Web UI call page is shown below. Users could make calls and initiate conference from Web UI. Firmware Version 1.0.1.5 GVC3200 User Guide Page 93 of 103... -
Page 95: Figure 50 Gvc3200 Web Ui - Call
Figure 50 GVC3200 Web UI – Call MAKING A CALL Enter phone number in input box and select call mode, tap on to dial out; Or select one call history entry in the list below and click on to dial out. -
Page 96: Figure 51 Gvc3200 Web Ui - Conference Control
Figure 51 GVC3200 Web UI - Conference Control CONTACTS PAGE This pages list Contacts, Schedule and Call History. CONTACTS Users could search/add/delete/edit contact on web page. The operations will be synchronized and can be viewed from LCD as well. The web UI contacts page is as shown below. -
Page 97: Figure 52 Gvc3200 Web Ui - Contacts
Edit Contact screen on the right. Edit contact information and save. GROUPS GVC3200 supports up 9-way conference. If there are more than 8 conference members, only the first 8 members in the group will be dialed. Firmware Version 1.0.1.5... -
Page 98: Figure 53 Gvc3200 Web Ui - Groups
Figure 53 GVC3200 Web UI – Groups SCHEDULE Conference can be scheduled, edited and deleted from web UI. Refer to chapter SCHEDULE for more details. Firmware Version 1.0.1.5 GVC3200 User Guide Page 97 of 103... -
Page 99: Figure 54 Gvc3200 Web Page - Schedule
Figure 54 GVC3200 Web Page - Schedule CALL HISTORY From web UI, users could also access Call history, which is synchronized with the call history from LCD. Firmware Version 1.0.1.5 GVC3200 User Guide Page 98 of 103... -
Page 100: Figure 55 Gvc3200 Web Ui - Call History
Figure 55 GVC3200 Web UI - Call History DEVICE CONTROL PAGE VIDEO CONTROL Users could add preset and manipulate PTZ control on this page. Move the cursor to one configured preset to preview preset. Click one preset to apply the preset. -
Page 101: Table 21 Gvc3200 Web Ui - Audio Control Parameters
Figure 56 GVC3200 Web UI - Video Control AUDIO CONTROL Table 21 GVC3200 Web UI - Audio Control Parameters Parameters Descriptions Ringtone Volume Users can slide left or right to adjust ringtone volume. Media Volume Users can slide left or right to adjust media volume. -
Page 102: Firmware Version 1.0.1.5
Call-Waiting Tone American standard. Users could adjust the tone frequencies based on parameters Gain from the local telecom provider. Users could select "Low", "Medium" or "High". The default setting is "Low". Firmware Version 1.0.1.5 GVC3200 User Guide Page 101 of 103... -
Page 103: Firmware Version 1.0.1.5
This page intentionally left blank Firmware Version 1.0.1.5 GVC3200 User Guide Page 102 of 103... -
Page 104: Experiencing Gvc3200
* Skype and Skype for Business are Registered Trademarks of Microsoft Corporation. HDMI, the HDMI Logo, and High-Definition Multimedia Interface are trademarks or registered trademarks of HDMI Licensing LLC in the United States and other countries. -------------------------------------------------------------------------------------------------------------------------------------------- Firmware Version 1.0.1.5 GVC3200 User Guide Page 103 of 103...
Need help?
Do you have a question about the GVC3200 and is the answer not in the manual?
Questions and answers