Grandstream Networks GVC3202 User Manual
Video conferencing system for android
Hide thumbs
Also See for GVC3202:
- Quick installation manual (52 pages) ,
- User manual (154 pages) ,
- Administration manual (94 pages)

Related Manuals for Grandstream Networks GVC3202


Summary of Contents for Grandstream Networks GVC3202
- Page 1 Grandstream Networks, Inc. GVC3202 Video Conferencing System for Android User Guide...
-
Page 2: Table Of Contents
FEATURE HIGHTLIGHTS..........................15 SAFETY COMPLIANCES..........................17 WARRANTY................................17 INSTALLING GVC3202..................18 EQUIPMENT PACKAGE CONTENT......................18 CONNECTING GVC3202..........................19 GETTING TO KNOW GVC3202................. 24 REMOTE CONTROL............................24 REMOTE CONTROL KEYS AND TOUCHPAD..................24 CAPTURING SCREENSHOT USING THE REMOTE CONTROL............ 27 USING THE REMOTE CONTROL......................27 USING MOUSE & KEYBOARD........................27 OLED SCREEN..............................28... - Page 3 PAIRING GVC3202 WITH A BLUETOOTH DEVICE................34 CONNECTING TO A BLUETOOTH DEVICE..................34 USING BLUETOOTH REMOTE CONTROL..................35 TRANSFER FILES WITH BLUETOOTH....................36 USING BLUETOOTH HEADSET......................36 VPN SETTINGS..............................36 VLAN SETTINGS...............................38 LLDP SETTINGS............................... 39 802.1X MODE..............................39 CAMERA.........................40 PRESET................................41 ADD PRESET.............................41 EDIT PRESET............................
- Page 4 BLUE JEANS..............................71 APPLICATIONS.....................72 CONTACTS.................................72 ADD CONTACT............................73 SEARCH CONTACTS..........................76 MANAGE CONTACTS..........................76 GROUPS..............................77 LDAP CONTACTS............................. 79 LDAP SETTINGS............................80 SEARCH LDAP CONTACTS........................84 ADD SEARCH RESULT INTO LOCAL CONTACTS................84 Firmware Version 1.0.0.X GVC3202 User Guide Page 3 of 117...
- Page 5 SEARCH APPS..............................95 DOWNLOAD AND INSTALL APPS......................... 95 UPDATE APPS..............................96 IPVIDEOTALK......................97 ENTERPRISE DIRECTORY..........................97 NOTICES................................99 SETTINGS................................ 101 GVC3202 WEB UI FEATURES................ 102 ACCESSING GVC3202 WEB GUI....................... 102 SAVING CHANGES............................103 DEFINITIONS..............................103 TOOLBAR................................. 104 CALL PAGE..............................104 MAKING A CALL............................105 CONFERENCE CONTROL........................105 CONTACTS PAGE............................
- Page 6 CALL HISTORY............................110 DEVICE CONTROL PAGE..........................111 VIDEO CONTROL............................111 AUDIO CONTROL........................... 112 FACTORY RESET....................115 RESET VIA LCD...............................115 RESET VIA WEB UI............................116 RESET VIA RESET HOLE..........................116 EXPERIENCING GVC3202................117 Firmware Version 1.0.0.X GVC3202 User Guide Page 5 of 117...
- Page 7 Table 19 : GVC3202 Export Contacts Parameters....................77 Table 20 : GVC3202 LDAP Settings Parameters....................80 Table 21 : GVC3202 Web Access ........................104 Table 22 : GVC3202 Web UI - Audio Control Parameters.................112 Firmware Version 1.0.0.X GVC3202 User Guide...
- Page 8 Figure 7 : GVC3202 English Input Method – Capslock..................30 Figure 8 : GVC3202 Soft Keyboard - Symbols and Numbers................31 Figure 9 : GVC3202 Soft Keyboard - More Symbols and Numbers..............31 Figure 10 : GVC3202 Home Screen........................32 Figure 12 : GVC3202 Bluetooth - Paired Device....................
- Page 9 Figure 72 : GVC3202 Web UI - Video Control....................112 Figure 73 : Factory Reset via LCD........................115 Figure 74 : GVC3202 Web UI - Factory Reset....................116 Figure 75 : GVC3202 Web UI - Factory Reset Confirmation................116 Firmware Version 1.0.0.X GVC3202 User Guide...
-
Page 10: Document Purpose
DOCUMENT PURPOSE This User Guide describes the basic concept and tasks necessary to use and configure your GVC3202. This document covers the topics of device installation, making basic conference calls and using basic call features. http://www.grandstream.com/support To learn the advanced features and configurations, please visit to download the latest "GVC3202 Administration Guide". -
Page 11: Gnu Gpl Information
GNU GPL INFORMATION GVC3202 firmware contains third-party software licensed under the GNU General Public License (GPL). Grandstream uses software under the specific terms of the GPL. Please see the GNU General Public License (GPL) for the exact terms and conditions of the license. -
Page 12: Change Log
CHANGE LOG GVC3202 user manuals. Only This section documents significant changes from previous versions of major new features or major document updates are listed here. Minor updates for corrections or editing are not documented here. FIRMWARE VERSION 1.0.0.X This is the initial version. -
Page 13: Welcome
SIP video conferencing platform - thus offering a great option to expand or implement a 3rd party platform. Additionally, since it is based on Android 4.4, the GVC3202 offers full access to all video conferencing apps in the Google Play Store. The GVC3202 sports an innovative, patent-pending embedded MCU that supports up to 3-way conferencing with local mixing between SIP and other protocols. - Page 14 User Manual, could void your manufacturer warranty. Warning: Please do not use a different power adaptor with GVC3202 as it may cause damage to the products and void the manufacturer warranty.
- Page 15 This equipment complies with FCC radiation exposure limits set forth for an uncontrolled environment. This equipment should be installed and operated with minimum distance 20cm between the radiator & your body. -------------------------------------------------------------------------------------------------------------------------------------------- Firmware Version 1.0.0.X GVC3202 User Guide Page 14 of 117...
-
Page 16: Product Overview
2 x HDMI output, 1 x VGA/HDMI input Integrated Bluetooth 4.0, Gigabit network port, SD interface (for local recording) Table 1: GVC3202 Technical Specifications Specification Description SIP RFC3261, BFCP, TIP (pending), RTP/RTCP, HTTP/HTTPS, ARP, ICMP, DNS (A Protocols/ record, SRV, NAPTR), DHCP, PPPoE, SSH, TFTP, NTP, STUN, LLDP-MED, LDAP (pending), TR-069, 802.1x, TLS, SRTP, TCP/IP/UDP, IPv6 (pending), FEC, FECC,... - Page 17 Layer 2 QoS (802.1Q, 802.1p) and Layer 3 (ToS, DiffServ, MPLS) QoS User and administrator level passwords, MD5 and MD5-sess based authentication, Security 256-bit AES encrypted configuration file, TLS, 128/256-bit SRTP, HTTPS, 802.1x media access control Firmware Version 1.0.0.X GVC3202 User Guide Page 16 of 117...
-
Page 18: Safety Compliances
WARRANTY If GVC3202 is purchased from a reseller, please contact the company where the device is purchased for replacement, repair or refund. If the phone is purchased directly from Grandstream, please contact Grandstream Support for a RMA (Return Materials Authorization) number before the product is returned. -
Page 19: Installing Gvc3202
INSTALLING GVC3202 EQUIPMENT PACKAGE CONTENT GVC3202 package contains the following items: Table 2: GVC3202 Package List Name Number GVC3202 Main Case External USB Speakerphone Remote Control (a pair of AAA batteries) 12V Universal Power Adapter with power cable 1.5m Ethernet Cable 5m USB Extension Cable 1.5m HDMI Cable... -
Page 20: Connecting Gvc3202
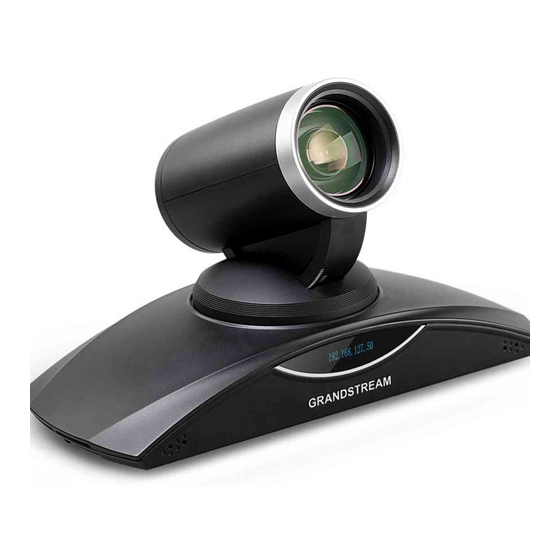
CONNECTING GVC3202 Figure 1: GVC3202 Front Panel Table 3: GVC3202 Front Panel Name Explanation 1/3" 2 Megapixel CMOS Camera 70°(W)*- 6.3°(T) field of view Vertical Rotating +/-23° tilt Stent Horizontal Rotating +/-90° pan Platform Power on / Normal Running: Green... -
Page 21: Table 4: Gvc3202 Back Panel
1 and 2. When there is only 1 HDMI output, it has to use HDMI output 1. Connect HDMI port 2 if you have additional display devices. GVC3202 will not work correctly if connecting HDMI port 2 without HDMI port 1 connected. -
Page 22: Table 5: Gvc3202 Optional Equipment List
Connect to power adapter. The arrow indicator on the power Power Interface adapter should face upwards when the power adapter is plugged When GVC3202 is powered up, use a small pin to press the button one time to reboot. Factory Restore ... - Page 23 (Optional) Connect the second video output devices to HDMI output interface 2 on GVC3202 with HDMI cable. Connect input device (e.g., a laptop or GXV3275) to GVC3202 VGA IN/HDMI IN port with VGA/HDMI cable. Connect the external speakerphone to the USB speaker interface on GVC3202.
-
Page 24: Figure 3: Gvc3202 Back Panel Connection Diagram
Figure 3: GVC3202 Back Panel Connection Diagram The following figure shows multiple GVC3202 devices deployed with other VoIP/network devices for video conference and collaboration. Figure 4: GVC3202 Deploy GVC3202 with Other Devices Firmware Version 1.0.0.X GVC3202 User Guide Page 23 of 117... -
Page 25: Getting To Know Gvc3202
Call interface. For example, typing 5 (JKL), 6 (MNO), 4 (GHI), 6 (MNO) can look for John if it exists in GVC3202 contacts list. Camera Switch to PTZ control mode during a call or in idle status. - Page 26 Enable/Disable presentation function show presentation on displayed device which is connected to HDMI output 1 as projection when GVC3202 is in standby mode. Access the dial screen by default when GVC3202 is in idle mode. Enter phone number and press the key to dial out.
- Page 27 Slide on the trackpad to move the mouse cursor. Press the trackpad to confirm operations. Trackpad Using two fingers to press on the trackpad and slide up/down for page up/down. Firmware Version 1.0.0.X GVC3202 User Guide Page 26 of 117...
-
Page 28: Capturing Screenshot Using The Remote Control
After powering up GVC3202, pressing "OK" key on the remote control, it will initiate connection and the remote control can be used right away. If the remote control fails to pair and connect to GVC3202, please follow the steps below to troubleshoot: ... -
Page 29: Oled Screen
USING THE LED INDICATOR GVC3202 LED indicator is located next to the OLED. It can be used to notify the users with current status of the device. Please refer to the status description below. Firmware Version 1.0.0.X... -
Page 30: Status Icons
Key pressing on the remote control Power off STATUS ICONS GVC3202 status icons are displayed on the right side of top status bar on GVC3202 LCD display device. The following table lists the main status icons used on GVC3202. Table 9: GVC3202 Status Icons Descriptions... -
Page 31: Using The Onscreen Keyboard
USING THE ONSCREEN KEYBOARD ENGLISH KEYBOARD This is the default keyboard on GVC3202. GVC3202 English keyboard supports multiple languages input methods. Users could tap on to switch among different languages. See figure below. Figure 6: GVC3202 Soft Keyboard - English Input Method... -
Page 32: Home Screen
Figure 9: GVC3202 Soft Keyboard - More Symbols and Numbers HOME SCREEN GVC3202 Home screen displays the icons for users to easily access applications, camera, schedule, call, contacts, settings and custom applications. Press the Left/Right keys on GVC3202 remote control to navigate. -
Page 33: Figure 10: Gvc3202 Home Screen
Figure 10: GVC3202 Home Screen Firmware Version 1.0.0.X GVC3202 User Guide Page 32 of 117... -
Page 34: Connecting To Network And Devices
GVC3202 supports a variety of network connections (Ethernet) and device connections, including USB, SD card and Bluetooth devices. When the GVC3202 boots up for the first time, a setup wizard will guide the users to pair and connect the remote control to GVC3202 and get started with the basic configurations. -
Page 35: Pairing Gvc3202 With A Bluetooth Device
-------------------------------------------------------------------------------------------------------------------------------------------- Note: The external speaker provided with GVC3202 is not pre-paired to GVC3202. If the user would like to use external speaker via Bluetooth connection with GVC3202, the user must pair and connect it to GVC3202 manually before using it for audio output. -
Page 36: Figure 12: Gvc3202 Bluetooth - Paired Device
3. Select and click "Search for devices". 4. On the remote control you would like to pair with GVC3202, press "OK" and digit 5 keys at the same time for about 5 seconds. 5. The pairing and connection process will be initiated and finished in a few seconds. Please do not Firmware Version 1.0.0.X... -
Page 37: Transfer Files With Bluetooth
By default, the ringing tone will be generated in Bluetooth headset when there is an incoming call. If the user would like to have the ringing tone generated in GVC3202 internal ringer as well, please select enable "Always Ring Internal Ringer" under GVC3202 web UI->Settings->Call Features. -
Page 38: Figure 13: Gvc3202 Add Vpn Files Screen
Figure 13: GVC3202 Add VPN Files Screen Fill in and save the configurations, go back to VPN page, you will find the new VPN file you just added. Tap on the VPN file to open the validation page as shown below: Figure 14: GVC3202 VPN Validation Screen Fill in correct username and password to connect to VPN. -
Page 39: Table 10: Gvc3202 Vpn File Parameters
DNS Server Enter DNS server address. Forwarding Routes Enter Forwarding Routes, for example, 10.0.0.0/8. VLAN SETTINGS Access GVC3202 home screen, go to Applications->Settings->Network->VLAN to configure VLAN settings on GVC3202. Table 11: GVC3202 VLAN Configuration Parameters Parameters Descriptions Assigns the VLAN Tag of the Layer 2 QoS packets for LAN port. The default value is... -
Page 40: Table 12: Gvc3202 Lldp Configuration Parameters
IP Precedence, Diff-Serv or MPLS. The default value is 48. 802.1X MODE Access GVC3202 home screen, go to Applications->Settings->Network->802.1x Mode. By default, 802.1x is disabled. Selecting 802.1x mode to "EAP-MD5", "EAP-TLS5" or "EAP-PEAP" to turn on 802.1x. Once it is enabled, the user will be required to enter the identity and password to be authenticated in the network. -
Page 41: Figure 15: Gvc3202 Camera Screen
Select on home screen to access Applications, then click on GVC3202 camera screen has the following options: Press recording button on the remote control to start or stop local recording. Press the red shortcut button on the remote control to edit preset. -
Page 42: Figure 16: Gvc3202 Add Preset Screen
Select the preset window and press the blue shortcut key on the remote control to access the editing screen. Adjust camera position and zoom in/zoom out using the remote control. On GVC3202 remote control, press "OK" key to save the preset, or press Back key to cancel. EDIT PRESET To edit an existing preset, press the blue shortcut key on the remote control to access the editing screen to edit. -
Page 43: Figure 17: Gvc3202 Camera Parameters Setting Screen
DELETE PRESET Access the preset editing screen, select preset and press the red shortcut key on GVC3202 remote control to delete it. APPLY PRESET If you have already set preset on camera, you can apply preset via one of the following two ways: ... -
Page 44: Table 14: Gvc3202 Camera Parameters
Table 14: GVC3202 Camera Parameters Parameters Descriptions GVC3202 has 4 built-in modes as well as "Manual" for customization. When set to "Manual", press "OK" key to access each setting to configure sharpness, contrast, saturation, and brightness. Sharpness: Higher sharpness brings higher screen clarity. The object displayed on the screen has more sharpen edge. -
Page 45: Peripheral
4. Users could view, copy and paste files by using the USB storage device. SD CARD Insert your SD card into SD card slot at the back of GVC3202. Please make sure the SD card is inserted with right direction on GVC3202. -
Page 46: Microphone And Speaker
MICROPHONE AND SPEAKER GVC3202 is equipped with a built-in microphone. Alternatively, you can connect external audio devices to GVC3202 as audio input/output sources. It is recommended to use the external speaker that comes with your GVC3202 package for better compatibility. -
Page 47: Figure 18: Gvc3202 Sip Account
Enter digits in the dial-up box. If the digits or the letters for the digit match contacts and call history in GVC3202, a dropdown list of numbers will be displayed. For example, entering 5 (JKL), 6 (MNO), 4 (GHI) and 6 (MNO) will display “5646” or “john” if contact "john" exists. The matching characters will be highlighted in red. -
Page 48: Figure 19: Gvc3202 Call Screen
Figure 19: GVC3202 Call Screen Press the red shortcut key on GVC3202 remote control to bring up call mode setting screen, set call mode to Call, Paging or IP call. Press the yellow shortcut key to set call type to Audio or Video. -
Page 49: Redial
-------------------------------------------------------------------------------------------------------------------------------------------- Note: 1. By default, GVC3202 allows users to press # key as SEND key. This behavior can be disabled via option "Use # as Dial Key" in web GUI->SIP Account->Call page. 2. When entering initials or full spellings of a name that exists in the contact, this contact will show up in the dropdown list. -
Page 50: Direct Ip Call
DIRECT IP CALL Direct IP Call allows GVC3202 and another VoIP device to talk to each other in an ad-hoc fashion without a SIP proxy. Direct IP calls can be made if: Both GVC3202 and VoIP phone have public IP addresses ... -
Page 51: Figure 20: Gvc3202 Single Incoming Call Screen
When the device is in idle and there is an incoming video call, the device will show the call screen as below: Figure 20: GVC3202 Single Incoming Call Screen Select "Video Answer" to answer the call with both video and audio, "Audio Answer" to answer the call with audio only, or "End"... -
Page 52: Figure 21: Gvc3202 New Incoming Call Screen
Figure 21: GVC3202 New Incoming Call Screen Users could select "Audio" to answer with audio only, "Video" to answer with video and audio, or "End" to reject the call. -------------------------------------------------------------------------------------------------------------------------------------------- Note: By default, answering a call during an active call will automatically add this party into the conference. -
Page 53: Mute Local Audio
At any time, users could log in GVC3202 web UI and click on “DND” on the top tool bar of the web page to turn on/turn off DND. -
Page 54: Call Forward
CONFERENCE DEVICE LAYOUT GVC3202 supports up to 9-way conference. GVC3202 can be the host to initiate a conference or join other conferences as a member. Users can connect 2 HDMI output devices for conference. HDMI 1 interface is the primary output when plugging in 2 HDMI display devices. -
Page 55: Figure 22: Gvc3202 3-Way Conference
Log in GVC3202 web GUI and go to Settings->SIP Account->Call page, and set "Auto-answer" option to "Yes". All incoming calls will be answered automatically. If it is a video call, it will be answered with video as well. ... - Page 56 - Suspend video from the video party. Click on it again to resume video. Suspend. It is used to pause/resume conference. Once it is paused, GVC3202 will stop sending local video to the remote parties.
-
Page 57: Table 15: Gvc3202 Conference Member Status Descriptions
Table 15: GVC3202 Conference Member Status Descriptions Icons Descriptions The current line is in an audio call. The current line is in a video call. The current line is being muted. The current line is not connected. The operations toolbar on the bottom of the video conference screen will be hidden automatically if there is no operation in 5 seconds. -
Page 58: Figure 23: Gvc3202 Conference Control Screen
, tap on it again to restore. -------------------------------------------------------------------------------------------------------------------------------------------- Note: Users could press the shortcut keys on GVC3202 remote control on conference control screen to mute all, block all or suspend videos. -------------------------------------------------------------------------------------------------------------------------------------------- PAUSE CONFERENCE The video will be stopped if the conference is paused. You will not see the video view of the members and the other members will not see your video either. -
Page 59: Figure 24: Gvc3202 3-Way Conference With Presentation
GVC3202. The following figure shows 2 TVs used for GVC3202. The one on the top shows presentation, the two on the bottom show remote party video. -
Page 60: Conference Recording
The recording files will be saved automatically to the external SD card plugged into GVC3202. -------------------------------------------------------------------------------------------------------------------------------------------- Note: GVC3202 only supports to save the recording file to the external SD card, if external SD card is not detected or the SD card is full, the recording will fail. -------------------------------------------------------------------------------------------------------------------------------------------- CALL DETAILS Users could view audio and video details of the conference members.
Need help?
Do you have a question about the GVC3202 and is the answer not in the manual?
Questions and answers