Grandstream Networks GVC3200 Quick Installation Manual
Hide thumbs
Also See for GVC3200:
- User manual (146 pages) ,
- Administration manual (94 pages) ,
- Setup manual (29 pages)
Table of Contents
Advertisement
Available languages
Available languages
Quick Links
Grandstream Networks, Inc.
126 Brookline Ave, 3rd Floor
Boston, MA 02215. USA
Tel : +1 (617) 566 - 9300
Fax: +1 (617) 249 - 1987
www.grandstream.com
*Android is a Registered Trademark of Google, Inc.
*Skype and Skype for Business are Registered Trademarks of Microsoft Corporation
HDMI, the HDMI Logo, and High-Definition
TM
Multimedia Interface are trademarks or registered
trademarks of HDMI Licensing LLC in the United
States and other countries.
For Warranty and RMA information, please visit www.grandstream.com
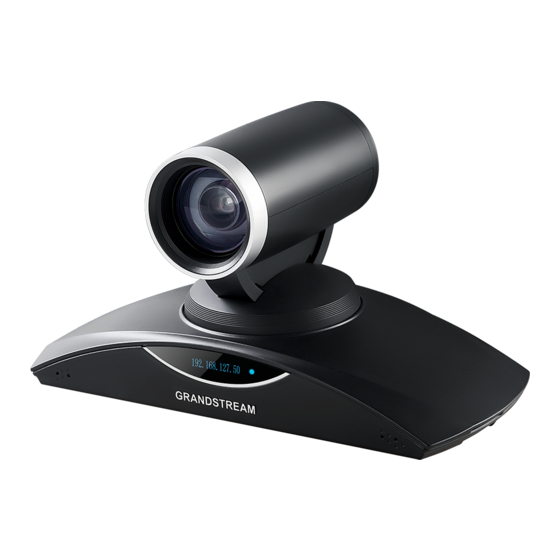
GVC3200
Video Conferencing System
Quick Installation Guide
Advertisement
Table of Contents

Related Manuals for Grandstream Networks GVC3200


Summary of Contents for Grandstream Networks GVC3200
- Page 1 Grandstream Networks, Inc. 126 Brookline Ave, 3rd Floor Boston, MA 02215. USA Tel : +1 (617) 566 - 9300 Fax: +1 (617) 249 - 1987 www.grandstream.com *Android is a Registered Trademark of Google, Inc. *Skype and Skype for Business are Registered Trademarks of Microsoft Corporation...
- Page 2 Content English................1 简体中文................12 Español................23 Français................34 Deutsch................45 Italiano................56 Русскй................67 Português................78 Polski................89...
-
Page 3: Package Contents
PRECEDING PARAGRAPH. (Including Part A and Part B attached to each other) 4 X Screws 1 X Quick Installation Guide/ Type 3 1 X GPL License Note: 1 set of external speakerphone is included to be used with the GVC3200. -
Page 4: Installation
2. Place GVC3200 on the top of the wall mount bracket Part A. See figure below. OVERVIEW: The locating pin on Part A should fit into the hole on the bottom of the GVC3200. The GVC3200 offers businesses a revolutionary video conferencing system with unprecedented flexibility and the support for multiple popular video conferencing protocols out of the box. - Page 5 6. Manage the wire harness with the Hook-and-loop fastener on wall mount Type 3 into each bolt. bracket Part B. INSTALLING BRACKET TO MOUNT THE GVC3200 ON WALL: 1. Locate the wall mount bracket in the package and identify Part A and Part B.
- Page 6 (LAN side of the router) using the Ethernet cable. address information LED Indicator 2. Connect the HDMI [1] port of the GVC3200 to the HDMI port of the main display after bootup. For example, device (e.g., TV) using the HDMI cable. Connect HDMI port 2 and then HDMI IP: 192.168.40.123...
- Page 7 If the remote control is not paired with the GVC3200 anymore (e.g., a factory reset is made), follow the steps below to pair and connect the remote control: 1. Connect a USB mouse to the GVC3200 USB port. Or, log in the GVC3200 web Connect HDMI cable from the UI and click on “Remote Control”...
- Page 8 1. Ensure your GVC3200 is properly powered up and connected to the Internet. 2. The IP address of the GVC3200 will show on the OLED in the front of the GVC3200. It will also show on the top status bar of the connected display device Grandstream Networks 公司的GVC3200不支...
- Page 9 注意事项: 设备包装清单: : 警告 请使用设备包装中的电源。使用其他没有经过认证的替代电源适配器有可 能对设备造成损害。 电源线 电源适配器 : 警告 请不要在设备启动未完成的时候或设备的软件升级过程中断开电源。如 上所述的操作会导致设备本身的程序损坏,进而造成设备无法启动。 产品概览: GVC3200支持多种流行的视频会议协议以及平台。其灵活性为现代企业提供了 一种突破性的视频会议解决方案。GVC3200基于安卓4.4系统,除了能够完美兼 电源(1个) 容潮流公司领先于业界先进水平的基于SIP方案的视频会议系统外,还能够完整 GVC3200话机(1台) 对接谷歌应用商店上的视频会议应用,如 Skype™, Skype for Business™, Google Hangouts™等。GVC3200使用一种新型的正在申请专利的MCU技术,能够支持多 达9方SIP协议和其他协议之间的本地混合的会议。同时,GVC3200兼容一些第三 方视频会议解决方案。GVC3200的灵活性、互用性、开放性以及应用的丰富性、 贴合现代的易用性使其能够成为企业级视频会议解决方案的一座新里程碑。 1.5米 HDMI线 (1根) 1.5米 网线 5米 USB 延长线 安装设备: 3米 HDMI线 (2根)...
- Page 10 安装设备在电视或显示器上: 5. 将螺丝类型1分别安装到支架B 的两个孔中,如右图所示。 1. 安装需要使用到GVC3200包装中的墙体支架。请保持支架A和支架B连接,先不 要将支架拆分。 2. 将GVC3200置于支架A上。见下图。支架A上的定位针要能够插入GVC3200底 部的定位孔中。 3. 拧紧固定螺丝,确保GVC3200 螺丝类型1(两个) 可以稳定置于支架A上。 6. 使用支架B上的魔术贴整理和固定需要用的线缆。 安装设备在墙上: 1. 安装需要使用到GVC3200包装中的墙体支架。请滑动或者推拉支架A,将其与 支架B分离。 固定螺丝 滑动或者推拉支架A 胶塞 支架A 定位针 4. GVC3200与墙体安装支架固定 后,将墙体安装支架从显示设备 后部放置于显示设备顶上。小心 滑动支架A和支架B,调整两者之 支架B上有四个螺 间的距离,确保显示设备适当卡 丝孔,用于螺丝类 入支架A和支架B之间。 型3,固定到墙上 支架B...
- Page 11 2. 在支架B上,有四个螺丝孔,用于螺丝类型3。将支架B靠在墙上并且移到需要 安装的位置。 8. 将支架A和支架B在左图所示的 3. 根据支架B的四个螺丝孔在墙上的位置,打出四个孔,用于装入螺栓。 螺孔处对准。然后使用螺丝类 型2从上往下装入螺孔并拧紧。 4. 将四个螺栓安装到步骤3中打的四个孔里。请确保螺栓光滑的一端朝墙外。 5. 将支架B放置到墙上,然后把螺 丝类型3从支架B上的四个孔穿入 到四个螺栓中,固定支架B。 9. 将GVC3200置于支架A上。支架A上 的定位针要能够插入GVC3200底部 的定位孔中。 10. 拧紧固定螺丝,确保GVC3200 可以稳定置于支架A上。 6. 拧紧四颗螺丝,确保支架B稳定 靠在墙上。 11. 使用支架B上的魔术贴整理和固定需要用的线缆。 连接GVC3200: 7. 将支架A滑入支架B,如以上箭头 1. 用网线将设备的网络接口和外部网络接口(如:集线器或交换机上的RJ-45网 所示。 络接口)连接。 2. 使用HDMI线将主显示设备连接到GVC3200的HDMI输出口1。如果有更多显示 设备,请分别依次连接到HDMI输出口2和3。 注意:连接显示设备时,请确保按照HDMI输出口1,2,3的顺序依次连接。如 果在未连接HDMI输出口1的情形下就连接2或者3,设备将无法正常工作。 3. 使用USB线将外接扬声器连接到GVC3200的SPKR口。...
- Page 12 6. 将SD卡插入GVC3200的SD卡插槽。录音文件将保存到SD卡中。 注意:请不要将外接扬声器连接到GVC3200上的USB接口。连接后,外接扬声器 可能不会正常工作。 7. (可选)使用HDMI线或者VGA线将演示设备(比如,笔记本电脑)连接到 4. 用12V电源适配器连接电话电源接口和交流电源插座。 GVC3200的HDMI输入接口或者VGA输入接口。 8. (可选)将USB辅助设备,例如鼠标、键盘或者USB存储设备接入GVC3200的 USB接口。 连接示例: 使 用 U S B 线 将 外 接 扬 声 器 连 接 到 GVC3200的SPKR口。如有需要,可 使用GVC3200包装中的USB延长线 VGA输入 重置 用网线连接GVC3200网络接口 和外部网络接口,如:集线器 或交换机上的RJ-45网络接口 HDMI输入 HDMI输出1/2/3 SD卡插槽 扬声器接口 USB接口 网络接口 电源接口...
- Page 13 5. 遥控器的MAC地址会显示在显示设备蓝牙界面列表。选择该设备将会与 使用GVC3200遥控器: GVC3200配对和连接。 触控板 首页 注意: 1. 用户可以下载蓝牙遥控器应用,安装在安卓设备上。该应用可以作为遥控器的 变焦:放大 替代。 音量增加 2. 请登录以下网址获取GVC3200用户手册和使用蓝牙遥控器应用的信息: http://www.grandstream.com/support 音量减小 变焦:缩小 菜单 返回 通过Web界面配置GVC3200: 摄像头控制 静音/免打扰 1. 确保GVC3200正常启动并且连接网络。 确认 导航键 2. GVC3200获取到的IP地址将会显示在OLED上。IP地址也会显示在显示设备顶 布局 演示 部的状态栏。 3. 在电脑浏览器输入话机的IP地址(电话和电脑必须在同一个网段),见下图。 复用键 4. 默认管理员的用户名是“admin”,密码是“admin”;默认终端用户的用户名 标准数字键盘 是“user”,密码是“123”。 5. 在Web界面,选择设置->账号->通用设置页面,配置用户名、SIP服务器、SIP用...
-
Page 14: Contenido Del Paquete
1 X Soporte de montura de Pared (Incluye Parte A y Parte B unidos entre si) 1 X Guia de Instalación Rápida 4 X Tornillos Tipo 3 1 X Licencia GPL Nota: Se incluye 1 teléfono altavoz externo para ser usado con el GVC3200. -
Page 15: Información General
La interrupción de la actualización del firmware puede causar mal funcionamiento del equipo. 2. Situe el GVC3200 en la parte superior de la montura de pared de la Parte A. INFORMACIÓN GENERAL: Ver figura. El pasador de posicionamiento sobre la Parte A debería encajar en El GVC3200 ofrece a las empresas un sistema de videoconferencia revolucio- el agujero de la parte inferior del GVC3200. - Page 16 Tipo 3 en cada perno. la Parte B. INSTALANDO EL SOPORTE PARA MONTAR EL GVC3200 EN LA PARED: 1. Localice la montura de pared en el paquete e identifique la Parte A y la Parte B al deslizar la Parte A hacia afuera.
- Page 17 8. Alinie la Parte A y la Parte B en los 4. Conecte el plug de salida de 12V DC al enchufe de poder del GVC3200, agujeros como se destaca abajo. conecte el adaptador de poder a un toma corriente.
- Page 18 Conecte el cable HDMI del 1. Conecte un ratón USB al puerto USB del GVC3200. O ingrese en la web GUI puerto 1 de salida del GVC3200 del GVC3200 y clic sobre “Control Remoto” en la parte superior de la esquina al puerto HDMI del Televisor.
- Page 19 2. La dirección IP del GVC3200 se mostrará sobre el OLED en el frontal del au service téléphonique traditionnel sans fil ou filaire afin GVC3200. Esta se mostrará en la barra superior de estado del dispositivo de d’accéder aux services d’urgence.
-
Page 20: Contenu Du Pack
Google Play™ Store - comme Skype™, Skype for Business™, Google Hang- outs™ et autres - en plus de la plateforme de Grandstream pionière en industrie visioconférence basée sur SIP. Le GVC3200 établit une nouvelle barre pour les solutions de visioconférence d’entreprises en terme de flexibilité, interopérabilité, 1 X Câble... - Page 21 Partie B. Prière de NE PAS détacher la Partie A de la Partie B quand vous faites le montage du support sur la TV. 2. Placer le GVC3200 en dessus du support de fixation murale Partie A. Voir figure ci-dessous. La broche de positionnement sur la Partie A doit être adaptée au trou dans le dessous du GVC3200.
- Page 22 Partie B. CONNECTER LE GVC3200: 1. Connecter le port LAN du GVC3200 au port RJ-45 d’un hub/switch ou un routeur (Partie LAN du routeur) en utilisant un câble Ethernet. 7. Glisser le support de fixation murale 2.
- Page 23 7. (Facultatif) Connecter un dispositif de présentation (par exemple, un ordinateur 4. Connecter le port de sortie 12V DC à la prise d’alimentation sur le GVC3200; portable ) au GVC3200 port HDMI IN ou port VGA IN pour des fins de brancher l’adaptateur d’alimentation dans une prise électrique.
- Page 24 Mute/DND Touches de navigation: WEB: Haut / Bas / 1. Assurez vous le GVC3200 est proprement mis sous tension et connecté à In Gauche / Droite ternet. Présentation 2. L’addresse IP du GVC3200 va apparaitre sur l’OLED à la partie frontale du Touches Raccourcis: GVC3200.
- Page 25 PACKUNGSINHALT: Das GVC3200 ist nicht für die Durchführung von Notrufen Netzkabel an Krankhäuser, Strafverfolgungsbehörden, medizinische Netzteil Pflegeeinrichtungen (“Notdienste”) oder jegliche andere Form von Notdiensten ausgerichtet. Sie müssen zusätzli- che Einstellungen vornehmen, um Zugang zu Notdiensten zu erhalten. Es liegt an Ihnen, einen SIP-kompatiblen In- ternettelefoniedienst zu erwerben, das GVC3200 korrekt 1 x GVC3200 Hauptgerät...
- Page 26 NICHT aus und wieder ein. Andernfalls können FirmwareBilder beschädigt werden und es könnten Funktionsstörungen am Gerät auftreten. 2. Platzieren Sie das GVC3200 an Teil A der Halterung wie auf der Skizze nebenan. Die Arretierung an Teil A passt in das Loch auf der Unterseite des ÜBERSICHT:...
- Page 27 2. Teil B der Wandhalterung weist vier Löcher auf, hier werden später die Schrauben Typ 3 Verwendung finden. Halten Sie nun den Teil B der 5. Fixieren Sie die Halterung mit den Wandhalterung an die gewünschte Stelle. Schrauben (Typ1) in die dafür vorge sehenen beiden Löchern an Teil B, 3.
- Page 28 Hinweis: Nutzen Sie zum Anschluß des Lautsprechers nicht den USB Port am GVC3200, diese Verbindung wird nicht funktionieren. 8. Schieben Sie Teil A soweit auf Teil B, 4. Verbinden Sie das mitgelieferte Netzteil mit dem GVC3200 und stecken Sie das bis die Löcher beider Elemente Netzkabel anschließend in die Steckdose.
- Page 29 Falls die Fernbedienung nicht mit dem Hauptgerät verbunden sein sollte, kann die Verbindung wie nachfolgend beschrieben wiederhergestellt werden. 1. Verbinden Sie eine USB Maus mit dem USB Port am GVC3200. Oder, loggen Verbinden Sie den HDMI OUT Sie sich in die Web-Oberfläche des GVC3200 und klicken Sie “Fernbedienung”...
- Page 30 Netzwerk (Internet) verbunden ist. funzioni in modo idoneo. Se non si effettua ciò, è Vostra 2. Die IP Adresse wird im OLED Display am GVC3200 sowie in der oberen responsabilità acquistare servizi telefonici fissi o wireless Statuszeile am Monitor/TV angezeigt.
-
Page 31: Contenuto Della Confezione
Skype™, Skype for Business™, Google Hangouts™ e molte altre - in aggiunta alla piattaforma per video conferenza basata su SIP, leader del settore, di Grandstream. GVC3200 stabilisce una nuovo traguardo per le soluzioni di video conferenza a livello enterprise, in termini di flessibilità, interoperabilità, apertura del sistema, ricchezza delle applicazioni e facilità... - Page 32 Parte A e la Parte B. NON staccare la Parte A dalla Parte B quando si effettua il montaggi della staffa sulla TV. 2. Posizionare GVC3200 in alto sulla Parte A della staffa per montaggio a parete. Vedere la figura seguente. Il perno di posizionamento sulla Parte A deve trovarsi nel foro nella parte inferiore di GVC3200.
- Page 33 Parte B della staffa per montaggio a parete. CONNESSIONE DEL GVC3200: 1. Collegare la porta LAN di GVC3200 alla presa RJ-45 di un hub o di un router (lato LAN del router) usando un cavo Ethernet. 2. Collegare la porta HDMI [1] di GVC3200 alla porta HDMI del dispositivo di 7.
- Page 34 7. (Opzionale) Collegare il dispositivo di presentazione (ad es. un laptop) alla porta HDMI IN di GVC3200 o alla porta VGA IN ai fini di una presentazione durante 4. Collegare il jack dell’alimentatore all’uscita 12V CC su GVC3200; collegare una conference call.
- Page 35 OK sul telecomando per avviare la connessione. Quindi sarà possibile utilizzare il telecomando normalmente. Se il telecomando non è più abbinato a GVC3200 (ad es, è stato effettuato un re- set di fabbrica), seguire la procedura riportata di seguito per abbinare e collegare il telecomando: 1.
-
Page 36: Комплект Поставки
прикреплённые друг к другу) ПРИГОТОВЛЕНИЯ, ЧТОБЫ ПОЛУЧИТЬ ДОСТУП К АВАРИЙНЫМ СЛУЖБАМ В СООТВЕТСТВИИ С 4 Х Винты, 1 X Инструкция по установке/ ПРЕДЫДУЩИМ ПАРАГРАФОМ. Тип 3 1 X Лицензия GPL Примечание: Для использования с GVC3200 включён 1 комплект внешнего громкоговорителя. -
Page 37: Меры Предосторожности
В при установке рамки на ТВ. загрузки системы или обновления микропрограммного обеспечения. Возможно повреждение встроенных программ, что приведет к поломке устройства. 2. Поместите GVC3200 сверху на часть А рамки. См. рисунок ниже. Установочный штифт на части А должен войти в отверстие на днище ОБЩИЙ ОБЗОР: GVC3200. - Page 38 Затем установите четыре винта Тип 3 в каждый болт. 6. Закрепите провода застёжкой на части В рамки настенного крепления. УСТАНОВКА РАМКИ ДЛЯ КРЕПЛЕНИЯ GVC3200 НА СТЕНУ: 1. Найдите настенное крепление в комплекте и определитесь, какая часть - часть А, а какая - часть В. Отделите часть А, выдвинув часть А наружу.
- Page 39 2 и далее HDMI порт 3 если у вас есть дополнительные дисплеи. Примечание: Пожалуйста, убедитесь, что вы соблюдаете порядок портов при подключении HDMI портов 1, 2 и 3. GVC3200 не будет работать корректно, если подключить HDMI порт 2 или 3 без подключения HDMI порта 1.
- Page 40 6. Вставьте SD-карту в слот SD-карты. Файлы записей будут сохранены на УПРАВЛЕНИЯ GVC3200: SD-карту. Трекпад ДОМОЙ 7. (Опционально) Подключите устройство презентации (напр. ноутбук) к порту HDMI IN на GVC3200 для презентации во время видеоконференции. 8. (Опционально) Подключите USB-аксессуар (напр., мышь, клавиатуру, USB- Добавить громкость Приблизить накопитель) к USB-порту. Пример подключения: Подключите...
- Page 41 SIP, configurar corretamente o Настройка GVC3200 с помощью веб-обозревателя: GVC3200 para usar esse serviço e periodicamente testar 1. Убедитесь, что ваша GVC3200 правильно подключена к электросети и к сети интернет. a configuração para confirmar que ele funciona como você...
-
Page 42: Conteúdo Do Pacote
Fonte de Alimentação possivelmente pode danificar o aparelho. ATENÇÃO: Por favor, não desligue e ligue o GVC3200 durante a inicialização do sistema ou atualização de firmware. Você pode corromper as imagens de firmware e fazer que a unidade funcione mal. - Page 43 NÃO retire a parte A da parte B ao montar o suporte na TV. 2. Coloque o GVC3200 na Parte A no topo do suporte de parede. Veja a figura abaixo. O pino de fixação da parte A deve caber dentro do buraco sob a base do GVC3200.
- Page 44 Parte B do suporte de parede. CONNECTANDO O GVC3200: 1. Conecte a porta LAN do GVC3200 à tomada RJ-45 de um hub / switch ou roteador (Lado LAN) através do cabo Ethernet. 2. Ligue a porta HDMI [1] do GVC3200 à porta HDMI do principal dispositivo de 7.
- Page 45 7. (Opcional) Ligue um dispositivo de apresentação (por exemplo, um laptop) na 4. Ligue a ficha de saída de 12V DC ao conector de energia no GVC3200; conecte porta HDMI IN ou VGA IN do GVC3200 para fins de apresentação durante uma o adaptador de alimentação a uma tomada elétrica.
- Page 46 1. Certifique-se que o seu GVC3200 está devidamente ligado e conectado à Internet. Cima / Baixo / 2. O OLED na frente do GVC3200 vai mostrar o endereço IP do GVC3200 . Ele Esquerda / Direita Apresentação também irá ser mostrado na parte superior da barra de status do dispositivo de vídeo conectado (por exemplo, TV) via HDMI.
-
Page 47: Zawartość Opakowania
ZAWARTOŚĆ OPAKOWANIA: Urządzenie GVC3200 nie jest wstępnie skonfigurowane do obsługi lub wykonywania połączeń alarmowych do szpitali, or- Przewód zasilający Zasilacz ganów ochrony porządku publicznego, jednostek opieki medy- cznej (zwanych dalej „służbami ratunkowymi”) ani jakichkolwiek innych służb ratunkowych. Aby uzyskać dostęp do służb ra- tunkowych, konieczne jest wprowadzenie dodatkowych ustawień. -
Page 48: Środki Ostrożności
3. Dokręć wbudowaną śrubę na ferencji wideo. Urządzenie GVC3200 działa w oparciu o system Android 4.4™ i oferuje Części A wspornika do montażu pełny dostęp do wszystkich aplikacji do wideokonferencji w sklepie Google Play™, ta- ściennego, aby zagwarantować,... - Page 49 śrub typu 3 w odpowiednim kołku. użyciu przylepcorzepów. INSTALACJA WSPORNIKA DO MONTAŻU URZĄDZENIA GVC3200 NA ŚCIANIE: 1. Znajdź wspornik do montażu ściennego w opakowaniu i zidentyfikuj Część A i Część B. Odłącz Część A od Części B, wysuwając Część A.
- Page 50 ściennego przy użyciu przylepcorzepów. Obiektyw PODŁĄCZENIE URZĄDZENIA GVC3200: Wyświetlacz OLED. 1. Przy użyciu kabla Ethernet połącz port LAN w urządzeniu GVC3200 z gniazdem Po uruchomieniu RJ-45 koncentratora/przełącznika lub routera (strona LAN w routerze). wyświetlana jest na Kontrolka LED 2.
- Page 51 HDMI komputerze nawiązać połączenie. Wówczas można normalnie używać pilota. przenośnym. Służy to do Jeśli pilot nie jest już sparowany z urządzeniem GVC3200 (np. wykonano reset do wyświetlania prezentacji. ustawień fabrycznych), wykonaj następujące czynności, aby sparować i połączyć pilota: 1. Podłącz mysz USB do portu USB urządzenia GVC3200. Możesz również...
- Page 52 GVC3200. Uwaga: 1. Użytkownicy mogą również pobrać aplikację pilota Bluetooth do urządzenia GVC3200 dla systemu Android™ i zainstalować ją na urządzeniu z systemem Android™. Tej aplikacji można używać jako alternatywy dla pilota dostarczonego z urządzeniem GVC3200. 2. Więcej informacji o tym, jak korzystać z aplikacji pilota Bluetooth do urządzenia GVC3200 dla systemu Android™, znajduje się...
Need help?
Do you have a question about the GVC3200 and is the answer not in the manual?
Questions and answers