Sign In
Upload
Download
Table of Contents
Contents
Add to my manuals
Delete from my manuals
Share
URL of this page:
HTML Link:
Bookmark this page
Add
Manual will be automatically added to "My Manuals"
Print this page
×
Bookmark added
×
Added to my manuals
Manuals
Brands
Viavi Manuals
Measuring Instruments
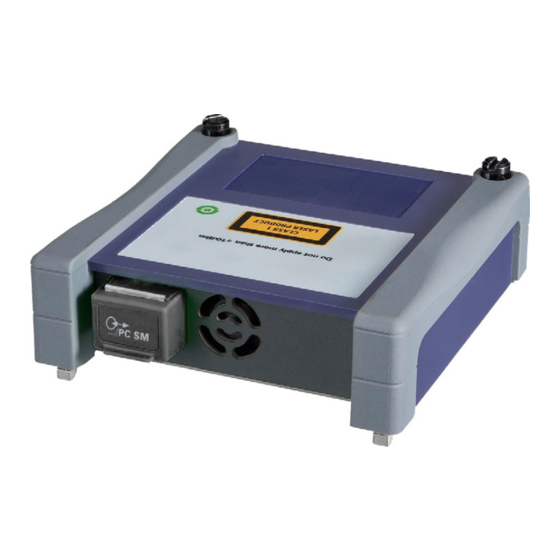
E4123MM
User manual
Viavi E4123MM User Manual
Optical time domain reflectometer for t-berd®/mts-2000, -4000 v2, -5800, smartotdr, celladvisor 5g and oneadvisor-800 platforms
Hide thumbs
1
2
3
4
5
6
Table Of Contents
7
8
9
10
11
12
13
14
15
16
17
18
19
20
21
22
23
24
25
26
27
28
29
30
31
32
33
34
35
36
37
38
39
40
41
42
43
44
45
46
47
48
49
50
51
52
53
54
55
56
57
58
59
60
61
62
63
64
65
66
67
68
69
70
71
72
73
74
75
76
77
78
79
80
81
82
83
84
85
86
87
88
89
90
91
92
93
94
95
96
97
98
99
100
101
102
103
104
105
106
107
108
109
110
111
112
113
114
115
116
117
118
119
120
121
122
123
124
125
126
127
128
page
of
128
Go
/
128
Contents
Table of Contents
Bookmarks
Table of Contents
Table of Contents
About this Guide
Assumptions
Conventions
Purpose and Scope
Recycling Information
Technical Assistance
Chapter 1 Starting up
Unpacking the Device - Precautions
Precautions Relating to the OTDR Module Use
Connecting Fiber Optic Cable
Inspecting and Cleaning Connector End Faces
Optical Connector Types
Connecting Fiber Optic Cable to Test Port
Optical Connectors and Interchangeable Adapters
Interchangeable Adapters
Cleaning Universal Connectors
Chapter 2 SMART TEST Function
Principle of the Smart TEST
Selecting Smart TEST
Configuring the Unit for Smart TEST
Selecting the Configuration File
Modifying some Parameters before the Acquisition
Performing Acquisitions in Smart TEST Mode
Performing Acquisition in Real Time
Stopping the Real Time Acquisition
Performing an Acquisition in Smart TEST Mode
Actions on Trace During Acquisition
Results Display
Smartlink View
Showing the Detailed Information of One Event
Grouped Events
Trace View
Display of Events on the Trace
Results Table
Cursors
Zoom Function
Grouped Events
Changing the Type of an Event
Saving Results for Smart TEST Acquisitions
Chapter 3 Expert OTDR Function
Principle of the Expert OTDR
Selecting Expert OTDR
Configuring the Unit for Expert OTDR
Configuring the Acquisition Parameters
Configuring the Alarms Parameters
Configuring the Display Parameters
Section Attenuation
Section Length
Index of Refraction
Scatter Coefficient
Distance Unit
Results on Trace
Show Cursors
Configuring the Advanced Parameters
Front Connector Meas
Detection
Configuring the Link Description Parameters
Fiber ID
Fiber Number
Change Fiber Nbr
Cable ID
Direction
Location a
Location B
Configuring the Project Information Parameters
Technician ID
Job ID
Comment
Configuring the Report Parameters
File(S) Save in
Dir
Filenaming
File Content
Auto Store
Report as
Report Layout
Report Naming
Include Microscope Image
Configuration in Test Auto Mode
Saving OTDR Configuration in a File
Loading an Existing OTDR Configuration
Performing Acquisitions in Expert OTDR Mode
Performing Acquisition in Real Time
Stopping the Real Time Acquisition
Performing an Acquisition with Expert OTDR
Multi-Wavelength Acquisition
Actions on Trace During Acquisition
Results Display
Smartlink View
Trace View
Changing the Type of an Event
Advanced Functions
Automatic Measurement and Detection
Addition of Events
Representation of the Events
Hints on the Positioning of Markers
Deleting Events
Manual Measurements
Measurements of Slope
Measurement of ORL
Measurement of Reflectance
Splice Measurements
Memorization of the Position of Events
Overlay Trace Function
Overlaying Several Traces Stored in Memory
Display of Traces in Overlay
Adding Traces in Overlay
Removing a Trace
Reference Trace Function
Use of the Reference Trace Function in the Result Page
Using the Reference Trace Function in the Explorer
Saving the Trace(S) and Generating a Report
Saving Results and Creating a Report from Results Page
Opening a Report
Chapter 4 File Management
Description of the Explorer
Opening the File Explorer
Managing Tabs
File Signature
Buttons on the Right of the Screen
Storage Media
Directories and Files Editing Function
Saving and Loading Files
Saving Files from the Explorer
Loading Files and Displaying Traces
Simple Loading
Load with Configuration
Loading Several Traces in Overlay
Exporting Files
Explorer/Link Manager
Editing Function
Exporting a Directory in a Txt File
Generating Pdf Report(S)
Using the Merge Key, with the Txt/Pdf Files
Chapter 5 Technical Specifications
OTDR Modules for T-BERD/MTS 2000/4000 V2
Characteristics of Reflectometry Measurements
Manual Measurement
Typical Specifications
Ranges
Class of the Lasers of the OTDR Modules
OTDR Modules Measurement
OTDR Module Supply
Environment
Indoor/Outdoor
Temperature
Humidity
Pollution Degree
OTDR Technical Specifications for Smartotdr
OTDR Optical Interfaces
OTDR Optical Characteristics
Characteristics of Reflectometry Measurements
Typical Specifications
Characteristics of the Source (Standard) and Power Meter (Optional)
Source
Power Meter (through OTDR Port)
PON/XG-PON Power Meter (E118FA65PPM Version)
Chapter 6 Options and Accessories
Commercial References of Measurement Modules for T-BERD/MTS- 2000/4000 V2
OTDR Modules
Options
Commercial References of the Smartotdr
Advertisement
Quick Links
1
Unpacking the Device - Precautions
2
Principle of the Smart Test
Download this manual
OTDR
Optical Time Domain
Reflectometer
For T-BERD®/MTS-2000, -4000 V2,
-5800,
SmartOTDR, CellAdvisor 5G and
OneAdvisor-800 Platforms
User Manual
Table of
Contents
Previous
Page
Next
Page
1
2
3
4
5
Advertisement
Table of Contents
Need help?
Do you have a question about the E4123MM and is the answer not in the manual?
Ask a question
Questions and answers
Related Manuals for Viavi E4123MM
Measuring Instruments Viavi E136FB-APC User Manual
Optical time domain reflectometer for t-berd®/mts-2000, -4000 v2, -5800, smartotdr, celladvisor 5g and oneadvisor-800 platforms (128 pages)
Measuring Instruments Viavi MPOL*-85P User Manual
Mpo light source/ mpo power meter (74 pages)
Measuring Instruments Viavi VSE-1100 User Manual
(9 pages)
Measuring Instruments Viavi Observer GigaStor GS-4P-16T Hardware Installation
Network monitoring device (8 pages)
Measuring Instruments Viavi Xgig User Manual
(468 pages)
Measuring Instruments Viavi OneExpert CATV User Manual
(204 pages)
Measuring Instruments Viavi WFED-300AC Quick Start Manual
Wifi advisor, wireless lan analyzer (67 pages)
Measuring Instruments Viavi OTDR Series User Manual
Optical time domain reflectometer for t-berd®/mts-2000, -4000 v2, -5800, smartotdr, celladvisor 5g and oneadvisor-800 platforms (148 pages)
Measuring Instruments Viavi ALT-8000 Test Note
Radio altimeter test procedure (14 pages)
Measuring Instruments Viavi CellAdvisor 5G User Manual
(359 pages)
Measuring Instruments Viavi ONA-800 Getting Started Manual
(47 pages)
Measuring Instruments Viavi OneExpert CATV Connection Manual
Connecting remotely with android phone (5 pages)
Measuring Instruments Viavi Xgig1000 Hardware Manual
(172 pages)
Measuring Instruments Viavi OLS-34 Operating Manual
Optical laser sources (38 pages)
Measuring Instruments Viavi SmartPocket OLP-35V2 Operating Manual
Optical power meters (38 pages)
Measuring Instruments Viavi CellAdvisor JD700B Series User Manual
Fw3.120 (813 pages)
This manual is also suitable for:
E4126a-pc
E4126a-apc
E4106a-pc
E4106a-apc
E4136a-pc
E4136a-apc
...
Show all
E4126b-pc
E4126b-apc
E4136b-pc
E4136b-apc
E4138fb65-apc
E4118fb65-apc
E4126c-pc
E4126c-apc
E4136c-pc
E4136c-apc
E4138fc65-apc
E4136fc65-apc
E4146quad
E100as-pc
E100as-apc
E100a-apc
E118fa65-apc
E118fa65ppm-apc
E126a-pc
E126a-apc
E136fb-pc
E136fb-apc
E138fa65-pc
E138fa65-apc
Table of Contents
Print
Rename the bookmark
Delete bookmark?
Delete from my manuals?
Login
Sign In
OR
Sign in with Facebook
Sign in with Google
Upload manual
Upload from disk
Upload from URL


Need help?
Do you have a question about the E4123MM and is the answer not in the manual?
Questions and answers