
Subscribe to Our Youtube Channel
Related Manuals for REMEHA Gas 210 Ace 80


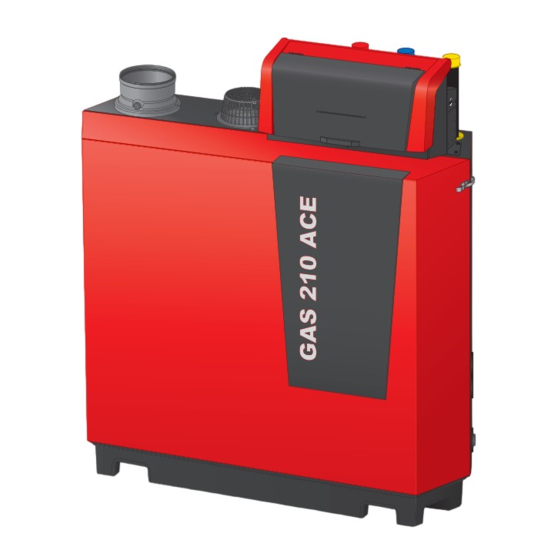
Summary of Contents for REMEHA Gas 210 Ace 80
- Page 1 United Kingdom Installation and user manual High-efficiency standing gas boiler Gas 210 Ace 80 - 120 - 160 - 200...
- Page 2 Dear Customer, Thank you very much for buying this appliance. Please read through the manual carefully before using the product, and keep it in a safe place for later reference. In order to ensure continued safe and efficient operation we recommend that the product is serviced regularly.
-
Page 3: Table Of Contents
Contents Contents Safety ................... . 6 General safety instructions . - Page 4 Contents 6.2.4 Description of the icons in the display ............37 Commissioning .
- Page 5 Contents 12 Technical specifications ................76 12.1 Homologations .
-
Page 6: Safety
1 Safety Safety General safety instructions 1.1.1 For the installer Danger If you smell gas: 1. Do not use naked flames, do not smoke and do not operate electrical contacts or switches (doorbell, lighting, motor, lift etc.). 2. Shut off the gas supply. 3. -
Page 7: Recommendations
1 Safety Warning The condensate drain must not be modified or sealed. If a condensate neutralisation system is used, the system must be cleaned regularly in accordance with the instructions provided by the manufacturer. Caution Ensure that the boiler is regularly serviced. Contact a qualified installer or arrange a maintenance contract for the servicing of the boiler. -
Page 8: Liabilities
Instruction and warning labels must never be removed or covered and must be clearly legible throughout the entire service life of the boiler. Damaged or illegible instructions and warning stickers must be replaced immediately. Important Modifications to the boiler require the written approval of Remeha. Liabilities 1.3.1 Manufacturer's liability Our products are manufactured in compliance with the requirements of the various Directives applicable. -
Page 9: Symbols Used In The Manual
Description of the product Boiler types The following boiler types are available: Tab.1 Boiler types Name Output Heat exchanger size Gas 210 Ace 80 93 kW 3 sections Gas 210 Ace 120 129 kW 4 sections Gas 210 Ace 160 179 kW... -
Page 10: Main Components
3 Description of the product Main components Fig.1 General 1 Flue gas outlet connection 2 Air inlet connection 3 Flow connection 4 Return connection 5 Gas supply connection 6 Control box 7 Data plate AD-3002429-01 Fig.2 Internal 1 Flue gas temperature sensor 2 Burner 3 Heat exchanger 4 Flame inspection glass... -
Page 11: Introduction To The E-Smart Controls Platform
3 Description of the product Fig.4 Control box 1 Display cover 2 Power button 3 Control panel 4 Service connector 5 Control box front part - for expansion PCBs and gateways 6 Control box rear part - for the control unit and expansion PCBs AD-3002432-01 Introduction to the e-Smart controls platform The Gas 210 Ace boiler is equipped with the e-Smart controls platform. -
Page 12: Before Installation
4 Before installation Tab.3 Specific devices delivered with the Gas 210 Ace boiler Name visible Software ver Description Function in display sion CU-GH13 Control unit CU-GH13 The CU-GH13 control unit handles all basic functionality of the Gas 210 Ace boiler. 1.94 Control panel HMI T-control The HMI T-control is the user interface to the Gas 210 Ace... -
Page 13: Requirements For Water Connections
4 Before installation Fig.6 Location requirements 1490 2930 1690 1690 AD-3002433-01 1 Heat exchanger inspection hatch location B Clearance of 250 mm needed on the right side of the 2 Support surface boiler A Clearance of 50 mm needed on the left side of the boiler Requirements for water connections Before installation, check that the connections meet the set... -
Page 14: Requirements For The Gas Connection
4 Before installation Important Flush the heating system with a volume of water equivalent to at least three times the volume of the system. Flush the domestic hot water pipes with at least 20 times the volume of the pipes. Important Due to the presence of an aluminium heat exchanger, suitable chemicals and the correct use of these chemicals should be... - Page 15 Horizontal flue terminal and connection material: Flue gas discharge in the outside wall. The air inlet is in the same pressure zone as the flue (e.g. a Remeha, combined with con horizontal flue terminal). nection material from Bur Parallel wall terminal not permitted.
-
Page 16: Material
4 Before installation Tab.8 Type of flue system: C Principle Description Recommended manufactur This system is supplied by us without an air inlet and flue. Use is only allowed when all When selecting the material, please note the following: our requirements are met and the description of this type of Condensed water must flow back to the boiler. -
Page 17: Dimensions Of Flue Gas Outlet Pipe
4 Before installation Fig.8 Sample string 1 EN 14471 or EN 1856–1: The material is UKCA approved according to this standard. For plastic this is EN 14471, For aluminium and stainless steel this is EN 1856-1. 2 T120: The material has temperature class T120. A higher number EN 14471 - T120 P1 W 1 O50 LI E U0 is also allowed, but not lower. -
Page 18: Length Of The Flue And Air Supply Pipes
AD-3002009-01 Tab.14 Maximum length (L) 100 mm 110 mm 130 mm 150 mm 180 mm Diameter Gas 210 Ace 80 19 m 35 m 50 m 50 m 50 m Gas 210 Ace 120 20 m 48 m 50 m... -
Page 19: Additional Guidelines
The maximum permitted height difference between the air inlet and the roof terminal is 36 m. AD-3002013-01 Tab.16 Maximum length (L) Diameter 150 mm Gas 210 Ace 80 60 m Gas 210 Ace 120 60 m Gas 210 Ace 160 32 m Gas 210 Ace 200 19 m (1) While maintaining the maximum length, additional 5 times 90°... -
Page 20: Requirements For The Electrical Connections
4 Before installation Condensation Direct connection of the flue gas outlet to structural ducts is not permitted because of condensation. If condensate from a plastic or stainless steel pipe section can flow back to an aluminium part in the flue gas outlet, this condensate must be discharged via a trap before it reaches the aluminium. -
Page 21: Installation Examples
4 Before installation Installation examples 4.8.1 1 boiler - 1 circuit (radiator) - DHW cylinder with loop Fig.16 Diagram and components - 6000037 CircA CircB CircC CB-01 SCB-10 AD-6000037-01 CircA Circuit A (radiator) P8 Circuit A pump CircB Circuit B P13 DHW charging pump CircC Circuit C P15 DHW circulation loop pump... -
Page 22: Boiler - 2 Circuits (Radiator, Underfloor Heating) - Dhw Cylinder With Loop
4 Before installation Code Display text Menu path Set to CP024 Zone Function 0 = Disable > Installation Setup > SCB-10 > AUX 1 > Parameters, counters, signals > Parameters > General CP294 ConfigZonePump 8 = DHW looping > Installation Setup > SCB-10 > AUX 1 > Parameters, counters, signals >... -
Page 23: Cascade Of 2 Boilers - 2 Circuits (Radiator, Underfloor Heating)
4 Before installation Code Display text Menu path Set to DP007 Dhw 3wv Standby 0 = CH position > Installation Setup > CU-GH13 > Internal DHW > Parameters, counters, signals > Parameters > General CP020 Zone Function 1 = Direct >... - Page 24 4 Before installation Fig.21 Electrical connections lead boiler A1 - CB-01, SCB-10 and AD249 Pump 0-10 On/Off CB-01 Tout AD-6000038-01 Status AD249 0-10V Tout R-Bus R-Bus R-Bus SCB-10 Tsyst Tsyst Tdhw Tflow Tflow Tflow +TA- S12 S9 AD-6000045-01 Fig.22 Electrical connections lag boiler A2 - CB-01 Pump 0-10 On/Off...
-
Page 25: Installation
5 Installation Installation Positioning the boiler Fig.24 Transport and unpack the boiler 1. Transport the boiler on the pallet to the installation location. 2. Remove the box with additional parts. 3. Remove the retaining straps. 4. Remove the other pieces of packaging. AD-3002434-01 Fig.25 Lift and manoeuvre the boiler... -
Page 26: Connecting The Condensate Drain Pipe
5 Installation Connecting the condensate drain pipe Fig.27 Connecting the condensate drain 1. Remove the protective cap from the condensate connection. pipe Caution Water from the factory test may come out. 2. Fit the trap by screwing the swivel nut onto the connection. 3. -
Page 27: Electrical Connections
5 Installation Fig.30 Fit the air inlet pipe to the boiler 2. Connect the air inlet (only for room-sealed system): 2.1. Remove the standard air supply filter. 2.2. Fit the air inlet adaptor (optional). 2.3. Fit the air supply pipe to the boiler. 2.4. -
Page 28: Connecting The System Pump
5 Installation Device Primary location Location option GTW-08 (optional) 8 / 14 GTW-21 BACNet (optional) 8 / 14 BLE Smart Antenna 8 / 13 GTW-30 (optional) 8 / 13 5.6.2 Connecting the system pump Fig.32 System pump 1. Undo the screws on both sides of the cover. 2. - Page 29 5 Installation Analogue input Fig.36 Analogue input This input has two modes: control based on temperature or based on heat output. If this input is used, the OT communication from the boiler is 0-10 ignored. 1. Connect the input signal to terminals 0–10 of the connector. Change the mode of the analogue input using the parameter EP014.
- Page 30 5 Installation Connecting an outdoor temperature sensor An outdoor temperature sensor can be connected to the Tout connector. Always connect the sensor to the PCB that controls the zones. For example: when the zones are controlled by an SCB-02 or SCB-10, connect the sensor to that PCB.
-
Page 31: The Scb-01 Expansion Pcb
5 Installation Release input Caution Only suitable for potential-free contacts (dry contact). Fig.42 Release input The boiler has a release input. A potential-free contact can be connected to the RL terminals of the connector. If the contact is closed during a heat demand, the boiler will be blocked immediately. -
Page 32: The Scb-02 Expansion Pcb
5 Installation Caution If possible, use the pump modulation signal. This provides the most accurate pump control. If the automatic burner unit does not support pump modulation, the pump will behave as an on/off pump. 5.6.5 The SCB-02 expansion PCB Fig.46 SCB-02 PCB Status A... - Page 33 5 Installation Fig.48 Mixing valve connector Connect the mixing valve as follows: Earth N Neutral Open Close AD-4000015-03 Connecting the system pump Fig.49 System pump 1. Connect a system pump to the Pump terminals of the connector. Important The maximum power consumption is 300 VA. The function of the system pump can be changed using parameters PP015, PP016 and PP018.
-
Page 34: Connecting The Power Cable
5 Installation Fig.52 Tflow connector 1. Connect the two-wire cable to the Tflow terminals of the connector. Tflow AD-3001311-01 Connecting an outdoor temperature sensor An outdoor temperature sensor can be connected to the Tout connector. Always connect the sensor to the PCB that controls the zones. For example: when the zones are controlled by an SCB-02 or SCB-10, connect the sensor to that PCB. -
Page 35: Preparation Of Commissioning
6 Preparation of commissioning Danger of electric shock Always turn off the main power before working on the electrical connections. Make sure the following requirements are met when connecting the power cable: Tab.24 Power connection Wire cross section Stripping length Tightening torque solid wire: 2.5 mm²... -
Page 36: Filling The Trap
6 Preparation of commissioning 6.1.2 Filling the trap Danger The trap must always be sufficiently filled with water. This prevents flue gases from entering the room. Fig.58 Filling the trap 1. Fill the trap via the condensate collector. 2. Put the sealing cap back on the condensate collector. AD-3002445-01 6.1.3 Preparing the gas circuit... -
Page 37: Description Of The Main Menu
6 Preparation of commissioning The tiles on the home screen provide quick access to the corresponding menus. Use the rotary knob to navigate to the desired item and press the button to confirm the selection. Fig.61 Icons on home screen 1 Tiles: the selected tile is highlighted 2 Date and time | Name of the screen (actual position in the menu) 3 Information about the selected tile... - Page 38 6 Preparation of commissioning Icon Description The outdoor temperature sensor is connected. Boiler number in cascade system. The solar calorifier is on and its heat level is displayed. Burner output level (1 to 5 bars, with each bar representing 20% output). The pump is running.
-
Page 39: Commissioning
7 Commissioning Commissioning Commissioning procedure Warning Commissioning must be done by a qualified installer. If adapting to another gas type, the gas valve unit must be adjusted before switching on the boiler. 1. Open the main gas valve. 2. Open the appliance gas valve. 3. -
Page 40: Checking And Setting The Gas/Air Ratio
7 Commissioning Restrictor for different gas types Fig.63 Installing gas conversion restrictor 1. Fit the correct gas conversion restrictor in the gas control valve if the boiler is used with different gas types: The required diameters for the restrictors are listed in the table. A separate assembly instruction is available for this. - Page 41 3. Compare the measured value with the checking values in the table. Tab.34 Checking/setting values for O at full load for G20 (H gas) Values at full load for G20 (H gas) Gas 210 Ace 80 3,9 – 5,2 – 6,5 8,1 – 8,8 – 9,5 Gas 210 Ace 120 3,9 –...
- Page 42 3. Compare the measured value with the checking values in the table. Tab.36 Checking/setting values for O at low load for G20 (H gas) Values at low load for G20 (H gas) Gas 210 Ace 80 3,8 – 4,3 – 9,6 Gas 210 Ace 120 3,8 – 4,3 –...
-
Page 43: Final Instructions
7 Commissioning Values at low load for G31 (propane) Gas 210 Ace 160 4,1 – 4,9 10,5 – 11,0 Gas 210 Ace 200 4,1 – 4,9 10,5 – 11,0 (1) Nominal value. (2) Nominal value. 4. If the measured value is outside of the values given in the table, correct the gas/air ratio. -
Page 44: Settings
8 Settings Use the rotary knob to navigate. Use the button to confirm your selection. 1. Press the button. 2. Select Advanced Service Menu. 3. Select Save as commissioning settings. 4. Select Confirm to save the settings. When you have saved the commissioning settings, the option Revert commissioning settings becomes available in the Advanced Service Menu. -
Page 45: Accessing The Installer Level
8 Settings Fig.74 Search 4. Select the search criteria (code): 4.1. Select the first letter (datapoint category)........00:12 4.2. Select the second letter (datapoint type)..........4.3. -
Page 46: Establishing A Bluetooth Connection
8 Settings Tab.38 Configuring a zone or function Parameters, counters, signals Description Parameters Set the parameters at installer level Counters Read the counters at installer level Signals Read the signals at installer level 8.3.2 Establishing a Bluetooth connection A GTW-35 is needed to connect to the appliance via Bluetooth. Proceed as follows to establish a Bluetooth connection: >... - Page 47 8 Settings Tab.40 Factory settings at basic installer level Code Display text Description Adjustment range Submenu 80 AP016 CH function Enable central heating heat 0 = Off Gas fired demand processing 1 = On appliance AP017 DHW function Enable domestic hot water 0 = Off Gas fired heat demand processing...
- Page 48 8 Settings Code Display text Description Adjustment range Submenu 80 AP009 Service hours Number of heat generator op 100 – 25500 Hours Gas fired 8750 8750 8750 8750 erating hours for raising a appliance service notification AP010 Service notifi Select the type of service noti 0 = None Gas fired cation...
- Page 49 8 Settings Code Display text Description Adjustment range Submenu 80 CP070 MaxReduce Max Room Temperature limit 5 – 30 °C CIRCA dRoomT.Lim of the circuit in reduced mode, that allows switching to com fort mode CP210 Zone HCZP Comfort footpoint of the tem 15 –...
- Page 50 8 Settings Code Display text Description Adjustment range Submenu 80 PP023 CH Hysteresis Temperature hysteresis for 1 – 25 °C Gas fired the generator to start on cen appliance tral heating ZP000 Screed drying Set the number of days spent 0 –...
- Page 51 8 Settings Code Display text Description Adjustment range Submenu 80 CP010 Tflow setpoint Zone flow temperature set 7 – 100 °C CIRCA zone point, used when the zone is set to a fixed flow setpoint. CP290 ConfigZone Configuration of Zone Pump 0 = Zone output CIRCA PumpOut...
-
Page 52: Maintenance
9 Maintenance Code Display text Description Adjustment range Submenu 80 PP012 Stabilization Stabilization time after heat 0 – 180 Sec Gas fired time generator start for central appliance heating PP017 ChPump Maximum central heating at 0 – 100 % Gas fired SpeedMax... -
Page 53: Opening The Boiler
9 Maintenance Opening the boiler Fig.79 Removing the panel 1. Unlock the over centre latches on both sides of the boiler. 2. Remove the panel. AD-3002452-01 Standard inspection and maintenance operations For a service, always perform the following standard inspection and maintenance operations. -
Page 54: Checking The Water Quality
9 Maintenance 9.3.2 Checking the water quality The requirements for the water quality can be found in our Water quality instructions. Caution Not fulfilling the water quality requirements can damage the boiler and will void the warranty. Fig.80 Checking the water quality 1. -
Page 55: Finalising Work
9 Maintenance Fig.82 Negative (-) side of the air pressure 10. Remove the syringe hose from the + side of the air pressure differential switch differential switch and reconnect the original hose. 11. Connect the - side (A2) of the air pressure differential switch the hose coming from the T piece. -
Page 56: 10 Troubleshooting
Only qualified professionals are authorised to work on the appliance and system. The error code remains visible until the problem is solved. 3. Note the error code when the problem cannot be resolved. 4. Contact your installer or Remeha for support. 7837114 - v.01 - 10012023... -
Page 57: Warning
10 Troubleshooting 10.1.2 Warning Tab.46 Warning codes Code Display text Description Solution A.00.00 TFlow Open Flow temperature sensor is either Zone flow temperature sensor open: removed or measures a temperature Sensor is not present. below range Wrong Zone Function setting: check the setting of parameter CP02x. -
Page 58: Blocking
10 Troubleshooting 10.1.3 Blocking Tab.47 Blocking codes Code Display text Description Solution H.00.16 DHW sensor Open Domestic Hot Water tank tempera Domestic hot water temperature sensor open: ture sensor is either removed or Sensor is not present measures a temperature below Incorrectly fitted sensor: check that the sensor range has been correctly fitted... - Page 59 10 Troubleshooting Code Display text Description Solution H.01.07 Max Delta TH-TR Maximum difference between heat Maximum difference between heat exchanger exchanger temperature and return and return temperature exceeded: temperature No flow or insufficient flow: Check the circulation (direction, pump, valves). Check the water pressure.
- Page 60 10 Troubleshooting Code Display text Description Solution H.02.00 Reset In Progress Reset In Progress Reset procedure active: No action H.02.02 Wait Config Number Waiting For Configuration Number Configuration error or unknown configuration number: Reset CN1 and CN2 H.02.03 Conf Error Configuration Error Configuration error or unknown configuration number:...
-
Page 61: Locking
10 Troubleshooting Code Display text Description Solution H.03.00 Parameter Error Safety parameters level 2, 3, 4 are Parameter error: security kernel not correct or missing Restart the boiler Replace the CU-GH H.03.01 CU to GVC data error No valid data from CU to GVC re Communication error with the CU-GH: ceived Restart the boiler... - Page 62 10 Troubleshooting Code Display text Description Solution E.00.08 THeat Ex Open Heat exchanger temperature sensor Heat exchanger temperature sensor open: is either removed or measures a Bad connection: check the wiring and connec temperature below range tors. Incorrectly fitted sensor: check that the sensor has been correctly fitted.
- Page 63 10 Troubleshooting Code Display text Description Solution E.02.04 Parameter Error Parameter Error Configuration error: Reset CN1 and CN2 The data plate for the CN1 and CN2 values. E.02.13 Blocking Input Blocking Input of the Control Unit Blocking input is active: from device external environment External cause: remove external cause Wrong parameter set: check the parameters...
- Page 64 10 Troubleshooting Code Display text Description Solution E.04.07 TFlow Sensor Deviation in flow sensor 1 and flow Flow temperature sensor deviation: sensor 2 detected Bad connection: check the connection Faulty sensor: replace the sensor E.04.08 Safety input Safety input is open Air pressure differential switch activated: Bad connection: check the wiring and connec...
-
Page 65: Error History
10 Troubleshooting Code Display text Description Solution E.04.13 Fan speed has exceeded normal op Fan fault: erating range Bad connection: check the wiring and connec tors. Fan operates when it should not be operating: check for excessive chimney draught Faulty fan: replace the fan E.04.15 FlueGas Pipe Blocked The flue gas pipe is blocked... -
Page 66: 11 User Instructions
11 User instructions Fig.85 Error details 3. Select the error code you want to investigate. The display shows an explanation of the error code and several ....22/02/2018 11:20 ... details of the appliance when the error occurred. Error Code: A.00.00 4. -
Page 67: Activating Holiday Programs For All Zones
11 User instructions Tab.49 Selectable tiles for the user Tile Menu Function Information menu. Read out various current values. Error indicator. Read out details about the current error. With some errors the icon will appear with installer contact details (when filled in). -
Page 68: Changing The Heating Temperature Of A Zone
11 User instructions Tab.51 Extended menu to configure a heating circuit Zone configuration Menu Function Short temperature change Change the room temperature temporarily. OperatingZoneMode Select the heating operating mode: Scheduling, Manual. Manu ZoneRoomTempSet Set the room temperature manually to a fixed setting. Holiday Mode Set the start and end date of your holiday and the reduced temperature for this zone. -
Page 69: Changing The Operating Mode Of A Zone
11 User instructions 4.1. Use the top row to change between capitalisation, numbers, symbols or special characters. Fig.89 Letter selection 4.2. Select a character or action. 4.3. Select to delete a character. 11:20 ....: ....4.4. - Page 70 11 User instructions 3. Select the time program you want to modify: Schedule 1, Schedule 2 or Schedule 3. Activities scheduled for Monday are displayed. The last scheduled activity of a day is active until the first activity of the next day. At initial start-up, all weekdays have two standard activities;...
-
Page 71: Changing The Heating Activity Temperatures
11 User instructions 3. Select Set Heating Activity Names. A list of 6 activities and their standard names is shown: Activity 1 Sleep Activity 2 Home Activity 3 Away Activity 4 Morning Activity 5 Evening Activity 6 Custom 4. Select an activity. A keyboard with letters, numbers and symbols is shown. -
Page 72: Changing The Room Temperature Temporarily
11 User instructions 11.6.6 Changing the room temperature temporarily Regardless of the operating mode selected for a zone, it is possible to change the room temperature for a short period. After this period has elapsed, the selected operating mode resumes. Select zone >... -
Page 73: Time Program To Control The Dhw Temperature
11 User instructions 3. Select the desired operating mode: Tab.57 Operating modes Icon Mode Description Scheduling The domestic hot water temperature is controlled by a timer program Manual The domestic hot water temperature is set to a fixed setting Hot water boost The domestic hot water temperature is increased temporarily Holiday The domestic hot water temperature is reduced during your holiday to save... -
Page 74: Changing The Comfort And Reduced Hot Water Temperature
11 User instructions 4. Select the DHW timer program Schedule 1, Schedule 2 or Schedule 11.7.4 Changing the comfort and reduced hot water temperature You can change the comfort and reduced hot water temperature for the timer program. > Domestic Hot Water Setpoints Use the rotary knob to navigate. -
Page 75: 11.10 Reading The Installer's Name And Phone Number
11 User instructions Use the rotary knob to navigate. Use the button to confirm your selection. 1. Press the button. 2. Select System Settings 3. Perform one of the operations described in the table below: Tab.58 Control panel settings System Settings menu Settings Set Date and Time Set the current date and time... -
Page 76: 11.13 Frost Protection
12 Technical specifications 11.13 Frost protection Caution Drain the boiler and central heating system if you are not going to use your home or the building for a long time and there is a chance of frost. The frost protection does not work if the boiler is out of operation. -
Page 77: Bluetooth ® Wireless Technology
12 Technical specifications Supplements or subsequent regulations and guidelines that are valid at the time of installation shall apply to all regulations and guidelines specified in this manual. ® 12.1.3 Bluetooth wireless technology Fig.96 Logo This product is equipped with Bluetooth wireless technology. ®... -
Page 78: Dimensions And Connections
12 Technical specifications 14 Gas control valve 19 Flow temperature sensor 15 Air pressure differential switch 20 Flue gas temperature sensor 16 Water pressure sensor 21 Valve proving system (VPS) 17 Return temperature sensor 22 Gas pressure switch (GPS) 18 Heat exchanger temperature sensor 23 Fan PWM signal 12.3 Dimensions and connections... -
Page 79: Technical Data Gas 210 Ace
12 Technical specifications Gas 210 Ace Height - gas connection 1309 mm 1309 mm Second return (optional) 1¼” male thread 1¼” male thread (1) Attach supplied 1¼” > 1½” reducer bushing. (2) With supplied 1¼” > 1½” reducer bushings. 12.4 Technical data Gas 210 Ace Tab.62 General... - Page 80 12 Technical specifications Gas 210 Ace NOx annual emissions G20 O = 0% (EN15502) NOx annual emissions mg/kWh (EN15502) NOx annual emissions mg/kWh (EN15502) CO annual emissions G20 O = 0% (EN15502) CO annual emissions mg/kWh (EN15502) CO annual emissions mg/kWh (EN15502) Flue gas amount...
- Page 81 12 Technical specifications Gas 210 Ace Fuse – CU-GH13 (AT) Fuse – CB-01 (AT) (1) Without pump. (2) For a room-sealed system. Tab.66 Other data Gas 210 Ace Total weight with packaging Including control box Total weight without packaging Including control box Average acoustic level at a dis...
-
Page 82: Technical Data Ble Smart Antenna
13 Appendix 13.1 ErP information 13.1.1 Product fiche Tab.69 Product fiche Remeha - Gas 210 Ace Seasonal space heating energy efficiency class (Prated or Psup) Rated heat output Seasonal space heating energy efficiency Annual energy consumption Sound power level L... - Page 83 Original instructions - © Copyright All technical and technological information contained in these technical instructions, as well as any drawings and technical descriptions supplied, remain our property and shall not be multiplied without our prior consent in writing. Subject to alterations.
- Page 84 T +44 (0)330 678 0140 E technical@remeha.co.uk W www.remeha.co.uk Remeha Commercial UK Brooks House Coventry Road Warwick CV34 4LL 7837114 - v.01 - 10012023 7837114...
Need help?
Do you have a question about the Gas 210 Ace 80 and is the answer not in the manual?
Questions and answers