
Related Manuals for REMEHA GAS 210-80 ECO PRO


Summary of Contents for REMEHA GAS 210-80 ECO PRO
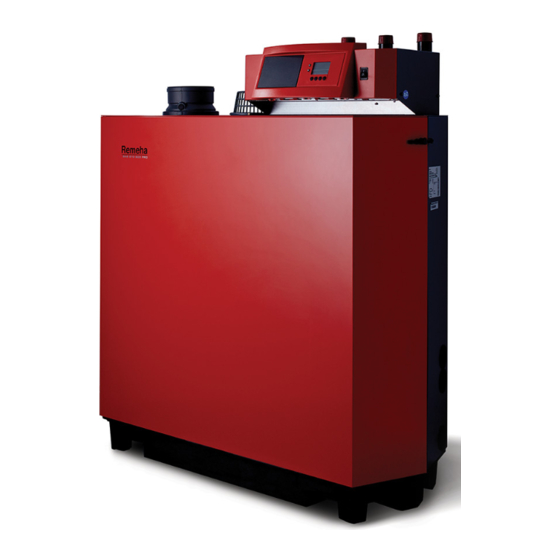
- Page 1 English GAS 210 ECO PRO High efficiency Low Nox gas boiler Types: 210-80 210-120 210-160 210-200 Technical information 114494-190310...
-
Page 2: Table Of Contents
Table of contents GAS 210 ECO PRO Table of contents Preface 1. EC declaration 2. Introduction 2.1 Pictograms used Important instructions 3. Safety 4. Installation 4.1 Scope of delivery and installation Dimensions 4.3 Installation and service clearances 5. Water-side connections 5.1.1 Condensed water discharge 5.1.2 Water treatment... - Page 3 Table of contents GAS 210 ECO PRO 8.4 Connection options for the optional 0 - 10 V control PCB (IF-01) 8.4.1 Connection status (Nc) 8.4.2 OTm connection 8.4.3 Analogue input (0 - 10 V) 8.4.4 Analogue output (0 - 10 V) 8.5 Connection options of the optional expanded control/protection PCB (SCU-S01) 8.5.1 Flue gas damper control (FgV) 8.5.2 Hydraulic valve control (HdV)
- Page 4 General 12.2 Exploded view 13. Regulations 13.1 General 13.2 Standards 13.3 Remeha factory test 13.4 Supplementary guidelines 14. Technical specifications 14.1 Technical data 15. Efficiency data and gas inspection labels 15.1 Unit usable efficiency (HR efficiency) 15.2 Water-side efficiency 15.3 Zero-load losses 15.4 Description of specifications...
- Page 5 Table of contents GAS 210 ECO PRO 114494-190310...
-
Page 6: Preface
PREFACE This technical information , which contains a lot of practical infor- mation about the Remeha Gas 210 ECO PRO, a High efficiency central heating unit, is mainly intended for installers. It contains important instructions for safe and trouble-free operation of the boiler before commissioning and during operation. -
Page 7: Ec Declaration
: Kanaal Zuid 110 City, Country : Postbus 32, NL-7300 AA Apeldoorn, Holland - this is to declare that the following product(s) : Remeha Gas 210 ECO PRO is/are in conformity with the following EEC-directives: EEC- Directive: 90/396/EEC tested and examined to the following norms:... -
Page 8: Introduction
2. Introduction GAS 210 ECO PRO 2. Introduction 2.1 Pictograms used The following pictograms are used in this document to emphasise certain instructions. This is in order to increase your personal safety and to safeguard the technical reliability of the boiler . The pictograms used are: ... -
Page 9: Safety
GAS 210 ECO PRO 3. Safety 3. Safety Adhere strictly to the specific safety instructions. Can you smell gas? Proceed as follows: • do not smoke and avoid fire and sparks • do not operate electrical switches. • close the gas cock. •... -
Page 10: Installation
4. Installation GAS 210 ECO PRO 4. Installation 4.1 Scope of delivery and installation The boiler is supplied fully assembled and protected. The boiler is placed on a pallet (70 x 130 cm, 145 cm high), which can be transported with a pallet truck, hand truck, forklift truck or 4-wheel transport boards. -
Page 11: Dimensions
GAS 210 ECO PRO 4. Installation 4.2 Dimensions 1190 114492LTAL21H001b fig. 01 Elevation drawings Connection Gas 210 ECO PRO 80/120/160 Gas 210 ECO PRO 200 1¼” male thread 1½” male thread (fit supplied adapter 1¼” > 1½”) É Flow 1¼” male thread 1½”... -
Page 12: Installation And Service Clearances
4. Installation GAS 210 ECO PRO 4.3 Installation and service clearances Clearance of at least 60 cm is required at the front of the boiler . However, we recommend a clearance of 1 m. W e recommend a clearance of at least 40 cm above the boiler control panel, at least 5 cm on the left side and at least 25 cm on the right side in con- nection with condensed water discharge. -
Page 13: Water-Side Connections
If used correctly water treatment can improve the boilers ef ficiency and increase the anticipated life expectancy of the boiler . For further information a special document “Remeha water quality regulations” is available from Broag. The regulations mentioned in this document must be followed. -
Page 14: Pressure Relief Valve
5. Water-side connections GAS 210 ECO PRO It is important to check the inhibitor concentration after installa- tion, system modifications, filling the system and every service in accordance with these instructions. For the correct dosage and the suitability of inhibitors for use with our boilers and for further information on water treatment or sys- tem cleaning we advise direct contact with either of the following companies:... -
Page 15: Gas-Side Connections
* Refer to Broag for using propane. 6.2 Gas pressure The boiler has been factory set and tested by Remeha to natural 3+4 L 5+6 L gas (G20) - with an inlet pressure of 17 mbar . -
Page 16: Connecting The Flue Gas Discharge And Air Supply
7. Connecting the flue gas discharge and air supply 7.1 General The Remeha Gas 210 PRO is suitable for conventional room ven- tilated or room sealed operation. Specify at the time of ordering if the boiler is to be supplied for room sealed operation. In that case, the boiler will be supplied with a purpose-designed room sealed terminal, air supply connection and some accessories. -
Page 17: Possible Lengths For The Flue Gas Discharge Pipe
GAS 210 ECO PRO 7. Connecting the flue gas discharge and air supply • The air supply opening must stay open. • The installation area or boiler room must be equipped with the necessary combustion air supply openings. These openings must not be obstructed or shut of f. -
Page 18: Room Sealed Installation
7. Connecting the flue gas discharge and air supply GAS 210 ECO PRO 7.3 Room sealed installation pipe connected directly to the boiler. This increases the number of installation options within a building, while the discharge location is subject to less stringent requirements because the air supply and flue gas discharge can be incorporated in the same pressure field. - Page 19 GAS 210 ECO PRO 7. Connecting the flue gas discharge and air supply When air supply and flue gas discharge pipes with diameters other than 150 mm are used, adapters are required: Ø150/100mm, Ø150/110mm, Ø150/130mm or Ø150/180mm and, for connec- tion to our standard combined vertical roof feed-through sets, also Ø180/150mm, Ø130/150mm or Ø110/150mm.
-
Page 20: Discharge In Different Pressure Areas
7. Connecting the flue gas discharge and air supply GAS 210 ECO PRO 7.3.2 Discharge in different pressure areas For installations where supply and discharge points are in two dif- ferent pressure zones CLV system please contact Broag Techni- cal Dept. for further details and advice. The maximum acceptable height difference between combustion air supply and flue gas discharge is 36 m and the maximum acceptable length of the air supply and flue gas discharge combined is shown in table 05. -
Page 21: Connection Of Flue Gas Discharge And Choice Of Material
GAS 210 ECO PRO 7. Connecting the flue gas discharge and air supply 7.3.3 Connection of flue gas discharge and choice material Connecting the flue gas discharge: Remove the cap from the flue gas discharge opening Ñ; • Fit the flue gas discharge pipes seamlessly together . ... -
Page 22: Control And Electrical Connections
IEE regulations. 8.1.1 Boiler control The heat output of the Remeha Gas 210 ECO PRO can be con- trolled as follows: - Modulating, where the output modulates between the minimum and maximum values on the basis of the flow temperature defined by the modulating controller. -
Page 23: Modulating Cascade Controller Mc4
8.1.5 Modulating cascade controller MC4 The Remeha Celcia MC4 cascade controller is suitable for the modulated control of 2 to 4 Remeha Gas 210 PRO boilers in cas- cade. This controller is wall-mounted and communicates according the OpenTherm protocol. We recommend using our Celcia MC4 modulating cascade controller in conjunction with the Celcia 20 Time/Weather compensation controller. -
Page 24: Electrical Connection Options
8. Control and electrical connections GAS 210 ECO PRO 8.3 Electrical connection options The boiler has several control, protection and regulation connec- tion options. The standard control PCB (PCU-01) can for example be expanded with: • an optional 0 - 10 V control PCB (available as an accessory IF-01); •... -
Page 25: Input Release (Rl)
GAS 210 ECO PRO 8. Control and electrical connections 8.3.5 Input release (RL) F1 1.6 AT The boiler is also equipped with an input release so that the burn- er can be released/shutdown. This input can be used in combina- tion with the limit switches on flue gas throttle valves, hydraulic PCU-01 control valves, safety interlocks, etc. -
Page 26: Connection Options For The Optional 0 - 10 V Control Pcb (If-01)
8. Control and electrical connections GAS 210 ECO PRO 8.4 Connection options for 0 - 10 V control PCB (IF-01) 8.4.1 Connection status (Nc) If the boiler locks out, a relay is de-energised and the alarm can be transmitted via a potential-free contact (maximum 230 V, 1 A) on terminals Nc and C of terminal strip X4. -
Page 27: Analogue Input (0 - 10 V)
GAS 210 ECO PRO 8. Control and electrical connections 8.4.3 Analogue input (0 - 10 V) This control can be based on temperature or heat output (option- al). The two controls are described briefly below . Connect the 0 - 10 V signal to the interface input for analogue control. Analogue temperature-based control () The 0-10 V signal controls the boiler flow temperature between 0°C and 100°C. -
Page 28: Connection Options Of The Optional Expanded Control/Protection Pcb (Scu-S01)
8. Control and electrical connections GAS 210 ECO PRO Jumper Output signal Boiler output Description 0 - 15 Boiler off 0,5 15 - 18 Alarm 2,0* - 10 20 - 100 Delivered boiler output * Dependent on the minimum modulation dept (fan rotation speeds set- tings, pre set 20%) table 09 Analogue output signal for boiler output... -
Page 29: Outside Temperature Sensor (Tout)
8.5.6 Outside temperature sensor (Tout) To take advantage of the boiler's modulating operation during the entire heating season, a Remeha outside temperature sensor (available as an accessory) can be used in combination with an on/off control or connection. Connect the on/of f control or connec-... -
Page 30: Wiring Diagram
9. Commissioning GAS 210 ECO PRO 8.5.9 Wiring diagram PRIMARY CONTROL UNIT - PCU-01 Pump Mains On / Off 1 2 3 1 2 3 4 1 2 3 SAFETY UNIT DISPLAY - SU-01 PE-6 PE-4 PE-5 PE-2 GN/YW GN/YW GN/YW PE-7 X235... -
Page 31: Commissioning
GAS 210 ECO PRO 9. Commissioning 9 Commissioning 9.1 Control panel The boiler's control panel contains four function keys, a menu key , a service engineers key, an on/off switch and a display. 114492LTAL21H008a fig. 17 Control panel 1 = Display 5 = [Central heating temperature] or [-] key 2 = [Menu] key 6 = [+] key... -
Page 32: Fault During Start-Up Procedure
9. Commissioning GAS 210 ECO PRO With a heat demand: 1 Boiler starts 2 Burner starts 3 Central heating operation; briefly in part load then in full load When a heat demand ceases: 5 Burner stops 6 Boiler stops 0 Stand-by mode table 10 Normal operation... -
Page 33: Reading Current Values
GAS 210 ECO PRO 9. Commissioning 9.1.3 Reading current values The following current values can be read in the ‘information menu’ - 5t = Status - 5u = Sub status - t1 = flow temperature [°C]; - t2 = return temperature [°C]; - t4 = outside temperature [°C];... -
Page 34: Status And Sub Status
9. Commissioning GAS 210 ECO PRO 9.1.3.1 Status and sub status In the ‘information menu’ the following status and sub status numbers are displayed: Status 5t Sub status 5u Number Status Number Sub status Stand-by mode Stand-by mode Anti-hunting Open hydraulic valve Boiler starts (heat demand) Start pump... -
Page 35: Changing Parameters At User Level (Without Access Code)
GAS 210 ECO PRO 9. Commissioning 9.1.5 Changing parameters at user level (without access code) The following settings can be changed at user level: p1 = Flow temperature set point [°C], adjustable between 20 and 90°C; p2 = Pump post-circulation time 0..98 mins, 99 is continuous; p3 = Boiler control;... - Page 36 9. Commissioning GAS 210 ECO PRO Factory setting Codes in Description Setting range and possible explanation 210- 210- 210- 210- display Flow temperature set point 20 - 90°C 0 – 98 minutes Pump post-circulation time 99 = continuous 0 = Central heating Boiler control 1 = Central heating 0 = Simple display...
- Page 37 GAS 210 ECO PRO 9. Commissioning • The parameters at service level may only be changed by a qualified installer. • Changing the factory settings can result in incorrect operation of the Gas 210 ECO PRO. The parameters can be changed at service level as follows: 1.
-
Page 38: Resetting Factory Settings
9. Commissioning GAS 210 ECO PRO 9.1.7 Resetting factory settings • Press the -key several times until the ˜ symbol flashes in the menu bar; • Select the installers menu using the -key, appears in the display; •... -
Page 39: Setting Manual Operation ( Symbol)
GAS 210 ECO PRO 9. Commissioning 9.1.8 Setting manual operation ( symbol) In some cases, it may be necessary to set the boiler to manual operation, for example when the controller has not yet been con- nected. The boiler can be set to automatic or manual operation under the ... - Page 40 9. Commissioning GAS 210 ECO PRO Operation can now be monitored via the code window: With a heat demand: 1 Boiler starts 2 Burner starts 3 Central heating operation; briefly in part load then in full load When a heat demand ceases: 5 Burner stops 6 Boiler stops 0 Stand-by mode...
- Page 41 GAS 210 ECO PRO 9. Commissioning 15.c Set minimum load: press the [-] -key and, when l 3 appears in the display, minimum load has been set. 15.d After minimum output has been reached, check the CO percentage and compare it with the value in table 14. If the % level deviates from these values, set the CO percentage using the correction screw of the pressure controller on the gas block (for the 210-80 and 210-120...
-
Page 42: Taking The Boiler Out Of Operation
9. Commissioning GAS 210 ECO PRO 9.3 Taking the boiler out of operation The boiler must be switched of f for maintenance or repair work. If the central heating system is not going to be used for a long time (for example, during holidays in frost-free periods), it is advisable to put the boiler out of operation. -
Page 43: Inspection And Maintenance
GAS 210 ECO PRO 10. Inspection and maintenance 10. Inspection and maintenance 10.1 General The boiler is virtually maintenance free; it only has to be inspected once a year and only if necessary be serviced/cleaned. The annual inspection of the boiler includes: - combustion check of the boiler (the fan draws in the combustion air through the venturi. -
Page 44: Cleaning The Fan
10. Inspection and maintenance GAS 210 ECO PRO 10.2.2 Cleaning the fan For the 210-80 and 210-120 versions: Remove the electrical connections from the fan. 230 V Unscrew the union nut under the gas multiblock (pay attention to the sealing). Remove the bolts from the outlet side of the fan. - Page 45 GAS 210 ECO PRO 10. Inspection and maintenance For the 210-160 and 210-200 versions: 1. Remove the electrical connections from the fan. 2. Remove the bolts that fix the venturi on the fan. 3. Remove the bolts and the nuts from the outlet side of the fan. 4.
-
Page 46: Cleaning The Heat Exchanger (Flue Gas Side)
10. Inspection and maintenance GAS 210 ECO PRO 10.2.3 Cleaning the heat exchanger (flue gas side) Caution: The sealing between the inspection hatch and heat exchanger may stick, as may the sealing between the burner and heat exchanger Prevent the sealing from tearing. Damaged or hardened sealing must always be replaced. -
Page 47: Cleaning The Burner
GAS 210 ECO PRO 10. Inspection and maintenance 10.2.4 Cleaning the burner 1. Dismantle the burner. 2. Check burner visually and if necessary clean carefully with air (e.g. compressed air at between 2 and 5 bar , nozzle - burner distance approx. 1 cm). 3. -
Page 48: Cleaning The Trap
10. Inspection and maintenance GAS 210 ECO PRO 10.3 Cleaning the trap Remove the trap from the boiler and clean it. Fill the trap with fresh water and fit it. 10.4 Checking the ignition electrode Check the ignition electrode adjustment (between 3 and 4 mm) and replace electrode if necessary (including sealing). -
Page 49: Control Stops And Faults
GAS 210 ECO PRO 11. Faults 11. Control stops and faults 11.1 General The boiler is fitted with an advanced control unit. The heart of the control is a microprocessor, the abc , which both protects and ® controls the boiler. 11.2 Control stops and faults Control stop: The control stop is a (temporary) boiler operating mode due to an... - Page 50 11. Faults GAS 210 ECO PRO Code Description Possible cause Check/solution • Reset dF and dU Parameter fault • Reset with RECOM PC Check: Maximum flow temperature • No flow or insufficient flow • Flow and/or reason exceeded for heat demand Check: •...
-
Page 51: Fault Codes
GAS 210 ECO PRO 11. Faults Code Description Possible cause Check/solution Configuration fault or default • PCU-01 unit parameters • Replace PCU-01 unit 17 * parameters table incorrect incorrect Configuration fault or parameter • Incorrect PSU PCB for this storage unit (PSU) not recog- •... - Page 52 11. Faults GAS 210 ECO PRO • Press the “RESET- key” for 2 seconds. If the fault code conti- nues to appear, look for the cause in the following fault table and rectify the fault. If the display does not show RESET but SERVICE, the boiler must be switched off and switched on again after 10 seconds before the fault can be reset.
- Page 53 GAS 210 ECO PRO 11. Faults Fault Description Possible cause Check/solution code • Check the cable bundle • Check that the trap is not empty; top up if necessary • Bad connection • Blockage in flue gas discharge/RGA • Pressure in flue gas discharge duct Trap protection activated covered E:12...
-
Page 54: Control Stop - And Fault Memory
11. Faults GAS 210 ECO PRO Fault Description Possible cause Check/solution code • Bad connection • Check the cable bundle Flow temperature sensor • Defective sensor • Replace the sensor if necessary E:33 open circuit • Sensor not correctly mounted •... -
Page 55: Reading Faults
GAS 210 ECO PRO 12. Service parts 11.5.1 Reading faults • Press the -key several times until the symbol flashes in the menu bar; • Press the key; B xx will flash in the display, together with the number of shutdowns that have been memorised; •... -
Page 56: Service Parts
12. Service parts GAS 210 ECO PRO 12. Service parts 12.1 General If it is ascertained during the annual inspection or maintenance work that a part in the boiler must be replaced, use only original parts or parts and materials recommended by Broag. Send the part to be replaced to Broag. -
Page 57: Exploded View
GAS 210 ECO PRO 12. Service parts 12.2 Exploded view 210-80 210-160 210-120 210-200 210-200 210-80 210-120 210-160 210-200 210-200 210-80 210-120 210-160 210-200 114492EVAL21H001b fig. 34 Exploded view 114494-190310... -
Page 58: Regulations
GAS 210 ECO PRO 13. Regulations 13.1 General The Remeha Gas 210 ECO PRO is a high efficiency, floor stand- ing central heating boiler, suitable for use with all types of natural gas; it recovers both perceptible and latent heat from flue gases. -
Page 59: Supplementary Guidelines
Installation and Serv- ice manual. The Remeha Gas 210 ECO PRO is a CE certified boiler and must not be modified or installed in any way contrary to these "Installation and Maintenance Instructions". Manufacturers Instructions must NOT be taken as overriding statutory obligations. -
Page 60: Technical Specifications
14. Technical specifications GAS 210 ECO PRO 14. Technical specifications 14.1 Technical data Boiler type Gas 210 ECO PRO Unit 210-80 210-120 210-160 210-200 General Number of sections Input control Modulating, 0-10 V or on/off Nominal output (80/60°) Pn Nominal output (50/30°) Pn Nominal input gross caloric value (GCV/Hs) Qn Nominal input net caloric value... -
Page 61: Efficiency Data And Gas Inspection Labels
GAS 210 ECO PRO 15. Efficiency data and gas inspection labels 15. Efficiency data and gas inspection labels 15.1 Unit usable efficiency (HR efficiency) Up to 108.6 with respect to Hi at T = 30°C. Return 15.2 Water-side efficiency a. Up to 98.4% with respect to Hi at full load at an average water temperature of 70°C (80/60°C). -
Page 62: Accessories
15. Efficiency data and gas inspection labels GAS 210 ECO PRO Available in 4 types: 210 -80: 87 kW nominal output at 80/60°C 210-120: 120 kW nominal output at 80/60°C 210-160: 166 kW nominal output at 80/60°C 210-200: 200 kW nominal output at 80/60°C 15.5 Accessories - Modulating rematic weather compensators. -
Page 63: Type Of Unit
GAS 210 ECO PRO 15. Efficiency data and gas inspection labels 15.7 Type of unit 114492LTAL21H016b fig. 35 Cross-section 1. Flue gas discharge 11. Return temperature sensor 21. Flue gas switch 2. O measuring point 12. Condensate collector 22. Flow temperature sensor 3. -
Page 64: Operating Principle
The flow temperature is adjustable between 20 and 90°C (factory setting 80°C). 15.9.2 Low water level protection The Remeha Gas 210 ECO PRO is equipped with low water pro- tection based on temperature difference measurements and tem- perature increase measurements. -
Page 65: Maximum Protection
GAS 210 ECO PRO 15. Efficiency data and gas inspection labels 15.9.3 Maximum protection The maximum protection switches the unit of f if the water tempera- ture is too high (110°C) and interlocks it on the control box. Once the fault has been remedied, the unit can be reset using the reset- key. -
Page 66: Application Data
16. Application data GAS 210 ECO PRO 16. Application data 16.1 General The boiler is suitable for a wide range of applications. The boiler offers numerous flue gas, hydraulic, gas and control applica- tion options, but, at the same time, is not complicated to install. This and its moderate dimensions, low noise levels and cascade options mean the boiler can be installed almost anywhere (for general legal requirements, see Section 13.2). - Page 67 Example of a hydraulic diagram cascade configuration 1. modulating cascade controller 8. automatic air vent 2. pump 9. pressure-free distributor (not supplied by Remeha, see table 19 for dimensions) 3. safety valve 10. drain cock 4. outside temperature sensor 11. system pump 5.
- Page 68 16. Application data GAS 210 ECO PRO The following table shows the minimum dimensions for the various pipes and for the low loss header based on a dT design of 20°. The boiler has a no built-in pump. fig. 37 Illustration of low loss header B = boiler side I = installation side...
-
Page 69: Control Options
GAS 210 ECO PRO 16. Application data 16.5 Control options The following types of control can be used for the boiler: - as a single boiler or in a cascade with modulating controllers based on room and/or outside temperature - on/off controllers, using the boiler's internal heating curve if necessary (in combination with outside temperature sensor) - high/low controllers - analogue signals (0-10 V) for control based on output or flow... -
Page 70: Checklists (Records)
17. Checklists (records) GAS 210 ECO PRO 17. Checklists (records) 17.1 Checklist for commissioning (Commissioning record) Commissioning work, see Section 9.2 Measured value or confirmation 1. Fill the central heating system with water . Check the water pressure in the central heating system. -
Page 71: Checklist For Maintenance (Maintenance Record)
GAS 210 ECO PRO 17. Checklists (records) 17.3 Checklist for maintenance (maintenance record) Confirmation and date Maintenance work (see Section 10) 1. Ignition electrode checked 2. Heat exchanger (central heating) cleaned 3. Combustion checked 4. Water pressure checked 5. Air supply and flue gas discharge connections checked 6. - Page 72 Broag Ltd. Remeha House Molly Millars Lane RG41 2QP WOKINGHAM, Berks. Tel: +44 118 9783434 Fax: +44 118 9786977 Internet: uk.remeha.com E-mail: boilers@broag-remeha.com © Copyright All technical and technological information contained in these technical instructions, as well as any drawings and technical descriptions furnisched by us remain our property and may not be multiplied without our prior consent in writing.
Need help?
Do you have a question about the GAS 210-80 ECO PRO and is the answer not in the manual?
Questions and answers