Table of Contents
Advertisement
Quick Links
Advertisement
Table of Contents

Subscribe to Our Youtube Channel
Related Manuals for Quantum Data 881


Summary of Contents for Quantum Data 881
- Page 1 881/882 Video Test Generator User Guide...
- Page 2 ! " & & ! " " " " ) & ( * " " + " ! " $ , ( " ! ' $ ( & ) & ( ) & $ , ) & - ' $ "...
-
Page 3: Getting Started
• Video interfaces • Computer interfaces • Front panel interface • Generator file system and media • Generator operational modes • Web interface • Command line interface • Working with user profiles 881/882 Video Test Generator User Guide (Rev A.25) -
Page 4: Standard Features
Introduction This User’s Guide describes the features, functions and operating procedures for the 881 and 882 Quantum Data video test instruments for testing analog and digital video display devices. The 881 provides features for testing video displays in production environments. -
Page 5: Optional Features
Also useful for testing cables. Test results can be issued as formatted reports. SD/HD-SDI — Single link • 1.485Gb/s and 1.485/1.001Gb/s • YCbCr • 4:2:2 color sub-sampling at 10 bits per component 881/882 Video Test Generator User Guide (Rev A.25) -
Page 6: Video Interfaces
Video interfaces This section describes the generator’s video interfaces. The video interfaces on the 882C are shown below. HDMI OUT 1 HDMI OUT 2 HDMI IN 1 HDMI IN 2 Interface Description SDI/HD-SDI connector outputs a serial digital signal per SMPTE 259M and SMPTE 292M standards. -
Page 7: Vga Interface
Signal Signal Analog Red Video Analog Red Video Ground No Connection Analog Green Video 7 Analog Green Video Ground 12 DDC/EDID Serial Data Analog Blue Video Analog Blue Video Ground Horizontal Sync 881/882 Video Test Generator User Guide (Rev A.25) -
Page 8: Dvi-I Interface
Signal Signal Signal No Connection DDC/EDID +5 Vdc Out Vertical Sync Digital Ground Digital Ground DDC/EDID Data Clock DVI-I interface The DVI-I interface, available on the model 882D generator, outputs digital video for testing DVI-compliant video displays. The DVI-I connector also provides an analog output which can be used to test analog formats. -
Page 9: S-Video Interface
S-Video compliant source for outputting composite TV signal. Composite video BNC The 882 generator has a composite TV BNC connector labeled “CVBS.” This interface emulates an analog composite TV source. 881/882 Video Test Generator User Guide (Rev A.25) -
Page 10: Computer Interfaces
SERIAL connector provides RS-232C serial data communication interface for the generator. DEBUG connector is for Quantum Data use only. ETHERNET connector is used to connect the generator with a TCP/IP network, for remote administration and control, and for sharing resources from a file server. -
Page 11: Gpib Interface
The GPIB connector pinouts are listed in the following table. Signal Signal Signal Signal DIO1 NRFD DIO5 Shield DIO2 NDAC DIO6 Shield DIO3 DIO7 Shield DIO4 DIO8 Shield Shield Shield Shield Signal Ground 881/882 Video Test Generator User Guide (Rev A.25) -
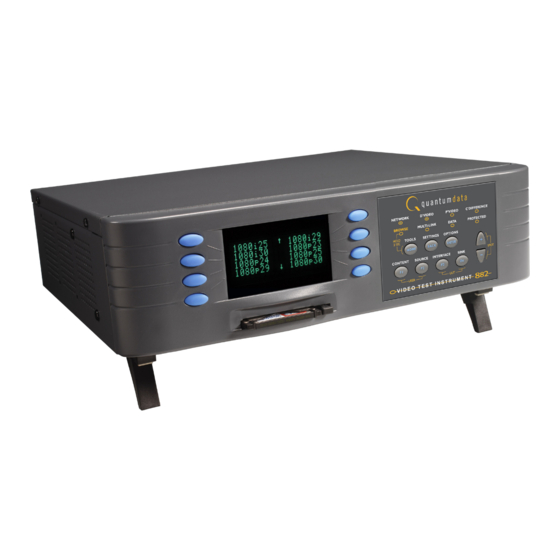
Page 12: Front Panel Interface
Front panel interface This section describes the front panel interface for operating the generator. The front panel keys are shown below. Item Display Soft Keys Status Indicators Recent Folder Tool ! Folder Setting - Disabled Rejected + Enabled Selected * Menu Selection Keys Status indicators Status indicators provide feedback about the operational status of the generator. -
Page 13: Menu Selection Keys
An icon located next to an item provides additional information about the item. Following is a list of icons and their meanings. Icon Meaning Folder containing related items. Recently visited folder. 881/882 Video Test Generator User Guide (Rev A.25) -
Page 14: Item Selection Examples
Icon Meaning Indicates active item in list of mutually exclusive items. Item is active, but may be deactivated by pressing soft key. Item is not active, but may be activated by pressing soft key. Value may be increased by pressing Up (+) key, or decreased by pressing Down (-) key. - Page 15 Video Signal, you will see the settings for Video Timing. If you press the soft key next to the arrow by Interface, you will see the settings for Synchronization. 881/882 Video Test Generator User Guide (Rev A.25)
- Page 16 Generator file system and media The generator has a file system comprised of a System folder and a Library folder of resource files that can be stored on multiple media (storage devices or locations). The files in the file system are briefly described below. Generator file system The 882 generator file system is comprised of two main directories (folders): 1) System and 2) Library.
- Page 17 3. Do one of the following: • To boot from the file server, press the soft key adjacent to Network Boot. To boot from the generator’s flash memory, press the soft key adjacent to Internal • Flash. 881/882 Video Test Generator User Guide (Rev A.25)
-
Page 18: Basic Mode
To boot from the generator’s PC card, press the soft key adjacent to PCMCIA Boot. • 4. Press the Options (Enter) key to save the configuration. 5. Either restart the generator by cycling the power or press the Tools key to return to the boot menu. -
Page 19: Browsing Other Media
Volatile memory in generator. This source contains objects that have been used (loaded into cache) since the generator was started. A list of folders on that medium appears on the generator’s display as shown below. System Library 881/882 Video Test Generator User Guide (Rev A.25) - Page 20 2. Choose the folder you want to open by pressing the adjacent soft key. The contents of the folder appears on the generator’s display. If you need to return to the previous menu list press the back (settings) key. Fonts FormatLib Formats Images...
- Page 21 SEQP /Server030/Library/Sequences The generator will now display the sequences on the server when you press the Tools key and then select sequences. 881/882 Video Test Generator User Guide (Rev A.25)
-
Page 22: Switching From Browse Mode To Basic Mode
Programming the generator’s function keys The generator is equipped with four function keys (F1 through F4) that can be programmed as shortcuts to folders. The procedure below describes how to program the function keys. To program a function key as a folder shortcut: 1. -
Page 23: Web Interface
Virtual Front Panel using a Web browser. To determine the IP address of the generator: 1. Press the Tools key. The Tools menu appears on the generator’s display as shown below. System Reports Sequence ImgShift Probe Analyzer 881/882 Video Test Generator User Guide (Rev A.25) - Page 24 2. Choose the System item by pressing the adjacent soft key. The System menu appears on the generator’s display as shown below. Clock Clone* CalFactor Server Network About Serial GPib 3. Choose the Network item by pressing the adjacent soft key. The generator’s IP address appears on the generator’s display as shown below.
-
Page 25: Working With The Cmd (Command) Terminal
To use the CMD Terminal: 1. Access the Virtual Front Panel page. See “To use the Virtual Front Panel:” on page 22. 2. Click the CMD Terminal link. The CMD Terminal window appears. 881/882 Video Test Generator User Guide (Rev A.25) - Page 26 3. In the box at the top of the CMD Terminal window, enter a command, and then press Enter. The command appears in the lower pane. Working with the Generator FTP Browser If you create objects on a PC, such as images or formats, you can use the Generator FTP Browser to copy these objects to a generator.
- Page 27 6. Verify that the source file or folder and the destination folder are correct, and then click 7. The Copying Files dialog box appears showing the status of the operation. When the status is 100%, click Done. 881/882 Video Test Generator User Guide (Rev A.25)
- Page 28 Copying files from a generator to a PC To copy files from a generator to a PC: 1. Access the generator’s FTP browser by choosing the FTP Browser menu item from the main web page. The Generator FTP Browser appears. The Instrument Files area shows the files stored on the generator.
- Page 29 The Host Files area shows the files stored on the PC. 2. In the Instrument Files area, click the down arrow by the Look in box and select tffs0. This is the generator’s flash memory. 881/882 Video Test Generator User Guide (Rev A.25)
- Page 30 3. Repeat step 2 to open a second Generator FTP Browser. In the Instrument Files area of the second Generator FTP Browser window, click the down arrow by the Look in box and select card0. This is the generator’s PC card. 4.
- Page 31 In the Look in box, click the down arrow and select the medium where the file or folder is located. Select tffs0 for the generator’s flash memory or card0 for the generator’s PC card. b. In the list of files, select the file or folder. 881/882 Video Test Generator User Guide (Rev A.25)
- Page 32 5. In the Generator FTP Browser window for the target generator, open the destination folder as follows: a. In the Look in box, click the down arrow and select the medium to which you want to copy the file or folder. Select tffs0 for the generator’s flash memory or card0 for the generator’s PC card.
-
Page 33: Command Line Interface
By default, the generator’s serial port is set to 9600 baud, 8 data bits, no parity, 1 stop bit, no flow control. 2. Establish a terminal connection with the generator. Press Enter until the C:> prompt appears. 881/882 Video Test Generator User Guide (Rev A.25) - Page 34 Configuring the generator’s serial port The following procedures describe how to change the generator’s default serial port configuration for a terminal session. You can configure the serial port through either the front panel, Virtual Front Panel or through the command line interface. To configure the generator’s serial port through the front panel or Virtual Front Panel: 1.
- Page 35 To save the changes, choose the Yes item by pressing the adjacent soft key. To exit without saving the changes, choose the No item. To return to the previous screen without saving the changes, choose the Back item. 881/882 Video Test Generator User Guide (Rev A.25)
-
Page 36: Working With The Network Interface
To configure the generator’s serial port through the command line interface: 1. Establish a session with the generator using HyperTerminal over a serial connection or Telnet over an Ethernet LAN. For instructions, see “Establishing a terminal session with generator” on page 31 and “Establishing a Telnet session with the generator”... -
Page 37: Sending Commands Interactively
FMTL format_name • To apply the format to the generator hardware, enter: FMTU • To load an image, enter: IMGL image_name • To apply the image to the generator hardware, enter: IMGU 881/882 Video Test Generator User Guide (Rev A.25) -
Page 38: Sending Command Files (Serial Interface Only)
Sending command files (serial interface only) When developing more complex, custom test sequences or formats, it is easiest to enter commands in a text file, and then send the file to the generator. This approach allows you to modify the file without entering the entire command script. Note: Sending command text files can be performed via the serial interface only. -
Page 39: Working With User Profiles
The procedure for setting up a new user profile is accomplished using the command line interface. 1. Establish a session with the generator using either HyperTerminal over a serial connection or Telnet over an Ethernet LAN. See “Establishing a terminal session with 881/882 Video Test Generator User Guide (Rev A.25) - Page 40 generator” on page 31 or “Establishing a Telnet session with the generator” on page 2. Enter the following command: username.xml USRA username.xml USRU Note: A user name is 8 alphanumeric characters. For example, to set up a user profile called “User3,” enter: USRA User3.xml USRU...
-
Page 41: Administrative Tasks
Overview • Calibrating the generator • Auto Upgrade • Upgrading the generator locally • Reconfiguring and booting a stalled generator • Cloning generators • Resetting a generator • Viewing generator configuration information 881/882 Video Test Generator User Guide (Rev A.25) - Page 42 Overview This section describes how to accomplish administrative tasks, including calibrating the generator, upgrading a generator, cloning a generator and maintaining the generator’s file system. Chapter 2 Administrative Tasks...
-
Page 43: Calibrating The Generator
3. Choose the System item by pressing the adjacent soft key. The System menu appears. Press the - key to scroll down until the CalFactor item appears. CalFactor Host Network About Serial Gpib BootFrom Init 881/882 Video Test Generator User Guide (Rev A.25) -
Page 44: Calibrating Frequency
4. Choose the CalFactor item by pressing the adjacent soft key. The following items appear on the generator’s display: Edit-Factors Self-Calibrate 5. Choose the Self-Calibrate item by pressing the adjacent soft key. During calibration, calibration factors and other information appear on the generator’s display. - Page 45 Press the - key to scroll down until the CalFactor item appears. CalFactor Host Network About Serial Gpib BootFrom Init 7. Choose the CalFactor item by pressing the adjacent soft key. The following items appear on the generator’s display: Edit-Factors Self-Calibrate 881/882 Video Test Generator User Guide (Rev A.25)
- Page 46 8. Choose the Edit Factors item by pressing the adjacent soft key. The following items appear on the generator’s display: Cal Factors Frequency -> RATC <- 1.000000000 a. Edit the RATC factor by pressing the soft keys adjacent to the bottom row until the cursor appears on the digit you want to change.
-
Page 47: Auto Upgrade - Network Method
Quantum Data periodically makes available new firmware releases for the 880 series generators. The Auto Update utility automates the process of upgrading firmware. It guides the user through the upgrade process, checking the Quantum Data website for the latest version and installing all files in the correct location on the generator. - Page 48 DHCP server on the network. The PC has to be connected to the Internet. Refer to the 880 Series User Guide, Chapter 3, “Networking Generators.” for full information on configuring a generator for network use. Refer to the diagrams below. Downloading and installing the Auto Update utility: The Auto Update utility is java-based, and requires the Java Virtual Machine (Java runtime) to be installed on the computer.
- Page 49 881/882 Video Test Generator User Guide (Rev A.25)
- Page 50 2. Select Network Upgrade, then Next. The Network Upgrade screen will appear: 3. Make sure you have network access to the generator, then select Next. Next you will have the opportunity to back up the files in the generator. If you have any custom images, formats, reports, or other files stored on the /tffs0 flash drive within the generator, they will be lost unless you choose to back up the files.
- Page 51 4. Optionally browse to a new backup directory, then click Next to begin the backup. If you don’t want to back up any files from the generator, click on Skip Backup. 5. Next, enter the IP address for the generator: 881/882 Video Test Generator User Guide (Rev A.25)
- Page 52 6. Click Next to continue. 7. If you see this screen, click Continue With Upgrade: Chapter 2 Administrative Tasks...
- Page 53 8. Next you must confirm that you are connected to the correct generator: Click Yes to continue. Next the utility will connect to the Quantum Data website to download the current firmware version for this generator, then display the version number and wait for your confirmation.
-
Page 54: Auto Upgrade - Pcmcia/Compact Flash Method
10. Now you must power cycle the generator to boot from the new firmware. Auto upgrade - PCMCIA/Compact Flash Method The second method of upgrading the generator using the auto upgrade feature is the PCMCIA/Compact Flash upgrade. This method is used when you connect the generator to the network and you cannot connect the PC to the generator but requires that you have a PC that is connected to the network (Internet). - Page 55 PCMCIA/Compact Flash card must be moved between the computer and the generator. Running the Auto Update utility: PCMCIA Upgrade 1. Run the utility by double-clicking on AutoUpdate.jar. You will be presented with the following screen: 881/882 Video Test Generator User Guide (Rev A.25)
- Page 56 2. Select PCMCIA Upgrade; then click Next. Prepare the PCMCIA/Compact Flash card per the following screen: 3. Click Next, then enter generator information (genstats) on the following screen. The button How To Get Genstats Manually will show you the method for reading genstats on an attached display.
- Page 57 5. When this information is correct, click on Next. 6. The utility will download the new firmware files from the Quantum Data website, and report the version number of the release: 7. Click on Yes, and the utility will extract the individual files from the downloaded release archive.
- Page 58 Chapter 2 Administrative Tasks...
- Page 59 You can type the drive letter into the space provided (such as G:\) or you can browse to the location. In either case, you must specify the root of the PCMCIA/Compact Flash card. 881/882 Video Test Generator User Guide (Rev A.25)
- Page 60 10. When the drive address is selected, click Next, and the backup files will be copied from the card onto the PC. When the backup is completed, the new release files will be Chapter 2 Administrative Tasks...
- Page 61 Then you will be prompted to insert the card back into the generator. 11. Click Next, and you will see the following screen instructing you to initiate the clone restore process by pressing Tools -> System -> Clone -> Restore. 881/882 Video Test Generator User Guide (Rev A.25)
- Page 62 12. After the clone restore is complete, you will again see the menu on the generator’s screen. Then click on Next. Chapter 2 Administrative Tasks...
- Page 63 881/882 Video Test Generator User Guide (Rev A.25)
- Page 64 13. Power cycle the generator, and it will boot the upgraded firmware. Chapter 2 Administrative Tasks...
-
Page 65: Upgrading The Generator Locally
Follow this procedure to upgrade a generator using the PC card. To upgrade a generator using the PC card: 1. Download the new release zip file from the Quantum Data download page (http://www.quantumdata.com/downloads/index.asp) and extract into a folder on your 2. - Page 66 3. If your PC does not have access to a PCMCIA slot or device, use the following procedure. You can skip this step if you performed Step 2 above. a. Access the generator’s main web page. For details on this, see “To connect directly to the generator:”...
-
Page 67: Manually Upgrading The Generator Without Using Pc Card
This procedure allows you to transfer (copy) the new release files (System and Library directories) directly to flash memory without using a PC Card. Follow this procedure to upgrade a generator without using a PC Card. 881/882 Video Test Generator User Guide (Rev A.25) - Page 68 1. Download the new release zip file from the Quantum Data download page (http://www.quantumdata.com/downloads/index.asp) and extract into a folder on your 2. Access the generator’s main web page. For details on this, see “To connect directly to generator:” on page 69.
-
Page 69: Connecting Generator Directly To A Pc
To establish communication between the PC and the generator, the generator must have an IP address. You can view and set the IP address through the front panel using the following procedures. 881/882 Video Test Generator User Guide (Rev A.25) - Page 70 To set the generator’s IP address: 1. Press the Tools key. The Tools menu appears on the generator’s display as shown below. System Reports Sequence ImgShift Probe Analyzer 2. Choose the System item by pressing the adjacent soft key. The System menu appears on the generator’s display as shown below.
-
Page 71: Setting The Pc's Network Settings
Panel, and then open the Network Connections window. 3. In the Network Connections window, right click the connection that represents your Ethernet card and select Properties. Select the Internet Protocol TCP/IP connection, and then click Properties. 881/882 Video Test Generator User Guide (Rev A.25) - Page 72 Note: If you have more than one Ethernet card make sure you configure the select the correct one. Chapter 2 Administrative Tasks...
- Page 73 5. Enter the subnet mask such that the network portion of the address is masked to a value of 255 for each. 6. Connect the crossover cable between the ETHERNET jack on the generator and the Ethernet jack on the PC. 881/882 Video Test Generator User Guide (Rev A.25)
- Page 74 7. Open a Web browser (such as Internet Explorer) and type the generator’s IP address in the address entry field. For example, enter the following: http://206.135.215.189/ The generator web page appears in the browser. Chapter 2 Administrative Tasks...
-
Page 75: Reconfiguring And Booting A Stalled Generator
To boot from the generator’s PC card, press the soft key adjacent to PCMCIA Boot. • 4. Press the Options (Enter) key to save the configuration. 5. Either restart the generator by cycling the power or press the Tools key to return to the boot menu. 881/882 Video Test Generator User Guide (Rev A.25) - Page 76 6. Scroll down to the allow viewing and selection of the BootNow item as shown below. !FileName !Other !InetAddr !TrgtName !HostAddr BootNow !User 7. Select BootNow by pressing the adjacent item selection key. 8. The following display appears: Press UP arrow to Boot Now 9.
- Page 77 “To boot a generator that is in a stalled state:” on page 73. 16. Restart the generator. 17. If the problem persists you may have to unseat the video board from the main board: http://www.quantumdata.com/support/videos/video.asp 881/882 Video Test Generator User Guide (Rev A.25)
- Page 78 18. Repeat the procedure. To boot a stalled generator from a different host: 1. Power down the generator, hold down the Tools key and then re-apply power to the generator. The following screen appears on the generator’s display: !BootDev !Passwd !HostName !Flags !FileName...
- Page 79 Adjust the value of the digit up or down by pressing the + or - keys. Repeat for each digit you want to change. 881/882 Video Test Generator User Guide (Rev A.25)
-
Page 80: Cloning A Generator Using The Pc Card
Cloning generators You can clone generators using either the generator’s PC card or the Generator FTP Browser over an Ethernet connection. To clone a generator, the firmware revision of the source and target generators must match. Cloning a generator using the PC card Follow this procedure to clone a generator using the PC card. - Page 81 To clone a generator using the Generator FTP Browser: 1. Connect the source generator to the PC using an Ethernet crossover cable between the Ethernet ports on the PC and the generator. 881/882 Video Test Generator User Guide (Rev A.25)
- Page 82 2. Access the source generator’s Generator FTP Browser. See “Working with the Generator FTP Browser” on page 24. 3. Copy all of the files in the source generator’s flash memory to the PC as follows: a. In the Instrument Files area of the Generator FTP Browser window, click the down arrow by the Look in box and select tffs0 (FlashMem).
- Page 83 (FlashMem). d. In the Host Files area, click Download. A confirmation dialog box appears. Click OK to download the source files to the generator. 9. Reboot the generator by cycling the power. 881/882 Video Test Generator User Guide (Rev A.25)
-
Page 84: Resetting A Generator
Resetting a generator You can reset a generator to a known good condition. Note: Resetting does not restore the generator to factory default condition. Thus, it should not be used to restore proper operation of the generator. Follow this procedure to reset a generator. To reset the generator using the command line interface: 1. -
Page 85: Viewing Generator Configuration Information
4. Press the Settings key. The main board information appears. Press the soft key adjacent to the arrow by Serial Number to see other information about the main board. About Main Board -> Serial Number -> 39298E000000 881/882 Video Test Generator User Guide (Rev A.25) - Page 86 5. To view the video board information, pressing the soft key adjacent to the arrow by Main Board. The video board build date appears as shown below. Press the soft key adjacent to the arrow by Build Date to see other information about the video board. About <- Video Board...
- Page 87 3. Choose the Misc item by pressing the adjacent soft key. The following menu appears on the generator’s display. !Formats !Genstats 4. Choose the !GenStats item by pressing the adjacent soft key. The generator display will briefly indicate that the report is being generated. 881/882 Video Test Generator User Guide (Rev A.25)
- Page 88 5. Open a Web browser (such as Internet Explorer) and type the generator’s IP address in the address entry field. For example, enter the following: http://206.135.215.189/ The generator home page appears in the browser. Note: You can add the page to your list of favorite pages in your Web browser to avoid retyping the IP address each time you want to access the page.
- Page 89 6. Choose the Generated Reports item. The Generator the provides a list of reports currently available as shown below. 881/882 Video Test Generator User Guide (Rev A.25)
- Page 90 7. Select the GenStats report. The GenStats report then appears in the browser window as shown below. You can then save the report as an web page file for distribution. Chapter 2 Administrative Tasks...
- Page 91 • Configuring a file server • Establishing a network environment • Network operations • Controlling a generator remotely • Upgrading generators over a network • Cloning generators using the generator FTP Browser 881/882 Video Test Generator User Guide (Rev A.25)
- Page 92 Overview This chapter describes how to use the generator in a networked environment. Quantum 882 generators can operate and be administered over an Ethernet LAN connection. By networking multiple generators together, you can centralize control in production environments. When networking generators, a file server containing a set of system and resource files is installed on the network.
-
Page 93: Configuring A File Server
Browse mode. Any standard FTP server program, such as Microsoft FTP Server, can be used. Microsoft FTP Server operates with Microsoft Internet Information Services; therefore, both must be installed on the server PC. 881/882 Video Test Generator User Guide (Rev A.25) - Page 94 To set up the FTP server: 1. Install the FTP server software on the file server PC and create the FTP site directory. You can use Microsoft Internet Information Services shown below. 2. Configure the FTP site properties. a. On the Home Directory tab, enter the name of the Local Path (your default directory for the FTP server).
- Page 95 C:\Inetpub\ftproot as the local path as shown below. You can use this path or click Browse to select a different path. b. On the Home Directory tab, specify read/write access. c. On the Security Accounts tab, select Allow only anonymous connections, and then click OK. 881/882 Video Test Generator User Guide (Rev A.25)
- Page 96 After installing the FTP server, you can download the generator system and resource files from the Quantum Data Web site and copy them to the FTP site on the file server. To copy generator system and resource files to the file server: 1.
- Page 97 4. Move the vxWorks file out of the System folder and into the ftproot folder. 881/882 Video Test Generator User Guide (Rev A.25)
-
Page 98: Establishing A Network Environment
Establishing a network environment To create a network environment for your generators, you must physically connect the generators to the network, and then configure their IP addresses and the IP address of the file server. Procedures for these tasks are described in this section. Connecting generators to the network In a typical networked environment, you will connect the generators to the corporate, IP-based Ethernet LAN. - Page 99 To set the IP address of the generator: 1. Press the Tools key. The Tools menu appears on the generator’s display as shown below. System Reports Sequence ImgShift Probe Analyzer 881/882 Video Test Generator User Guide (Rev A.25)
- Page 100 2. Choose the System item by pressing the adjacent soft key. The System menu appears on the generator’s display as shown below. *Clock Clone CalFactor Server Network About Serial Gpib 3. Choose the Network item by pressing the adjacent soft key. The generator’s IP address and subnet mask appear on the generator’s display as shown below.
- Page 101 3. Choose the Network item by pressing the adjacent soft key. The generator’s IP address and subnet mask appear on the generator’s display as shown below. IP Address 192.168.254.001 Subnet Mask 255.255.255.000 881/882 Video Test Generator User Guide (Rev A.25)
- Page 102 4. Press the Settings key. The Network Connection screen appears on the generator’s display as shown below. Network Connection Set TCP/IP IP Address 206.135.215.168 If the DHCP configuration option is not visible, press the soft key adjacent to the arrow symbol by SubnetMask or IP Address until the DHCP configuration screen appears.
- Page 103 Adjust the value of the digit up or down by pressing the + or - keys. Repeat for each address digit you want to change. 881/882 Video Test Generator User Guide (Rev A.25)
- Page 104 6. (Optional) Change the host name as follows: a. If the Host Name configuration option is not visible, press the soft key adjacent to the arrow symbol by Host Address until Host Name appears. b. Position the blinking cursor on the character you want to change. To do this, press the soft key adjacent to the arrow by the name to move the cursor left or right until it appears on the character you want to change.
-
Page 105: Network Operations
About Serial Gpib BootFrom Init 5. Choose the BootFrom item by pressing the adjacent soft key. The BootFrom menu appears on the generator’s display as shown below. Boot From Server Flash *Card 881/882 Video Test Generator User Guide (Rev A.25) -
Page 106: Sharing Objects On A File Server
6. Choose the NetPlace item by pressing the adjacent soft key. Sharing objects on a file server The generator can be set up to access shared format, image, and sequence files stored on a file server. To do this, you must set the generator’s path to point to the corresponding folders on the file server. - Page 107 Formats folder, press the soft key adjacent to Formats. The contents of the selected folder appears on the generator’s display. 5. Choose an item by pressing the adjacent soft key. The path is now set to the selected folder on the file server. 881/882 Video Test Generator User Guide (Rev A.25)
- Page 108 Controlling a generator remotely In addition to controlling the generator using the front panel keys, you can also control the generator from a remote PC either through the Virtual Front Panel Web-based interface or the command line interface. Using the Virtual Front Panel to operate a generator remotely The 882 generator has a built-in Web server that provides a graphical interface called the Virtual Front Panel to control the generator.
-
Page 109: Upgrade Options And Procedures
To begin an upgrade, you must either have a CD-ROM containing the new files, or download the files from the Quantum Data Web site. You will copy the new files to your file server PC which must be connected to the LAN through the Ethernet cable. -
Page 110: Copying Files To The Pc File Server
FTP folder. Before you begin, you must either have a CD-ROM containing the new system, gateware, and library files, or download the files from the Quantum Data Web site. To copy the new files to the file server: 1. - Page 111 The upgrade is now complete and you are ready to reboot the generators from the updated system files you just copied to each generator’s flash memory. Reboot each generator by cycling the power. 881/882 Video Test Generator User Guide (Rev A.25)
- Page 112 Cloning generators using the generator FTP Browser You can clone generators either through the front panel or through the Generator FTP Browser on the Virtual Front Panel Web page. Procedures for cloning generators through the front panel are provided in “Cloning generators”...
- Page 113 Hold down the SHIFT key and drag the selected folders to the Instrument Files area of the target generator’s Generator FTP Browser window. A confirmation dialog box appears. d. Click OK to copy the files. 881/882 Video Test Generator User Guide (Rev A.25)
- Page 114 Chapter 3 Networking Generators...
Need help?
Do you have a question about the 881 and is the answer not in the manual?
Questions and answers