SMA SUNNY ISLAND 4.4M Operating Manual
Hide thumbs
Also See for SUNNY ISLAND 4.4M:
- Quick reference manual (310 pages) ,
- Operating manual (192 pages) ,
- Replacement of various components (32 pages)

Related Manuals for SMA SUNNY ISLAND 4.4M


Summary of Contents for SMA SUNNY ISLAND 4.4M
- Page 1 Operating manual SUNNY ISLAND 4.4M / 6.0H / 8.0H ENGLISH SI44M-80H-13-BE-en-15 | Version 1.5...
- Page 2 Legal Provisions The information contained in these documents is the property of SMA Solar Technology AG. No part of this document may be reproduced, stored in a retrieval system, or transmitted, in any form or by any means, be it electronic, mechanical, photographic, magnetic or otherwise, without the prior written permission of SMA Solar Technology AG.
-
Page 3: Table Of Contents
SMA Solar Technology AG Table of Contents Table of Contents Information on this Document..................... Validity................................Target Group ..............................Levels of warning messages..........................Symbols in the Document..........................Typographical Elements in the Document ...................... Designations in the Document......................... Explanation of Used Terms ..........................10 Additional Information............................. - Page 4 Table of Contents SMA Solar Technology AG 6.5.7.3 Connecting the Data Cable for the Internal Communication of the Cluster ..........42 6.5.7.4 Connecting the Data Cable of the Multicluster-Box..................42 6.5.7.5 Connecting Control and Measuring Cables of the Multicluster-Box ............43 6.5.7.6...
- Page 5 SMA Solar Technology AG Table of Contents 7.8.1.1 Changing the Current Thresholds for the Generator ..................92 7.8.1.2 Changing the Voltage Thresholds for the Generator..................93 7.8.1.3 Changing the Frequency Thresholds of the Generator Voltage..............93 7.8.1.4 Changing the Permitted Reverse Power in the Generator ................93 7.8.1.5...
- Page 6 Table of Contents SMA Solar Technology AG Stopping the System ............................119 Switching off the System..........................119 Tripping the Emergency Disconnection of the System...................120 10 Data Storage and Firmware Update ..................121 10.1 Viewing Event Messages or Instantaneous Values..................121 10.2 Exporting Event Messages ..........................121 10.3 Exporting Service Files and Values.........................121...
- Page 7 16.2 AC2 Connection for Utility Grid and Generator (External Energy Source) ..........176 16.3 DC Connection for Battery..........................176 16.4 Efficiency ................................178 16.5 Sunny Island 4.4M Efficiency Profile......................178 16.6 Sunny Island 6.0H Efficiency Profile.......................179 16.7 Sunny Island 8.0H Efficiency Profile.......................180 16.8 Switchover times of the Sunny Island 6.0H / 8.0H ..................180 16.9 Energy Consumption in No-Load Operation and Standby or Energy-Saving Mode........180...
-
Page 8: Information On This Document
1 Information on this Document SMA Solar Technology AG 1 Information on this Document Validity This document is valid for: • SI4.4M-13 (Sunny Island 4.4M) from firmware version 3.30.12.R • SI6.0H-13 (Sunny Island 6.0H) from firmware version 3.30.12.R • SI8.0H-13 (Sunny Island 8.0H) from firmware version 3.30.12.R Target Group This document is intended for qualified persons and operators. -
Page 9: Typographical Elements In The Document
SMA Solar Technology AG 1 Information on this Document Icon Explanation Desired result ☑ Example This information is relevant for systems which are to be operated in parallel with utility grid: • System for increased self-consumption (storage system) • Battery-backup system Content is relevant for off-grid systems. -
Page 10: Explanation Of Used Terms
Explanation of Used Terms Term Explanation SMA Energy System Home In the SMA Energy System Home (storage system), the Sunny Island uses the connected battery for the intermediate storage of excess PV energy for increased self-consumption. Battery-backup system In the event of grid failure, a battery-backup system supplies loads with energy and a PV system disconnected from the utility grid with voltage. - Page 11 SMA Solar Technology AG 1 Information on this Document Title and information content Type of information "Multicluster Systems with Stand-Alone Grid or Increased Self-Consumption and System description Battery-Backup Function" Detailed system information, connection overviews and information on commis- sioning MULTICLUSTER-BOX 6.3-11 Installation –...
-
Page 12: Safety
Alterations to the SMA products, e.g., changes or modifications, are only permitted with the express written permission of SMA Solar Technology AG. Unauthorized alterations will void guarantee and warranty claims and in most cases terminate the operating license. SMA Solar Technology AG shall not be held liable for any damage caused by such changes. -
Page 13: Important Safety Instructions
SMA Solar Technology AG 2 Safety The type label must remain permanently attached to the product. IMPORTANT SAFETY INSTRUCTIONS Keep the manual for future reference. This section contains safety information that must be observed at all times when working. The product has been designed and tested in accordance with international safety requirements. As with all electrical or electronical devices, there are residual risks despite careful construction. - Page 14 2 Safety SMA Solar Technology AG DANGER Danger to life due to electric shock in case of overvoltages and unsuitable loads Overvoltages of up to 1500 V can occur in the stand-alone grid and in the battery-backup grid. If the loads are not suitable for these overvoltages or are not safe to operate, a voltage that poses a danger to life may be present on accessible parts or cables.
- Page 15 SMA Solar Technology AG 2 Safety WARNING Danger to life from electric shock due to circuit breakers that cannot be tripped In off-grid systems and battery-backup systems, the Sunny Island can only trip circuit breakers up to a certain tripping characteristic. Circuit breakers with a higher operating current cannot be tripped. Under fault conditions, a voltage that poses a danger to life may be present on accessible parts for several seconds.
-
Page 16: Battery Safety Information
Sunny Portal or the use of FTP push. High costs for the Internet connection can be the result. • SMA Solar Technology AG recommends using an Internet flat rate. A country data set must be set for feed-in operation To ensure the inverter begins feed-in operation during initial commissioning, a country data set must be set (for instance via the installation assistant on the user interface of the product, or via a communication product). - Page 17 SMA Solar Technology AG 2 Safety WARNING Danger to life due to explosive gases Explosive gases may escape from the battery and cause an explosion. • Protect the battery environment from open flames, embers and sparks. • Install, operate and maintain the battery in accordance with the manufacturer’s specifications.
- Page 18 2 Safety SMA Solar Technology AG NOTICE Damage to the battery due to incorrect settings The set battery parameters influence the charging behavior of the inverter. The battery can be damaged by incorrect settings of the battery type, nominal voltage and capacity parameters.
-
Page 19: Scope Of Delivery
SMA Solar Technology AG 3 Scope of Delivery 3 Scope of Delivery Check the scope of delivery for completeness and any externally visible damage. Contact your distributor if the scope of delivery is incomplete or damaged. Sunny Island Figure 1: Components included in scope of delivery... - Page 20 3 Scope of Delivery SMA Solar Technology AG Position Quan- Designation Position Quan- Designation tity tity Cable gland M25 Micro SD card (optional) Counter nut for cable gland M25 Battery temperature sensor (optional) Communication for Multicluster System Order Option Position...
-
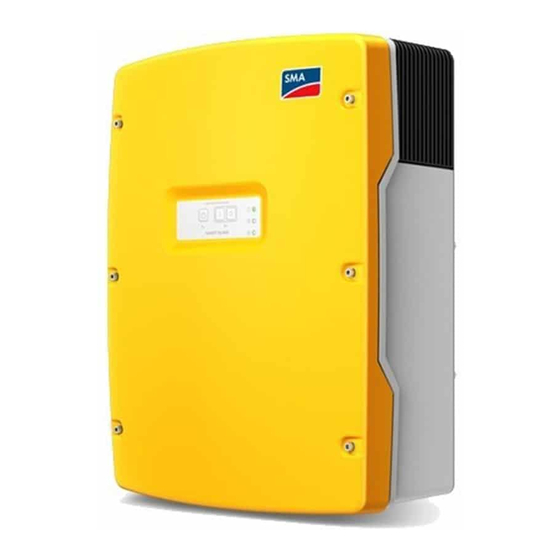
Page 21: Product Overview
Figure 2: Design of the Sunny Island inverter Position Designation Enclosure lid Label with QR Code for scanning via the SMA 360° App and easy connection to the in- verter's user interface via WLAN Control panel with LED signals Ventilation grid Type label The type label uniquely identifies the inverter. - Page 22 4 Product Overview SMA Solar Technology AG Icon Explanation Beware of electrical voltage The product operates at high voltages. Beware of hot surface The product can get hot during operation. Danger to life due to high voltages in the inverter; observe a waiting time of 15 minutes.
-
Page 23: Overview Of Firmware Versions
SMA Solar Technology AG 4 Product Overview Overview of firmware versions Systems with parallel operation with the utility grid The system structure and system configuration (e.g. as battery-backup system) determine the firmware version that is required for commissioning the system. - Page 24 WLAN connection to SMA 360° app The product has a QR code. By scanning the QR Code attached to the product via the SMA 360° app, access to the product is established via WLAN and the connection to the user interface is made automatically.
-
Page 25: Control Panel With Led Signals
Sunny Island system can be traced. From this, for example, parameter settings can be derived that will e.g. increase the self-consumption of PV energy or the service life of the battery. For SMA Service, this data simplifies the analysis of any errors present and the identification of possible solutions. -
Page 26: Multifunction Relay
4 Product Overview SMA Solar Technology AG Position Icon Designation LED signal Explanation Grid LED Not glowing There is no voltage present from the generator or the utility grid. Glowing green Generator or utility grid is connected. Glowing orange The Sunny Island is synchronizing the stand- alone grid with the generator or the utility grid. -
Page 27: Information On Battery-Backup Systems
SMA Solar Technology AG 4 Product Overview Possible function or Explanation output Display of operating Each multifunction relay can display either one event or one warning message (see Sec- states and warning tion 6.5.14, page 51). messages Control of a battery- The multifunction relay is activated when the charging current causes the battery to emit room fan gasses. -
Page 28: Mounting
5 Mounting SMA Solar Technology AG 5 Mounting Requirements for Mounting Requirements for the mounting location: WARNING Danger to life due to fire or explosion Despite careful construction, electrical devices can cause fires. This can result in death or serious injury. - Page 29 SMA Solar Technology AG 5 Mounting 90° ... ≥75° 0° Figure 4: Permitted and prohibited mounting positions Dimensions for mounting: 217.3 217.3 Ø 11 79.2 104.6 87.3 87.3 Ø 9 58.3 58.3 Figure 5: Position of the anchoring points(Dimensions in mm) Recommended clearances: If you maintain the recommended clearances, adequate heat dissipation will be ensured.
-
Page 30: Mounting The Sunny Island
5 Mounting SMA Solar Technology AG 1035 Figure 6: Recommended clearances(Dimensions in mm) Mounting the Sunny Island CAUTION Risk of injury due to weight of product Injuries may result if the product is lifted incorrectly or dropped while being transported or mounted. - Page 31 SMA Solar Technology AG 5 Mounting 5. If the Sunny Island is to be secured against theft, mark the drill holes for the anti-theft device. Use at least one hole on the right and one on the left. 6. Mount the SI4.4M-13 to the wall mounting bracket. For this, use the side recess grips.
-
Page 32: Electrical Connection
6 Electrical Connection SMA Solar Technology AG 6 Electrical Connection Content and Structure of the Section Some of the following sub-sections relate to the physical connection of components or the use of physical connections on the Sunny Island. Other sub-sections describe actions that must always be performed. -
Page 33: Overview Of The Connection Area
SMA Solar Technology AG 6 Electrical Connection Overview of the Connection Area NO C NO C Relay 1 Relay 2 Figure 7: Connection area of the Sunny Island inverter Position Designation Position Designation DC+ connection Enclosure opening for DC- DC- connection... -
Page 34: Inserting The Micro Sd Card
The optional micro SD card extends the data storage capacity of the inverter (see Section 16.14, page 182). The micro SD card can be ordered as an optional accessory from SMA Solar Technology AG or purchased via specialist retailers. Perform the following steps to insert the micro SD card. -
Page 35: Connecting The Components
DC energy sources have interference immunity for industrial environments (e.g. according to EN 61000-6-2). SMA recommends the Sunny Island Charger of MSTE SOLAR GmbH as DC charge controller. The recommended minimum conductor cross-section depends on the battery voltage, the power and the length of the... -
Page 36: Connecting The Utility Grid In The System For Increased Self-Consumption
☐ For connection of the Sunny Island inverter to the utility grid, there must be a circuit breaker and a type A residual- current device on the distribution board (see circuitry overview in the quick reference guide "SMA Energy System Home") Procedure: 1. -
Page 37: Connecting An Automatic Transfer Switch In The Battery Backup System
Relevant for systems connected to the utility grid The AC power cables conduct the energy between the battery-backup grid and the Sunny Island (see circuitry overview in the quick reference guide "SMA Energy System Home with Battery-Backup Function"). Requirements: ☐ With each three-phase cluster, the connection of the line conductor must be prepared as follows: L1 to the master, L2 to slave 1 and L3 to slave 2. -
Page 38: Connecting The Measuring Cables Of The Automatic Transfer Switch
The Sunny Island measures the voltages of the respective line conductors via 1 measuring cable. In addition, the master measures whether the tie switch has activated or deactivated (see circuitry overview in the quick reference guide "SMA Energy System Home with Battery-Backup Function"). Cable route for control cables and measuring cables in the automatic transfer switch... -
Page 39: Connection Of Multicluster-Box 12 (Mc-Box-12.3-20)
SMA Solar Technology AG 6 Electrical Connection WARNING Danger to life due to fire In case of a short circuit, the short-circuit current driven by the generator flows over the unprotected cable between the Sunny Island and the AC distribution board. Short-circuit currents can cause fires. -
Page 40: Connecting The Measuring Cable Of The Multicluster-Box 12
6 Electrical Connection SMA Solar Technology AG WARNING Danger to life from electric shock due to incorrect insulation In the case of faulty insulation, supposedly de-energized parts or cables may be live. Touching live components or cables can result in death or serious injury due to electric shock. -
Page 41: Communication Connection
SMA Solar Technology AG 6 Electrical Connection Requirements: ☐ A separate cable must be laid for each Sunny Island from the AC distribution board or directly from the generator. ☐ For a single-phase parallel cluster, the cable length and the conductor cross-section must be identical from each Sunny Island to the AC distribution board or directly to the generator. -
Page 42: Connecting The Data Cable For The Internal Communication Of The Cluster
6 Electrical Connection SMA Solar Technology AG PIN assignment for CAN battery communication: Assignment CAN Ground CAN High CAN Low Procedure: 1. Plug the data cable into a free pin connector ComSync on the Sunny Island (see Section 6.6.4, page 59). 2. Connect the other end of the data cable to the battery management of the lithium-ion battery (see battery manufacturer documentation). -
Page 43: Connecting Control And Measuring Cables Of The Multicluster-Box
SMA Solar Technology AG 6 Electrical Connection Cable requirements: ☐ Classification: CAT5e ☐ Type of plug: RJ45 Procedure: 1. Plug the black data cable into a free pin connector ComSync on the Sunny Island (see Section 6.6.4, page 59). 2. Connect the other end of the black data cable to the Multicluster-Box (see Multicluster-Box documentation). -
Page 44: Connecting The Battery Temperature Sensor
6 Electrical Connection SMA Solar Technology AG Cable requirements: ☐ Classification: CAT5e ☐ Maximum cable length: 30 m Procedure: 1. Ensure that the communication interface SI-SYSCAN.BGx is installed in each master (see SI-SYSCAN-NR documentation). 2. Remove the terminator from the SysCanOut pin connector on the master of the main cluster and plug it into the SysCanIn pin connector. -
Page 45: Connecting The Battery Current Sensor In The Off-Grid System
When using lead-acid batteries, a battery current sensor can be installed for precise measurement of the battery current. SMA Solar Technology AG also recommends installing a battery current sensor when connecting DC loads or DC energy sources. When connecting DC loads or DC energy sources, the SOC calculation can only work correctly with the measured data from the battery current sensor. -
Page 46: Connecting The Control Cable For Autostart Generators
6 Electrical Connection SMA Solar Technology AG 2. Connect the BatCur+ insulated measuring conductor to the side Battery fuse for connecting the battery fuse on the battery current sensor. BatCur + BatCur − Battery 3. Connect the BatCur- insulated measuring conductor to the side Battery fuse for connecting the battery on the battery current sensor. -
Page 47: Connecting A Signaler For Generators Without An Autostart Function
SMA Solar Technology AG 6 Electrical Connection Procedure: WARNING Danger to life from electric shock due to incorrect insulation In the case of faulty insulation, supposedly de-energized parts or cables may be live. Touching live components or cables can result in death or serious injury due to electric shock. -
Page 48: Connecting Load-Shedding Contactors
6 Electrical Connection SMA Solar Technology AG Procedure: WARNING Danger to life from electric shock due to incorrect insulation In the case of faulty insulation, supposedly de-energized parts or cables may be live. Touching live components or cables can result in death or serious injury due to electric shock. - Page 49 SMA Solar Technology AG 6 Electrical Connection Specifications for load-shedding configuration: Load shedding in a multicluster system One-level load shedding is integrated into the Multicluster-Box. The load-shedding contactor is controlled directly by the master of the main cluster via communication with the Multicluster-Box. If you install an additional load- shedding contactor in a multicluster system, it is controlled with a multifunction relay in the master of extension cluster 1.
-
Page 50: Connecting The Time Control For External Processes
6 Electrical Connection SMA Solar Technology AG Procedure: 1. Ensure that the load-shedding contactor only disconnects loads from the system. This ensures that the battery can be recharged from AC sources in the system. Observe default setting of the battery inverter The default setting of the battery inverter uses the multifunction relay Relay2 for load shedding. -
Page 51: Connecting Message Devices For Operating States And Warning Messages
SMA Solar Technology AG 6 Electrical Connection 6.5.14 Connecting Message Devices for Operating States and Warning Messages You can connect message devices to the multifunction relays to allow operating states and warning messages from the Sunny Island inverter to be output. 1 of the following operating states and warning messages can be displayed for each multifunction relay: •... -
Page 52: Connecting The Battery Room Fan
6 Electrical Connection SMA Solar Technology AG Procedure: WARNING Danger to life from electric shock due to incorrect insulation In the case of faulty insulation, supposedly de-energized parts or cables may be live. Touching live components or cables can result in death or serious injury due to electric shock. -
Page 53: Connecting The Electrolyte Pump For The Battery
SMA Solar Technology AG 6 Electrical Connection WARNING Danger to life from electric shock due to incorrect insulation In the case of faulty insulation, supposedly de-energized parts or cables may be live. Touching live components or cables can result in death or serious injury due to electric shock. -
Page 54: Connecting The Signal Cable Of The External Generator Request
6 Electrical Connection SMA Solar Technology AG Use of excess energy The energy source of an off-grid system is PV energy. On days with high solar irradiation and low power consumption, the battery cannot take up all of the PV energy during the constant voltage phase. In order to utilize the excess energy, the Sunny Island activates the control of a pump that pumps water into a container for subsequent use. -
Page 55: Connecting The Cables
• Ensure that the lithium-ion batteries are approved for use with the Sunny Island (see technical information “List of Approved Batteries” at www.SMA-Solar.com). • If no lithium-ion batteries approved for the inverter can be used, lead-acid batteries can be used. - Page 56 6 Electrical Connection SMA Solar Technology AG NOTICE Damage to the battery inverter due to excessive electric currents because of the DC cables being incorrectly connected If the DC cables are swapped or incorrectly connected, dangerously high currents will flow after the load- break switch has closed.
-
Page 57: Connecting The Ac Power Cable
SMA Solar Technology AG 6 Electrical Connection 13. Use an Allen key (AF 5) to fasten the DC-cable to the DC- connection with an M8x20 pan head screw (torque: 12 Nm). Be sure to adhere to the following screw assembly: screw head | conical spring washer | fender washer | terminal lug | DC connection. - Page 58 6 Electrical Connection SMA Solar Technology AG WARNING Danger to life from electric shock due to incorrect connection of the neutral conductor ins single systems and single-cluster systems In single systems and single-cluster systems, the neutral conductor of the external energy source is firmly connected to the neutral conductor of the Sunny Island inverter on connection AC2 Gen/Grid N.
-
Page 59: Connecting The Grounding Conductor
SMA Solar Technology AG 6 Electrical Connection 7. Insert the line conductor as far as it will go into terminal L and push the lever down. 8. Connect the grounding conductor (see Section 6.6.3, page 59). 9. Ensure that the seal insert is positioned correctly in the cable gland. -
Page 60: Connecting Relay 1 And Relay 2
6 Electrical Connection SMA Solar Technology AG 5. When all data cables are connected, select two cable support sleeves with a suitable number of openings. 6. Open the cable support sleeves and place the cables in the cable support sleeves. -
Page 61: Connecting Batvtgout, Digin, Battmp And Batcur
SMA Solar Technology AG 6 Electrical Connection Cable requirements: ☐ Conductor type: copper wire ☐ Conductor cross-section: 0.2 mm² to 2.5 mm² Procedure: 1. Break through a suitable location in the cable feed-through plate with a sharp object. 2. Strip 7 mm of the cable insulation. -
Page 62: Connecting Extvtg
6 Electrical Connection SMA Solar Technology AG ☐ Cable length for BatCur: less than 3 m ☐ Cable length for BatVtgOut, DigIn, and BatTemp: less than 30 m ☐ If cable lengths of 30 m and more are required for BatVtgOut, DigIn, and BatTemp, suitable lightning protection precautions must be taken. -
Page 63: Checking The Wiring
SMA Solar Technology AG 6 Electrical Connection 7. Ensure that the seal insert is positioned correctly in the cable gland. 8. Tighten the swivel nut of the cable gland (torque: 2.6 Nm). Checking the Wiring Ensure that you carry out all tests relevant to the system and rectify all detected problems. Tip: Tests can be documented directly in the tables. - Page 64 6 Electrical Connection SMA Solar Technology AG Test point Test criterion DC connection Terminal lugs are pressed on firmly. ☐ The bolted connection for fitting terminal lugs to the DC connection is ☐ assembled as follows: head of M8x20 screw | conical spring washer | fender washer | terminal lug | DC connection.
- Page 65 SMA Solar Technology AG 6 Electrical Connection Checking the Generator Connection Test point Test criterion The connection cables The conductor cross-section is sufficient for the maximum generator ☐ current. The cables are sufficiently protected by circuit breakers. ☐ With a three-phase off-grid system, al- The allocation of the Sunny Island inverters to the line conductors of...
-
Page 66: Sealing And Closing The Sunny Island
6 Electrical Connection SMA Solar Technology AG Checking the Wiring of the Communication Products Test point Test criterion Electricity supply to communication The plug-in power supply units are plugged in. ☐ products The communication products are connected to an electricity supply. -
Page 67: Inserting The Fuse Links In The Fuse Switch-Disconnector
SMA Solar Technology AG 6 Electrical Connection 3. Seal the cable feed-through plate (B) using the provided sealing compound. The sealing compound must completely seal the cable feed-through plate and the gap between the cable feed-through plate and enclosure. 4. Attach 1 serrated conical spring washer to each screw. Ensure that the grooved side of the serrated conical spring washer points to the screw head. -
Page 68: Commissioning
Section 7.3, page 69 SMA Grid Guard code for changing the grid-relevant parameters must be available after completion of the first 10 operating hours. You can request the SMA Grid Guard code via the Online Service Center. Make individual parameter settings: • Set country data set. -
Page 69: Commissioning The Inverter
In order to receive service assignments for the Sunny Island system, all system data must be recorded in the information sheet for Sunny Island systems during commissioning and made available to Service (for information sheet see www.SMA-Solar.com). Start the system. Section 9.2, page 118... -
Page 70: Configuring The Country Data Set
7 Commissioning SMA Solar Technology AG Once you have logged into the user interface as Installer, the installation assistant opens. Layout of the installation assistant Figure 16: Layout of the installation assistant (example) Position Designation Description Configuration steps Overview of the installation assistant steps. The number of steps de- pends on the type of device and the additionally installed modules. -
Page 71: Changing Thresholds For Systems For Increased Self-Consumption
≤ 2.99.99.R. • It is decided how to proceed according to the locally valid regulations and the SMA manufacturer's declaration valid for the country of use. Set the generally valid country dataset according to EN 50549 with the firmware version ≥... -
Page 72: Lead-Acid Batteries: Adjust The Battery Management To The Battery
You will find further information on battery management and the charging processes of the Sunny Island for lead-acid batteries in the technical information "Battery Management" at www.SMA-Solar.com. The basic procedure for changing operating parameters is explained in another section (see Section 8.6, page 113). - Page 73 SMA Solar Technology AG 7 Commissioning • Systems for increasing self-consumption that are not intended to feed in any excess PV energy (zero feed-in systems) and therefore switch off the PV system by means of a contactor before the battery state of charge reaches 100% SOC (see planning guidelines "PV systems with zero export").
-
Page 74: Battery Use Regarding Systems For Increased Self-Consumption
7 Commissioning SMA Solar Technology AG Parameter Explanation Time until interrupting the equalization If neither SOC range 1 nor SOC range 2 could be completed within charge for lithium-ion batteries the time specified by this parameter, the equalization charge is inter- rupted. - Page 75 SMA Solar Technology AG 7 Commissioning The longer the days become, the more the SlfCsmp range increases automatically and the range for protection against deep discharge (BatRes) decreases. The range for increased self-consumption reaches its maximum on the longest day.
- Page 76 7 Commissioning SMA Solar Technology AG Range Explanation of the range and parameters Behavior of the Sunny Island inverter Deep discharge protection range (BatRes) If a utility grid is available, the Sunny Island charges the battery using nominal power This range can only be reached when the utility grid fails.
-
Page 77: Changing The Battery Usage Regarding Battery-Backup Systems With Increased Self-Consumption
SMA Solar Technology AG 7 Commissioning Parameters for battery use: If the values for the battery usage ranges are incorrect, no adjustment is possible If all battery usage ranges combined exceed 100%, the parameters for battery usage cannot be set. - Page 78 7 Commissioning SMA Solar Technology AG • Increased self-consumption range (SlfCsmp) You determine the percentage of the battery capacity that is to be used for increased self-consumption on the shortest day of the year. • Range for battery-backup function (BURes) You specify the percentage of the battery capacity that is to be used for the battery-backup function on the longest day.
- Page 79 SMA Solar Technology AG 7 Commissioning Range Explanation of the range and parameters Behavior of the Sunny Island inverter State of charge conservation range (PVRes) Excess PV energy is used for conserving the battery charge. If no excess PV energy is The range size is constant year-round.
- Page 80 7 Commissioning SMA Solar Technology AG Range Lead-acid battery Lithium-ion battery Shortest day Longest day Shortest day Longest day Deep discharge 10% to 15% 10% to 15% 3% to 13% 3% to 13% protection range Deep discharge 0% to 10%...
-
Page 81: Changing The Battery Usage Regarding Battery-Backup Systems Without Increased Self-Consumption
SMA Solar Technology AG 7 Commissioning Parameter Value Minimum width of deep discharge protection Range for protection against deep discharge as a per- range centage of the battery capacity Within this range, the system goes into energy-saving mode and automatically attempts to recharge the battery from available PV energy. - Page 82 7 Commissioning SMA Solar Technology AG Ranges for battery use: 100 % Winter Summer Winter (Summer) (Winter) (Summer) Figure 19: State of charge ranges of the battery according to the time of year (example) Range Explanation of the range and parameters Behavior of the Sunny Island inverter...
- Page 83 SMA Solar Technology AG 7 Commissioning The following ranges result from the parameter default values: Range Lead-acid battery Lithium-ion battery Backup power 15% to 100% 13% to 100% range Deep discharge 10% to 15% 3% to 13% protection range Deep discharge...
-
Page 84: Changing The Battery Protection Mode In Off-Grid Systems
7 Commissioning SMA Solar Technology AG 7.6.6 Changing the Battery Protection Mode in Off-Grid Systems Relevant for off-grid systems The basic procedure for changing operating parameters is explained in another section (see Section 8.6, page 113). Function of the battery protection mode: The battery protection mode protects the battery. -
Page 85: Energy-Saving Mode
SMA Solar Technology AG 7 Commissioning 7.6.7 Energy-saving mode The battery inverter has an energy-saving mode where the power consumption is less than 7 watts. When entering and leaving the energy-saving mode, the battery inverter behaves depending on the operating mode (stand-alone mode and parallel grid operation mode). -
Page 86: Setting The Control Of The Battery Room Fan
7 Commissioning SMA Solar Technology AG • R = total resistance of the battery fuse (see manufacturer documentation) battery fuse The basic procedure for changing operating parameters is explained in another section (see Section 8.6, page 113). Procedure: 1. Calculate the individual cable resistances. -
Page 87: Setting One-Level Load Shedding
SMA Solar Technology AG 7 Commissioning 7.7.2 Setting One-Level Load Shedding The basic procedure for changing operating parameters is explained in another section (see Section 8.6, page 113). 1 multifunction relay controls the load-shedding contactor depending on the state of charge of the battery. -
Page 88: Setting Time-Dependent One-Level Load Shedding
7 Commissioning SMA Solar Technology AG • Set the second stage of load shedding. Set the first stage of load shedding 1. Select Device > Load shedding 1 > Additional time range. 2. Set the parameter Lmt value battery state of charge for start load shedding 1 to the lower SOC threshold. - Page 89 SMA Solar Technology AG 7 Commissioning 80 % 40 % 30 % 12 a.m. 6 a.m. 10 p.m. Standard time period Additional time period Figure 21: Profile of the SOC thresholds for controlling the load-shedding contactor and the start times for the intervals The start time for the first interval is set to 6:00 a.m.
-
Page 90: Setting Time-Dependent Two-Level Load Shedding
7 Commissioning SMA Solar Technology AG 7.7.5 Setting Time-Dependent Two-Level Load Shedding The basic procedure for changing operating parameters is explained in another section (see Section 8.6, page 113). The time-dependent load shedding divides the day into 2 intervals (see Section 8.12.2, page 117). You set the SOC thresholds that apply for each interval for 2-stage load shedding. -
Page 91: Setting Utilization Of Excess Energy In Off-Grid Systems
SMA Solar Technology AG 7 Commissioning 7. Ensure that the multifunction relay used for controlling the first stage of load shedding is set to 1-stage load shedding or 1st stage with 2-stage load shedding (see Section 7.10.2, page 102). 8. Ensure that the multifunction relay used for controlling the second stage of load shedding is set to 1st stage with 2-stage load shedding. -
Page 92: Generator Management
7 Commissioning SMA Solar Technology AG The Sunny Island controls the utilization of excess energy during the constant voltage phase depending on the cell voltage of the battery. During the constant voltage phase, the battery is charged with a constant charging voltage. -
Page 93: Changing The Voltage Thresholds For The Generator
SMA Solar Technology AG 7 Commissioning Procedure: 1. Select Generator > Generator. 2. Set the parameter Rated generator current to the desired value. Tip: A suitable value for the Rated generator current is 80% of the maximum generator current per line conductor. -
Page 94: Configuring The Current Limit For The Generator Depending On The Frequency
7 Commissioning SMA Solar Technology AG If the reverse power for the set time is exceeded, all Sunny Island inverters disconnect the generator from the stand- alone grid and block the connection of the generator to the stand-alone grid for the minimum stop time. -
Page 95: Configuring Generator Run Times
SMA Solar Technology AG 7 Commissioning Procedure: 1. Select Generator > Generator. 2. If the generator has an autostart function, set the parameter Generator request to Automatic. 3. If the generator does not have an autostart function, set the parameter Generator request to Manual control. -
Page 96: Changing The Minimum Stop Time For The Generator
7 Commissioning SMA Solar Technology AG 7.8.3.4 Changing the Minimum Stop Time for the Generator Relevant for off-grid systems The basic procedure for changing operating parameters is explained in another section (see Section 8.6, page 113). Procedure: 1. Select Generator > Operation. - Page 97 SMA Solar Technology AG 7 Commissioning The time-dependent generator request divides the day into 2 intervals. For each interval, you set which conditions there are for the generator request (see Section 8.12.2, page 117). In this way, you can, for example, set the generator not to start at night.
-
Page 98: Configuring The Load-Dependent Generator Request
7 Commissioning SMA Solar Technology AG Set the switch-on limits (lower SOC thresholds) for the standard time period and the additional time period 1. Select Generator > Generator queries state of charge > Additional time range > Switch-on limit in time range. -
Page 99: Time-Controlled Generator Requesting
SMA Solar Technology AG 7 Commissioning 3. Set the parameter Generator startup load limit to the switch-on power limit. 4. Set the parameter Generator shutdown load limit to the switch-off power limit. 5. Select Generator > Time-controlled generator operation. 6. Set the parameter Average time for generator request via power to the averaging time with which the generator management calculates the average power. -
Page 100: Setting An External Generator Request
7 Commissioning SMA Solar Technology AG 7.8.4.7 Setting an External Generator Request Relevant for off-grid systems An external control signal can transmit a generator request to the generator management. The basic procedure for changing operating parameters is explained in another section (see Section 8.6, page 113). - Page 101 SMA Solar Technology AG 7 Commissioning The Sunny Island distinguishes between battery current sensors of the types 50 mV and 60 mV. The types reflect the amplification factor of the battery current sensor. The amplification factors are given in amperes per 50 mV or in amperes per 60 mV, e.g., 400 A/60 mV.
-
Page 102: Changing The Automatic Frequency Synchronization In Off-Grid Systems
7 Commissioning SMA Solar Technology AG 10. Connect the BatCur– insulated measuring conductor on the side Battery fuse for connecting the battery. BatCur + BatCur − Battery 11. Close the battery fuse load-break switch quickly and switch on the inverter. -
Page 103: Complete Commissioning
6. With off-grid systems only, when full charge is complete, switch on all circuit breakers and load-break switches. 7. In order to receive service assignments for the Sunny Island system, all system data must be recorded in the information sheet for Sunny Island systems and made available to Service (for information sheet see www.SMA- Solar.com). -
Page 104: Operation
☐ The personal SMA Grid Guard code of the Installer must be available for the changing of grid-relevant settings after completion of the first 10 operating hours or of the installation assistant. You can request the SMA Grid Guard code via the Online Service Center. -
Page 105: Establishing A Connection Via Wlan In The Local Network
1. Search for Wi-Fi networks with your end device. 2. Select the SSID of the product SMA[serial number] in the list with the detected Wi-Fi networks. 3. Enter the device-specific Wi-Fi password (see WPA2-PSK on the type label of the product or the rear side of the manual included in delivery). -
Page 106: Establishing A Direct Connection Via Ethernet
☐ The personal SMA Grid Guard code of the Installer must be available for the changing of grid-relevant settings after completion of the first 10 operating hours or of the installation assistant. You can request the SMA Grid Guard code via the Online Service Center. -
Page 107: Establishing A Connection Via Ethernet In The Local Network
☐ The personal SMA Grid Guard code of the Installer must be available for the changing of grid-relevant settings after completion of the first 10 operating hours or of the installation assistant. You can request the SMA Grid Guard code via the Online Service Center. - Page 108 Installer password for inverters registered in a communication device or in Sunny Portal To be able to register the inverter in a communication device (e.g., SMA Data Manager) or in a Sunny Portal system, the password for the user group Installer must match the system password. If you assign a password for the user group Installer via the user interface of the inverter, the same password must also be used as the system password.
-
Page 109: Start Page Design Of The User Interface
SMA Solar Technology AG 8 Operation Start Page Design of the User Interface Figure 24: Design of the user interface's home page (example) Operating manual SI44M-80H-13-BE-en-15... - Page 110 • SMA Grid Guard login • Logout Help Provides the following functions: • Displaying information on Open Source licenses used • Link to the website of SMA Solar Technology AG Status bar Displays the following information: • Inverter serial number • Inverter firmware version •...
-
Page 111: Changing The Password
SMA Solar Technology AG 8 Operation Position Designation Description State of charge Chronological sequence of the state of charge (SOC) of the battery Status display The various areas display information on the current status of the sys- tem. • Device status... -
Page 112: Starting The Installation Assistant
☐ The personal SMA Grid Guard code of the Installer must be available for the changing of grid-relevant settings after completion of the first 10 operating hours or of the installation assistant. You can request the SMA Grid Guard code via the Online Service Center. -
Page 113: Changing Operating Parameters
10 operating hours or of the installation assistant. You can request the SMA Grid Guard code via the Online Service Center. Procedure: • For installers only: Log in with SMA Grid Guard code. You need the SMA Grid Guard code to change parameters that are marked with a lock. • Change operating parameters. -
Page 114: Setting Time-Controlled Inverter Operation In Off-Grid Systems
8 Operation SMA Solar Technology AG Change operating parameters 1. Open the user interface (see Section 8.1, page 104). 2. Log into the user interface (see Section 8.2, page 107). 3. Call up the menu Device parameters. 4. Click on [Edit parameters]. 5. Expand the parameter group that contains the parameter which is to be configured. -
Page 115: Configuring The Energy Meter
SMA Solar Technology AG 8 Operation The basic procedure for changing operating parameters is explained in another section (see Section 8.6, page 113). Switching WLAN Off If you would like to switch the WLAN function off completely, you must switch off both the direct connection and the connection in the local network. -
Page 116: Supplementary Information
, the Modbus interface must be activated. After activating the interface, the communication ports of the IP protocol can be changed. For information on commissioning and configuration of the Modbus interface, see the technical information "SMA Modbus® Interface" at www.SMA- Solar.com. -
Page 117: Setting Time-Dependent Functions
SMA Solar Technology AG 8 Operation 8.12.2 Setting Time-Dependent Functions Time-dependent functions, such as time-dependent load shedding, split the day into two time periods. You specify the time periods using two points in time. The standard time period starts with time 1 and ends with time 2. The additional time period starts with time 2 and ends with time 1. -
Page 118: Starting And Stopping The System
9 Starting and Stopping the System SMA Solar Technology AG 9 Starting and Stopping the System Switching on the System Requirements: ☐ All inverters must be closed (see Section 6.8, page 66). ☐ The fuse switch-disconnector of the battery fuse must be closed (see Section 6.9, page 67). -
Page 119: Stopping The System
SMA Solar Technology AG 9 Starting and Stopping the System Starting a multicluster system When starting a multicluster system, the extension cluster masters wait for the start command from the main cluster master. • For multicluster systems, press and hold the "start-stop" button on the master of the main cluster until an acoustic signal sounds. -
Page 120: Tripping The Emergency Disconnection Of The System
9 Starting and Stopping the System SMA Solar Technology AG 2. For systems with up to 3 Sunny Island inverters, press and hold the "Off" button on the master until an acoustic signal sounds. 3. For multicluster systems, press and hold the "Off" button on each master until an acoustic signal sounds. -
Page 121: Data Storage And Firmware Update
Sunny Island system can be traced. From this, for example, parameter settings can be derived that will e.g. increase the self-consumption of PV energy or the service life of the battery. For SMA Service, this data simplifies the analysis of any errors present and the identification of possible solutions. -
Page 122: Updating The Firmware
5. Follow the additional instructions in the user interface. 10.5 Updating the Firmware If no automatic update is set in the communication product (e.g. SMA Data Manager or Sunny Home Manager) or in Sunny Portal, you have the option of carrying out a manual firmware update. Duration of firmware update For systems with 1 battery inverter, the firmware update takes about 15 minutes. -
Page 123: Saving The Configuration In A File
Requirements: ☐ Changes to grid-relevant parameters must be approved by the responsible grid operator. ☐ The SMA Grid Guard code must be available. You can request the SMA Grid Guard code via the Online Service Center. Procedure: 1. -
Page 124: Manually Controlling The Generator
11 Manually Controlling the Generator SMA Solar Technology AG 11 Manually Controlling the Generator 11.1 Starting the Generator via the User Interface The basic procedure for changing operating parameters is explained in another section (see Section 8.6, page 113). Requirement: ☐ The Sunny Island must be able to control the generator via a control cable. -
Page 125: Starting The Generator Without Autostart Function
SMA Solar Technology AG 11 Manually Controlling the Generator 1. Select Generator > Generator. 2. Set the parameter Automatic generator start to Off. 11.3 Starting the Generator without Autostart Function 1. Start the generator (see manufacturer's manual). 2. Close the load-break switch between the generator and Sunny Island. -
Page 126: Disconnecting The Inverter From Voltage Sources
12 Disconnecting the Inverter from Voltage Sources SMA Solar Technology AG 12 Disconnecting the Inverter from Voltage Sources Procedure: 1. Stop the system: At the master, or at the master of the main cluster, press the "Start-Stop" button until an acoustic signal sounds. -
Page 127: Cleaning And Maintenance
SMA Solar Technology AG 13 Cleaning and Maintenance 13 Cleaning and Maintenance 13.1 Cleaning and Checking the Sunny Island Inverter Enclosure NOTICE Damage to the product due to cleaning agents The use of cleaning agents may cause damage to the product and its components. -
Page 128: Cleaning The Fans
13 Cleaning and Maintenance SMA Solar Technology AG 13.4 Cleaning the Fans If the user interface displays the warning Derating due to temp. unusually often, it is likely that one of the fans is defective or blocked. Procedure: • Clean the ventilation grids. - Page 129 SMA Solar Technology AG 13 Cleaning and Maintenance 6. To clean the fan guard, first use a screwdriver to push the 2 locking tabs at the right-hand edge of the fan guard to the right- hand side and remove them from the retainer.
-
Page 130: Checking And Maintaining The Battery
13 Cleaning and Maintenance SMA Solar Technology AG 13.5 Checking and Maintaining the Battery WARNING Danger to life due to explosive gases Explosive gases may escape from the battery and cause an explosion. • Protect the battery environment from open flames, embers and sparks. -
Page 131: Emergency Charge Mode After Automatic Shutdown
SMA Solar Technology AG 13 Cleaning and Maintenance Check whether the current state of the battery corresponds to the expected state 1. In the parameter group Battery > Battery > Diagnosis, select the parameter Number of battery charge throughputs and compare the value with the expected nominal energy throughput. - Page 132 13 Cleaning and Maintenance SMA Solar Technology AG The emergency charge mode is only an option in single-phase off-grid systems. For all other Sunny Island systems, the system configuration must be adjusted temporarily. DANGER Danger to life due to electric shock when live components or cables are touched High voltages are present in the conductive components or cables of the product.
- Page 133 SMA Solar Technology AG 13 Cleaning and Maintenance Adjust the system configuration for the emergency charge mode (not required for single-phase off-grid system) 1. Ensure that all loads are switched off. 2. Close the load-break switch of the battery fuse.
-
Page 134: Changing Slave Addresses In A Cluster
13 Cleaning and Maintenance SMA Solar Technology AG Disconnect the generator from connection AC1 1. Ensure that the generator is stopped permanently. WARNING Danger to life from electric shock due to high voltages High voltages are present on the AC power cables and on the control cables. Touching live components can result in death or serious injury due to electric shock. -
Page 135: Replacing The Battery
• Ensure that the lithium-ion batteries are approved for use with the Sunny Island (see technical information “List of Approved Batteries” at www.SMA-Solar.com). • If no lithium-ion batteries approved for the inverter can be used, lead-acid batteries can be used. - Page 136 Note that the battery charging behavior names used by SMA Solar Technology AG and the battery manufacturer may, in some cases, differ in meaning (for the battery charging behavior of the Sunny Island inverter, see technical information “List of Approved Batteries”).
-
Page 137: Replacing The Micro Sd Card
SMA Solar Technology AG 13 Cleaning and Maintenance 13.9 Replacing the Micro SD Card DANGER Danger to life due to electric shock when live components or cables are touched High voltages are present in the conductive components or cables of the product. Touching live parts and cables results in death or lethal injuries due to electric shock. -
Page 138: Opening And Closing The Inverter
13 Cleaning and Maintenance SMA Solar Technology AG 13.10 Opening and Closing the Inverter If you have to open the inverter enclosure lid for repairs or replacement, proceed as described in the following. DANGER Danger to life due to electric shock when live components or cables are touched High voltages are present in the conductive components or cables of the product. -
Page 139: Recommissioning The Inverter
SMA Solar Technology AG 13 Cleaning and Maintenance 7. On the Sunny Island, fasten the enclosure lid following the sequence 1 to 6 using an Allen key (AF 5) (torque: 6 Nm). The teeth of the serrated conical spring washer must press into the enclosure lid. -
Page 140: Troubleshooting
14 Troubleshooting SMA Solar Technology AG 14 Troubleshooting 14.1 Sunny Island Inverter Behavior Under Fault Conditions Event messages Warnings and errors are displayed in the menu Events in the user interface until the causes of these warnings and errors are no longer detected by the Sunny Island. Exception: Some errors must be acknowledged via the user interface. - Page 141 SMA Solar Technology AG 14 Troubleshooting Event number Message, cause and corrective measures Grid incident The voltage of the generator or of the utility grid of the Sunny Island line conductor Lxx is too low. Corrective measures for generator: • Adjust the thresholds for the generator voltage of the Sunny Island (see Sunny Island technical information "Measured Values and Parameters").
- Page 142 14 Troubleshooting SMA Solar Technology AG Event number Message, cause and corrective measures Grid incident The frequency of the generator or the utility grid of the Sunny Island at line conductor Lxx is too low or too high. Corrective measures for generator: •...
- Page 143 SMA Solar Technology AG 14 Troubleshooting Event number Message, cause and corrective measures 1402 Grid incident The voltage of the generator or the utility grid at the Sunny Island at line conductor Lxx is out- side the configured thresholds (redundant measurement).
- Page 144 14 Troubleshooting SMA Solar Technology AG Event number Message, cause and corrective measures 1408 Grid incident AC sources in the system are driving the generator. The reverse power in the generator has been exceeded for too long. Corrective measures: • Adjust the generator request to the properties of the AC sources in the system and the loads, e.g., for PV inverters, preferably request the generator at night.
- Page 145 SMA Solar Technology AG 14 Troubleshooting Event number Message, cause and corrective measures 1413 Grid incident Phase position of the measured AC voltage at ExtVtg and AC2 does not match at line con- ductor Lxx. Corrective measures: • Ensure that the neutral conductor and line conductor are correctly connected to connection ExtVtg.
- Page 146 14 Troubleshooting SMA Solar Technology AG Event number Message, cause and corrective measures 1612 Grid disconnection release as power limit not reached Relevant for load-dependent grid requirement: The power requirement of the loads has fallen below the power limit stored in the battery inverter. The battery inverter issues the release for grid disconnection.
- Page 147 SMA Solar Technology AG 14 Troubleshooting Event number Message, cause and corrective measures 1706 System failure A contactor in the Multicluster-Box is not functioning correctly. Corrective measures: • Reset the off-grid system. For this, disconnect the off-grid system and restart.
- Page 148 14 Troubleshooting SMA Solar Technology AG Event number Message, cause and corrective measures 1710 Stand-alone grid Voltage at terminal AC1 of the Sunny Island at line conductor Lxx is too low due to AC sources in the system. Corrective measures: • Ensure that the Sunny Island is functional. For this, disconnect all AC sources and loads from the Sunny Island and restart the Sunny Island.
- Page 149 SMA Solar Technology AG 14 Troubleshooting Event number Message, cause and corrective measures 3809 Overcurrent in inverter bridge at line conductor Lxx Too much current is flowing through the DC connection of a Sunny Island at line conductor Lxx. Corrective measures: •...
- Page 150 • Connect the loads with very high power directly to the generator whenever possible or connect the utility grid. Ensure that the generator is not overloaded. • In off-grid systems, ensure that the country data sets of the SMA inverters are set to stand-alone mode.
- Page 151 SMA Solar Technology AG 14 Troubleshooting Event number Message, cause and corrective measures 6614 Overload The device at Lxx has been loaded over its 5-minute rated capacity. Corrective measures: • Reduce the power of the loads. 6615 Overload The device at Lxx has been loaded over its 30-minute rated capacity.
- Page 152 Corrective measures: • Make sure thresholds of the parameters are complied with. • Change the parameter again. • For grid-relevant parameter: Ensure that the SMA Grid Guard code is available. 7106 Update file defective The update file is defective. The update failed.
- Page 153 SMA Solar Technology AG 14 Troubleshooting Event number Message, cause and corrective measures 7303 Host computer update failed The cause must be determined by the Service. Corrective measures: • Contact the Service. 27312 Update completed The inverter has successfully completed the update.
- Page 154 14 Troubleshooting SMA Solar Technology AG Event number Message, cause and corrective measures 7342 Update Bootloader failed The bootloader update failed. Corrective measures: • Retry update. • If this message is displayed again, contact the Service. 7345 Master starts firmware update of cluster The firmware update for slave 1 and slave 2 has been started.
- Page 155 SMA Solar Technology AG 14 Troubleshooting Event number Message, cause and corrective measures 7354 Update of time zone database not successful The update of the time zone database failed. Corrective measures: • Retry update. • If this message is displayed again, contact the Service.
- Page 156 14 Troubleshooting SMA Solar Technology AG Event number Message, cause and corrective measures 7609 Communication failure Communication with an energy meter is faulty. Corrective measures: • Ensure that the optical probe is correctly installed and connected. 7611 Communication failure A protocol that is not supported has been recognized on 1 energy meter.
- Page 157 SMA Solar Technology AG 14 Troubleshooting Event number Message, cause and corrective measures 7619 Communication fault with meter unit The inverter is not receiving any data from the energy meter. Corrective measures: • Ensure that the energy meter is correctly integrated into the same network as the inverter (see energy meter manual).
- Page 158 14 Troubleshooting SMA Solar Technology AG Event number Message, cause and corrective measures 8003 Derating occurred The inverter at Lxx reduces the battery charging current due to overheating. Corrective measures: • Reduce the total power of the loads, e.g. by staggering their use over time.
- Page 159 SMA Solar Technology AG 14 Troubleshooting Event number Message, cause and corrective measures 8615 Box encoding does not correspond to software settings Box coding conflicts with software settings: Configuration of the Sunny Island inverters does not match the Multicluster-Box. Corrective measures: •...
- Page 160 9003 Grid parameters locked Changes to the grid-relevant parameters are now blocked. In order to be able to make changes to the grid parameters, from now on you must log in using the SMA Grid Guard code. 29004 Grid parameter unchanged...
- Page 161 Observe the technical data for the battery at the DC connection. • Ensure that the DC sources are correctly connected and configured. • For off-grid systems: ensure that all SMA inverters are configured to the country data set for stand-alone mode.
- Page 162 14 Troubleshooting SMA Solar Technology AG Event number Message, cause and corrective measures 9341 Status change to battery equalization charge 9362 Battery error The range for protection against deep discharge (Deep discharge protection range) or the range for protection during deep discharge (Deep discharge range) has been reached.
- Page 163 SMA Solar Technology AG 14 Troubleshooting Event number Message, cause and corrective measures 10101 Setting of parameter [xx] failed. |xx| to |xx| The displayed parameter was not changed. Corrective measures: • Make sure thresholds of the parameters are complied with.
- Page 164 • Ensure that with an Ethernet connection, the network cable and the network connector are not damaged and that the network connectors are correctly plugged. • If necessary, increase the data query intervals. • If necessary, reduce the number of devices in the network. 12 Troubleshooting SMA Solar Technology AG 78 10251 Communication status goes to [OK / Warning / Error / Not connected] The communication status to the network switch or DHCP server (router) has changed.
- Page 165 • If this message is displayed often, improve the Wi-Fi connection by using a Wi-Fi repeater. 10287 Wi-Fi module detected 10339 Webconnect enabled The inverter can communicate with Sunny Portal without an additional SMA communications product (e.g. Sunny Home Manager). Operating manual SI44M-80H-13-BE-en-15...
- Page 166 The Webconnect function has been switched off. This means that the inverter can not commu- nicate with Sunny Portal without an additional SMA communications product (e.g. Sunny Home Manager). • If the inverter is to communicate with Sunny Portal without an additional SMA communication product, switch the Webconnect function on. 10414...
-
Page 167: Providing Files For Troubleshooting
SMA Solar Technology AG 14 Troubleshooting Event number Message, cause and corrective measures 10520 Supplied power: [xx] W (permitted value: [xx] W) The set active power limitation cannot be met. Corrective measures: • Ensure that the correct active power limitation has been configured. -
Page 168: Frequently Asked Questions (Faqs)
14 Troubleshooting SMA Solar Technology AG 2. Set Reset operating data to Reset operation inhibition. 3. Start the system (see Section 9.2, page 118). 14.5 Frequently Asked Questions (FAQs) 14.5.1 Questions Regarding the Sunny Island Why is the Sunny Island not switching off even though I have opened the load-break switch of the battery fuse? The Sunny Island may still be supplied from the AC side. -
Page 169: Questions Regarding The Battery
SMA Solar Technology AG 14 Troubleshooting • In a three-phase system, all 3 line conductors of the external energy source must be connected • In a single-phase parallel system, it is possible to connect the generator to the master only. -
Page 170: Questions Regarding The Generator
• Check whether the voltage and frequency of the generator are within the thresholds set (see technical information "Parameters and Measured Values" at http://www.SMA-Solar.com). – If the voltage and frequency of the generator are not within the thresholds set, ensure that the fuse is not defective or that the circuit breaker is switched on. -
Page 171: Questions Regarding Multicluster Systems
The password for the user group Installer is the same as the system password in the communication product. Procedure: 1. Request PUK (application form available at www.SMA-Solar.com). 2. Open the user interface (see Section 8.1, page 104). 3. Enter the PUK instead of the password into the field Password. -
Page 172: Problems With Streaming Services
Set time for detection of communication failure If communication between the Sunny Island and the SMA Energy Meter or the Sunny Home Manager is interrupted, the Sunny Island stops after a certain time. Both multifunction relays then switch to the idle state. As a consequence, the feed-in operation of the PV inverters is stopped. -
Page 173: Decommissioning The Inverter
SMA Solar Technology AG 15 Decommissioning the Inverter 15 Decommissioning the Inverter DANGER Danger to life due to electric shock when live components or cables are touched High voltages are present in the conductive components or cables of the product. Touching live parts and cables results in death or lethal injuries due to electric shock. - Page 174 15 Decommissioning the Inverter SMA Solar Technology AG 6. Loosen the screws on both sides between the inverter and the wall mounting bracket using an Allen key (AF 5). 7. Regarding SI4.4M-13: Remove the inverter by lifting it vertically up and off the wall mounting bracket. For this, use the side recess grips.
-
Page 175: Technical Data
27.6 kW In multicluster systems, the Multicluster-Box specifies the maximum connectable output of the PV inverters (for technical data, see the Multicluster-Box operating manual at www.SMA-Solar.com). AC sources that can not be regulated by the Sunny Island (e.g. CHP plant) Operating manual... -
Page 176: Ac2 Connection For Utility Grid And Generator (External Energy Source)
16 Technical Data SMA Solar Technology AG SI4.4M-13 SI6.0H-13 SI8.0H-13 Short-circuit current for 60 ms 60 A 120 A 120 A Maximum triggering characteristic of miniature cir- cuit breaker per Sunny Island 16.2 AC2 Connection for Utility Grid and Generator (External Energy Source) SI4.4M-13 SI6.0H-13 SI8.0H-13... - Page 177 SMA Solar Technology AG 16 Technical Data SI4.4M-13 SI6.0H-13 SI8.0H-13 Rated discharging current 75 A 103 A 136 A Maximum battery charging current 75 A 110 A 140 A Battery type Lead-acid battery: Lead-acid battery: Lead-acid battery: FLA, VRLA lithium- FLA, VRLA lithium-...
-
Page 178: Efficiency
16 Technical Data SMA Solar Technology AG 16.4 Efficiency SI4.4M-13 SI6.0H-13 SI8.0H-13 Maximum efficiency 95.3 % 95.8 % 95.8 % European weighted efficiency 94.0 % 94.3 % 94.1 % 16.5 Sunny Island 4.4M Efficiency Profile SI4.4M-13 V = 42 V DC V = 48 V DC V = 54 V DC... -
Page 179: Sunny Island 6.0H Efficiency Profile
SMA Solar Technology AG 16 Technical Data 16.6 Sunny Island 6.0H Efficiency Profile SI6.0H-13 V = 42 V DC V = 48 V DC V = 54 V DC Output power / Rated power Figure 28: Characteristic efficiency curve Operating manual... -
Page 180: Sunny Island 8.0H Efficiency Profile
16 Technical Data SMA Solar Technology AG 16.7 Sunny Island 8.0H Efficiency Profile SI8.0H-13 V = 42 V DC V = 48 V DC V = 54 V DC Output power / Rated power Figure 29: Characteristic efficiency curve 16.8 Switchover times of the Sunny Island 6.0H / 8.0H... -
Page 181: Protective Devices
SMA Solar Technology AG 16 Technical Data TN-C-S grid configuration Suitable This grid configuration is used in battery-backup systems and systems for increased self-consumption (not for off- grid systems). When using systems with MC- BOX-12.3-20, a GRID-BOX-12.3-20 must be installed. -
Page 182: Data Storage Capacity
16 Technical Data SMA Solar Technology AG 16.14 Data Storage Capacity With internal inverter With optional micro SD memory card Instantaneous values recorded per second over one day – over two months (1 file for 1 day) Instantaneous values recorded over the duration of five 64 days... - Page 183 SMA Solar Technology AG 16 Technical Data SI4.4M-13 SI6.0H-12 / SI8.0H-13 Climatic category in accordance with IEC 60721 Degree of protection in accordance with IP54 IP54 IEC 60529 Radio technology WLAN 802.11 b/g/n WLAN 802.11 b/g/n Radio spectrum 2.4 GHz 2.4 GHz Maximum transmission power 100 mW...
-
Page 184: Spare Parts And Accessories
SMA Solar Technology AG 17 Spare Parts and Accessories You will find the corresponding accessories and spare parts for your product in the following overview. If required, these can be ordered from SMA Solar Technology AG or your distributor. Designation Brief description SMA order number SI-SYSCAN.BGx... -
Page 185: Contact
SMA Solar Technology AG 18 Contact 18 Contact If you have technical problems with our products, please contact the SMA Service Line. The following data is required in order to provide you with the necessary assistance: • Battery inverter: – Device type –... -
Page 186: Eu Declaration Of Conformity
2011) and 2015/863/EU (L 137/10, March 31, 2015) (RoHS) SMA Solar Technology AG confirms herewith that the products described in this document are in compliance with the fundamental requirements and other relevant provisions of the above-mentioned directives. The entire EU Declaration of Conformity can be found at www.SMA-Solar.com. -
Page 187: Declaration Of Conformity
• The Restriction of the Use of Certain Hazardous Substances in Electrical and Electronic Equipment Regulations 2012 (SI 2012/3032) SMA Solar Technology AG confirms herewith that the products described in this document are in compliance with the fundamental requirements and other relevant provisions of the above-mentioned regulations. The entire UK Declaration of Conformity can be found at www.SMA-Solar.com. - Page 188 www.SMA-Solar.com...
Need help?
Do you have a question about the SUNNY ISLAND 4.4M and is the answer not in the manual?
Questions and answers