
Related Manuals for Rinnai Novo Cube


Summary of Contents for Rinnai Novo Cube
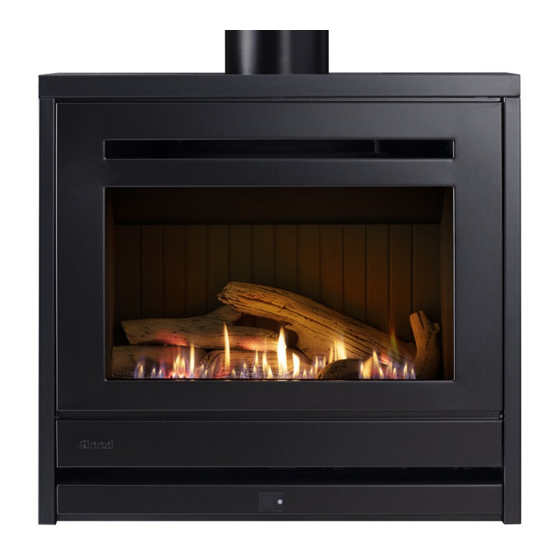
- Page 1 Models: RDV2320FN, RDV2320FL Novo Cube Novo Freestander - cabinet base Novo Freestander - plinth base Novo direct vent Cube and Freestander gas fireplaces Installation guide...
- Page 2 Important Appliance must be installed with a Rinnai approved flue system. This appliance shall be installed in accordance with: Manufacturer’s installation instructions Current: AS/NZS 5601 Gas Installations AS/NZS 5263 Gas Appliances General Requirements AS/NZS 3000 Electrical Standards AS/NZS 3500 Plumbing and Drainage Standards For use with Natural Gas or Universal LPG as indicated on the appliance.
-
Page 3: Table Of Contents
Specification ............5 Dimensions ............6 General clearances ..........7 Material selection..........8 Gas supply and connection ........10 Electrical supply............11 Novo cube installation ..........12 Aeration plates............14 Novo freestander and cabinet installation ....15 Novo freestander and plinth installation ....18 Burn media installation .........22 Commissioning .............24 Wi-Fi module installation (if applicable) ....25... -
Page 4: Before You Start
Wi-Fi module retrofit kit: R7000 Black integrated mesh guard, can be easily Kit enables the fire to be connected to the installed, no fixing required. Rinnai Fire Wi-Fi App for full Designed to protect against thermostatic control, as well touching the hot surface of... -
Page 5: Specification
Operated using a simple IR remote to control flame height and fan speed, or by the Rinnai Wi-Fi app (optional accessory) that allows full thermostatic control, as well as other features such as timers. -
Page 6: Dimensions
Dimensions Novo Cube Novo Freestander - cabinet base Novo freestander - plinth base Viewable glass dimensions 530 mm 6 | Novo freestanding installation guide:13992-A 01-22... -
Page 7: General Clearances
Heating radiating from this fire may over time affect the appearance of some materials used for flooring, such as carpet, vinyl, cork, or timber. We don’t recommend installing the Novo Cube directly on the floor if sensitive or unrated materials are used (refer next page) unless there is some protection placed in front of the appliance, such as a mat. -
Page 8: Material Selection
Material selection The temperature in front of the fire (approximately 200-350 mm x 400 mm wide) can reach up to 40 °C above ambient, which is why material selection is important. For example, vinyl planks are a popular option for flooring, however vinyl is only rated for ambient temperatures. In this example it would not be recommended that the fire is installed directly on the floor unless there was some form of floor protection in front of the fire. - Page 9 Installation examples Cube installed on a combustible platform Depending on material, refer table on previous page. The platform could extend 150 mm or 100 mm maximum in front of the fire. This is dimension E in the table. The height of the platform would need to be at least 150 mm or 300 mm high.
-
Page 10: Gas Supply And Connection
The use of a rubber hose for any gas connection to a fixed appliance is NOT authorised by the manufacturer. IMPORTANT The gas supply position will vary slightly based on if a Novo Cube has been ordered or Freestander with a cabinet / plinth, refer installation pages for more information. Gas connection Firmly grasp the stainless steel flexi pipe and bend to line up with the gas control valve inlet, then attach the pipe to the gas control valve and tighten. -
Page 11: Electrical Supply
If the power cord is damaged, it must be replaced by a licensed tradesperson. This must be a genuine replacement part available from Rinnai. * Consult a qualified electrician if direct wiring is required as it must comply with AS/NZS 5601 and AS/NZS 3000 and... -
Page 12: Novo Cube Installation
Novo Cube installation Unpack the fire the back, there is a knockout in the bottom 1. Remove the frame (two screws). right corner (viewed from the back of the fire) of the back panel that can be removed with 2. Remove the control panel (two screws) and pliers. - Page 13 Power cord entry 310 mm 310 mm 25 mm 25 mm Gas supply entry options Flue centre Gas connection 230 mm Note: fire is supplied with a 200 mm flexi pipe Fire Footprint 368 mm 298 mm 245 mm Alternate gas pipe Alternate power 70 mm cord position...
-
Page 14: Aeration Plates
Aeration plates The Novo has an aeration plate factory fitted either side of the unit, refer photo. The plates are fitted in a position for flue lengths between 3-5.5 m. Two additional plates are supplied in the accessory pack, these are for flues between 5.6-8 m. -
Page 15: Novo Freestander And Cabinet Installation
Novo Freestander and cabinet installation Flexi tube & connector Screw pack (30 screws) LH outer side panel Back outer panel Back cover Inner side panels x 2 Base mounting plate RH outer side panel Base cover plate There are two ways to install the cabinet to the Novo freestanding cube: Complete assembly Build up (requires two people) - Page 16 Novo Freestander and cabinet installation cont. Fit the base cover panel Fit side panel covers Ensure the lower front edge of the panel is Fit tabs into slots. Slide panels forward so the hooked under the front edge of the base leading edge is behind the side panel.
- Page 17 Cabinet assembly Fixing the fire to the cabinet 7 screws in back panel 4 screws each side Power and gas supply Fitting base cover panel Fix in place - 2 screws Power Front faces FLUSH Lower front edge hooked under base panel Fit side panel covers Fit back panel Fix in place...
-
Page 18: Novo Freestander And Plinth Installation
Novo Freestander and plinth installation Support rail x2 Screw pack (36 screws) Underside cover x2 Flexi tube Tube connector Side panel x2 Base mount plate Back outer panel Front panel Base cover plate 1. Mounting area and mounting plate • Mark the flue centre on the floor. - Page 19 2. Prepare services For best results the gas and power can be supplied through the plinth and into the base of the fire. The power will need to be hard wired. Bring enough cable through the floor to reach at least 100 mm above the top of the plinth. Bring the gas supply through to within approximately 50 mm of the top of the plinth, flare the pipe, and fit the supplied flexi tube.
- Page 20 Freestanding cube + plinth installation cont. 4. Fix fire base plate to plinth Unpack the fire, refer p.12 for more information. Remove the fire base plate and fix to the top of the plinth assembly using the stiffening rails as shown. Fit the second flexi pipe supplied with the fire. 5.
- Page 21 7. Connect services and commission Connect the power and gas. Fit the underside covers, and commission as per the commissioning instructions. Alternate flex power cord routing Hard wiring option Underside cover must be fitted to protect wiring Novo freestanding installation guide: 13992-A 01-22 | 21...
-
Page 22: Burn Media Installation
Burn media installation The granule pack and log set, consisting of five logs, comes packaged inside the appliance. Use extreme care when handling the logs, they are fragile and will damage easily. The unit must never be used with broken logs or other burn media. Experience has shown that the majority of performance problems are caused by burn media being installed incorrectly. - Page 23 Ensure the left hand log is pushed hard against the left and rear ceramic panels. DO NOT place the granules directly in front of the pilot flame If there are some abnormally long streaky flames, then readjust the granule position around the burner holes until the flames have improved.
-
Page 24: Commissioning
Commissioning The gas pressures must be checked against those printed on the data plate of the appliance. The pressures are factory set and may not require adjustment. When checking the operating pressures the combustion chamber glass must be on. The commissioning sheet is located in a plastic pouch inside the unit on top of the PCB cover. Follow the commissioning instructions to complete the gas pressure checks. -
Page 25: Wi-Fi Module Installation (If Applicable)
Wi-Fi module installation (if applicable) If the Wi-Fi module retrofit kit has been purchased as an accessory, complete the installation using the instructions provided in the kit. Once installation has been completed check, when the power is on, that the Wi-Fi LED flashes and turns a solid red. This indicates everything is ready for setup via a smart device. -
Page 26: Test Operation And Lighting Sequence
If the appliance cannot be made to perform correctly please contact Rinnai. Soot build up Installation checklist and customer handover Complete the installation checklist in the customer operation guide, and make sure you leave the guide with the customer. -
Page 27: Wiring Diagram
Wiring diagram (part of commissioning) gr/y gr/y gr/y 1 2 3 4 5 6 7 8 Light Only for RDV600-700 r bl 1 2 3 1 2 3 4 5 6 7 8 9 13 12 11 10 9 8 7 6 5 4 3 2 1 gr/y 12 11 10 9 8 7 6 5 4 3 2 1 4 3 2 1... -
Page 28: Novo Flueing
Supporting the flue is usually completed during the framing stage with flue supports or straps within the cavity. Wall straps have been included in the Rinnai vertical flue kits. Elbow straps are also available as a separate component to prevent excess weight on the flue elbow. -
Page 29: Novo Freestanding Flueing Options
Novo Freestanding flueing options Minimum flue length Maximum flue length This is required to ensure adequate draw and The maximum flue length is determined by to prevent spill-back of combustion products, what the product has been tested, verified, and which can cause the safety sensors to shut certified to. -
Page 30: Novo Freestanding Flueing Overview
Novo freestanding flueing overview General installation information The flue is built from the bottom up. The galaxy black sections of the flue are supported by the fire in the event of the fire needing to be removed for maintenance, servicing etc. The pipes are interlocking. Use of sealant is optional. Novo freestanding vertical Novo freestanding vertical offset Suitable flashing (not provided) -
Page 31: Novo Freestanding Flue Kits And Components
Novo freestanding flue kits and components R3706: Novo freestanding flue kit DV black 3.6 m Galaxy black powder coated freestanding flue kit. Contains: • R3636: 1 x 1200 mm flue pipe unpainted • R3636GL: 2 x 1200 mm flue pipe black •... - Page 32 Novo freestanding flue components Coaxial vertical flue cowl DV flue pipe extensions unpainted, and painted Code: R3651 75-175 mm: R3638 (unpainted) R3638GL (painted) 75-360 mm: R3639 (unpainted) R3639GL (painted) Aluminium flue terminal required for all coaxial vertical Used for extended straight lengths of flue. Available in two lengths— flue installations—part of all extending to 175 mm or 360 mm.
- Page 33 Wall strap DV Elbow flue strap DV Code: R3647 Code: R3644 Adjustable strap used in Flue supports for elbows installations to add lateral and offsets. Strap length support to the flue. Provides approximately 432 mm. a 50-200 mm clearance to combustibles.
-
Page 34: Material Selection Calculations
Appendix: Material selection calculations The following information and table is supplementary to the information provided on pages 8-9. The information provides further detail on the relationship between various clearance dimensions and gives examples of what specific dimensions can be if other clearances are tweaked. Dim. - Page 35 Top view Front Side view Side view A =100, so non-combustible hearth B = 350 (A + 250) C = 100, so Un-rated material floor D = 50 (C-50) In this case, F can be reduced using F = 450 - E mm min. Novo freestanding installation guide: 13992-A 01-22 | 35...
- Page 36 Rinnai.co.nz Tel: 0800 746 624 http://www.youtube.com/rinnainz Novo freestanding installation guide 13992-A http://facebook.com.rinnainz...
Need help?
Do you have a question about the Novo Cube and is the answer not in the manual?
Questions and answers