Advertisement
Quick Links
Advertisement

Related Manuals for Siruba DT828L


Summary of Contents for Siruba DT828L
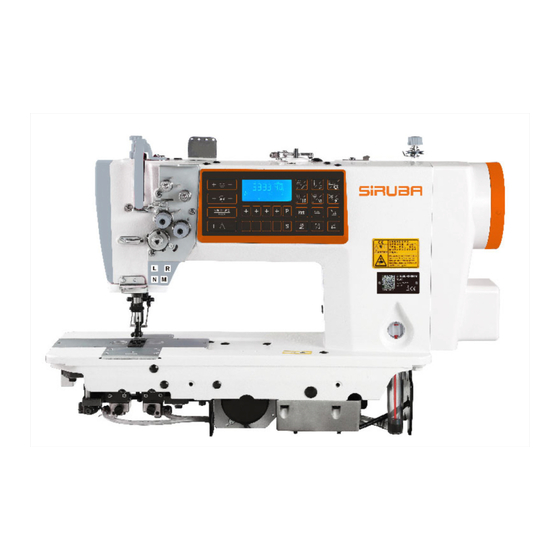
- Page 1 使用說明書與零件圖 INSTRUCTIONS BOOK & PARTS LIST DT828L...
- Page 2 溫馨提醒 A WARM REMINDER 請儘快下載 SIRUBA APP,並將您的機器註冊,以便獲得原廠的保固。APP 還提供多項有用 的資訊。 please register your Siruba machine online or through Siruba App at once, as to gain the full Apple Store Google Play warranty protection. You may also acquire more useful information through Siruba APP .
-
Page 3: Safety Precautions
安全須知 SAFETY PRECAUTIONS 危險 Danger An accident means " to cause personal injury or death, or damage 意外事件將會導致人員受傷甚至死亡,也會造成財產的損害。 to property. " 當有必要進行電控系統的檢修時,務必要關閉電源,並等候至少 When it is necessary to perform service on electrical parts, be sure to 5分鐘以上才能打開電控箱/操作箱,以避免電擊。 turn the power off and wait for 5 minutes or more before opening the power cabinet/box in order to avoid electrical shock. - Page 4 PRECAUTIONS TO BE TAKEN IN 在不同階段的注意事項 VARIOUS OPERATION STAGES 1. 運輸 1. Transportation (1) When lift or move the machine, please take the machine (1) 當搬運或移動機器時,請考量機器重量,選擇安全合適的 weight into consideration and apply a safe manner. 方式。請參考機器規格。 Refer to the specification for the information you need for (2) 採取足夠的安全防護,以避免機台在搬運或移動中掉落。...
- Page 5 (1) 注意手,頭髮,衣服不在機件移動範圍。不要將個人物品 (2) The machine is designed to run at high speed. Always keep 置放於機器上。 your hands away from the moving area. Do not resume the work cycle until the machine stops completely. (2) 機器會高速運作。保持雙手遠離移動機件範圍。機器完全 (3) Be careful not to be caught by the machine or components 停止前不要靠近。...
- Page 6 索引 INDEX 頁 PAGE 規格 SPECIFICATION 各部件名稱 NAMES OF MAJOR PARTS 安裝方法 INSTALLATION 縫紉前的準備 PREPARATION BEFORE SEWING 縫紉 SEWING 縫紉效果 THREAD TENSION 保養 CLEANING 旋梭供油量的調整 ADJUSTING THE ROTARY HOOK LUBRICATION AMOUNT 標準調整 STANDARD ADJUSTMENT 服務部分政策 SERVICE PARTS POLICY 桌板圖 TABLE CUT-OUT...
-
Page 7: Specification
規格 SPECIFICATION D T 8 2 8 L - 0 6 4 自動切線 064 1/4" Auto thread trimmer 旋梭 標準旋梭 大旋梭 Rotary hook Standard hook Large hook 縫製類型 標準 ( 固定針桿 ) 角縫 Stitch function Fixed needle bar Split needle bar 用途... -
Page 8: Names Of Major Parts
各部件名稱 NAMES OF MAJOR PARTS (1)壓腳扳手 NAMES OF MAJOR PARTS (2)挑線桿防護罩 (1)Lifting lever (5)梭芯繞線裝置 (2)Thread take-up cover (4)線架 (5)Bobbin winder (3)電源開關 (4)Cotton stand (6)操作盒 (3)Power switch (7)手輪 (6)Operation panel (8)電機罩 (7)Machine pulley (9)油標 (8)Motor cover (10)倒縫開關按鈕 針桿分離按鈕 (245,275) (9)Oil gage window (11)油盤... -
Page 9: Installation
安裝方法 INSTALLATION Machine installation should only be carried out by a qualified 請讓受過培訓的技術人員來安裝縫紉機 technician. 縫紉機安裝時必須由兩人以上來完成 The installation should be carried out by two or more people. 在安裝完成前,請不要連接電源,如果誤 Do not connect the power cord until installation is complete. 踩下啟動開關時,縫紉機動作會導致受傷。 The machine may operate if the treadle is depressed by 縫紉機頭倒下時,請一定要固定工作台,... - Page 10 油盤 (1)頭部防震墊塊左 [2 個 ] (1)Head cushions(left) [2 pcs] (2)頭部防震墊塊右 [2 個 ] (2)Head cushions(right) [2 pcs] (3)放油橡皮塞 (3)Rubber cap (4)油盤 (4)Oil pan (5)油壺 (5)Oiler 機殼鉸鏈 Rubber cushions (1)釘 [4 個 ] (1)Nails [4pcs] (2)機殼鉸鏈套 [2 個 ] (2)Rubber cushions [2pcs] 縫紉機頭部...
- Page 11 加油方法 Lubrication 在加油未完成前,請勿插上電源。 Do not connect the power cord until lubrication has been 當勿按到啟動開關時,縫紉機動作會導致人 completed, otherwise the machine may operate if the treadle 員受傷。 is depressed by mistake, which could result in injury. 使用潤滑油和黃油時,務必戴好保護眼睛和 Be sure to wear protective goggles and gloves when handing 保護手套等,以防潤滑油落入眼中或沾在皮...
-
Page 12: Preparation Before Sewing
縫紉前的準備 PREPARATION BEFORE SEWING 機針的安裝方法 Installing the needle 安裝機針時,請切斷電源。 Turn off the power switch before installing the needle. 當誤按動開關時,縫紉機動作會導致人群 The machine may operate if the treadle is depressed by istake, 受傷。 which could result in injury. 1. 轉動縫紉機上輪,將針桿移動到最高位 1.Turn the machine pulley to move the needle bar to its hidhest 置。... - Page 13 在繞線過程中,不用觸摸任何運動部件或 Do not touch any of the moving parts or press any objects against 將物件靠在運動部件上,以為這會導致人 the machine while winding the lower thread, as this may result in 員受傷或縫紉機損壞。 personal injury or damage to the machine. 1. 打開電源開關。 1.Turn on the power switch. 2.
- Page 14 梭芯的裝取方法 Installing the bobbin 取出梭芯時,請切斷電源。 Turn off the power switch before removing the bobbin. 當誤按動開關時,縫紉機動作會導致人員 The machine may operate if the treadle is depressed by mistake, 受傷。 which could result in injury. 掛鉤式 Latch type 1. 將線的繞向置於如圖所示的方向,然後 1.Insert the bobbin (1) into the rotary hook (2) so that the winding 將梭芯(1)放⼊旋鎖(2)內。...
- Page 15 梭芯套式 Bobbin case type 1. 將線的繞向置於如圖所示的方向,然後 1.Insert the bobbin (1) into the bobbin case (2) so that the winding 將梭芯(1)放⼊梭芯套(2)內。 direction is as shoen in the illustration. 2. 梭芯套(2)有 A、B、C 三種。請根據 2.There are three types of cap (2) A,B,C. Thread the thread by one 所使用的梭芯套(2)的形狀,按下述...
- Page 16 面線的穿法 Threading the upper thread 在穿線過程中,請切斷電源。 Turn off the power switch before threading the upper thread. 當誤按動開關時,縫紉機動作會導致人員 The machine may operate if the treadle is depressed by mistake, 受傷。 which could result in injury. 1. 在穿面線之前轉動上輪,抬高挑線桿。 1.Turn the machine pulley and raise the thread take-UP (1) before 這樣會使穿線更加容易,並防止面線在...
- Page 17 膝控碰塊的使用方法 Using the knee lifter 按動膝控碰塊(1)可抬高壓腳(2)。 The presser foot (2) can be raised by pressing the knee lifter plate (1). ⻆形縫製方法 Corner sewing method 注意:要將本縫紉機作為單針縫紉機使 NOTE: If using this machine in place of a single-needle 用時,請把不使用一側的機針拆 machine,remove the needle which is not being used.In such 掉後再進行縫紉。請使用下述的...
- Page 18 縫紉 SEWING 為了安全起见,在使用本縫紉機之前,請安裝 Attach all safety devices before using the sewing ,achine.If the machine 保護裝置。 ie used without these devices attached,injury may result. 如果未安裝這些安全裝置就使用縫紉機,會造 Turn off the power switch at the following times, The machine may 成人身傷害及縫紉機損壞,發生下列情況時, operate if the treadle is depressed by mistake, which could result in injury. 請切斷電源,否則誤踩下啟動踏板時,縫紉機...
-
Page 19: Thread Tension
縫紉效果 THREAD TENSION 調節線張力 Adjusting the thread tension 正確的線跡 Good even stitches 面線 Upper thread 底線 Lower thread 面線張力過小或 增大面線張力減小底線張力 底線張力過大 Increase the upper thread Upper thread tension tension Decrease the lower too weak or lower thread tension thread tension to strong 面線張力過大或... - Page 20 調節壓腳壓力 Adjusting the presser foot pressure Correct Stitches 正確縫紉 Skipped Stitches 跳針 Uneven stitch → Increase the pressure 縫距不平均→押腳壓力增強 of the presser foot Wrinkles occurred → Reduce the 產生縐折→押腳壓力減弱 pressure of the presser foot ①應盡可能減小壓腳壓力,但需有足夠壓 ① The presser foot pressure should be as weak as possible, 力使布料不致滑動。(以下表的“壓...
- Page 21 挑線量的調節 採用向線量調整器(1)穿過線的方法來調節挑線量 標準線量調整器(1)的使用方法 ●線不穿過線量調整器(1), 鬆開固定螺釘(2), 將 線量調整器(1)移向右側 ●線穿過線量調整器(1), 固定螺釘(2)被置於調 整範圍的中間狀態時 , 就是線量調整器(1)的標 準位置 挑線量的調節 線穿過線量調整器(1)進行調節,越將線量調整器 (1)向右移則挑線量越少 線不穿過線量調整器(1)適用於下列情況 ●用⼥士內⾐規格的縫紉機縫製厚布料時 ●要加長針距等而挑線量不夠時 線穿過線量調整器(1)適用於下列情況 ●使用易滑的機針線時 ●縫製薄的布料時 ●以 2mm 以下的針距進行縫紉時 調整基準 旋梭尖端補充上線環,使環移動到旋梭線量最大的點 (A)的近前方(B)為止時,挑線簧(3)開始運動, 這就是標準的挑線桿線量 挑線桿線量過多 ●如果挑線桿的線量很多,那麼即使經過了 (A),挑 線簧(3)也不會開始移動,會造成跳針、機線鬆 緊如不果良挑、線斷桿線的線量少,挑線簧(3) 從(B)跟前開始移動,會造成斷線、面線過緊、 拉線 ●由於線的種類、布料的厚度、針距的大小的不同, 挑線桿需要的線量會改變,所以請根據縫製條件來 進行調整。 挑線桿線量過少 開始轉動...
- Page 22 Adjusting the thread take-up amount Using the standard thread amount adjuster (1) ● Do not pass the thread through the thread amount adjuster (1), Loosen the screw (2) and slide the thread amount adjuster (1) to the right-side position. ● Pass the thread through the thread amount adjuster (1).
- Page 23 保養 CLEANING 注意 CAUTION Turn off the power switch before carrying out claning 在開始清潔作業前,請切斷電源。 The machine may operate if the treadle is depressed by istake, 當誤按動開關時,縫紉機動作會導致人員 which could result in injury. 受傷。 Be sure to wear protective goggles and gloves when handling the 使用潤滑油和⻩油時,務必戴好保護眼睛...
-
Page 24: Adjusting The Rotary Hook Lubrication Amount
ADJUSTING THE ROTARY HOOK 旋梭供油量的調整 LUBRICATION AMOUNT 注意 CAUTION 在檢查旋梭供油量時,手指和油量測試紙 Guide to lubrication adjustment 不能碰到旋梭和送布機構等運動零部件 1.Tilt back the machine head 如更換了旋梭或要變更縫紉速度時,請按 2.Turn the oil adjusting screw (1) to adjust the height to within 10- 下述步驟調整旋梭的供油量 15 mm 供油量調整的大致標準 1. 將縫紉機頭部倒下 Checking the lubrication amount 2. -
Page 25: Standard Adjustment
標準調整 STANDARD ADJUSTMENT 注意 CAUTION Maintenance and inspection of the sewing machine should only 只有經過培訓的技術人員才能進行縫紉機 be carried out by a qualified technician 的檢查和維修 If any safety devices have been removed, be absolutely sure to re- 若有安全裝置已拆下,務必在使用前將它 install them to their original positions and check that they operate 們安裝在原來的位置上,並檢查是否正常... - Page 26 ① Height of stopper [right](3)[for right thread] ①挑線簧限位器 [ 右 ] ( 3) 的高度 [ 右線用 ] 1. Loosen the screw (6),and then slide the stopper [right](3) to 1. 旋松螺釘(6),滑動挑線簧限位器 adjust the thread take-up amount [ 右 ]( 3),提高高度。 2. Tighten the screw (6) 2.
- Page 27 Clearance between rotary hook and needle plate 旋梭和針板的間隙 The clearance (A) between the rotary hook (1) and the needle 出廠時, 旋梭 (1) 和針板 (2) 的間隙 (A) plate (2) is 1.4-1.7 mm. 的尺寸為 1.4-1.7mm。 ● Check clearance (A) each time parts such as the rotary hook (1) ●在更換旋梭(1)和針板(2)等對間隙...
- Page 28 ① Clearance between rotary hook and opener ①旋梭與分線勾的間隙 1.Loosen the set screw (3) and move the opener (1) to the left 1. 分線勾(1)沿箭頭方向拉滿的時候, or right to adjust so that the clearance between the rotary 旋松固定螺釘(3),將分線勾(1) hook (2) and the opener (1) is 0.1-0.3 mm when the opener (1) 左右調整,使旋梭(2)和分線勾(1)...
- Page 29 機針與旋梭的同步 Needle and rotary hook timing 1. 將針距調整到 0 1.Adjust the needle distance to 0 2. 逆時針轉動手動輪,使針桿(4)上升, 2.Turn the manual wheel counter clockwise so that the needle bar 直至針桿(4)的基線(2)與針桿支架 (4) rises until the needle bar (4) the baseline (2) is aligned with (3)的下端對⻬...
- Page 30 8. 在機針的槽部塗上油墨 8.Use an oil-based marker pen to color in the hollow of the needle 9. 邊 轉 動 手 輪, 邊 將 機 針 推 向 旋 梭 尖 9.With the needle raised,turn the machine pulley forward while (13),在機針的槽部會留下旋梭尖端 pushing the needle against the rotary hook tip (13) with your (13)的痕跡...
- Page 31 ①送布⽛的安裝方法 ① Installing the feed dog 1. 將送布⽛(1)用螺釘(3)安裝在⽛ 1.Install the feed dog (1) to the feed bar (2) with the two screws 架叉組件( 2)上 2. 擰緊送布⽛叉組件的固定螺釘(4), 2.Tighten the feed dog support set screw (4) so that the tip of 使其前端與送布⽛(1)的下面接觸 the set screw (4) touches the bottom of the feed dog (1) 3.
- Page 32 送布⽛的高度 Feed dog height 轉動手動輪,送布⽛(1)上升到最高位 Turn the machine pulley forward until the feed dog (1) is at 置,此位置進行調整,使送布⽛(1)距 its highest position, and then adjust so that the feed dog (1) 針板(2)上面 0.9-1.1mm protrudes 0.9-1.1 mm from the top of the needle plate (2) 1.
- Page 33 送布⽛的傾斜 Feed dog angle ⽛架軸(1)與水平送布台臂(3)的標準 1.The standard angle for the feed dog is when the mark (2) on the 為:⽛架軸(1)的配合標記(2)與水平 feed bar shaft (1) is aligned with the reference line (4) on the 送布台臂(3)的基線(4)一致 feed rocker base arm (3). 1. 放下縫紉機頭 2.Loosen the set screw (5).
- Page 34 SERVICE PARTS POLICY To ensure the quality and safety of machine, all SIRUBA parts pass the highest quality inspection and test. For any case of adopting non-genuine SIRUBA parts for replacement and service, it may cause not only losing the warranty coverage, but also the unexpected damage to the operator and property.
- Page 36 1 / 1 DT828L 2022/01/13 1.机体部分/Machine body 序号 图 号 数量 零 件 名 称 NAME OF PARTS 062351212 螺釘M3.5×12 SCREW PAN M3.5×12 橡皮塞 15.5 115010701 RUBBER CAP 15.5 124010301-1 面板 FACE PLATE 062501016 螺釘M5×10 SCREW PAN M5×10 124010402 机头灯組件...
- Page 37 1 / 1 DT828L 2022/01/13 3.針杆摆动装置/Needle bar rocking mechanism 序号 图 号 数量 零 件 名 称 NAME OF PARTS 螺釘M5×6 062500616 SCREW PAN M5×6 124030301 摆动軸軸套R BUSH R 124030401 針杆摆动大組件 NEEDLE BAR ROCKER LEVER 用於 42/72 規格 124031501 軸套L...
- Page 38 1 / 1 DT828L 2022/01/13 5.針杆切换操作装置/Needle bar rocking mechanism 序号 图 号 数量 零 件 名 称 NAME OF PARTS 125040101 分离板 SEPARATION PLATE 012500536 螺釘 M5×5 SCREW PAN M5×5 125040301 紧圈 SET SCREW COLLAR 012400532 螺釘M4×5 SCREW PAN M4×5 125040401 弹簧...
- Page 39 1 / 1 DT828L 2022/01/13 8.定規部件/Gauge parts 序号 图 号 数量 零 件 名 称 NAME OF PARTS 124081401 針夹組件 1/4 NEEDLE CLAMP ASSY 1/4 125081601 左針夹組件 1/4 NEEDLE CLAMP ASSY 1/4 125081701 右針夹組件 1/4 NEEDLE CLAMP ASSY 1/4 115024106 机針DP×5 (#14)
- Page 40 1 / 1 DT828L 2022/01/13 9.旋梭部件/Rotary hookj mechanism 序号 图 号 数量 零 件 名 称 NAME OF PARTS 124090101 分線鉤连杆軸 SHAFT O-LINK 124090201 分線鉤连杆 OPENER LINK 125090201 分線鉤连杆 OPENER LINK 124090301 螺釘SM3.57×40 SCREW SM3.57×40 124090401 分線鉤 OPENER 124090501 分線鉤杆...
- Page 41 1 / 1 DT828L 2022/01/13 10.旋梭装置/Rotary hook mechanism 序号 图 号 数量 零 件 名 称 NAME OF PARTS 124100106 旋梭組件 (小) ROTARY HOOK BOX ASSY ( S) 125100105 旋梭組件 (大) ROTARY HOOK BOX ASYY ( B) 124095501 梭芯 (小)...
- Page 42 1 / 1 DT828L 2022/01/13 14.供油润滑装置/Lubrication 序号 图 号 数量 零 件 名 称 NAME OF PARTS 062501016 螺釘M5×10 SCREW PAN M5×10 124120301 油管支架 OIL SUPPORT 062401016 螺釘M4×10 SCREW PAN M4×10 101012702 电線过線圈 RUBBER CAP 115012401 橡皮塞8 RUBBER CAP 8 124125502 机头储油盒...
- Page 43 1 / 1 DT828L 2022/01/13 16.扫線装置/Thread wiper mechanism 序号 图 号 数量 零 件 名 称 NAME OF PARTS 124160101 扫線电磁鐵組件 THREAD WIPER SOLENOID ASSY 062501016 螺釘M5×10 SCREW PAN M5×10 124160301 螺釘M3×12 SCREW PAN M3×12 021300306 螺母M3 NUT M3 021400306 螺母M4...
- Page 44 1 / 1 DT828L 2022/01/13 18.附件/Accessories 序号 图 号 数量 零 件 名 称 NAME OF PARTS 机头鉸鏈 HEAD HINGE 115150401 釘 NAIL 115151701 机头鉸鏈套 RUBBER CUSHION 115150501 头部防震垫 L HEAD CUSHION L 115150601 头部防震垫 R HEAD CUSHION R 115150801 螺丝刀...
- Page 46 由於對產品的改良及更新,本產品使用說明書中與零件圖之產品及外觀的修改恕不事先通知 ! The specification and/or appearances of the equipment described in this instruction book & parts list are subject to change because of modification which will without previous notice. DT828L.DEC.2021...
Need help?
Do you have a question about the DT828L and is the answer not in the manual?
Questions and answers