Racelogic Performance Box Touch V2 Quick Start Manual
Hide thumbs
Also See for Performance Box Touch V2:
- Quick start manual (36 pages) ,
- Manual (9 pages) ,
- Installing (6 pages)
Table of Contents
Advertisement
Quick Links
Quick Start Guide: Accel Mode - Performance Box Touch V2
https://en.racelogic.support//Product_Info/Performance_Meters/Performance_Box_Touch/
Performance_Box_Touch_V2/Quick_Start_Guide_%E2%80%93_Performance_Box_Touch_V2/
Quick_Start_Guide%3A_Accel_Mode_-_Performance_Box_Touch_V2
The Performance Box Touch provides you with a wealth
of information combined with easy installation and
use. Performance Box Touch V2 contains an
integrated high-performance, 25 Hz GNSS engine and
antenna, as well as a port for an external antenna.
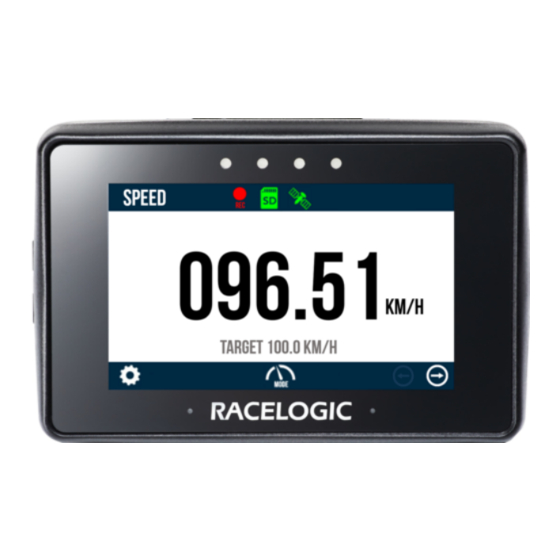
Performance Box Touch has 4 modes
available; Accel, Decel, Lap Timing and Speed.
They allow you to conduct a range of performance tests
and functions and can be changed by pressing
the
Mode
button at the bottom of the screen.
• Acceleration tests include 0–60, 0–100, 0–100–0
and 0–¼ mile.
• Custom speed, distance or 0-speed-0 tests can be
configured, and other options include enabling or
disabling an alert at end of the test, one-foot rollout
and slope correction.
• Can display up to 4 concurrent test results.
• Screen displays time, run number, distance, VMAX,
Peak G and altitude difference. Units of
measurement for speed or distance can be easily
swapped between metric or imperial.
Registration
Please register your Performance Box Touch so that Racelogic can continue to inform you about the latest software
releases and firmware upgrades and offer technical support.
1
Advertisement
Table of Contents

Subscribe to Our Youtube Channel
Related Manuals for Racelogic Performance Box Touch V2


Summary of Contents for Racelogic Performance Box Touch V2
- Page 1 Registration Please register your Performance Box Touch so that Racelogic can continue to inform you about the latest software releases and firmware upgrades and offer technical support.
-
Page 2: What Is In The Box
Cigar Plug USB Adapter (RLACS184) and the vehicle's 12 V cigar power socket to power the Performance Box Touch. You can also power the Performance Box Touch with the optional battery (RLACS290 – available from Racelogic). You can find more information on the battery below. - Page 3 media. The first time the unit is booted up, it will present the Display Mode screen. Every time after this, it will present the previously used display mode. Battery To give you the opportunity to use the unit without connecting it to a power source, we have an optional battery (RLACS290) available for the Performance Box Touch.
-
Page 4: Auto Power Off
bars, each representing a 10% charge. When the battery is charging, you will see a charging symbol appear over the battery symbol. If the battery has less than a 10% charge left, you will see a warning screen appear on the display, which will be displayed for 10 seconds. -
Page 5: Installation
There are many types of capacitive touch compatible gloves available for purchase. If you are unsure which gloves you need, please do not hesitate to contact Racelogic. Installation The battery is connected to Performance Box Touch with a Richter mounting system on the rear of the unit. Insert the prongs from the back of the battery into the rear of the Performance Box Touch unit and push upwards to secure. - Page 6 Richter mounting system on the rear of battery (RLACS290) Performance Box Touch Performance Box Touch comes supplied with a Suction Cup Windscreen Mount (ACS318MOUNT) so you can mount it on the vehicle's windscreen. It attaches to the Richter mounting system on the back of the unit, or at the back of the Battery if this is connected to the unit.
-
Page 7: Satellite Reception
Satellite Reception Performance Box Touch has an internal patch antenna. This means that, in many circumstances, the unit does not require an external antenna if it has a clear view of the sky without any interference (e.g. roof bars, athermic windscreen, windscreen wipers). However, if you are struggling to maintain a stable satellite lock (indicated by a flashing red satellite icon), you can use an external antenna (RLACS284). -
Page 8: Gps Coldstart
roof, and place some adhesive-backed metal foil underneath, on the inside of the roof. Media, iframe, embed and object tags are not supported inside of a PDF. Acquiring Satellite Lock Tall buildings or trees can block GNSS signals, causing a reduction in the number and quality of satellites being tracked. - Page 9 When you press the button, the unit will make an audible sound and you will see a ‘PLEASE WAIT’ message counting down from 3. Until the satellite lock has been acquired, the number of satellites will be displayed as '00' and the GPS status will show ‘SEARCHING FOR SATELLITES’.
-
Page 10: General Settings
Diagnostics The Diagnostics menu displays basic information about the GNSS receiver and the VBOX unit and its battery. Performance Box Touch V2 – Accel Mode Acceleration Mode is where you can perform acceleration tests by using either pre-defined configurations or your own specified values. You can also display up to 4 concurrent test results on the screen. - Page 11 The previously selected Acceleration test will be displayed after each power cycle. You can choose from either speed or distance parameters to start and end the test. Test results displayed on the screen of the Performance Box Touch will remain on-screen at the end of the test until the next start condition is met. The speed units used depend on what you select in the General Settings area.
- Page 12 The screen is split into 2 halves: • Left-hand side: This includes a live speed display which always show the current speed of the vehicle, irrespective of any test start or end conditions. If the vehicle is travelling slower than 0.5 km/h or the satellite lock is lost (less than 4 satellites), the value will display as 000.0.
- Page 13 screen. • Right-hand side: This contains results from the defined acceleration test ranges, either as time, distance, or speed. These values will start to populate once the start condition of the test is met. When the end condition is met, they will remain on screen until the start condition is met again. Along with pressing the Settings button, you can also define Accel tests by double-tapping on an existing test range header or result.
- Page 14 The currently selected test ranges are presented on the left-hand side of the screen and will be remembered for future use, even if you choose another mode. Press on the existing parameters to change them. Note: You can also define Accel tests in the Secondary Accel Screen by double-tapping on an existing test range header or result.
- Page 15 Speed Test Parameters Distance Test Parameters Test Type Parameters Start Speed (km/h or Result (time or Speed End Speed (km/h or mph) mph) distance) End Distance (m or ft) Start Speed (km/h or Result (time or Distance Pre-Set Distance buttons include ¼ mile, ½ mile mph) speed) and 1 km.
-
Page 16: Result Type
Keypad example for Start Speed. To save your chosen value, press the Confirm button on the bottom right of the screen. If you wish to return to the Custom Test screen without saving, press the Cancel button. Notes: • The maximum input value is 999.9 for speed and 9999 for distance. •... - Page 17 • Distance tests: ◦ Time (default) - The elapsed time between the start and end conditions is given as the selected range result. ◦ Speed - When the end condition is met, speed is given as the selected range result. Accel Settings You can access the Accel Mode settings screen by pressing the Settings...
- Page 18 • Slope correction only applies to the live display results to match post-process corrections from the DB Scanner third-party software. You cannot apply post-process corrections with Racelogic software programs. • You cannot enable Slope Correct while One-Foot Rollout is enabled.
-
Page 19: Test History
Screenshot Selecting the Screenshot button will save a full image of what is shown on the screen to the inserted SD card. You can learn more about the screenshot function here. IMPORTANT NEVER remove the SD card when a screenshot is being taken and saved, it could cause the unit to crash! Test History You can view a history of the test results by selecting the Results... -
Page 20: Save Results
• Time of first completed run in session • Date of first completed run in session • Test run number • Test completion time • Test completion distance (km/h or mph) • Maximum Speed (km/h or mph) • Maximum acceleration achieved during a test run (g) •... -
Page 21: Sd Card Format
Note: If the SD card is removed while the box is still recording, you may need to repair it on a PC before you can use it again. SD Card Format Performance Box Touch V2 is supplied with an 8 GB SDHC card in a FAT32 file format, which is the only file format it supports. - Page 22 SD card organisation. SD Card Format Performance Box Touch V2 is supplied with an 8 GB SDHC card in a FAT32 file format, which is the only file format it supports. If you are looking to purchase a new SD card, we recommend that any card you use has a write speed of above 7 MB/s (4 MB/s is the absolute minimum) and a speed class of 10 (4 is the absolute minimum).
- Page 23 If you have an SD card that is formatted in the exFAT or NTFS file formats, you will have to reformat it to a FAT32 file system before it will work with a Performance Box Touch V2 unit. SDHC cards (2 GB to 32 GB) Supplied or purchased SDHC cards are formatted in the FAT32 file format.
-
Page 24: Led Behaviour
LED Behaviour General The 4 LEDs at the top of the unit provide visual feedback dependent on what process is being performed: • Accel Mode: If Alert at End is enabled, the LEDs will flash green for 0.5 s once the test end criteria are met. •...
Need help?
Do you have a question about the Performance Box Touch V2 and is the answer not in the manual?
Questions and answers