Racelogic VBOX LapTimer User Manual
Hide thumbs
Also See for VBOX LapTimer:
- User manual (57 pages) ,
- Quick start manual (5 pages) ,
- Quick start (2 pages)
Table of Contents
Advertisement
Quick Links
VBOX LapTimer User Manual
•
01 - VBOX LapTimer - Introduction
•
02 - VBOX LapTimer - GPS
•
03 - VBOX LapTimer - Speed/Max Speed/Speed Bar
•
04 - VBOX LapTimer - Lap Timing
•
05 - VBOX LapTimer - Predictive Lap Timing
•
06 - VBOX LapTimer - Lap Count
•
07 - VBOX LapTimer - Lateral/Longitudinal g
•
08 - VBOX LapTimer - Menu Options
•
09 - VBOX LapTimer - Square Button Functions
•
10 - VBOX LapTimer - Using as an OLED Display
•
11 - VBOX LapTimer - Technical Properties
•
VBOX LapTimer - EC Declaration of Conformity
•
VBOX LapTimer - PIN OUTS
•
VBOX LapTimer - Standard Inventory
•
VBOX LapTimer - Technical Specification
•
How to Update the VBOX LapTimer Firmware
1
Advertisement
Table of Contents

Related Manuals for Racelogic VBOX LapTimer


Summary of Contents for Racelogic VBOX LapTimer
- Page 1 08 - VBOX LapTimer - Menu Options • 09 - VBOX LapTimer - Square Button Functions • 10 - VBOX LapTimer - Using as an OLED Display • 11 - VBOX LapTimer - Technical Properties • VBOX LapTimer - EC Declaration of Conformity •...
-
Page 2: Compatible Media
Compatible media VBOX LapTimer can record to MMC, SD, SDHC and SDXC media cards that are formatted in a FAT or FAT32 format. SDXC cards will be formatted as exFAT by default, a format type not supported by VBOX LapTimer. They can still be used, as long as they have been reformatted to FAT32. -
Page 3: Display Modes Overview
Display Modes Overview VBOX LapTimer has different display modes, which can be accessed using the Up and Down buttons. The data on each screen is calculated at all times, even if it is not displayed. Live Speed Lap Timing Max. Speed... -
Page 4: Hardware Connections
Hardware Connections Standalone https://en.racelogic.support//Product_Info/Lap_Timing_and_Pit_Timing/VBOX_LapTimer/VBOX_LapTimer_User_Guide/01_- _VBOX_LapTimer_-_Introduction... - Page 5 With Video VBOX Pro https://en.racelogic.support//Product_Info/Lap_Timing_and_Pit_Timing/VBOX_LapTimer/VBOX_LapTimer_User_Guide/01_- _VBOX_LapTimer_-_Introduction...
- Page 6 With Video VBOX Lite https://en.racelogic.support//Product_Info/Lap_Timing_and_Pit_Timing/VBOX_LapTimer/VBOX_LapTimer_User_Guide/01_- _VBOX_LapTimer_-_Introduction...
- Page 7 With Video VBOX Waterproof https://en.racelogic.support//Product_Info/Lap_Timing_and_Pit_Timing/VBOX_LapTimer/VBOX_LapTimer_User_Guide/01_- _VBOX_LapTimer_-_Introduction...
- Page 8 Obtaining the Best GPS Quality Placement of the GPS antenna is crucial to the quality of the data recorded by VBOX LapTimer. Any metal close to a GPS antenna can disturb the signal in an unpredictable way due to interference from reflections of weak GPS signals.
- Page 9 Media, iframe, embed and object tags are not supported inside of a PDF. Acquiring Satellite Lock Tall buildings or trees can block GPS signals, causing a reduction in the number and quality of satellites being tracked, leading to inaccurate position measurements and a noisy velocity signal. https://en.racelogic.support//Product_Info/Lap_Timing_and_Pit_Timing/VBOX_LapTimer/VBOX_LapTimer_User_Guide/02_- _VBOX_LapTimer_-_GPS...
- Page 10 GPS Coldstart If VBOX LapTimer is struggling to acquire satellite lock, a GPS coldstart may be required. This may be necessary when the unit hasn’t been used for a number of days or has dramatically moved location since its last use. To perform a cold- start, select MENU >...
-
Page 11: Max Speed
In this mode the screen will display a large clear speed value to 2 decimal places. The speed can be set to display in kph, mph or knots. The number of decimal places displayed can be adjusted through the VBOX LAPTIMER menu. -
Page 12: Bar Graph Settings
Bar graph settings If the square button is pressed, the user can set the desired speed and configure the speed display range of the bar graph. https://en.racelogic.support//Product_Info/Lap_Timing_and_Pit_Timing/VBOX_LapTimer/VBOX_LapTimer_User_Guide/03_- _VBOX_LapTimer_-_Speed%2F%2FMax_Speed%2F%2FSpeed_Bar... - Page 13 ‘+’ is shown for a slower than best. Split line display If split lines have been set via the VBOX LapTimer main menu, then split times will be shown for between 2-20 seconds https://en.racelogic.support//Product_Info/Lap_Timing_and_Pit_Timing/VBOX_LapTimer/VBOX_LapTimer_User_Guide/04_-...
- Page 14 ▼button within 5 seconds. If split lines or a separate finish are also required, then use the ‘set start finish and splits’ option in the main menu. Note: The vehicle must be moving >10 km/h to set a Start/Finish Line. https://en.racelogic.support//Product_Info/Lap_Timing_and_Pit_Timing/VBOX_LapTimer/VBOX_LapTimer_User_Guide/04_- _VBOX_LapTimer_-_Lap_Timing...
- Page 15 05 - VBOX LapTimer - Predictive Lap Timing For this mode to work, a start/finish line is required. Make sure that a track layout is selected through the main menu, or set a start line manually. • Until the start line is crossed, the screen will show ‘Waiting for start line’...
- Page 16 • Above this minimum Combo G selected, the LEDs will show a colour gradient between and GREEN, giving a changing YELLOW/ORANGE colour, dependent on the live Combo G. • The LEDs will show GREEN where the Combo G is equal to or greater than the maximum g threshold selected. https://en.racelogic.support//Product_Info/Lap_Timing_and_Pit_Timing/VBOX_LapTimer/VBOX_LapTimer_User_Guide/05_- _VBOX_LapTimer_-_Predictive_Lap_Timing...
- Page 17 Save reference lap This feature allows the user to save a reference lap for future use, insert an SD card into VBOX LapTimer and use the menu options shown below. Note that the vehicle must be stationary to make this transfer.
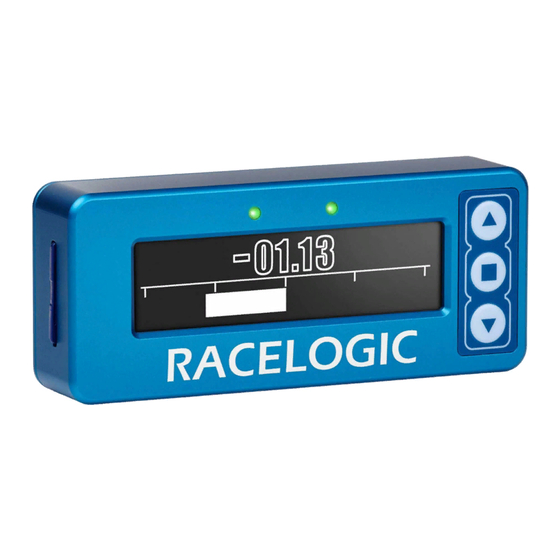
- Page 18 The amount of time shown on the bar graph can be altered in the main menu to 2, 5, 10 or 30 seconds. Additionally the LEDs on the front of the VBOX LapTimer indicate Delta-V. Red indicates that velocity is slower than the reference point and green faster.
- Page 19 The lap count screen will display two lap counts. On the left hand side of the screen the total lap count is displayed – this counter will only be reset by a power cycle of the VBOX LapTimer. The right hand side of the screen displays the current laps and will be reset by removal of the logging media from VBOX LapTimer.
- Page 20 07 - VBOX LapTimer - Lateral/Longitudinal g Lateral g Displays the current g within the vehicle as a live display whilst also displaying the maximum lateral g reached. This helps the driver push their vehicles that little bit harder during cornering.
- Page 21 +3.0 g. The target g can be set within the same menu between -3.0 to +3.0 g to help reach the desired g on braking Within the menu, the user can also select to have an inverted target g labelled on the graph. https://en.racelogic.support//Product_Info/Lap_Timing_and_Pit_Timing/VBOX_LapTimer/VBOX_LapTimer_User_Guide/07_- _VBOX_LapTimer_-_Lateral%2F%2FLongitudinal_g...
- Page 22 View lap times VBOX LapTimer will store all the lap times from the current session (maximum of 99 lap times). The lap times will be cleared when a new start line is set or the lap timing data is reset.
-
Page 23: Select Track
When satellites have been acquired, the VBOX LapTimer will check the GPS location against Racelogic’s track map database and load the layouts available. The user must use this menu option to select the layout they are driving to allow the VBOX LapTimer to load correct start/finish line. -
Page 24: Logging Status
This range setting affects the sensitivity of the Delta-V LEDs. Settings of 2 kph, 5 kph and 10 kph are available – the default setting is 5 kph. Note: if the VBOX LapTimer is set to show speed in mph or knots, then these values will be the direct equivalent of the three values. - Page 25 Save reference lap This feature allows the user to save a reference lap for future use, insert an SD card into VBOX LapTimer and use the menu options shown below. Note that the vehicle must be stationary to make this transfer.
- Page 26 Set Start & Splits After the square button is pressed a new start/finish point is set. After this the VBOX LapTimer will display “Set split 1”. Press square to set the split,▼to skip to additional split points, Finish line and back. If a new start/finish or split line is set then the lap count, best lap and all the best split time values automatically reset.
- Page 27 Split time display period This function allows you to set how long the split time is shown for on the VBOX LAPTIMER display when a split line or the start/finish line is crossed. There is a choice of: 2 s, 5 s, 10 s, 15 s or 20 s, to select these options navigate to Main Menu - Lap timing Menu then highlight Split Time Display Period and use the square button to cycle through each option.
- Page 28 10 seconds. This will automatically reset when the user comes to a stop. After 2 seconds of being stationary, the screen counts down from 5 then shows ARMED – Start when ready. If the user pulls away before 1 is shown on the screen, nothing changes. During or after 1 is shown, when the user pulls https://en.racelogic.support//Product_Info/Lap_Timing_and_Pit_Timing/VBOX_LapTimer/VBOX_LapTimer_User_Guide/08_- _VBOX_LapTimer_-_Menu_Options...
-
Page 29: Display Menu
Pressing the square button will cycle through KPH, MPH and KNOTS. Speed decimal places Pressing the square button will cycle through 0, 1, and 2 decimal places. Speed smoothing Pressing the square button will cycle through five smoothing settings. https://en.racelogic.support//Product_Info/Lap_Timing_and_Pit_Timing/VBOX_LapTimer/VBOX_LapTimer_User_Guide/08_- _VBOX_LapTimer_-_Menu_Options... -
Page 30: Led Brightness
Pressing the square button will cycle through five brightness settings labeled 1 - 5. The displays screen will change its brightness as each setting is cycled through. LED Brightness Pressing the square button with this option selected will cycle through five brightness settings for the Delta V LEDs used in Predictive LapTiming Mode. https://en.racelogic.support//Product_Info/Lap_Timing_and_Pit_Timing/VBOX_LapTimer/VBOX_LapTimer_User_Guide/08_- _VBOX_LapTimer_-_Menu_Options... -
Page 31: Gps Options
If the VBOX LapTimer is being fitted in a permanent install or if it is expected to experience some heavy vibrations when in use, then the user may wish to fix the orientation as this can trigger the sensitive internal gyro to flip the screen. - Page 32 A new leap second is usually introduced every 4 to 7 years. The last leap second was added in December 2016. The current offset is 18 seconds - click here for more details. About In this section, the VBOX LapTimer serial number and installed firmware version is listed. https://en.racelogic.support//Product_Info/Lap_Timing_and_Pit_Timing/VBOX_LapTimer/VBOX_LapTimer_User_Guide/08_- _VBOX_LapTimer_-_Menu_Options...
- Page 33 09 - VBOX LapTimer - Square Button Functions Depending which mode is currently active on the screen, the function of the square button will change. The splash screen shown when scrolling through the menu describes the square button function for each mode.
- Page 34 10 - VBOX LapTimer - Using as an OLED Display Using with Video VBOX VBOX LapTimer can be used as an OLED display when connected to a Video VBOX unit. The LapTimer will check for the presence of a Video VBOX unit when it is powered up.
- Page 35 Video VBOX Lite To connect VBOX LapTimer to a Video VBOX Lite, use a RLCAB123 cable (sold separately). https://en.racelogic.support//Product_Info/Lap_Timing_and_Pit_Timing/VBOX_LapTimer/VBOX_LapTimer_User_Guide/10_- _VBOX_LapTimer_-_Using_as_an_OLED_Display...
- Page 36 Video VBOX Pro To connect VBOX LapTimer to a Video VBOX Pro, use a RLCAB122 cable (sold separately). https://en.racelogic.support//Product_Info/Lap_Timing_and_Pit_Timing/VBOX_LapTimer/VBOX_LapTimer_User_Guide/10_- _VBOX_LapTimer_-_Using_as_an_OLED_Display...
- Page 37 Using with Speed Sensor VBOX LapTimer can be used as an OLED display when connected to a Speed Sensor unit. The LapTimer will check for the presence of a connected unit when it is powered up. Connect the VBOX LapTimer as shown below, using the cables specified.
- Page 38 Using with VBOX VBOX LapTimer can be used as an OLED display when connected to a VBOX unit. The LapTimer will check for the presence of a connected unit when it is powered up. Connect the VBOX LapTimer as shown below, using the cables specified.
- Page 39 11 - VBOX LapTimer - Technical Properties Upgrading VBOX LapTimer VBOX LapTimer EC Declaration Firmware of Conformity VBOX LapTimer Standard VBOX LapTimer PIN OUTS Inventory VBOX LapTimer Technical Specification https://en.racelogic.support//Product_Info/Lap_Timing_and_Pit_Timing/VBOX_LapTimer/VBOX_LapTimer_User_Guide/11_- _VBOX_LapTimer_-_Technical_Properties...
- Page 40 VBOX LapTimer - EC Declaration of Conformity We declare that this product has been tested to and meet the requirements of: EC directive 2004/108/EC “Adapting to technical progress council directive 72/245/EEC relating to the radio interference (electromagnetic compatibility) of vehicles and amending directive 70/156/EEC on the approximation of the laws of the member states relating to the type-approval of motor vehicles and their trailers.”...
- Page 41 VBOX LapTimer - PIN OUTS Connector 1 - POWER (Lemo 2 PIN) Function Power+ Ground Chassis Ground https://en.racelogic.support//Product_Info/Lap_Timing_and_Pit_Timing/VBOX_LapTimer/VBOX_LapTimer_User_Guide/11_- _VBOX_LapTimer_-_Technical_Properties/VBOX_LapTimer_-_PIN_OUTS...
- Page 42 Connector 2 - RS232 / CAN (Lemo 5 PIN) Function RS232 Tx RS232 Rx CAN High CAN Low Power Connector 3 - GPS Antenna Function Signal Chassis Ground https://en.racelogic.support//Product_Info/Lap_Timing_and_Pit_Timing/VBOX_LapTimer/VBOX_LapTimer_User_Guide/11_- _VBOX_LapTimer_-_Technical_Properties/VBOX_LapTimer_-_PIN_OUTS...
- Page 43 VBOX LapTimer - Standard Inventory Product Code Quantity Description VBLAP01-V2 VBOX LapTimer Unit RLCAB010LE Cigar Lighter Power Cable Lightweight Camera/Display Suction RLACS287 Mount With Thumb Nut 8 GB SD Ultima Pro UHS-1 Memory RLACS313 Card External GPS/GLONASS Antenna RLACS284 (3 m - MCX Male Connector) https://en.racelogic.support//Product_Info/Lap_Timing_and_Pit_Timing/VBOX_LapTimer/VBOX_LapTimer_User_Guide/11_-...
- Page 44 VBOX LapTimer - Technical Specification Dimensions https://en.racelogic.support//Product_Info/Lap_Timing_and_Pit_Timing/VBOX_LapTimer/VBOX_LapTimer_User_Guide/11_- _VBOX_LapTimer_-_Technical_Properties/VBOX_LapTimer_-_Technical_Specification...
- Page 45 _VBOX_LapTimer_-_Technical_Properties/VBOX_LapTimer_-_Technical_Specification...
-
Page 46: General Specification
GPS Specification Velocity Accuracy 0.1 km/h Units km/h or mph Update rate 20 Hz or 10 Hz* Maximum velocity 1800 km/h Minimum velocity 0.1 km/h Resolution 0.01 km/h *Version 1 units 20Hz only, Version 2 units 10Hz only. https://en.racelogic.support//Product_Info/Lap_Timing_and_Pit_Timing/VBOX_LapTimer/VBOX_LapTimer_User_Guide/11_- _VBOX_LapTimer_-_Technical_Properties/VBOX_LapTimer_-_Technical_Specification... - Page 47 ±5 m ** 95% CEP (Circle of Error Probable) means 95% of the time the position readings will fall within a circle of the stated radius. Acceleration Accuracy 0.5 % Maximum Resolution 0.01 g Heading Resolution 0.01° Accuracy ±0.1° https://en.racelogic.support//Product_Info/Lap_Timing_and_Pit_Timing/VBOX_LapTimer/VBOX_LapTimer_User_Guide/11_- _VBOX_LapTimer_-_Technical_Properties/VBOX_LapTimer_-_Technical_Specification...
- Page 48 How to Update the VBOX LapTimer Firmware Occasionally Racelogic will release new versions of firmware (internal code) for the VBOX LapTimer, often to introduce new features. Download the latest Firmware file here How do you run the update? 1. Download the upgrade file from the link above und unzip it.
Need help?
Do you have a question about the VBOX LapTimer and is the answer not in the manual?
Questions and answers