
Subscribe to Our Youtube Channel
Related Manuals for Landoll Brillion LSP5


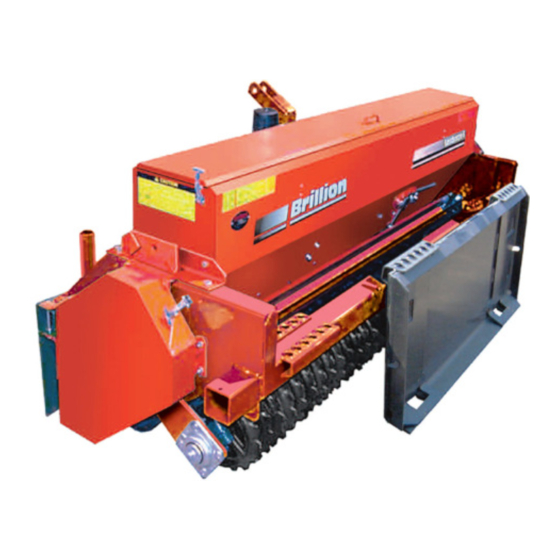
Summary of Contents for Landoll Brillion LSP5
- Page 1 ‘ Landscape Grass Seeder Models LSP5, LSP6 and LSS6 Operator’s Manual LANDOLL COMPANY, LLC 1900 North Street Marysville, Kansas 66508 (785) 562-5381 800-428-5655 ~ WWW.LANDOLL.COM 7K458-0221...
- Page 2 Manuals for Landscape Grass Seeder - LSP5, LSP6 and LSS6 Manual Number Manual Type 7K458 Operator’s Manual 7K457 Parts Manual...
- Page 3 Table of Contents Safety Information Introduction ........... . 1-1 Description of Unit .
- Page 4 TABLE OF CONTENTS Table provided for general use. NOTES: 7K458-0221...
-
Page 5: Safety Information
10 days of retail purchase, using the Landoll most turf seeds with ease. Built on a structural tube Company, LLC Ag Products on-line registration process. -
Page 6: Understanding Safety Statements
TABLE OF CONTENTS Safety • When applying decals to the implement, be sure to clean the surface to remove any dirt or residue. Where possible, sign placement should protect the sign from NOTE abrasion, damage, or obstruction from mud, dirt, oil etc. -
Page 7: Maintenance Safety
TABLE OF CONTENTS Safety Instructions for Towing Maintenance Safety Vehicles • Block the machine so it will not roll when working on or under it to prevent injury in case of hydraulic failure or The maximum travel speed is the lesser of inadvertent lowering by another person. -
Page 8: Safety Decals
TABLE OF CONTENTS Safety Decals CAUTION WARNING DO NOT LUBRICATE, ADJUST OR REPAIR WHEN MACHINE IS IN MOTION. DO NOT TOW OR TRANSPORT FASTER THAN 15 MILES PER HOUR. DO NOT RIDE OR ALLOW OTHERS TO RIDE ON THE MACHINE. BLOCK UP ALL HYDRAULICALLY OR MECHANICALLY RAISED COMPONENTS TO PREVENT UNINTENDED LOWERING OR LOWER THE MACHINE TO THE GROUND TO MAKE ADJUSTMENT OR REPAIRS OR WHEN NOT IN USE. - Page 9 TABLE OF CONTENTS Figure 1-3: Decal Locations 7K458-0221...
- Page 10 TABLE OF CONTENTS Table provided for general use. NOTES: 7K458-0221...
- Page 11 Chapter 2 TABLE OF CONTENTS Assembly Agitator Blades (Optional Cage CAUTION or Brushes) The brushes will be destroyed if installed Agitator Blades are supplied as standard on your backwards. seedbox. They should operate leaving a slight clearance with the bottom of the seedbox. 4.
- Page 12 TABLE OF CONTENTS REAR Bushing Washer Intermediate Bearing Cage Agitator Brush Agitator Bolt, 5/16-18 x 3/4 Blade Agitator FRONT Shafts Out Right End Box End Bearing Figure 2-3: Agitator Blades Installation CAT2 Quick Coupler Hitch Adaptor Kit - Optional 1. Remove Seeder Lower Hitch Pins. 2.
- Page 13 TABLE OF CONTENTS Bolt,1/2-13 x 4-1/2 Sleeve,1-1/4 x 1-15/16 **Sleeve,1 x 2 **Quick Pin **Clevis Pin,3/4 x 3 Lower 3-Pt Pin Bolt,1/2-13 x 4-1/2 Clamp Plate Hitch Lug **Hairpin Cotter **Quick Pin Locknut,1/2-13 Clamp Plate Hitch Lug Lower 3-Pt Pin Locknut,1/2-13 **Existing Hardware Figure 2-4: CAT2 Quick Coupler Hitch Adaptor Kit - Optional...
- Page 14 TABLE OF CONTENTS Lift Sling Kit - Optional 1. Attach a mounting bracket to the left side of machine and a mounting bracket and strap to the right side of machine at the center holes of the right and left end WARNING plates.
- Page 15 TABLE OF CONTENTS Acre Meter Kit 6K036 Installation 4. Run the wire from the bottom of the meter down the side of the seedbox and along its left side. Use The Acre Meter Kit consists of four main parts; Acre Meter mounting bases to hold the wire in place.
- Page 16 TABLE OF CONTENTS 5. At the rear of the seeder, mount the L- shaped bracket 8. Adjust the Pick-up Switch so the centerline of Magnet to the end plate with a 5/8-11 x 1 1/2" capscrew and Wheel and Pick-up Switch are horizontally and locknut as shown.
-
Page 17: Operation
Chapter 3 TABLE OF CONTENTS Operation Landscape Seeder Operation DANGER DANGER The Brillion Landscaper Seeder is fully assembled from Always be sure the front of the tractor has the factory. This section refers to how to successfully enough weight to maintain control when the operate your machine. -
Page 18: Attaching To A Tractor
TABLE OF CONTENTS Attaching to a Tractor On LSS6, skid steer models, there is a parking pin located on each side of the frame. In addition, a quick attach When hooking up seeders: frame attaches to the rear frame tube of the seeder by means of two pins and Klik Pins. - Page 19 TABLE OF CONTENTS Seed Rate Adjustment - Adjusting the Box Slide When properly adjusted, with the control handle set at “6”. The holes in the slide should line up with the holes in the box. See Figure 3-3. To make an adjustment, loosen the control handle on the box, move the slide until the holes line up.
- Page 20 TABLE OF CONTENTS Calibration of the Seedbox 17 Tooth Seedbox may be calibrated for unlisted seeds as follows: Idler See Figure 3-6. 1. Raise machine and lock in transport position. 2. Place a tarp under machine to collect seed. 26 Tooth 13 Tooth Driven 3.
- Page 21 TABLE OF CONTENTS Doubling the Seed Rate Seed rates can be doubled by using the 26-Tooth Sprocket and extra chain links included with the seeder. See Figure 3-8. Procedure is as follows: 1. Loosen drive chain. 2. Open chain at connector. 3.
- Page 22 TABLE OF CONTENTS Loup Acre Meter Settings - After If a password is set, you will not be able to adjust the pulses per mile. 05/15/2012 Width The battery operated acre counter operates in one of two modes. In sleep mode, the display is blank, and the Press the /FUNC button until the “WIDTH”...
- Page 23 TABLE OF CONTENTS Loup Acre Meter Settings - Prior To Disable Password to 05/15/2012 1. Press the function button to scroll to the password screen it will show (ent). • When the meter is set to “count” mode in pulses 2.
- Page 24 TABLE OF CONTENTS Acre Meter Settings Charts Pulses Width MODEL per 400 FT (Feet) SSPT604 SSP4 SSP5 SSP6 SSP8 SSBP8 SSB8 SSP10 SSBP10 SS10 SSB10 10.0 SSP12 SSBP12 SS12 SSB12 12.0 SSP16 SS16 16.0 SSP108 SS108 SSP110 SS110 10.0 SSP112 SS112 12.0 SSP208/2081...
- Page 25 TABLE OF CONTENTS Width MODEL Pulses (Feet) SSPT604 SSP4 SSP5 SSP6 SSP8 SSBP8 SSB8 SSP10 SSBP10 SS10 SSB10 SSP12 SSBP12 SS12 SSB12 SSP108 SS108 SSP110 SS110 SSP112 SS112 SSP208 SSP2081 SS208 SS2081 SSP210 SSP2101 SS210 SS2101 SSP212 SSP2121 SS212 SS2121 SSP308 SS308 SSP310...
- Page 26 TABLE OF CONTENTS Adjustment of Wheel Track Remover The depth of the wheel track removers can be adjusted as shown. See Figure 3-10. Loosen the 1/2-13 x 1-1/4 bolts and nuts that secure the clamps to the coil tine supports. Adjust the supports up or down to the desired depth and then retighten the nuts on the bolts.
-
Page 27: Maintenance
Chapter 4 TABLE OF CONTENTS Maintenance General Torque Specifications (rev. 4/97) This chart provides tightening torques for general purpose applications when special torques are not specified on process or drawing. Assembly torques apply to plated nuts and capscrews assembled without supplemental lubrication (as received condition). They do not apply if special graphite moly-disulfide or other extreme pressure lubricants are used. - Page 28 TABLE OF CONTENTS Fasteners NOTE It is good machine maintenance practice to check all bolts Before operating your Brillion machine, check all for tightness during regular lubrications. Tighten any hardware for tightness. Use the Tightening Torque Table fasteners that may have loosened during operation. as a guide.
-
Page 29: Chain Tension
TABLE OF CONTENTS Chain Tension Roller Wheels Adjust the chain between the front roller and transmission Occasionally it is necessary to loosen clamp bands and to have approximately 1/4" to 3/8" of slack. tighten roller wheel assemblies. As nearly as possible, peaks on rear wheels should line up with valleys on front To adjust the chain: wheels. -
Page 30: Maintenance Chart
TABLE OF CONTENTS Maintenance Chart (Subject to change without notice) Initial Run - In 20 Hours Annually Storage Fasteners Lubricate Roller Chains Adjust Roller Chain Tension **Clean Machine Grease After Cleaning Touch-Up Paint **Avoid spraying high pressure water directly at bearing seals and electrical components. 7K458-0221... -
Page 31: Specifications
Chapter 5 TABLE OF CONTENTS Specifications LSP-5 LSP-6 LSS-6 Approximate Weight 924 lbs. (416 kg) 1,006 lbs. (453 kg) 1,242 lbs. (559 kg) Working Width 5 ft. 0 in. (1.25 m) 6 ft. 0 in. (1.8 m) 6 ft. 0 in. (1.8 m) Transport Width 6 ft. - Page 32 TABLE OF CONTENTS Table provided for general use. NOTES: 7K458-0221...
- Page 33 Document Control Revision Log: Date Form # Improvement(s): Description and Comments 05/2008 102rev0508 Initial Release 10/2011 102rev1011 Updated, Incorporated Landoll Format 03/13/2013 102rev0313 Added New Acre Meter Data 02/2021 7K458-0221 Added CAT2 Quick Coupler Hitch Adaptor Kit...
- Page 34 Equipment from Landoll Company, LLC is built to exacting standards ensured by ISO 9001 registration at all Landoll manufacturing facilities. Landscape Grass Seeder Models LSP5, LSP6 and LSS6 Operator’s Manual Re-Order Part Number 7K458 LANDOLL COMPANY, LLC 1900 North Street...
Need help?
Do you have a question about the Brillion LSP5 and is the answer not in the manual?
Questions and answers