
Related Manuals for Landoll Brillion SS4


Summary of Contents for Landoll Brillion SS4
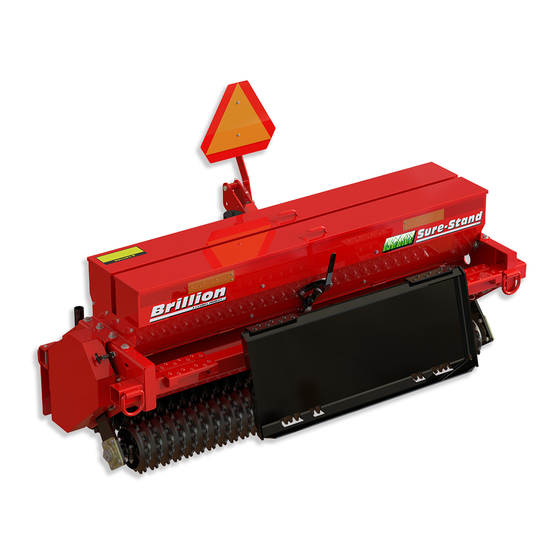
- Page 1 ‘ Sure Stand Seeder Models SS4, SS5, SS6, SSB4, SSB5, SSB6, SSP4, SSP5, SSP6 Operator’s Manual LANDOLL COMPANY, LLC 1900 North Street Marysville, Kansas 66508 (785) 562-5381 800-428-5655 ~ WWW.LANDOLL.COM 7K555-2401...
- Page 2 Manuals for Sure Stand Seeder - 4FT, 5FT, 6FT Manual Number Manual Type 7K555 Operator’s Manual 7K554 Parts Manual...
- Page 3 Table of Contents Safety Information Introduction ........... . 1-1 Description of Unit .
- Page 4 TABLE OF CONTENTS Maintenance General Torque Specifications ........4-1 Fasteners .
- Page 5 Brillion Farm Equipment, by Landoll, shall have no warranty obligation unless each product is registered, Description of Unit within 10 days of retail purchase, using the Landoll Company, LLC Ag Products on-line registration process. 4FT, 5 FT, 6FT Sure Stand Seeders feature a front Meter...
- Page 6 TABLE OF CONTENTS SAFETY INFORMATION Safety • When applying decals to the implement, be sure to clean the surface to remove any dirt or residue. Where possible, sign placement should protect the sign from NOTE abrasion, damage, or obstruction from mud, dirt, oil etc.
- Page 7 TABLE OF CONTENTS SAFETY INFORMATION Safety Instructions for Towing Protective Equipment Vehicles • Wear protective clothing and equipment appropriate for the job. Avoid loose fitting clothing. The maximum travel speed is the lesser of • Because prolonged exposure to loud noise can cause •...
- Page 8 NOT RECOMMENDED: BLUESTEMS OTHER THAN SHOWN, ZORRO FESCUE NOT RECOMMENDED: BLUESTEMS OTHER THAN SHOWN, ZORRO FESCUE 7K434 FOR SSBP4, SSBP5, SSBP6, SSBS6 SEEDERS 528934 ITEM 8 7K434 A LANDOLL PRODUCT 193500 ITEM 10 CALIBRATION PLANTING RATES MACHINE MAY BE CALIBRATED FOR UNLISTED SEED AS FOLLOWS: 1.
- Page 9 TABLE OF CONTENTS SAFETY INFORMATION Figure 1-3: SSB4 Decal Locations (After 12/2023) 7K555-2401...
- Page 10 TABLE OF CONTENTS SAFETY INFORMATION Figure 1-4: SSB5, SSB6 Decal Locations (After 12/2023) 7K555-2401...
- Page 11 TABLE OF CONTENTS SAFETY INFORMATION Figure 1-5: SSB6S Decal Locations (Skid Steer) (After 12/2023) 7K555-2401...
- Page 12 TABLE OF CONTENTS SAFETY INFORMATION Figure 1-6: SSBP4 Decal Locations (Before 12/2023) 7K555-2401...
- Page 13 TABLE OF CONTENTS SAFETY INFORMATION Figure 1-7: SSBP5, SSBP6 Decal Locations (Before 12/2023) 7K555-2401...
- Page 14 TABLE OF CONTENTS SAFETY INFORMATION Table provided for general use. NOTES: 1-10 7K555-2401...
- Page 15 Chapter 2 TABLE OF CONTENTS Assembly The Seeder is shipped completely assembled. See To ensure alignment of assemblies, leave the nuts loose Figure 2-1. until completion of final assembly. Use lock washers or flat washers as specified. Spread all cotter pins. CAUTION After completion of final assembly, tighten all nuts evenly to prevent misalignment, distortion or binding.
- Page 16 TABLE OF CONTENTS ASSEMBLY Skid Steer Seeder Quick The Quick Attach Plate can be mounted on the front (Skid Steer pulls the Seeder) or rear (Skid Steer pushes the Attach Plate Seeder) of the Seeder. See Figure 2-3. Quick Attach Plate when mounted on the rear can be offset.
- Page 17 TABLE OF CONTENTS ASSEMBLY Quick Attach Plate Seeder C L Seeder Frame Rear Tube REAR Frame Lug Frame Lug FRONT 3-PT Hitch Seeder Seeder C L REAR 3-PT Hitch Frame Lug Frame Lug FRONT Stop Channel Stop Channel Quick Attach Plate Figure 2-3: Quick Attach Plate Mounted - Centered 7K555-2401...
- Page 18 TABLE OF CONTENTS ASSEMBLY Quick Attach Plate 5" Offset Seeder Frame Rear Tube REAR Frame Lug Frame Lug FRONT 3-PT Hitch Seeder C L Figure 2-4: Quick Attach Plate Mounted - Offset Agitator Installation 5-Strip Brush Agitators must be installed with the brushes facing backward, away from rotation to wipe over the seed openings.
- Page 19 TABLE OF CONTENTS ASSEMBLY Lock Washer,5/16 Nut,5/16-18 ROTATION Bolt,5/16-18 5-Strip x 1-1/4 Brush Shifter Cotter Pin,5/32 Plate x 1-1/2 REAR Flat Washer,7/8 Figure 2-6: 5-Strip Brush Agitator Orientation Agitator Installation Steps 1. Remove the Cotter Pins from the RH end of the Seed Square Shaft.
- Page 20 TABLE OF CONTENTS ASSEMBLY Acre Meter Installation - 6. Attach the Pick-Up Switch short ground wire to the small hole in the Pick-Up Switch Bracket with #6-32 x Optional 1/2 Screw and Nut. Remove paint under the wire connector to assure a good electrical ground The Acre Meter Kit consists of three main parts, the Acre connection.
- Page 21 TABLE OF CONTENTS ASSEMBLY 8. Connect the Acre Meter and Pick-Up Switch Connectors. 9. Securely fasten the cords with tie wraps to the Seeder Frame End Plate to prevent cords from becoming entangled or rubbing on moving parts. See Figure 2-13. 10.
- Page 22 TABLE OF CONTENTS ASSEMBLY CAT2 Quick Hitch Adapter Kit 3. Insert a Clamp Plate into each Hitch Lug Slot and over the top of the Seeder Frame Tube. Secure with 1/2-13 - Optional x 4-1/2 Bolts and Locknuts. See Figure 2-15. 4.
- Page 23 TABLE OF CONTENTS ASSEMBLY Hair Pin Cotter Clevis Pin Bushing,1" x 2" Lower 3-PT Hitch Pin Bushing,1-1/8 18" Klik Pin Klik Pin x 3-3/16 Lower 3-PT Bushing,1-1/8 Hitch Pin x 3-3/16 Category 2 Free Link Bushing,1-1/4 x 1-15/16 Clevis Pin Hair Pin Cotter Pin Ø1-7/16"...
- Page 24 TABLE OF CONTENTS ASSEMBLY Lift Sling Kit - Optional 1. Attach a Mounting Bracket onto each side of the Seeder Frame with 1/2-13 x 1-3/4 Bolts, Lock Washers and Nuts. See Figure 2-17. WARNING 2. Attach Lift Sling to Mounting Brackets with 5/8-11 x 1-1/2 Bolts and Locknuts.
- Page 25 TABLE OF CONTENTS ASSEMBLY Speed-Up Kit - Optional 5. Install the 26 Tooth Sprocket on the End of the Front Roller. Seed rates can be doubled by installing Optional 6. Double check Sprocket alignment. Adjust with Speed-Up Kit 26 Tooth Sprocket and extra Chain. See Washers as necessary.
- Page 26 TABLE OF CONTENTS ASSEMBLY Table provided for general use. NOTES: 2-12 7K555-2401...
- Page 27 Chapter 3 TABLE OF CONTENTS Operation DANGER DANGER DANGER DANGER Never allow anyone to ride on the seeder at any Always lock the tractor drawbar in the center time. Allowing a person to ride on the machine position when transporting the unit. Failure to do can inflict serious personal injury or death to that so can result in serious injury or death and cause person.
- Page 28 TABLE OF CONTENTS OPERATION Tractor Preparation - 4. Disengage both Parking Pins from the back LH and RH sides of the Seeder. This will allow the Rear Roller Attaching/Detaching to float during operation. See Figure 3-1. • Remove each Parking Pin Klik Pin. The Sure Stand Seeder is available as a 3-PT Hitch or •...
- Page 29 TABLE OF CONTENTS OPERATION Clevis Pin Hair Pin Cotter Pin Ø3/4" 18" Pin Ø7/8" Pin Ø7/8" Klik Pin Klik Pin Lower Hitch Pin Lower Hitch Pin Category 1 Free Link Clevis Pin Hair Pin Cotter Bushing Ø1" Bushing Ø1-1/8" Bushing Ø1-1/8" 18"...
- Page 30 TABLE OF CONTENTS OPERATION SMV Position in Transport Skid Steer Preparation - Attaching/Detaching The SMV should be clearly viewable from the rear of the Seeder and as vertical as possible when in transport. Skid Steer Preparation 1. Loosen the 1/2-13 Hardware attaching the SMV Mount to the Seeder.
- Page 31 TABLE OF CONTENTS OPERATION 4. Raise Seeder so Rollers are barely off the ground. 5. Disengage both Parking Pins from the back LH and Klik Pin RH sides of the Seeder. This will allow the Rear Roller to float during operation. See Figure 3-5. Parking Pin •...
- Page 32 TABLE OF CONTENTS OPERATION Front Seed Box Seed Rate Seed Rate Charts specific to Seeder Model are located inside the Seed Box Cover and in this manual. See Adjustment Figure 3-15. It should be used as a reference only. Because of seed variation, a more accurate rate can be determined by performing Front Meter Box Seed WARNING Calibration Procedure to calibrate the seed.
- Page 33 TABLE OF CONTENTS OPERATION Front Meter Box Seed Calibrate unlisted seeds as follows: 1. Remove the Outer Reduction Drive Chain between Calibration Procedure the 17 Tooth and 19 Tooth Sprockets. See Figure 3-9. 2. Raise machine. NOTE 3. Place a canvas or tarp under the Seeder to catch The information listed in the Seed Charts is subject to seed.
- Page 34 TABLE OF CONTENTS OPERATION POUNDS PER ACRE INDICATOR SETTINGS Alfalfa (Uncoated) Bahia Bermuda (Hulled) Birdsfoot Trefoil (Broadleaf) Blue Grass (Kentucky) Blue Grass (Park Kentucky) Blue Grass (Sherman Big) Canola* Centipede Clover (Alsike, Ladino, Sweet, Red) Clover (Alyce, Calif. Bur., Crimson, Hubam) Crested Wheat Crown Vetch Flax...
- Page 35 TABLE OF CONTENTS OPERATION POUNDS PER ACRE INDICATOR SETTINGS Alfalfa (Uncoated) Bahia Bermuda (Hulled) Birdsfoot Trefoil (Broadleaf) Blue Grass (Kentucky) Blue Grass (Park Kentucky) Blue Grass (Sherman Big) Canola* Centipede Clover (Alsike, Ladino, Sweet, Red) Clover (Alyce, Calif. Bur., Crimson, Hubam) Crested Wheat Crown Vetch Flax...
- Page 36 TABLE OF CONTENTS OPERATION Rear Agitator Seed Box Seed • Cage and 8-Row Brush Agitators can be used to plant cereal grains such as Wheat, Oats, Rye, and Barley. Rate Adjustment However, Brillion does not recommend this for a harvestable grain crop because the seed will be placed WARNING in the top 1/4"...
- Page 37 TABLE OF CONTENTS OPERATION Rear Agitator Box Seed Calibrate unlisted seeds as follows: 1. Remove the Outer Reduction Drive Chain between Calibration Procedure the 17 Tooth and 19 Tooth Sprockets. See Figure 3-9. 2. Raise machine. NOTE 3. Place a canvas or tarp under the Seeder to catch The information listed in the Seed Charts is subject to seed.
- Page 38 TABLE OF CONTENTS OPERATION Table provided for general use. NOTES: 3-12 7K555-2401...
- Page 39 TABLE OF CONTENTS OPERATION Track Remover Adjustment The pitch of the Tire Track Remover/s can be adjusted. The depth of the Tire Track Remover/s can be 1. Loosen the Clamp Bolts that secure the Coil Tine adjusted. Harrow Tube to the Coil Tine Supports. See 1.
- Page 40 TABLE OF CONTENTS OPERATION Loup Acre Meter Kit - Total Acres Optional (After 05/15/2012) Press the /FUNC button until the “TOTAL” LED is lit. The digits indicate the acres covered since the total acre counter was cleared. IMPORTANT To clear the total acre count, press and hold the UP and Acre Meter is dust and splash resistant, under no DOWN buttons for two seconds.
- Page 41 TABLE OF CONTENTS OPERATION Loup Acre Meter Kit - If the display shows “Ent”: You must enter your password using the UP and DOWN buttons. When your Optional (Before 05/15/2012) password is displayed, press the /FUNC button to test the password. If the password is correct, you will be able Settings to change the acre counter settings.
- Page 42 TABLE OF CONTENTS OPERATION Acre Meter Settings Charts MODEL Pulses per 400 FT Width (Feet) SSPT604 SSP4 SSB4 SSP5 SSB5 SSP6 SSB6 SSP8 SSBP8 SSB8 SSP10 SSBP10 SS10 SSB10 10.0 SSP12 SSBP12 SS12 SSB12 12.0 SSP16 SS16 4610-16 16.0 SSP108 SS108 SSP110 SS110...
- Page 43 TABLE OF CONTENTS OPERATION MODEL Pulses Width (Feet) SSPT604 SSP4 SSP5 SSP6 SSP8 SSP10 SS10 SSP12 SS12 SSP108 SS108 SSP110 SS110 SSP112 SS112 SSP208 SSP2081 SS208 SS2081 SSP210 SSP2101 SS210 SS2101 SSP212 SSP2121 SS212 SS2121 SSP308 SS308 SSP310 SS310 SSP312 SS312 SLP8 4147...
- Page 44 TABLE OF CONTENTS OPERATION Transporting the Seeder 9. Verify that SMV sign, reflectors, and Safety Decals are clearly visible and tractor or Skid Steer lamps are 1. Check and follow all federal, state, and local functioning properly. requirements before transporting the Seeder. 10.
- Page 45 Chapter 4 TABLE OF CONTENTS Maintenance General Torque Specifications (rev. 4/97) This chart provides tightening torques for general purpose applications when special torques are not specified on process or drawing. Assembly torques apply to plated nuts and capscrews assembled without supplemental lubrication (as received condition). They do not apply if special graphite moly-disulfide or other extreme pressure lubricants are used.
- Page 46 TABLE OF CONTENTS MAINTENANCE Fasteners Lubrication Before operating your Brillion machine, check all WARNING hardware for tightness. Use the Tightening Torque Table reproduced above as a guide. See Page 4-1. Do Not lubricate Seeder while in motion. If After a few hours of use, check the entire machine and Guard is opened for lubricating, it must be tighten any loose nuts or bolts.
- Page 47 TABLE OF CONTENTS MAINTENANCE Front and Rear Roller Adjustment Roller Drum Front Roller Welded Seam Assembly NOTE tight against Roller Drum Wheel Hub Failure to position the Front Roller Clamp Band Socket Head Bolt (Clamp Band open section) over the Roller Drum weld seam will cause Clamp Band to loosen and Clamp slide.
- Page 48 TABLE OF CONTENTS MAINTENANCE Chain Tension Outer Reduction Drive Chain 1. Adjust Chain Tension by loosening Outer Yoke Idler Sprocket Hardware and adjusting the Outer Yoke IMPORTANT Locknut to obtain about 1/8"-1/4" sag. Do not over-tighten the Inner Seed Shaft Drive Chain. 2.
- Page 49 TABLE OF CONTENTS MAINTENANCE Idler Bracket Outer Yoke Locknut Outer Yoke Idler Sprocket Hardware Outer Reduction Drive Chain Front Roller Idler Drive Chain Sprocket Spring Spring Clip Idler Arm Assembly Figure 4-4: Outer Reduction Drive Chain 23 Tooth Agitator Idler Sprocket Assembly Sprocket Rear Seed Box...
- Page 50 TABLE OF CONTENTS MAINTENANCE Seed Meter Adjustment The Pointer should point to the Seed Shaft Extension hex groove marked “0” when all the Seed Meters are closed. See Figure 4-8. IMPORTANT 1. If it does not, loosen both of the 5/8-11 Adjusting Hex Nuts on each side of the bearing.
- Page 51 TABLE OF CONTENTS MAINTENANCE Agitator Box Slide 4. Check that the Shifter Handle functions properly in relationship with the Shifter Plate. Adjustment • Shift the Shifter Handle to “0”. The Agitator Box bottom opening should be fully closed. See When the Agitator Box Slide is properly adjusted, the Figure 4-11.
- Page 52 TABLE OF CONTENTS MAINTENANCE Acre Meter Troubleshooting 2. Verify that the magnet in the Magnet Wheel Assembly has not come out. 3. Place the Acre Meter display in “Calibrate” mode by IMPORTANT pressing the *(FUNC) key until the “P-WORD” Acre Meter is dust and splash resistant, under no indicator is lit and then press the up/down arrow keys circumstances should this unit be submerged in any until the display shows 0 and the LED is blinking.
- Page 53 Chapter 5 TABLE OF CONTENTS Specifications Product Attributes SSBP 4 SSBP 5 Approximate Weight 888 lbs. (403 kg) 1,061 lbs. (481 kg) Working Width 4 ft. 0 in. 1.2 m) 5 ft. 0 in. (1.25 m) Transport Width 5 ft. 0 in. (1.25 m) 6 ft.
- Page 54 TABLE OF CONTENTS SPECIFICATIONS Product Attributes SSBP 6 SSBS 6 (Skid Steer) Approximate Weight 1,205 lbs. (546.6 kg) 1,401 lbs. (635.5 kg) Working Width 6 ft. 0 in. (1.8 m) 6 ft. 0 in. (1.8 m) Transport Width 7 ft. 0 in. (2.1 m) 7 ft.
- Page 55 Document Control Revision Log: Date Form # Improvement(s): Description and Comments 03/2013 402rev0313 Added New Acre Meter Data 06/2020 7K555rev0620 Revised Chain Tension Illustration 02/2021 7K555-0221 Add CAT2 Quick Coupler Hitch Adapter Kit Option 01/2024 7K555-2401 ECN 49189, 49285, 49288, 49305, 49332, 49393, 49401, 49402, 49417, 49503 - Lift Sling Kit, SMV, Quick Hitch Sleeves, Decal Update, Rollers ECN 49297 - Acre Meter Bracket *Revision Format “Year/Date”...
- Page 56 Equipment from Landoll Company, LLC is built to exacting standards ensured by ISO 9001 registration at all Landoll manufacturing facilities. Sure Stand Seeder Models SS4, SS5, SS6, SSB4, SSB5, SSB6, SSP4, SSP5, SSP6 Operator’s Manual Re-Order Part Number 7K555 LANDOLL COMPANY, LLC...
Need help?
Do you have a question about the Brillion SS4 and is the answer not in the manual?
Questions and answers