
Related Manuals for Landoll Brillion ML 2253


Summary of Contents for Landoll Brillion ML 2253
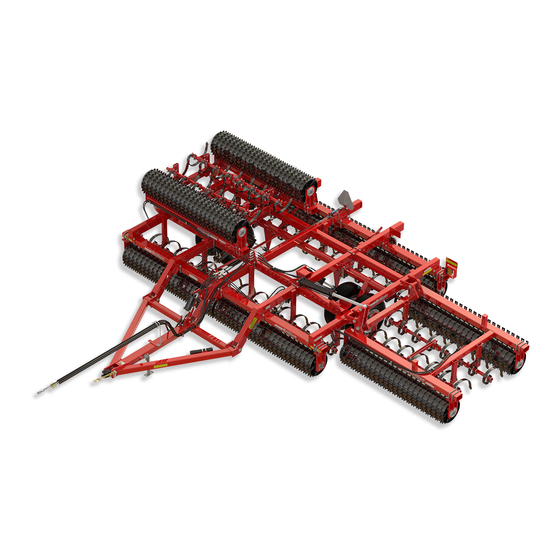
- Page 1 ‘ ML Rigid Pulvi-Mulcher Models: 2253 ML, MLS, MCL, MCC, MCLS, MLCS, MCCS Operator’s Manual LANDOLL COMPANY, LLC 1900 North Street Marysville, Kansas 66508 (785) 562-5381 800-428-5655 ~ WWW.LANDOLL.COM 1K965-2408...
- Page 2 Manuals for ML2253 Pulvi-Mulcher Manual Number Manual Type 1K965 Operator’s Manual 1K975 Parts Manual...
- Page 3 DANGER DO NOT operate or perform any maintenance tasks on this equipment until you have completed the following: 1. Receive proper training to operate this equipment safely. 2. Read and understand the operator’s manual. 3. Be thoroughly trained on inspection and repair procedures. Failure to comply with this warning may result in serious injury or possibly death.
- Page 5 Table of Contents Safety Introduction ............1-1 Description of Unit .
- Page 6 TABLE OF CONTENTS Hydraulic Installation ..........2-24 Lift Circuit .
-
Page 7: Warranty Registration
Failure to comply with this warning can result in within 10 days of retail purchase, using the Landoll personal injury or death, damage to the Corporation Ag Products on-line registration process. -
Page 8: Transporting Safety
TABLE OF CONTENTS SAFETY Safety • When applying decals to the implement, be sure to clean the surface to remove any dirt or residue. Where possible, sign placement should protect the NOTE sign from abrasion, damage, or obstruction from Investigation has shown that nearly 1/3 of all farm mud, dirt, oil etc. -
Page 9: Maintenance Safety
TABLE OF CONTENTS SAFETY Safety Instructions for Towing Maintenance Safety Vehicles • Block the machine so it will not roll when working on or under it. The maximum travel speed is the lesser of • Make sure Transport Lock Pin is installed and •... -
Page 10: High Pressure Fluid Safety
TABLE OF CONTENTS SAFETY High Pressure Fluid Safety Carriage Bolt, Escaping fluid under pressure can be nearly invisible and Drawbar 1-8 x 3-1/2 Tractor have enough force to penetrate the skin causing serious Drawbar injury. Use a piece of cardboard, rather than hands, to search for suspected leaks. - Page 11 ITEM 7 - 528934 ITEM 6 - 528933 ITEM 8 - 528938 ITEM 4 - 4K036 PULVI-MULCHER P/N: 232191 ITEM 5 - 4K039 ITEM 9 - 232191 MEMBER Landoll Company, LLC Marysville, Kansas www.landoll.com mile/h MODEL # 144193 FARM EQUIPMENT SERIAL # MANUFACTURERS...
- Page 12 TABLE OF CONTENTS SAFETY Figure 1-5: Front Decal Locations 1K965-2408...
- Page 13 TABLE OF CONTENTS SAFETY Figure 1-6: Rear Decal Locations (After 07/2016) 1K965-2408...
- Page 14 TABLE OF CONTENTS SAFETY Figure 1-7: Rear Decal Locations (Before 07/2016) 1K965-2408...
-
Page 15: Frame Assembly
Chapter 2 TABLE OF CONTENTS Assembly IMPORTANT CAUTION All Harnesses must be firmly attached to machine Do Not work on or under this machine unless frame members or Hydraulic Hoses so they do not securely blocked and supported by a hoist or sag or become torn loose by field debris. - Page 16 TABLE OF CONTENTS ASSEMBLY Figure 2-1: Frame Assembly 1K965-2408...
- Page 17 TABLE OF CONTENTS ASSEMBLY Rear Tube RH Outer Tube LH Outer Tube P/N 9J104 P/N 9J103 21-11/16" 51-1/2" 43-3/8" 51-1/2" Front Tube RH Inner Tube LH Inner Tube P/N 1K041 P/N 1K040 Figure 2-2: Frame Assembly Dimensions 1K965-2408...
- Page 18 TABLE OF CONTENTS ASSEMBLY Rockshaft Installation 3. Install the base end of the 3 1/2 x 16 Hydraulic Cylinder with ports up to the Rear Frame Lug and the 1. Place the Rockshaft under the frame Rockshaft Rod End to the Rockshaft Arm with the pins provided Mounting Angles.
-
Page 19: Tire Installation
TABLE OF CONTENTS ASSEMBLY Tire Installation WARNING Use a torque wrench to assure proper torque. Insufficient torque can cause stud breakage and damage the wheel pilots. Over torque can over stress the studs and strip the threads. NOTE All tire/wheel assemblies are mounted with the valve stem facing outward from Hub and Spindle. - Page 20 TABLE OF CONTENTS ASSEMBLY Rockshaft Link 4. In the front hole of the Link, install Roller Assembly with a 1.375 x 1.66 x .688 Spacer on each side, place 1. On the front frame tube angle bottom hole, install .546 Thrust Washer on the outside of Link.
- Page 21 TABLE OF CONTENTS ASSEMBLY Pin, 1 x 5-1/16 Roll Pin, Flat Washer,1" 1/4 x 2 Link Hyd Cyl, 3-1/2 x 16 Thrust Washer, 1-1/4 x 12Ga Pin, 1-1/4 x 4-1/2 Roll Pin, 1/4 x 2 Spacer, 1.375 x 1.66 x .688 Roller Assembly ML OpDrawbarLink Figure 2-6: Rockshaft Link...
-
Page 22: Drawbar Installation
TABLE OF CONTENTS ASSEMBLY Drawbar Installation 3. Install Jack onto the male swivel on the side of the Drawbar. The swivel on the top of the Drawbar is for 1. Attach the factory assembled Drawbar to the Frame storing the Jack. by removing and reinstalling the two 1 x 7-7/16 Pins, 4. - Page 23 TABLE OF CONTENTS ASSEMBLY Spring Linkage Assembly 2. Align Spring Linkage slot with Drawbar Center Mast. On the Center Mast place a flat washer on each side The purpose of the spring linkage is to cause the rear of of the Spring Linkage slot. Secure with 1 x 7-1/2 the machine to lift before the front during the raising cycle.
-
Page 24: Roller Installation
TABLE OF CONTENTS ASSEMBLY Roller Installation 1. Center Bracket Assembly has a bearing on each side. End Bracket Assembly has a bearing on one side Determine Roller Assemblies location based on the 2. Mount a Center Bracket Assemblies on the front machine model. - Page 25 TABLE OF CONTENTS ASSEMBLY Figure 2-10: Roller Installation 1K965-2408 2-11...
- Page 26 TABLE OF CONTENTS ASSEMBLY Figure 2-11: Roller Assemblies 2-12 1K965-2408...
- Page 27 TABLE OF CONTENTS ASSEMBLY Table provided for general use. NOTES: 1K965-2408 2-13...
- Page 28 TABLE OF CONTENTS ASSEMBLY Tooth Tube Bracket Assembly Tooth Tube Bracket Locknut, 9J091 Assemble Tooth Tube Brackets to Center Frame Vertical Use Top and 1/2-13 Middle Holes Tubes. See Figures 2-13 and 2-12. Reversing some of these brackets will cause interference later when Tooth Tube mounting the teeth.
- Page 29 TABLE OF CONTENTS ASSEMBLY Figure 2-14: Tooth Tube Bracket Locations 1K965-2408 2-15...
- Page 30 TABLE OF CONTENTS ASSEMBLY Table provided for general use. NOTES: 2-16 1K965-2408...
- Page 31 TABLE OF CONTENTS ASSEMBLY Tooth Control Installation 1. After Tooth Tube Brackets are assembled on the machine, pencil mark the tooth locations on the Tooth Tubes. See Figure 2-21. 2. Slide the Tooth Tubes through the Brackets. Both of the Tooth Tubes must be centered on the machine, an equal length of tube extending out beyond the outer brackets.
- Page 32 TABLE OF CONTENTS ASSEMBLY S-Tine Installation Tooth locations are shown in Figure 2-21. For ease of Duckfoot installation, assemble points with 3/8-16 x 1-3/4 Plow Bolts and Flange Locknuts to spring tine before mounting onto tooth tube. See Figure 2-16. Secure each with a Clamp, 1/2-13 x 3-1/2 Carriage Bolt and Locknut.
- Page 33 TABLE OF CONTENTS ASSEMBLY Nut,5/8-11 Washer,5/8 Rear Tube Hydraulic Cylinder Rachet Jack Pin, 3/4 X 5-5/16 Bolt,5/8-11 x 8 Washer,3/4 Cotter Pin, 3/16 X 1-1/2 Washer,3/4 Nut,5/8-11 Washer,5/8 Washer,3/4 Spacer Cotter Pin, 3/16 x 1-1/2 Pin, U-Bolt,5/8-11 3/4 x 6-5/16 Washer,3/4 FRONT Nut,5/8-11...
- Page 34 TABLE OF CONTENTS ASSEMBLY C-Tooth Installation Tooth locations are shown in Figure 2-21 Secure each Spring Tooth with a Tooth Clamp, a Clamp Strap, Lock Washers and Nuts. See Figure 2-19. 1. Locate on the front Tooth Tube the C-Tooth that is right of center.
- Page 35 TABLE OF CONTENTS ASSEMBLY Hex Nut,5/8-11 Washer,5/8 Rear Tube Hydraulic Cylinder Ratchet Jack Bolt,5/8-11 x 8 U-Bolt,5/8-11 Cotter Pin, 3/16 x 1-1/2 Washer,5/8 Washer,3/4 Hex Nut,5/8-11 Washer,3/4 Cotter Pin, 3/16 x 1-1/2 FRONT U-Bolt,5/8-11 Front Bracket Washer,5/8 Right Hand Hex Nut,5/8-11 Tooth should be centered Front Bracket between the two Angle Brakets...
- Page 36 TABLE OF CONTENTS ASSEMBLY Tooth Locations Figure 2-21: Tooth Locations 2-22 1K965-2408...
- Page 37 TABLE OF CONTENTS ASSEMBLY Bracket Relationship per Tine Style - Independent INDEPENDENT TOOTH CONTROL S-TINE LINKAGE LH Front Angle Rear Frame 9J108 Tube Rear Tooth RH Front Angel Bracket Cylinder Bracket Tooth 9J109 9J220 9J216 Linkage Hydraulic Cylinder or Rachet Jack FRONT S-Tine Figure 2-1: Center Bracket Relationship per Tine Style - Independent - S-Tine...
-
Page 38: Hydraulic Installation
TABLE OF CONTENTS ASSEMBLY Hydraulic Installation Tightening Procedure For Swivel O-Ring Fittings 1. Lubricate O-Ring and install the fitting until the metal washer which backs up the O-Ring contacts the face IMPORTANT of the boss. Lower the unit to the ground and relieve system 2. - Page 39 TABLE OF CONTENTS ASSEMBLY Hyd Cyl, 3-1/2 x 16 Elbow 90° 8MJ x 8MOR Adapter, 8MJ x 8MOR Hose Asm, 3/8 x 42" Hyd Cyl, Adapter, 3 x 8 8MJ x 8MOR Hose Asm, 3/8 x 30" Relief Valve Hose Asm, Tee, Branch 3/8 x 285"...
- Page 40 TABLE OF CONTENTS ASSEMBLY Purging the Lift Hydraulic Circuit 6. Recheck tractor reservoir to make sure it is within operating limits. Fold and Lift Hydraulic Circuit approximate oil IMPORTANT requirement: 1.0 gallon Lower the unit to the ground and relieve system pressure before attempting to repair, adjust, or Purging the Independent Tooth disconnect components.
- Page 41 TABLE OF CONTENTS ASSEMBLY Warning Lamp Installation IMPORTANT All harnesses must be firmly attached to machine 1. Install a Lamp Bracket approximately 31 inches from frame members, or hydraulic hoses, so they don’t sag center line on each side of the rear frame tube using or become torn loose by field debris.
- Page 42 TABLE OF CONTENTS ASSEMBLY Figure 2-27: Warning Lamp Installation Dimensions 2-28 1K965-2408...
- Page 43 TABLE OF CONTENTS ASSEMBLY Figure 2-28: Warning Lamp Installation 1K965-2408 2-29...
- Page 44 TABLE OF CONTENTS ASSEMBLY Rear Notched Scrapers 2. Center the Scraper Tube with respect to the Rollers. Mount the Scraper Brackets to the Scraper Tube by Installation placing the Scraper Tube between a 2" wide Scraper and a Scraper Bracket. Secure the Scrapers to the Brackets with 3/8-16 x 3-1/2 Bolts, Flat Washers, NOTE Lock Washers, and Nuts.
-
Page 45: Rear Hitch - Optional
TABLE OF CONTENTS ASSEMBLY Rear Hitch - Optional 1. Attach the Rear Hitch between the Center Frame Tubes with 5/8-11 x 6 U-Bolts, Lock Washers, and Nuts. See Figure 2-30. 2. Route the Tandem Adapter Harness through the bulkhead and secure with 1/4-20 x 1 Bolts and Locknuts. - Page 46 TABLE OF CONTENTS ASSEMBLY Land Leveler Kit - Optional 2. Assemble the LH and RH Adjustment Angles to the appropriate LH and RH Brackets with 1/2-13 x 1-1/2 Bolts, Lock Washers, and Nuts. NOTE 3. Center the Leveler Angle in front of the Pulvi-Mulcher If the soil pushes ahead of the bar it is set too low.
- Page 47 TABLE OF CONTENTS ASSEMBLY V-Leveler - Optional 2. Attach the Arm to the front of the Front Frame Tube by placing 4-Hole Plate behind the Front tube and inserting 5/8-11 x 8 Bolts, Lock Washers and Nuts. NOTE Slide the V-Leveler up to the Brackets and insert 1 x If the soil pushes ahead of the bar it is set too low.
- Page 48 TABLE OF CONTENTS ASSEMBLY Table provided for general use. NOTES: 2-34 1K965-2408...
-
Page 49: Tractor Preparation
Chapter 3 TABLE OF CONTENTS Operation DANGER DANGER CAUTION Never allow anyone a ride on the seeder at any When transporting farm implements on public time. Allowing a person to ride on the machine can roads, it is the responsibility of the operator to inflict serious personal injury or death to that abide by state and local laws concerning wide person. -
Page 50: Attaching To The Tractor
TABLE OF CONTENTS OPERATION Attaching to the Tractor • If an operator plugs in the 7-Pin Connector, but the lights do not seem to work right, check the 1. Align the Tractor Drawbar with the machine. Raise or above items to make sure there is a good lower the hitch, as needed, using the jack. -
Page 51: Hydraulic System
TABLE OF CONTENTS OPERATION Hydraulic System Independent Tooth Control Circuit IMPORTANT The Tooth Control Circuit engages and disengages the Lower the unit to the ground and relieve system C-Spring Teeth or S-Tine Shanks into the soil. When the pressure before attempting to repair, adjust, or Hydraulic Cylinder is fully extended the C-Spring Teeth or disconnect components. -
Page 52: General Operation
TABLE OF CONTENTS OPERATION General Operation Front Frame Spacer Hairpin Cotter 1. The minimum horsepower requirement is 6-8 Tube Angles horsepower per foot. This will vary widely due to speed, depth, moisture, residue and types of soils. Local dealers can help in making recommendations for your areas. - Page 53 TABLE OF CONTENTS OPERATION Transport Lock (Before Road to Field 1. Raise the machine slightly to loosen the Transport 07/2016) Lock Pin. 2. Remove the Transport Lock Pin from the Link second hole from the rear (transport lock position). Insert the CAUTION Pin in the Link rear hole (storage position).
-
Page 54: Depth Control
TABLE OF CONTENTS OPERATION Depth Control NOTE The center frame links and wing links must always be in S-Tine and C-Tooth depth is controlled by adjusting the "agreement" or the spring teeth on wings will work at a position of the 3 x 8 Cylinder Striker Plate limiting the different depth than center frame. - Page 55 TABLE OF CONTENTS OPERATION Notched Wheel Scraper Adjustment NOTE Rear Notched Roller Wheel Scrapers are standard and reversible. Front Notched Roller Scrapers are optional. NOTE A scraper can be used as a guide to achieve the 1/4" gap between the Scraper and Notched Wheels. Notched Roller Wheel Scrapers are designed to keep the Notched Roller Wheels from building up with moist soil during operation.
- Page 56 TABLE OF CONTENTS OPERATION Land Leveler / V-Leveler - Land Leveler Height Adjustment 1. Remove the 1/2-13 x 1-1/2 Bolts, Lock Washers, and Optional Nuts that mount the RH and LH Adjustment Angles to the RH and LH Brackets. NOTE 2.
- Page 57 TABLE OF CONTENTS OPERATION Transport 6. Before transporting: • Know the transport height and width of the unit 1. Check and follow all federal, state, and local before transport. Use caution when transporting requirements before transporting the Pulvi-Mulcher. near bridges and power lines. 2.
- Page 58 TABLE OF CONTENTS OPERATION Table provided for general use. NOTES: 3-10 1K965-2408...
-
Page 59: General Torque Specifications
Chapter 4 TABLE OF CONTENTS Maintenance General Torque Specifications (rev. 4/97) This chart provides tightening torques for general purpose applications when special torques are not specified on process or drawing. Assembly torques apply to plated nuts and capscrews assembled without supplemental lubrication (as received condition). They do not apply if special graphite moly-disulfide or other extreme pressure lubricants are used. -
Page 60: Hydraulic Fitting Torque Specifications
TABLE OF CONTENTS MAINTENANCE Hydraulic Fitting Torque Specifications 37 degree JIC, ORS, & ORB (REV. 10/97 This chart provides tightening torques for general purpose applications when special torques are not specified on process or drawing. Assembly torques apply to plated nuts and capscrews assembled without supplemental lubrication (as received condition). They do not apply if special graphite moly-disulfide or other extreme pressure lubricants are used. -
Page 61: Lubrication Maintenance
TABLE OF CONTENTS MAINTENANCE Tires Lubrication Maintenance Recommended Tire Size: 9.5L x 15-8 Ply Tire Lubricate with quality grease per recommended lubrication frequency intervals indicated or if machine is Tire Inflation Pressure: 44 PSI not used for an extended period. Greaseable components When Re-Installing 1/2-20 x 1 Wheel Bolts tighten to are the same on each side. -
Page 62: Hydraulic Maintenance
TABLE OF CONTENTS MAINTENANCE Hydraulic Maintenance 1. Check the tractor hydraulic fluid level per tractor owner's manual and after any leakage. Check hydraulic fluid level when the C-Teeth and S-Tines IMPORTANT are raised, and machine is raised for transport. Lower the Drawbar Seeder to the ground, and relieve 2. - Page 63 TABLE OF CONTENTS MAINTENANCE Clamp Tightening Procedure C-Tooth Point Replacement The tightening procedure and torque requirement is As the C-Tooth Point wears, a replacement reversible critical in keeping the clamp tight. point is available for installation. Place the reversible point on the front of the C-Tooth, Clamp Tightening Procedure: line-up the two bolt holes, insert two 3/8-16 x 1-3/4 1.
-
Page 64: Warning Lamps
TABLE OF CONTENTS MAINTENANCE Warning Lamps Storage When connecting the 7-Pin Warning Lamp Connector: 1. The service life of the Seeder will be extended by proper off-season storage practices. Prior to storing 1. Make sure the Tractor has a good clean Receptacle, the unit, complete the following procedures: free of dirt and corrosion. -
Page 65: Quick Reference
Chapter 5 TABLE OF CONTENTS Specifications Quick Reference Standard Machine Specifications Transport Height - 3' 8" 4" Roller Axles Dual Transport Wheels Transport Length - 19' 10" Nominal Teeth Spacing - 6" (4) 9.5L x 15-8 Ply Tires 20" Notched Ductile Iron Wheels Maximum Tooth Depth of Operation - 6"... -
Page 66: Specifications
TABLE OF CONTENTS SPECIFICATIONS Product Attributes ML 2253, MCL 2253, MLC 2253, MCC 2253 MLS 2253, MCLS 2253, MLCS 2253, MCCS 2253 Approximate Weight ML 2253: 8,313 lbs. (3,771 kg) MLS 2253: 8,223 lbs. (3,730 kg) MCL 2253: 8,175 lbs. (3,708 kg) MCLS 2253: 8,086 lbs. - Page 67 Date Form # Improvement(s): Description and Comments Initial Release 02/2011 1291rev0211 Incorporated New Drawings, Parts and ECN’s, Independent Hydraulics. Updated to the Landoll format. 06/2012 1291rev0612 Incorporated New Drawings, New Part Numbers, and Optional Equipment. 06/2013 1291rev0613 Incorporated Improved Drawings.
- Page 68 Equipment from Landoll Company, LLC is built to exacting standards ensured by ISO 9001:2015 registration at all Landoll manufacturing facilities. ML Rigid Pulvi-Mulcher Models 2253 ML, MLS, MCL, MLC, MCC, MCLS, MLCS, MCCS Re-Order Part Number 1K965 LANDOLL COMPANY, LLC...
Need help?
Do you have a question about the Brillion ML 2253 and is the answer not in the manual?
Questions and answers