Table of Contents
Advertisement
Advertisement
Table of Contents

Related Manuals for ACME ENERGY SPOT XA-400 SPOT


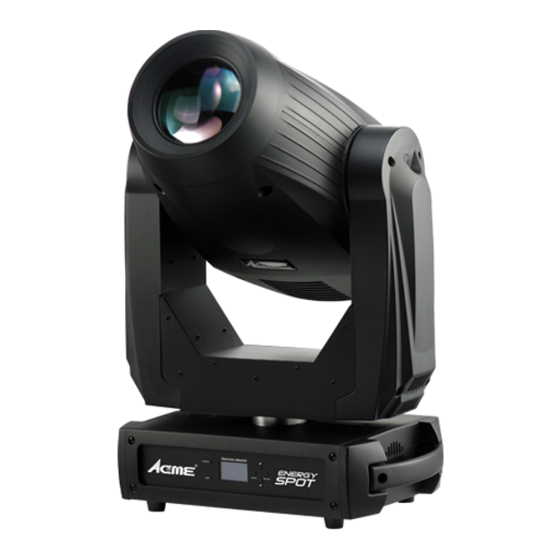
Summary of Contents for ACME ENERGY SPOT XA-400 SPOT
- Page 1 X -400 SPUT User Manual Please read the instruc on carefully before use...
-
Page 2: Table Of Contents
CONTENTS 1. Safety Instructions ..................2 2. Technical Specifications .................. 3 3. How To Set The Unit ..................5 3.1 Control panel .................... 5 3.2 Main Function ..................6 3.3 Home Position Adjustment..............11 4. Control By Universal DMX Controller ............14 4.1 DMX Connection .................. -
Page 3: Safety Instructions
1. Safety Instructions Please read carefully the instruction, which includes important information about the installation, usage and maintenance. WARNING Please keep this User Guide for future consultation. If you sell the unit to another user, be sure that they also receive this instruction booklet. ... -
Page 4: Technical Specifications
Warning: To prevent or reduce the risk of electrical shock or fire, do not expose the unit to rain or moisture. DO NOT open the unit within five minutes after switching off. The housing, the lenses, or the ultraviolet filter must be replaced if they are visibly damaged. Caution: There are no user serviceable parts inside the unit. - Page 5 Color Wheel: 2 color wheels, both of them have 7 colors plus open Gobo Wheel: 1 static gobo wheel with 10 gobos plus open 1 rotating gobo wheel with 7 gobos plus open, easy to replace Prism: 8 facet prism, rotating in both directions Construction: Display: LCD display Data In/Out: 5-pin XLR...
-
Page 6: How To Set The Unit
3. How To Set The Unit 3.1 Control panel Wire Version: 5 6 7 POWERCON Version: 1. LED: POWER Power On DMX input present 2. Display: Used to show the various menus and the selected function 3. Button: MENU To select the programming functions DOWN To go forward in the selected functions To go backward in the selected functions... -
Page 7: Main Function
3.2 Main Function To select any of the given functions, press the MENU button up to when the required one is showing on the display. Select the function by the ENTER button and the display will blink. Use the DOWN and UP button to change the mode. Once the required mode has been selected, press the ENTER button to setup, to go back to the functions without any change press the MENU button again. - Page 8 DMX Settings To select DMX Settings, press the ENTER button to confirm, use the UP/DOWN button to select DMX Address, DMX Channel Mode, DMX State or View DMX Value. DMX Address —DMX512 address setting To select DMX Address, press the ENTER button to confirm. Use the UP/DOWN button to adjust the address from 001 to 512, press the ENTER button to store.
- Page 9 Tilt Inverse To select Tilt Inverse, press the ENTER button to confirm. Use the UP/DOWN button to select No (normal) or Yes (tilt inverse), press the ENTER button to store. Press the MENU button back to the last menu or let the unit idle one minute to exit menu mode. P/T Feedback To select P/T Feedback, press the ENTER button to confirm.
- Page 10 Display Inverse Select Display Inverse, press the ENTER button to confirm, present mode will blink on the display, use the UP/DOWN button to select No (normal display) or Yes (inverse display), press the ENTER button to store. Press the MENU button back to the last menu or let the unit idle one minute to exit menu mode.
- Page 11 Fixture Test Enter menu mode, select Fixture Test, press the ENTER button to confirm, use the UP/DOWN button to select Auto Test or Manual Test Auto Test Select Auto Test, press the ENTER button to confirm, the unit will run built-in programs to automatically test pan, tilt, shutter, color, CMY, gobo, gobo rotation, prism, prism rotation, iris, frost, zoom, focus, dimmer and lamp on/off.
-
Page 12: Home Position Adjustment
Reset Functions Enter menu mode, select Reset Functions, press the ENTER button to confirm, use the UP/DOWN button to select Pan&Tilt, Effect or All. Pan﹠Tilt —Reset Pan/Tilt Select Pan﹠Tilt, press the ENTER button to confirm, use the UP/DOWN button to select No(normal) or Yes (the unit will run built-in program to reset pan and tilt to their home positions), press the ENTER button to store. - Page 13 Tilt Color 1 Color 2 -128 Gobo 1 Gobo 2 R-Gobo Prism Zoom Focus Iris Pan—pan home position adjustment Enter offset mode, Select Pan, press the ENTER button to confirm, the present position will blink on the display, use the UP/DOWN button to offset the value from -128 to 127, press the ENTER button to store.
- Page 14 Gobo 2—Gobo 2 home position adjustment Enter offset mode, Select Gobo 2, press the ENTER button to confirm, the present position will blink on the display, use the UP/DOWN button to offset the value from -128 to 127, press the ENTER button to store.
-
Page 15: Control By Universal Dmx Controller
4. Control By Universal DMX Controller 4.1 DMX Connection 1. Connect the fixture together in a “daisy chain” by XLR plug cable from the output of the fixture to the input of the next fixture. The cable cannot be branched or split to a “Y” cable. Inadequate or damaged cables, soldered joints or corroded connectors can easily distort the signal and shut down the system 2. -
Page 16: Address Setting
4.2 Address Setting If you use a universal DMX controller to control the units, you have to set DMX address from 1 to 512 so that the units can receive DMX signal. Press the MENU button to enter menu mode, select the DMX Functions, press the ENTER button to confirm, use the UP and DOWN button to select the DMX Address, press the ENTER button to confirm, the present address will blink on the display, use the UP and DOWN button to adjust the address from 0 to 512, press the ENTER button to store. - Page 17 088-095 Macro 11 096-103 Macro 12 104-111 Macro 13 112-119 Macro 14 120-127 Macro 15 128-135 Macro 16 136-143 Macro 17 144-151 Macro 18 152-159 Macro 19 160-167 Macro 20 168-175 Macro 21 176-183 Macro 22 184-191 Macro 23 192-199 Macro 24 200-207 Macro 25...
- Page 18 056-064 Color 7 065-127 Index 128-189 Clockwise rotation from fast to slow 190-193 Stop 194-255 Clockwise rotation from slow to fast Gobo 000-005 Open 006-0011 Gobo 1 012-017 Gobo 2 018-023 Gobo 3 024-029 Gobo 4 030-035 Gobo 5 036-041 Gobo 6 042-047 Gobo 7...
- Page 19 000-255 0-100% Prism 000-007 No effect 008-255 Prism effect R-prism 000-127 Index 128-189 Clockwise rotation from fast to slow 190-193 Stop 194-255 Clockwise rotation from slow to fast Zoom 000-255 0-100% Focus 000-255 0-100% Shutter 000-007 008-015 016-131 Strobe, from slow to fast 132-139 Open 140-181...
- Page 20 22 Channels Mode (Mode 2): Channel Value Function 000-255 Pan movement 0°-540° 000-255 Pan Fine Tilt 000-255 Tilt movement 0°-270° 000-255 Tilt Fine Pan/Tilt speed 000-255 Fast to slow Pan/Tilt Macro 000-007 No Function 008-015 Macro 1 016-023 Macro 2 024-031 Macro 3 032-039...
- Page 21 Pan/Tilt Marco speed 000-255 Fast to slow Color 1 000-007 Open 008-015 Color 1 016-023 Color 2 024-031 Color 3 032-039 Color 4 040-047 Color 5 048-055 Color 6 056-064 Color 7 065-127 Index 128-189 Clockwise rotation from fast to slow 190-193 Stop 194-255...
- Page 22 190-193 Stop 194-255 Clockwise rotation from slow to fast Gobo 2 000-010 Open 011-021 Gobo 1 022-032 Gobo 2 033-043 Gobo 3 044-054 Gobo 4 055-065 Gobo 5 066-076 Gobo 6 077-088 Gobo 7 089-127 Gobo shaking 128-189 Clockwise rotation from fast to slow 190-193 Stop 194-255...
-
Page 23: Troubleshooting
232-239 Open 240-247 Random strobe 248-255 Open Dimmer 000-255 0-100% 000-255 Dimmer Fine Function 000-069 No Function 070-079 Enable blackout while Pan/Tilt moving 080-089 Disable blackout while Pan/Tilt moving 090-099 Enable blackout while color changing 100-109 Disable blackout while color changing 110-119 Enable blackout while gobo changing 120-129... -
Page 24: Fixture Cleaning
4. Try to use another DMX controller. 5. Check if the DMX cables run near or run alongside to high voltage cables that may cause damage or interference to DMX interface circuit. C. One of the channels is not working well 1. - Page 27 Declaration of Conformity We declare that our products (lighting equipments) comply with the following specification and bears CE mark in accordance with the provision of the Electromagnetic Compatibility (EMC) Directive 89/336/EEC. EN55103-1: 2009+A1:2012; EN55103-2: 2009; EN61000-3-2: 2014; EN61000-3-3: 2013. & Harmonized Standard EN 60598-1:2015;...
- Page 28 Innovation, Quality, Performance...
Need help?
Do you have a question about the ENERGY SPOT XA-400 SPOT and is the answer not in the manual?
Questions and answers