Table of Contents
Advertisement
Quick Links
Advertisement
Table of Contents

Related Manuals for ACME GLORV FRAMING XP-5000SZF


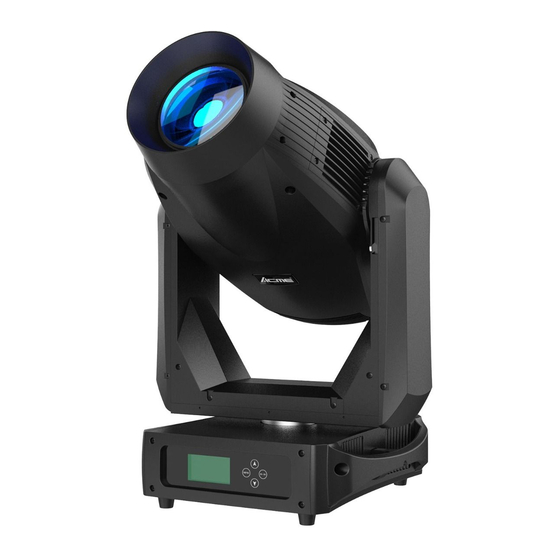
Summary of Contents for ACME GLORV FRAMING XP-5000SZF
-
Page 2: Table Of Contents
CONTENTS 1. Safety Instruction ....................2 2. Technical Specification ................... 4 3. Control Panel ......................6 4. Gobo Wheel and Lamp ................... 7 4.1 Gobo Wheel ..................... 7 4.2 Lamp ........................ 7 4.3 Change The Lamp ..................... 8 5. How To Set The Unit ....................9 5.1 Main Function .................... -
Page 3: Safety Instruction
1. Safety Instruction Please read the instruction manual carefully which includes important information about the installation, usage and maintenance. WARNING Please keep this User Manual for future consultation. If you sell the unit to another user, be sure that they also receive this instruction manual. Important: Damages caused by the disregard of this user manual are not subject to warranty. - Page 4 off the mains power immediately. Do not operate in dirty or dusty environment; do clean the fixture regularly. Do not touch any wire during operation as there might be a hazard of electric shock. Avoid power wires twist other cables. ...
-
Page 5: Technical Specification
2. Technical Specification Power Voltage: AC 230V, 50/60Hz Power Consumption: 1790W Light Source: Osram HTI 1400W Color Temperature: 6000K CRI: ≥90 Zoom Range: 9°~61° Movement: Pan: 540° Tilt: 270° Pan/Tilt Resolution: 16 bit Fixation: Pan/Tilt lock ... - Page 6 Control DMX Channel: 34/40/25 channels Control Mode: DMX, Art-Net, RDM Firmware Upgrade: Update via DMX link Construction: Display: LCD display Battery backup for user operation without connecting to the mains Data In/Out: 3-pin and 5-pin XLR Power In/Out: Power Connector in Protection Rating: IP20 ...
-
Page 7: Control Panel
3. Control Panel 1. DISPLAY: Shows the various menus and the selected functions BUTTON: MENU To select the programming functions To go backward in the selected functions DOWN To go forward in the selected functions ENTER To confirm the selected functions 2. -
Page 8: Gobo Wheel And Lamp
4. Gobo Wheel and Lamp 4.1 Gobo Wheel Rotation gobo wheel DANGER! Install/change the gobo-wheel with the device switched off only. 4.2 Lamp Osram HTI 1400W 1. Because of its high internal pressure, there might be a risk that the Discharge lamp would explode during operation. -
Page 9: Change The Lamp
4.3 Change The Lamp Loosen the screw at the rear side of the fixture and open the lamp compartment cover. Remove the old lamp and turn the lamp left in order to take the lamp out, put a new lamp that must be the same type as the old one. -
Page 10: How To Set The Unit
5. How To Set The Unit 5.1 Main Function Turn on the unit, press the MENU button into menu mode, and press the UP/DOWN button until the required function is shown on the monitor. Select the function by the ENTER button. Use the UP/DOWN button to choose the submenu, press the ENTER button to store and automatically return to the last menu. - Page 12 DMX Settings To select DMX Settings, press the ENTER button to confirm, use the UP/DOWN button to select DMX Address, Channel Mode, Connect To, Device ID, IP Address, Art-Net Settings, DMX Retransmit or View DMX Value. DMX Address To select DMX Address, press the ENTER button to confirm. Use the UP/DOWN button to adjust the address from 1 to 512, press the ENTER button to store.
- Page 13 Device ID To select Device ID, press the ENTER button to confirm. Use the UP/DOWN button to select Auto or Manual, press the ENTER button to store. Press the MENU button back to the last menu or let the unit idle one minute to exit menu mode. IP Address To select IP Address, press the ENT ER button to confirm and the display will show the current IP Address of the unit.
- Page 14 Tilt Inverse To select Tilt Inverse, press the ENTER button to confirm. Use the UP/DOWN button to select No (normal) or Yes (tilt inverse), press the ENTER button to store. Press the MENU button back to the last menu or let the unit idle one minute to exit menu mode. P/T Feedback To select P/T Feedback, press the ENTER button to confirm.
- Page 15 Dimmer Curve To select Dimmer Curve, press the ENTER button to show the DIMMER CURVE on the display, use the UP/DOWN button to select Square Law, Inv SQ Law, Liner or S Curve. Once selected, press the ENTER button to store. Press the MENU button back to the last menu or let the unit idle one minute to exit menu mode.
- Page 16 Cooling Mode To select Cooling Mode, press the ENTER button to confirm. Use the UP/DOWN button to select Auto, Fast or Quiet, press the ENTER button to store. Press the MENU button back to the last menu or let the unit idle one minute to exit menu mode. Display Settings To select Display Settings, press the ENTER button to confirm, use the UP/DOWN button to select Display Inverse, Backlight Intensity or Temperature.
- Page 17 Manual Test To select Manual Test, press the ENTER button to confirm, the present channel will show on the display, use the UP/DOWN button to select channel, press the ENTER button to confirm, then use the UP/DOWN button to adjust the value, press the ENTER button to store, the fixture will run as the channel value indicates.
- Page 18 Reset Functions To select Reset Functions, press the ENTER button to confirm, use the UP/DOWN button to select Pan & Tilt, Effect or All. Pan & Tilt —Reset Pan & Tilt To select Pan & Tilt, press the ENTER button to confirm, use the UP/DOWN button to select No or Yes (the unit will run built-in program to reset pan and tilt to their home positions), press the ENTER button to store.
-
Page 19: Home Position Adjustment
RDM FUNCTIONS Select the MANUFACTURER menu to display the manufacturer of the fixture. Select the SOFTWARE VERSION menu and the program version number of the fixture will be displayed. Select the DMX START ADDRESS menu to change the DMX 512 address (001-512). Select the DEVICE MODEL DESCRIPTION menu to display the model of the fixture. - Page 21 Pan - pan home position adjustment Enter offset mode, select Pan, press the ENTER button to confirm. Use the UP/DOWN button to offset the value from -128 to 127, press the ENTER button to store. Press the MENU button to exit. Tilt - Tilt home position adjustment Enter offset mode, select Tilt, press the ENTER button to confirm.
- Page 22 Prism – Prism home position adjustment Enter offset mode, select Prism, press the ENTER button to confirm. Use the UP/DOWN button to offset the value from 0 to 255, press the ENTER button to store. Press the MENU button to exit. R Prism –...
- Page 23 CTO- CTO home position adjustment Enter offset mode, select CTO, press the ENTER button to confirm. Use the UP/DOWN button to offset the value from 0 to 255, press the ENTER button to store. Press the MENU button to exit. Animation- Animation home position adjustment Enter offset mode, select Animation, press the ENTER button to confirm.
-
Page 24: Control By Universal Dmx Controller
Blade-DW2 - Blade-DW2 home position adjustment Enter offset mode, select Blade-DW2, press the ENTER button to confirm. Use the UP/DOWN button to offset the value from 0 to 255, press the ENTER button to store. Press the MENU button to exit. Blade-LF2 - Blade-LF2 home position adjustment Enter offset mode, select Blade-LF2, press the ENTER button to confirm. -
Page 25: Channel Mode Setting
1. At last unit, the DMX cable has to be terminated with a terminator. Solder a 120-ohm 1/4W resistor between pin 2(DMX-) and pin 3(DMX+) into a 3-pin XLR-plug and plug it in the DMX-output of the last unit. 2. Connect the unit together in a “daisy chain” by XLR plug cable from the output of the unit to the input of the next unit. -
Page 26: Address Setting
6.3 Address Setting If you use a universal DMX controller to control the units, you have to set DMX address from 1 to 512 so that the units can receive DMX signal. Press the MENU button to enter menu mode, select DMX Settings, press the ENTER button to confirm, use the UP/DOWN button to select DMX Address, press the ENTER button to confirm, the present address will blink on the display. - Page 27 000 – 255 6000K 3200K COLOR WHEEL Open 001 – 014 Open Color 1 Color 1 016 – 029 Color 1 Color 2 Color 2 031 – 044 Color 2 Color 3 Color 3 046 – 059 Color 3 ...
- Page 28 233 – 255 Gobo wheel CCW Rotation, slow fast GOBO WHEEL ROTATION: 000 – 002 Index to 0° 003 – 125 CW Rotation: fast slow 126 – 128 Stop 129 – 252 CCW Rotation: slow fast 253 – 255 Index to 90°...
- Page 29 254 – 255 Stop at 45° position IRIS 000 – 255 100% 0% ZOOM 000 – 255 Wide narrow ZOOM FINE 000 – 255 FOCUS 000 – 255 Far near FOCUS FINE 000 – 255 000 – 255 0°...
- Page 30 40 Channels (Mode 2): CHANNEL VALUE FUNCTION STROBE 000 – 019 Shutter closed, lamp switches to low power 020 – 049 Shutter Open 050 – 200 Strobe, slow fast 201 – 210 Shutter Open 211 – 255 Random strobe, slow fast DIMMER 000 –...
- Page 31 218 – 243 CCW Rotation, slow fast 244 – 255 No Function GOBO WHEEL 000 – 009 Open 010 – 014 Gobo-1 015 – 019 Gobo-2 020 – 024 Gobo-3 025 – 029 Gobo-4 030 – 034 Gobo-5 035 – 309 Gobo1 Rotation 040 –...
- Page 32 Blade - LF1 000 – 255 100% 0% Blade - LF2 000 – 255 100% 0% Blade - RG1 000 – 255 100% 0% Blade - RG2 000 – 255 100% 0% Framing 000 – 255 0% ...
- Page 33 038 – 039 Fan Speed Fast 040 – 044 Lamp On 045 – 049 Lamp Off 050 – 059 No Function 060 – 064 Dimmer curve: liner 064 – 069 Dimmer curve: square law 070 – 074 Dimmer curve: inverse square law 075 –...
- Page 34 YELLOW 000 – 255 0% 100% 000 – 255 6000K 3200K COLOR WHEEL Open 001 – 014 Open Color 1 Color 1 016 – 029 Color 1 Color 2 Color 2 031 – 044 Color 2 Color 3 Color 3 046 –...
- Page 35 150 – 179 Gobo4 shake: slow fast 180 – 209 Gobo5 shake: slow fast 210 – 232 Gobo wheel CW Rotation, fast slow 233 – 255 Gobo wheel CCW Rotation, slow fast GOBO WHEEL ROTATION: 000 – 002 Index to 0°...
-
Page 36: Troubleshooting
000 – 255 TILT FINE SPECIAL FUNCTIONS 000 – 009 No function 010 – 014 Reset all 015 – 029 Reset effect 030 – 034 Reset Pan/Tilt Fan Speed Quiet 036 – 037 Fan Speed Auto 038 – 039 Fan Speed Fast 040 –... -
Page 37: Fixture Cleaning
B. Not responding to DMX controller 1. DMX LED should be on. If not, check DMX connectors, cables to see if they are linked properly. 2. If the DMX LED is on and no response to the channel, check the address settings and DMX polarity. - Page 40 Innovation, Quality, Performance...
Need help?
Do you have a question about the GLORV FRAMING XP-5000SZF and is the answer not in the manual?
Questions and answers