Table of Contents
Advertisement
Quick Links
Advertisement
Table of Contents

Related Manuals for ACME XA-400 SPOT PRO


Summary of Contents for ACME XA-400 SPOT PRO
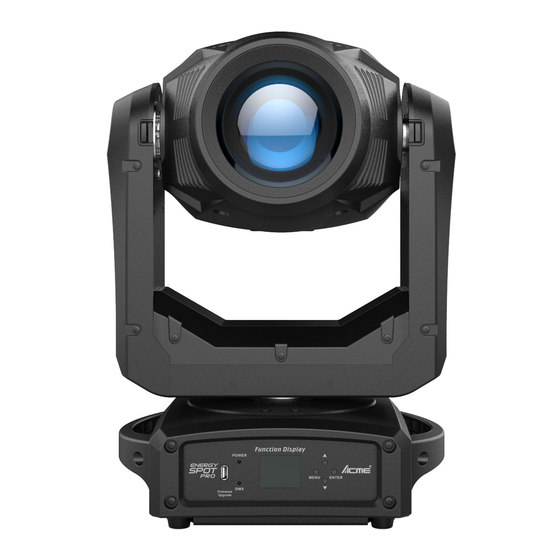
- Page 1 XA-400 SPOT PRO User Manual Please read the instruction carefully before use...
-
Page 2: Table Of Contents
CONTENTS 1. Safety Instructions ..................2 2. Technical Specifications .................. 3 3. How To Set The Unit ..................4 3.1 Control panel ..................4 3.2 Main Function ..................5 4. Control By Universal DMX Controller ............13 4.1 DMX Connection ................... 13 4.2 Address Setting .................. -
Page 3: Safety Instructions
1. Safety Instructions Please read carefully the instruction, which includes important information about the installation, usage and WARNING Please keep this User Guide for future consultation. If you sell the unit to another user, be sure that they also receive this instruction booklet. ... -
Page 4: Technical Specifications
moisture. DO NOT open the unit within five minutes after switching off. The housing, the lenses, or the ultraviolet filter must be replaced if they are visibly damaged. Caution: There are no user serviceable parts inside the unit. DO NOT open the housing or attempt any repairs yourself. -
Page 5: How To Set The Unit
Photometrics Diagram Distance(m) 8° 45° 32000 7800 3300 1750 8° Lux Diameter(m) 0. 2 7 1 4 . 5 2 1 . 7 2 91 45° Lux 8 .2 1 .3 1 . 6 4 Diameter(m) 4 1 . 3. How To Set The Unit 3.1 Control panel 1. -
Page 6: Main Function
ENTER To confirm the selected functions 3. Function Display: Used to show the various menus and the selected function; 4. Fireware Upgrade 5. DMX IN/OUT: DMX 512 link, use XLR cable to link the unit and DMX controller; 6. FUSE (T6.3Amp): Protect the unit from damage of the overcurrent; 7. - Page 7 DMX Address Mode1(18) DMX Channel Mode Mode2(22) Mode3(25) DMX Functions Blackout DMX State Hold View DMX Value Pan Inverse Tilt Inverse P T Feedback Liner Square law Fixture Setting Dimmer Curve Inv SQ law S Curve Fast Dimmer Speed Smooth Disable Near MENU...
- Page 8 DMX Settings To select DMX Settings press the ENTER button to confirm, use the UP/DOWN button to select DMX Address, DMX Channel Mode or DMX State View DMX Value. , DMX Address —DMX512 address setting To select DMX Address, press the ENTER button to confirm. Use the UP/DOWN button to adjust the address from 001 to 512, press the ENTER button to store.
- Page 9 No (normal) or Yes (tilt inverse), press the ENTER button to store. Press the MENU button back to the last menu or let the unit idle one minute to exit menu mode. P/T Feedback To select P/T Feedback, press the ENTER button to confirm. Use the UP/DOWN button to select No (Pan or tilt’s position will not feedback while out of step) or Yes (Feedback while pan/tilt out of step), press the ENTER button to store.
- Page 10 Mode 1(Optically Linear): The increase in light intensity appears to be linear as DMX value is increased. Mode 2(Square Law): Light intensity control is finer at low levels and coarser at high levels. Mode 3(Inverse Square Law): Light intensity control is coarser at low levels and finger at high levels. Mode 4(S-cure): Light intensity control is finger at low levels and high levels and coarser at medium levels.
- Page 11 Select Temperature Unit, press the ENTER button to confirm, present mode will blink on the display, use the UP/DOWN button to select ℃ or ℉, press the ENTER button to store. Press the MENU button back to the last menu or let the unit idle one minute to exit menu mode. Language To select Language , press the ENTER button to confirm, present mode will blink on the display, use the UP/DOWN button to select English or Chinese, press the ENTER button to store.
- Page 12 display, press the MENU button to exit. Temperature Select Temperature, press the ENTER button to confirm, fixture temperature will show on the display, press the MENU button to exit. USB upgrade File Select Firmware Version, press the ENTER button to confirm, firmware version will show on the display, press the MENU button back to exit.
- Page 13 Factory Settings Select Factory Settings, press the ENTER button to confirm, use the UP/DOWN button to select Yes (the fixture will reset to factory settings) or No (normal), press ENTER button to store. Press the MENU button to exit. 5.2 Home Position Adjustment Press the MENU button into menu mode, then press the ENTER button for about 3 seconds into offset mode to adjust the home position.
-
Page 14: Control By Universal Dmx Controller
4. Control By Universal DMX Controller 4.1 DMX Connection DMX Out 1. Connect the fixture together in a “daisy chain” by XLR plug cable from the output of the fixture to the input of the next fixture. The cable cannot be branched or split to a “Y” cable. Inadequate or damaged cables, soldered joints or corroded connectors can easily distort the signal and shut down the system 2. -
Page 15: Address Setting
4.2 Address Setting If you use a universal DMX controller to control the units, you have to set DMX address from 1 to 512 so that the units can receive DMX signal. Press the MENU button to enter menu mode, select the DMX Functions, press the ENTER button to confirm, use the UP and DOWN button to select the DMX Address, press the ENTER button to confirm, the present address will blink on the display, use the UP and DOWN button to adjust the address from 0 to 512, press the ENTER button to store. - Page 16 070-084 Strobe 2: opening pulse, fast slow 085-089 Open 090-104 Strobe 3: closing pulse, fast slow 105-109 Open 110-124 Strobe 4: random strobe, fast slow 125-129 Open 130-144 Strobe 5:random opening pulse, fast slow 145-149 Open 150-164 Strobe 6:random closing pulse, fast slow 165-169 Open 170-184...
- Page 17 013-018 Color2 019-025 Color3 026-031 Color4 032-037 Color5 038-044 Color6 045-050 Color7 051-056 Color8 057-063 Color9 064-127 Color Index 128-190 Fast->Slow 191-192 Stop 193-255 Slow->Fast Gobo 000-007 Open 008-015 Gobo1 016-023 Gobo2 024-031 Gobo3 032-039 Gobo4 040-047 Gobo5 048-055 Gobo6 056-063 Gobo7 064-072...
- Page 18 191-192 Stop 193-255 Slow->Fast RGobo1 000-127 Index 0 -> 360 128-190 Fast->Slow 191-192 Stop 193-255 Slow->Fast Gobo 2 000-006 Open 007-012 Gobo1 013-018 Gobo2 019-025 Gobo3 026-031 Gobo4 032-037 Gobo5 038-044 Gobo6 045-050 Gobo7 051-056 Gobo8 057-063 Gobo9 064-070 Gobo1 Shaking 071-077 Gobo2 Shaking 078-084...
- Page 19 193-255 Slow->Fast Iris 000-255 Big->Small Prism1 000-010 No Effect 011-127 Prism1 On 128-255 Prism1 Macro1 – Macro32 R-Prism1 000-127 Index 0 -> 360 128-190 Fast->Slow 191-192 Stop 193-255 Slow->Fast Frost 000-255 0-100% Zoom 000-255 Focus 000-255 0-100% Function 000-069 Null 070-079 BlackOut Pan/Tilt Move Enable 080-089...
- Page 20 160-169 Focus Compensate Far 170-199 Null 200-209 Reset All 210-219 Reset Effect 220-229 Reset Pan/Tilt 230-255 Null 22 Channels Mode (Mode 2): Channel Value Function Cyan 000-255 0-100% Magenta 000-255 0-100% Yellow 000-255 0-100% Color 000-006 Open 007-012 Color1 013-018 Color2 019-025 Color3...
- Page 21 Shutter 000-019 Blackout 020-024 Open 025-064 Strobe 1: fast slow 065-069 Open 070-084 Strobe 2: opening pulse, fast slow 085-089 Open 090-104 Strobe 3: closing pulse, fast slow 105-109 Open 110-124 Strobe 4: random strobe, fast slow 125-129 Open 130-144 Strobe 5:random opening pulse, fast slow 145-149 Open...
- Page 22 008-015 Gobo1 016-023 Gobo2 024-031 Gobo3 032-039 Gobo4 040-047 Gobo5 048-055 Gobo6 056-063 Gobo7 064-072 Gobo1 Shaking 073-081 Gobo2 Shaking 082-090 Gobo3 Shaking 091-099 Gobo4 Shaking 100-108 Gobo5 Shaking 109-117 Gobo6Shaking 118-127 Gobo7Shaking 128-190 Fast->Slow 191-192 Stop 193-255 Slow->Fast RGobo1 000-127 Index 0 ->...
- Page 23 038-044 Gobo6 045-050 Gobo7 051-056 Gobo8 057-063 Gobo9 064-070 Gobo1 Shaking 071-077 Gobo2 Shaking 078-084 Gobo3 Shaking 085-091 Gobo4 Shaking 092-098 Gobo5 Shaking 099-105 Gobo6Shaking 106-112 Gobo7 Shaking 113-119 Gobo8Shaking 120-127 Gobo9Shaking 128-190 Fast->Slow 191-192 Stop 193-255 Slow->Fast Prism1 000-010 No Effect 011-127 Prism1 On...
- Page 24 Zoom 000-255 0-100% Focus 000-255 0-100% 000-255 0~100% Pan Fine 000-255 0-100% Tilt 000-255 0-100% Tilt Fine 000-255 0-100% Pan/Tilt Speed 000-255 Fast -> Slow Function 000-069 Null 070-079 BlackOut Pan/Tilt Move Enable 080-089 BlackOut Pan/Tilt Move Disable 090-099 BlackOut Color Move Enable 100-109 BlackOut Color Move Disable 110-119...
- Page 25 220-229 Reset Pan/Tilt 230-255 Null 25 Channels Mode (Mode 3): Channel Value Function 000-255 Pan movement 0°-540° Pan Fine 000-255 0~100% Tilt 000-255 Tilt movement 0°-270° Tilt Fine 000-255 0~100% Pan/Tilt Speed 000-255 Fast -> Slow Function 000-069 Null 070-079 BlackOut Pan/Tilt Move Enable 080-089 BlackOut Pan/Tilt Move Disable...
- Page 26 220-229 Reset Pan/Tilt 230-255 Null Color 000-006 Open 007-012 Color1 013-018 Color2 019-025 Color3 026-031 Color4 032-037 Color5 038-044 Color6 045-050 Color7 051-056 Color8 057-063 Color9 064-127 Color Index 128-190 Fast->Slow 191-192 Stop 193-255 Slow->Fast Cyan 000-255 0-100% Magenta 000-255 0-100% Yellow 000-255...
- Page 27 024-031 Gobo3 032-039 Gobo4 040-047 Gobo5 048-055 Gobo6 056-063 Gobo7 064-072 Gobo1 Shaking 073-081 Gobo2 Shaking 082-090 Gobo3 Shaking 091-099 Gobo4 Shaking 100-108 Gobo5 Shaking 109-117 Gobo6Shaking 118-127 Gobo7Shaking 128-190 Fast->Slow 191-192 Stop 193-255 Slow->Fast RGobo1 000-127 Index 0 -> 360 128-190 Fast->Slow 191-192...
- Page 28 051-056 Gobo8 057-063 Gobo9 064-070 Gobo1 Shaking 071-077 Gobo2 Shaking 078-084 Gobo3 Shaking 085-091 Gobo4 Shaking 092-098 Gobo5 Shaking 099-105 Gobo6Shaking 106-112 Gobo7 Shaking 113-119 Gobo8Shaking 120-127 Gobo9Shaking 128-190 Fast->Slow 191-192 Stop 193-255 Slow->Fast Prism1 000-010 No Effect 011-127 Prism1 On 128-255 Prism1 Macro1 –...
- Page 29 Iris 000-255 Big->Small Shutter 000-019 Blackout 020-024 Open 025-064 Strobe 1: fast slow 065-069 Open 070-084 Strobe 2: opening pulse, fast slow 085-089 Open 090-104 Strobe 3: closing pulse, fast slow 105-109 Open 110-124 Strobe 4: random strobe, fast slow 125-129 Open 130-144...
-
Page 30: Troubleshooting
Dimmer Macro 000-144 Jump Macro 145-255 Fade Macro Dimmer Macro Speed 000-255 Slow->Fast 5. Troubleshooting Following are a few common problems that may occur during operation. Here are some suggestions for easy troubleshooting: A. The unit does not work, no light and the fan does not work 1. - Page 31 to optimize light output. Cleaning frequency depends on the environment in which the fixture operates: damp, smoky or particularly dirty surrounding can cause greater accumulation of dirt on the unit’s optics. Clean with soft cloth using normal glass cleaning fluid. ...
- Page 32 Declaration of Conformity We declare that our products (lighting equipments) comply with the following specification and bears CE mark in accordance with the provision of the Electromagnetic Compatibility (EMC) Directive 89/336/EEC. EN55103-1: 2009+A1:2012; EN55103-2: 2009; EN61000-3-2: 2014; EN61000-3-3: 2013. & Harmonized Standard EN 60598-1:2015;...
Need help?
Do you have a question about the XA-400 SPOT PRO and is the answer not in the manual?
Questions and answers