Table of Contents
Advertisement
Advertisement
Table of Contents

Related Manuals for ACME XP-280 BS


Summary of Contents for ACME XP-280 BS
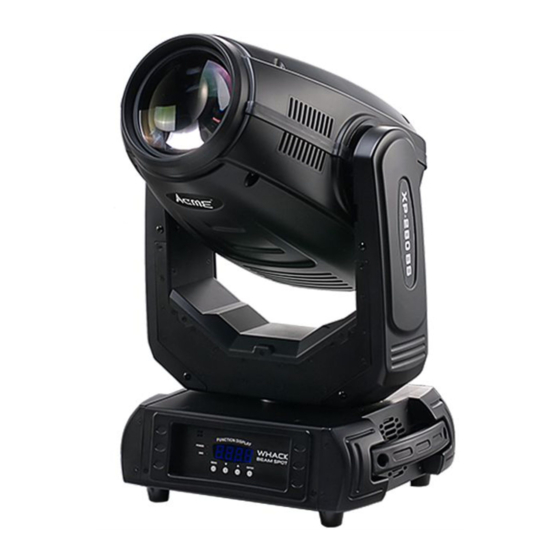
- Page 1 XP-280 BS User Manual Please read the instruction carefully before use...
-
Page 2: Table Of Contents
CONTENTS 1. Safety Instruction ................... 2 3. Technical Specification ................... 4 4. Fixture Description ..................6 4.1 Control Panel .................... 6 5. Gobo Wheel and Lamp ................... 6 5.1 Gobo Wheel ..................... 7 5.2 Lamp ......................7 5.3 Change The Lamp ..................8 6. -
Page 3: Safety Instruction
1. Safety Instruction Please read the instruction manual carefully which includes important information about the installation, usage and maintenance. WARNING Please keep this User Manual for future consultation. If you sell the unit to another user, be sure that they also receive this instruction manual. Important: Damages caused by the disregard of this user manual are not subject to warranty. - Page 4 Avoid any inflammable liquids, water or metal objects entering the unit. Once it happens, cut off the mains power immediately. Do not operate in dirty or dusty environment; do clean the fixture regularly. Do not touch any wire during operation as there might be a hazard of electric shock. ...
-
Page 5: Technical Specification
into the holes of the base and tighten fully clockwise. 3. Hang the fixture to the support (4) through clamp and fasten the screws (5). Fasten the safety cable (6) through the bottom of the base and over the support. Attention: Always ensure that the structure to which you are attaching the unit is secure and is able to ... - Page 6 Delivering extremely powerful output High quality lens Movement Pan: 540° Tilt: 270° Pan/Tilt moving speed adjustable. Automatic Pan/Tilt correction Easy calibration and maintenance by Pan/Tilt magnetic home positioning Dimmer/Shutter: Mechanical dimmer Mechanical shutter and adjustable speed strobe effect Color wheel: Color wheel: 13 fixed colors Rainbow effect in both directions Easy calibration and maintenance by magnetic home positioning...
-
Page 7: Fixture Description
4. Fixture Description 4.1 Control Panel 1. LED: POWER Power On DMX input present 2. BUTTON: MENU To select the programming functions To go forward in the selected functions DOWN To go backward in the selected functions ENTER To confirm the selected functions 3. -
Page 8: Gobo Wheel And Lamp
5. Gobo Wheel and Lamp 5.1 Gobo Wheel DANGER! Install/change the gobo-wheel with the device switched off only 5.2 Lamp MSD280 R10 Because of its high internal pressure, there might be a risk that the Discharge lamp would explode during operation. The lamp emits intense UV radiation which is harmful to the eyes and skin. -
Page 9: Change The Lamp
When lighting up, the lamp operates at high pressure and there is a slight risk of arc tube rupture. The risk increases with age, temperature and improper handling of the lamp. Do not use the lamp longer than its lifespan. Make sure the lamp is located in the center of the reflector for the best projection ... -
Page 10: How To Set The Fixture
Figure 2 3. Finally Place the new lamp into the lamp recess reinstall the head cover, fastening it securely before reapplying power. Figure 3 6. How to set the fixture 6.1 Main Function To select any of the given functions, press the MENU button up to when the required one is showing on the display. - Page 11 again. Hold and press the MENU button about one second or wait for one minute to exit the menu mode. The main functions are showing below:...
- Page 12 DMX 512 Address Select the , press the ENTER button to confirm, the display will show the present address. Use the UP and DOWN button to adjust the address from (1) to (512), press the ENTER button to store. Press the MENU button back to the last menu or idling 30 seconds to exit menu mode.
- Page 13 Select , press the ENTER button to confirm, use the UP and DOWN button to select the (on) or (off), press the ENTER button to store. Press the MENU button back to the last menu or idling 30 seconds to exit menu mode. Display Inverse Select , press the ENTER button to confirm, use the ENTER button to select...
-
Page 14: Home Position Adjustment
Press the MENU button up to when the is blinking on the display. Press the ENTER button and the display will show the version of software of the unit. To go back to the functions press the MENU button again. Default Select , press the ENTER button to confirm, use the UP and DOWN button to select the... - Page 15 Offset...
- Page 16 — Pan home position adjustment To select the , press the ENTER button to show the PAN OFFSET on the display. Use the DOWN and UP button to adjust the value from -127 to 127, press the ENTER button to store. Press the MENU button to exit.
- Page 17 DOWN and UP button to adjust the value from -127 to 127, press the ENTER button to store. Press the MENU button to exit. —Gobo 2 Rotation home position adjustment To select the , press the ENTER button to show the R-Gobo 2 OFFSET on the display. Use the DOWN and UP button to adjust the value from -127 to 127, press the ENTER button to store.
-
Page 18: Control By Universal Dmx Controller
—Frost home position adjustment To select the , press the ENTER button to show the Frost OFFSET on the display. Use the DOWN and UP button to adjust the value from 0 to 255, press the ENTER button to store. Press the MENU button to exit. -
Page 19: Channel Mode Setting
1. At last unit, the DMX cable has to be terminated with a terminator. Solder a 120-ohm 1/4W resistor between pin 2(DMX-) and pin 3(DMX+) into a 3-pin XLR-plug and plug it in the DMX-output of the last unit. 2. Connect the unit together in a “daisy chain” by XLR plug cable from the output of the unit to the input of the next unit. -
Page 20: Dmx Address Setting
7.3 DMX Address Setting By using a universal DMX controller to control the units, you have to set DMX address from 1 to 512 so that the units can receive DMX signal. Press the MENU button up to when the DMX Address is showing on the display. Pressing ENTER button and the display will blink. - Page 21 180-189 Null 190-199 Prims/Focus/Zoom/Frost reset 200-209 Reset all 210-219 Blackout while pan/tilt/gobo/color change enable 220-229 Blackout while pan/tilt/gobo/color change disable 230-239 Lamp off 240-255 Null COLOR: 000-002 White 003-004 Color1 005-006 Color2 007-009 Color3 010-011 Color4 012-013 Color5 014-015 Color6 016-018 Color7 019-020...
- Page 22 021-024 Gobo6 025-028 Gobo7 029-032 Gobo8 033-036 Gobo9 037-040 Gobo10 041-044 Gobo11 045-048 Gobo12 049-052 Gobo13 053-057 Gobo14 058-062 Gobo1 Shaking 063-067 Gobo2 Shaking 068-072 Gobo3 Shaking 073-077 Gobo4 Shaking 078-082 Gobo5 Shaking 083-087 Gobo6 Shaking 088-092 Gobo7 Shaking 093-097 Gobo8 Shaking 098-102 Gobo9 Shaking...
- Page 23 128-189 Rotation: Fast Slow 190-193 Stop 194-255 Rotation: Slow Fast GOBO 2 ROTATION: 000-127 Index Rotation 128-189 Rotation: Fast Slow 190-193 Stop 194-255 Rotation: Slow Fast PRISM: 000-007 No Effect 008-063 Prism1 Effect 064-255 Prism2 Effect PRISM ROTATION: 000-127 ndex Rotation...
- Page 24 000 - 255 0 ° 540° 000 - 255 PAN FINE TILT 000 - 255 0 ° 270° 000 - 255 TILT FINE PAN/TILT SPEED: 000 - 255 Fast Slow SPECIAL FUNCTION: 000-069 Null 070-079 Blackout while pan/tilt move enable 080-089 Blackout while pan/tilt move disable 090-099...
- Page 25 128-135 Macro 16 136-143 Macro 17 144-151 Macro 18 152-159 Macro 19 160-167 Macro 20 168-175 Macro 21 176-183 Macro 22 184-191 Macro 23 192-199 Macro 24 200-207 Macro 25 208-215 Macro 26 216-223 Macro 27 224-231 Macro 28 232-239 Macro 29 240-247 Macro 30...
- Page 26 061-063 Color27 064-127 Index 128-189 Rotation: Fast Slow 190-193 Stop 194-255 Rotation: Slow Fast GOBO 1: 000-004 Gobo1 005-008 Gobo2 009-012 Gobo3 013-016 Gobo4 017-020 Gobo5 021-024 Gobo6 025-028 Gobo7 029-032 Gobo8 033-036 Gobo9 037-040 Gobo10 041-044 Gobo11 045-048 Gobo12 049-052...
- Page 27 052-057 Gobo8 058-064 Gobo9 065-071 Gobo1 Shaking 072-078 Gobo2 Shaking 079-085 Gobo3 Shaking 086-092 Gobo4 Shaking 093-099 Gobo5 Shaking 100-106 Gobo6 Shaking 107-113 Gobo7 Shaking 114-120 Gobo8 Shaking 121-127 Gobo9 Shaking 128-189 Rotation: Fast Slow 190-193 Stop 194-255 Rotation: Slow Fast GOBO 2 ROTATION:...
-
Page 28: Troubleshooting
240-247 Strobe Random 248-255 Open DIMMER: 000 - 255 0% 100% 8. Troubleshooting Following are a few common problems that may occur during operation. Here are some suggestions for easy troubleshooting: A. The unit does not work, no light and the fan does not work 1. - Page 29 2. Internal temperature may be too high. Check if replacement of fan is needed on the head. E. If The pan belt is broken 1. Turn off the mains power. 2. Loosen the screws (A),open the cover (B). 3. Loosen the screws (C). 4.
-
Page 30: Check And Cleaning
9. Check and Cleaning Check Ballast A. Do check the fixtures every two months and make sure that all the screws and terminals have been locked firmly to make sure the normal performance of the fixtures. Negligence of check would cause malfunction of the fixture. B. -
Page 31: Declaration Of Conformity
Declaration of Conformity We declare that our products (lighting equipment) comply with the following specification and bears CE mark in accordance with the provision of the Electromagnetic Compatibility (EMC) Directive 89/336/EEC. EN55103-1: 2009 ; EN55103-2: 2009; EN62471: 2008; EN61000-3-2: 2006 + A1:2009 + A2:2009; EN61000-3-3: 2008. &... - Page 32 Innovation, Quality, Performance...
Need help?
Do you have a question about the XP-280 BS and is the answer not in the manual?
Questions and answers