
Related Manuals for iBike Gen III


Summary of Contents for iBike Gen III
- Page 1 ® iBike Gen III Power Meter Operating Instructions Firmware 424+ January 2011 PROTECTED BY ONE OR MORE OF THE FOLLOWING US PATENTS 7,387,029; 7,377,180; D528,451...
- Page 2 In just a few minutes you’ll have your new iBike power meter mounted on your bicycle, set-up and ready to use. And with the iBike as your guide you’ll enter the exciting world of power training—the way the world’s top cyclists get to their peak levels of performance.
- Page 3 • PART TWO provides additional instructions for extra iBike features of interest to advanced cyclists and coaches To learn how to install your iBike mount, please refer to the “iBike Mount and Sensor Installation” instructions, included separately. Other resources:...
-
Page 4: Table Of Contents
• Setting and using the iBike Profile 13-14 • iBike features and buttons 15-18 • iBike Trip Information and Ride Files • Starting your iBike on each day’s ride 20-21 • Auto Wind and Cal Wind feature 21-22 • Wireless Sensors and the “Scan” process... - Page 5 F+) the iBike battery and wireless mount battery will last 50 hours or more before needing replacement. In winter conditions (45F or lower) the iBike battery and wireless mount battery are cold and their performance drops. They will last 2-5 hours before needing replacement.
- Page 6 IBIKE SETUP AND CALIBRATION PROCESS Before using your iBike on the road, it is essential to complete a one-time setup and calibration process for each bike. YOUR IBIKE WON’T WORK PROPERLY UNTIL THE SETUP PROCESS HAS BEEN COMPLETED. The setup process involves two simple steps: 1) Enter information into the iBike’s memory.
-
Page 7: Ibike Setup Screens
Each setup screen displays one step of the iBike’s setup process. iBike screens are organized like a Rolodex. You can scroll forwards and backwards to any setup screen. When you reach the final screen and click the up arrow to advance to the next screen, you will return to the first screen. -
Page 8: Fast Start Sequence
When the parameter is set to the desired value, click the center button to confirm the entry. The word “DONE” flashes and the iBike advances to the next step of the sequence. IMPORTANT: Click the UP arrow to advance sequentially from step 1, to step 2, etc. - Page 9 YOUR MOUNT. SEE “IBIKE MOUNT INSTALLATON” INSTRUCTIONS FOR INFORMATION REGARDING MOUNT AND SENSOR INSTALLATION. Enter Setup. Note that when a new battery is inserted in to the iBike, the screen “YES FAST START” appears automatically when the user enters Setup.
- Page 10 “EST AERO” (estimated aero drag) • Each rider has a different aerodynamic drag. The iBike estimates your aero drag based on certain factors. Click the center button to start the EST AERO steps: Enter your body height, then click the center button to continue;...
- Page 11 1. Leave your bike and iBike outdoors for 5 minutes. This acclimates your iBike to outdoor temperature. 2. If it is windy where the calibration is being performed, cup your hand over the iBike’s wind port (at the front of the iBike) to prevent wind from striking the wind port.
-
Page 12: Calibration Ride
7) To start the Cal Ride click the center button. 8) Your iBike checks to see when the Tilt and Cal Wind steps were performed. If these steps were performed more than 30 minutes prior to the start of your Cal Ride, you will be required to perform the Tilt and Cal Wind calibrations again. - Page 13 Cal Ride. IMPORTANT: RIDE BACK ON THE SAME ROADS 17) At the end of your calibration ride your iBike will notify you that the cal ride is done (“Cal Done”). After a few seconds your iBike will exit setup.
- Page 14 4) calibration data (drag coefficients, riding tilt, and wind scaling factor) Your iBike stores two Profiles in its memory, and your iBike software can store as many profiles as you like. Any two of the profiles stored on your iBike software can be uploaded into your iBike.
- Page 15 If you have two different profiles stored in your iBike, say for two different bikes, to use your iBike’s Profile 2 with bike #2, enter setup, scroll to Set Prof, select “Prof 2”, then click the center button to accept. Exit setup. Your iBike will now load all the settings for Profile 2 into memory and you’re ready to ride.
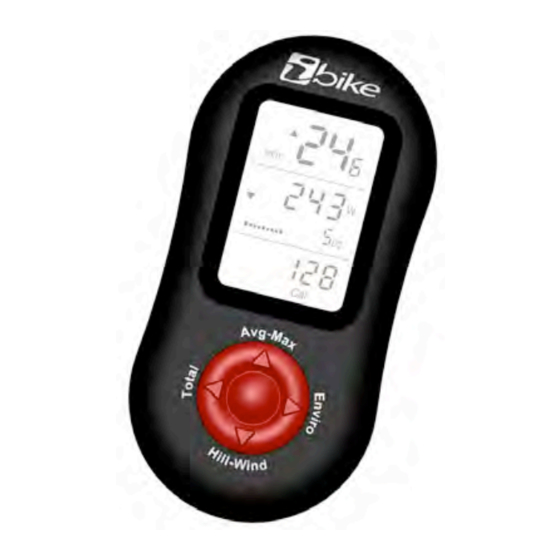
- Page 16 USING iBIKE BUTTONS AND FEATURES This section describes the functions and features of the five control buttons on your iBike (center button, up, down, left, right arrow). Center Button: BIKE COMPUTER AND POWER SCREENS The iBike has two main screens:...
- Page 17 o Click top arrow again to see max values. IMPORTANT: To return to the main screen click the center button. Bottom Arrow: HILL SLOPE AND WIND SPEED DISPLAY No matter which main screen you are using, at any point in your ride you can find out the slope of the hill you’re climbing, or the amount of head wind or tail wind.
- Page 18 When the screen says 0% full your ride memory is empty; when it says 99% full your ride memory is full. TIP: THE IBIKE RECORDS AT ONE SECOND INTERVALS (13 HOURS OF DATA RECORDING) OR FIVE SECOND INTERVALS (65 HOURS OF DATA RECORDING). SELECT THE RECORD INTERVAL IN THE SETUP SCREEN.
- Page 19 90% FULL. DOWNLOAD YOUR RIDES AS SOON AS POSSIBLE OR YOU MAY LOSE YOUR MOST RECENT RIDE FILE! TIP: YOU CAN ERASE YOUR MEMORY WITH AN IBIKE COMMAND THAT LOCATED IN THE SETUP MENU. THE “ERAS DATA” COMMAND CLEARS ALL YOUR MEMORY AND ERASE ALL RIDES STORED IN YOUR IBIKE.
- Page 20 Information from each trip is recorded in a “Ride File”. Generally, each time you start a new day’s ride you’ll want to start a new iBike trip. A simple and fast “Trip-Reset” (described below) closes the previous ride file and creates a new iBike Trip and opens a new ride file.
- Page 21 2) Let your iBike acclimate to outdoor temperature for 5 minutes 3) Click the center button of your iBike to awaken it. If you are using a heart rate strap, make sure to stand next to your iBike until your iBike competes its startup process 4) During the startup process the iBike checks battery voltage.
-
Page 22: "Auto-Wind" And "Cal Wind" Feature
“HRT FOUND” (heart rate found). Once the main iBike screen appears you’re ready to ride! NOTE: IF YOUR IBIKE RIDE MEMORY IS 80% FULL OR MORE YOU WILL SEE WARNING MESSAGES APPEAR. YOU CAN ERASE YOUR IBIKE MEMORY FROM THE IBIKE SETUP SCREEN, “ERAS DATA”. - Page 23 3) Click the center button: When the calibration is complete the message “DONE WIND” displays, the number in the top window goes to 0 , and the iBike returns automatically to the main screen Copyright Velocomp LLP 2005-2011...
- Page 24 There are two different types of iBike wireless sensors. iBike Wireless Sensors, years 2007 to 2010: The wireless iBike speed and cadence sensors (model BKM3, model number shown just below the ANT icon) were shipped between 2007 and 2010 and look like this:...
- Page 25 Wireless Sensors, years late 2010+ In late 2010, iBike introduced a new series of wireless sensors. The two, separate speed and cadence sensors have been replaced by a single, combined speed/cadence sensor (model BKM4G): The heart rate strap has been updated to model HRM1G: An important characteristic of these model “G”...
- Page 26 2) You remove the sensor battery from ANY wireless ANT+ sensor made by any other manufacturer (Garmin, Trek, etc) 3) You install a new set of iBike or ANT+ sensors, either for a new bike or to replace wireless sensors on your existing bike Note that you do NOT need to do a new Scan after replacing the sensor battery on any iBike model “G”...
- Page 27 6) Whenever the top window flashes, the iBike is still looking for other wireless sensors. For any sensors your iBike does NOT find, you’ll see the message “xxx OFF”, where xxx is the name of the sensor the iBike does not find.
-
Page 28: Part Two
PART TWO ADVANCED FEATURES Copyright Velocomp LLP 2005-2011... - Page 29 For most cyclists it is not necessary to use the USER and RACR sequences; however, there are some extra features available that can be accessed from these sequences. The USER sequence contains features and settings of value to many iBike users. The RACR (racer) sequence contains features and settings of interest to advanced users and racers.
-
Page 30: User Sequence
Set Date: “DATE” • Set Time: “CLOC” • TIP: YEAR, DATE AND TIME CAN BE ENTERED INSTANTLY USING THE IBIKE SOFTWARE. Set Display Contrast: “LCD” • Also, there are four other selections you can make in the User Sequence: Perform Coast Down calibration: “COAST” (special instructions below) •... - Page 31 The Coast Down measurement works very well when its steps are followed carefully. However, if the procedure is not followed EXACTLY, then it is likely that your iBike will be more poorly calibrated than it was prior to the Coast Downs! So, if you decide to do coast downs, please read the instructions carefully and follow them exactly.
- Page 32 6. To begin the Coast Down procedure, click the center button. 7. Before going to the coast down screen your iBike will check to see how recently you performed the “Tilt” and “Cal Wind” steps. If these steps were performed more than 30 minutes prior to the start of your Coast Downs, you will be required to do them again.
-
Page 33: Coastdowns
RESISTANCE (CRR = 0.0055) IN THE COAST DOWN MEASUREMENT. IMPORTANT: YOUR COAST DOWN AND CAL RIDE DATA MUST BE DOWNLOADED AND ANALYZED IN THE IBIKE SOFTWARE TO PROVIDE YOU THE BEST RESULTS. SEE THE “IBIKE SOFTWARE INSTRUCTIONS” FOR DETAILS. Copyright Velocomp LLP 2005-2011... -
Page 34: Setting Wind Speed Display
Your iBike includes a built-in, power-based fitness test that measures your cycling fitness. It is a very simple test: you ride as hard as you can for 20 minutes. Then, the iBike computes the average watts you held during the test, divided by your body weight in KG. - Page 35 3) You can repeat the fitness test during the season, and quantify the improvements achieved by your cycling efforts At the end of the 20 minute test your iBike will show you your test result, expressed both as your W/KG ratio and as your fitness level.
- Page 36 Click the center button to continue; you’ll be asked to tell the iBike if you are female or male. If you are male select the screen that says “FE NO” (not female); if you are female click the up arrow to select “FE YES”...
- Page 37 TIP: 20 minutes is a long time! You’ll see that both average and current watts are displayed on the iBike. Both of these numbers will help you keep a good pace. For example, if you start off way too hard your current watts will be huge for a few minutes and your average watts will be high too.
- Page 38 “Test Abrt” (test abort) and the test will end. The W/KG and fitness score result from your earlier test will be remain in memory. At the end of the ride your iBike will compute your watts per kilogram and show you your fitness level.
-
Page 39: Racr Sequence
Assuming a value of Crr can improve the accuracy of the CdA measurement. The default setting for EST FRIC is YES; that is, in the EST FRIC YES setting the iBike will assume a fixed, user-set value of Crr, even when coast downs are performed. - Page 40 2) By estimate, based on the 20 minute iBike Fitness Test If an iBike Fitness Test is performed then FTP = Average watts from 20 minute test * 0.95 IMPORTANT: WHENEVER YOU DO AN IBIKE FITNESS TEST, YOUR ESTIMATED FTP WILL BE AUTOMATICALLY COMPUTED AND STORED.
- Page 41 TOTAL ODO (total Odometer) • You can set the iBike’s odometer to start at a number other than the default number of zero. This is a handy feature if you want to copy your odometer setting from your old bike computer.
-
Page 42: Day-To-Day Setup Screens
So, unless you choose to reveal the sequence steps, they’ll remain hidden from view. Some iBike setup and calibration steps are very common, so much so that you’ll want easy access to them. We’ve gathered the most common setup items together as “day-to-day”... - Page 43 8) SET PROF 9) REC INT (RECORD INTERVAL) Your iBike’s memory will fill with information as you ride. You can select in this screen how often to record your ride information: Click the center button, then select 1 sec (one second recording interval) to record...
- Page 44 Here’s how turn the Indoor Trainer function “On”: 1) Make sure your speed sensor is mounted on the rear wheel of your bike 2) (iPro and iAero only) Use the iBike software to install the select and install the profile for your indoor trainer, “Device/Edit Trainer Settings…”...
- Page 45 The iBike has a lap timer that lets you see your important lap stats (lap number, average speed, average watts, and lap time) while on the bike and that marks those laps in your ride file for later analysis.
- Page 46 1: Press-hold the right arrow to enter FIT TRAIN. Use the left/right arrow to select “USER”: 2. To start the first User Interval, click the center button or just start pedaling; when you start moving the User Interval will start automatically. 3.
- Page 47 Continue with the workout until the set is finished. 8) To exit the interval workout, press-hold the right arrow. SPECIAL FEATURE #5: “USER-PROGRAMMED INTERVAL WORKOUTS” Not only is it possible to use the iBike with the pre-programmed workouts described in Copyright Velocomp LLP 2005-2011...
- Page 48 After you’ve created your custom interval set, simply click the “Send to iBike” button, located on the Edit Intervals window. Your interval set will be transferred to your iBike. TIP: YOUR COACH CAN CREATE INTERVAL SETS FOR YOU WITH HIS COPY OF IBIKE SOFTWARE.
- Page 49 TIP: USING THE INTERVAL TRAINER WITH YOUR BIKE COACH Your bike coach can create and email to you interval training files for your iBike. Your iBike Ride Analysis software is used to upload the training interval into your iBike. And, after you’ve downloaded your ride data to your PC/Mac, you can send your coach the actual ride...
-
Page 50: Troubleshooting
2) Calibration ride was not performed. 3) Wind offset was not zeroed prior to the ride. See instructions to correct. 4) iBike or wireless mount battery is weak. Battery voltage must be 275 or above. Replace BOTH batteries. 5) iBike handlebar mount rotates on handlebars. Tighten mount: see instructions to correct, then recalibrate. - Page 51 2) USB cable isn’t plugged into your computer. 3) Your iBike isn’t fully fastened on to the USB adapter. Make sure you feel a solid “click” when connecting your iBike to your USB adapter. DO NOT WORRY ABOUT OVERTIGHTENING THE IBIKE ON THE USB ADAPTER! 4) iBike software and/or USB drivers are installed improperly.
- Page 52 TIP: REMEMBER, THE EST CDA FUNCTION DOES A GREAT JOB OF PROVIDING AERO DRAG DATA, WITHOUT THE REQUIREMENT OF A COAST DOWN! Problem: I get the message “bad data” when I put the battery into the iBike Possible cause: 1) Your iBike’s ride file structure has been corrupted. Using your iBike software, perform the command Device/Erase Ride Data.
- Page 53 FTP. Another way to estimate your FTP is by using the iBike’s 20 minute fitness test. The iBike 20 minute fitness test is similar to a time trial, just shorter in time. To estimate your FTP from the iBike fitness test, take the watts per kilogram number shown in your “FIT TEST”...
- Page 54 ride. In events such as a time trial or climbing hills where the wattage holds very steady, NP and average power will be very close to each other because you pedal almost all the time. Using Intensity Factor (IF) to gauge the difficulty of your Workout If you do cycling workouts regularly you know that some of your workouts are more intense than others.
- Page 55 Where to find your TSS, IF and NP factors in your iBike screen After each ride you’ll find your TSS, IF and NP measurements in the Totals screens (left arrow). Click the left arrow to find your scores. Whenever you do a Trip Reset (press-hold center button, then click to confirm) these three measurements will be reset to zero.
-
Page 56: Frequently Asked Questions
All sensors except the wheel pickup are located within the iBike housing, making it possible to use the iBike, quickly and easily, on all of your bicycles. Copyright Velocomp LLP 2005-2011... - Page 57 CdA and Crr. The value of aero can vary from 0.2 to 1.5, depending on the location of the iBike on the handlebars. The value of fric can vary from 5.00 to 25.00, depending on the weight of the rider.
- Page 58 You ride at 15mph directly into a 12 mph headwind. The iBike will read 27 mph • headwind. You’re going 18 mph and there is a cross wind of 10 mph. The iBike will display 18 • mph as the headwind (remember, you’re riding perpendicular to the wind’s direction.)
- Page 59 IS THE IBIKE SUITABLE FOR RAINY RIDES? Yes! Your iBike was designed to be water resistant so don’t worry if you get it wet. If the front port becomes filled with water your power readings may be wrong. To correct this problem, remove your iBike, blow the water out of the front port, and dry your mount and underside of the iBike with a dry cloth.
- Page 60 5. Your iBike will now be totally reset, in a condition identical to that when it was shipped from the factory NOTICE: AFTER YOU DO A HARD RESET YOU WILL NEED TO RESET THE DATE AND TIME IN YOUR IBIKE. HOWEVER, YOU WILL NOT NEED TO RE-ENTER WEIGHT, TIRE CIRCUMFERENCE, AND CALIBRATION DATA.
Need help?
Do you have a question about the Gen III and is the answer not in the manual?
Questions and answers