Table of Contents
Advertisement
Quick Links
OWN
NER'S
Fiber
rMark
This m
manual can
Epilog Da
disk t
Technical
Email Tech
E
ww
www.
S MAN
NUAL F
Fusio
on - M
n also be f
found in el
ashboard D
Drivers and
that came w
with your la
May 3
30, 20
16
6371 Table
e Mountain
Golde
en, CO 804
Phone (3
303) 277-1
Fax (30
03) 277-96
Support D
Direct Line:
hnical Supp
port: tech@
Technical
Support O
ww.epilogla
aser.com/se
.epiloglase
er.com/dow
FOR E
EPILO
MODE
EL 130
lectronic fo
ormat on th
d Documen
ntation
aser system
m.
013
n Parkway
403
1188
669
(303) 215
5-9171
@epiloglas
ser.com
Online:
ervice.htm
wnloads.htm
m
OG
000
he
Advertisement
Table of Contents

Related Manuals for Epilog Laser FiberMark Fusion 13000


Summary of Contents for Epilog Laser FiberMark Fusion 13000
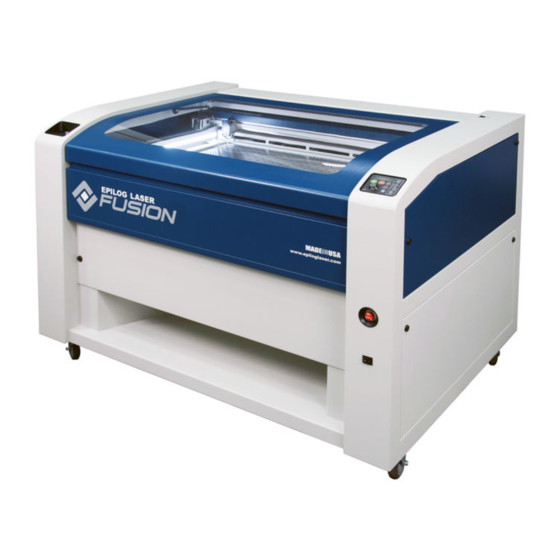
- Page 1 NER'S S MAN NUAL F FOR E EPILO Fiber rMark Fusio on - M MODE EL 130 This m manual can n also be f found in el lectronic fo ormat on th Epilog Da ashboard D Drivers and d Documen ntation disk t that came w...
- Page 2 THIS PAGE WAS INTENTIONALLY LEFT BLANK...
-
Page 3: Table Of Contents
Contents at a Glance Fire Warning! ..................ix Introduction ..................xi Epilog Laser Setup ................1 Section 1: Safety ..........................3 Section 2: Dos and Don’ts ......................13 Section 3: Getting Started ......................15 ... - Page 4 Contents at a Glance THIS PAGE WAS INTENTIONALLY LEFT BLANK...
- Page 5 Table of Contents Fire Warning! ..................ix Introduction ..................xi How to Use This Owner’s Manual ..................xi Epilog Laser Setup ................1 Section 1: Safety ..........................3 Laser Safety ..........................3 Electrical Safety ........................5 ...
- Page 6 Table of Contents Artwork Setup ........................95 Job Setup ..........................98 Section 8: Using the Front Control Panel .................. 105 Keyboard Commands ......................105 Section 9: Using the ECC (Epilog Control Center) ..............119 Job Tab ..........................119 ...
- Page 7 Table of Contents Section 14: Specifications ......................153 Epilog Fusion 32 x 20 Specifications ................. 153 Compatibility ........................154 Recommended PC ....................... 154 Other Computer Hardware Recommendations ..............156 About The Laser ......................... 156 Federal Communications Commission (FCC) Notice ............
- Page 8 Table of Contents THIS PAGE WAS INTENTIONALLY LEFT BLANK viii...
-
Page 9: Fire Warning
Fire Warning! Your laser system uses a high intensity beam of light that can generate extremely high temperatures when it comes into contact with the material being engraved, marked or cut. Some materials are extremely flammable and can easily ignite and burst into open flame setting the machine afire. - Page 10 Fire Warning! THIS PAGE WAS INTENTIONALLY LEFT BLANK...
-
Page 11: Introduction
You will be ready to use the Epilog laser system as soon as you read the first six sections. Then you can refer to topics in the remaining sections, as you work. - Page 12 Introduction Icons Used in this Manual Look for these symbols to help you find valuable information throughout the text: Sometimes the right perspective on a procedure is essential to success. This icon Flags a Quick Note regarding the task at hand. This Icon signifies places to look for additional information to assist with the topic currently being discussed.
- Page 13 Introduction Indicates pages including information regarding connecting your laser system to your computer using an Ethernet connection. Indicates the potential for fire danger when operating the laser. xiii...
- Page 14 Introduction THIS PAGE WAS INTENTIONALLY LEFT BLANK...
-
Page 15: Epilog Laser Setup
anual Epi i log g La ase er S Setu u p... - Page 16 THIS PAGE WAS INTENTIONALLY LEFT BLANK...
-
Page 17: Section 1: Safety
Section 1: Safety In This Section Laser Safety Electrical Safety Fire Safety Safety Features And Regulatory Compliance Laser Safety The Epilog Model 13000 Laser System is a Class 2 laser product, as defined in International Standard IEC 60825-1. The Epilog Model 13000 complies with 21 CFR 1040.10 and 1040.11, the Federal Performance Standards for Light-Emitting Products, except for deviations pursuant to Laser Notice No. - Page 18 Section 1: Safety We have made every effort to make the Laser Diode Pointer (Red Dot Pointer) as safe as possible. Its beam path is located well inside the cabinet, and under normal conditions, no hazardous levels of laser radiation can escape. The operator of the Epilog Model 13000 should observe the following general precautions: ...
-
Page 19: Electrical Safety
Section 1: Safety Electrical Safety The AC input power to the Epilog Model 13000 Laser System is potentially lethal and is fully contained within the cabinet. DO NOT open any of the machine’s access panels while the unit is plugged in. -
Page 20: Fire Safety
Section 1: Safety Fire Safety Laser cutting and engraving systems represent a significant fire hazard. Most engraving materials are inherently combustible, and while the objective of most cutting and engraving operations is to vaporize material without burning, it is easy to ignite a flame. -
Page 21: Safety Features And Regulatory Compliance
Section n 1: S afety Safe ety Fe eature es and d Reg gulato mplian Epilog g has incor rporated spe ecific safety y features in nto the Mod del 13000 L Laser System m in order t to meet the requirement ts of 21 CFR R 1040 and... - Page 22 Section 1: Safety Warning Label. This label is located on the rear of the machine’s cabinet, below the Certification/Identification Label above. Explanatory Label. This label identifies the classification of the Model 13000 in accordance with IEC 60825-1. It is located on the rear of the machine’s cabinet, beside the Warning Label above.
- Page 23 Section 1: Safety Defeatably-interlocked Protective Housing Safety Label. This label is located on the machine’s cabinet door, in the upper left-hand corner. Aperture Safety Label. This label is located on the steering-mirror cover inside the machine’s cabinet, beside the aperture where the laser beams enter the cabinet. Electrical Safety Label.
- Page 24 Section 1: Safety Emergency Stop EMERGENCY STOP Power Labels Main Breaker Labels Air Assist Label AIR ASSIST 30 PSI MAX 200 kPa MAX Fire Warning Label DANGER This fire hazard label is located on the left and right sides of the top access door of your laser FIRE HAZARD system: DO NOT OPERATE...
- Page 25 Section n 1: S afety The follo o wing diagra ams show the e location of f each specif fic label desc c ribed above e .
- Page 26 S S ection n 1: S afety...
-
Page 27: Section 2: Dos And Don'ts
Section 2: Dos and Don’ts In This Section Operating Dos and Don’ts DON’T! NEVER operate the machine without a properly operating vent to the outside! Most material will only produce an irritating smoke when engraved. Some materials, including but not limited to paint, varnish, composition board and plastics, produce compounds that can be harmful if concentrated. - Page 28 Section 2: Dos and Don’ts Please allow a few minutes a week for cleaning your machine. Just a small amount of effort at the end of the week will pay off with years of trouble free operation of your machine. See the Engraving Machine Cleaning section of this manual for specifics.
-
Page 29: Section 3: Getting Started
Installing the Dashboard Print Driver Setting Up Your Laser System Setting up your Epilog Laser System is easy to do! If you’ve ever installed a paper printer, this is only slightly more difficult. The following information will help you understand the entire system and how it works. - Page 30 Section 3: Getting Started Epilog software and connection options: Epilog provides two pieces of software for the Fusion: a) The ECC (Epilog Control Center). b) The Dashboard print driver. Please refer to Section 4: Installing the ECC and Section 5: Installing the Epilog Dashboard Print Driver sections of this manual for additional information.
- Page 31 Sectio on 3: Gettin ng Star rted The la ast choice is to use only the Etherne et connection n. Most user rs will not ch hoose this m method becau use the ECC is not availa able through h the Etherne et connection ECC (Epilo g Control C...
- Page 32 Sectio on 3: Gettin ng Star rted The Fusion Dashboard p print driver. he print driv ver is the pr imary interf face between n the compu uter and the laser nd sends all j jobs and las er paramete ers to the las er.
- Page 33 Section 3: Getting Started Connection cables that allow your computer and laser to talk to each other. Fusion both Ethernet connections. Exhaust fan. The exhaust fan is mandatory and is used to remove smoke and debris from the Fusion work area. The exhaust air can be ported to the outside or into a filter box.
- Page 34 Section 3: Getting Started The following drawing represents a typical setup: ET HERNET US B Electrical Connection (110/220V - 50/60 Hz) Follow these steps to set up your Fusion laser system: 1. Remove it from the crate 2. Connect the exhaust system to your laser 3.
-
Page 35: Connecting The Exhaust
Section 3: Getting Started Connecting the Exhaust In this manual, the term “exhaust” refers to either an exhaust fan or a filter unit and the term “exhaust” is used for simplicity. The important point is that it is mandatory that an exhaust unit or filter system is incorporated as part of your laser system. - Page 36 Section 3: Getting Started Epilog Exhaust/Filter Connections There are two 4” (100 mm) ports attached to the back of the laser system. Attach your ducting to the machine as shown above. Check your exhaust system for leaks. Most small leaks can be remedied with duct tape.
- Page 37 Section 3: Getting Started Roof or exterior wall 4” (100 mm) flexible aluminum duct or rigid galvanized sheet metal (Do not use vinyl, plastic or “soft” flexible duct). Exhaust Blower Exhaust Blower Roof or exterior wall 4” (100 mm) flexible aluminum duct or rigid galvanized sheet metal (Do not use vinyl, plastic or “soft”...
-
Page 38: Connecting Electrical Power
Section 3: Getting Started Connecting Electrical Power All Epilog laser systems have an auto-switching power supply that detects the incoming voltage and automatically switches itself to operate properly at any single-phase voltage between 100 and 240 VAC. The power supply will also automatically compensate for either 50 or 60 Hz. - Page 39 Laser Cooling Requirements and Operating Temperatures All Epilog laser systems use air-cooled laser tubes. Laser technology is such that the laser tubes generate a lot of excess heat and the tubes must be cooled for proper operation. There are cooling fans located at the back of the laser. The fans and vents should always be clear of restrictions and should never be covered.
- Page 40 Section 3: Getting Started THIS PAGE WAS INTENTIONALLY LEFT BLANK...
-
Page 41: Section 4: Installing The Ecc
ectio on 4 : In stal ling pilog g Co ntro ol Ce ente n This Sect tion Install ling the ECC The E ECC (Epilog g Control Ce enter) provid des Job Man nagement fe eatures as w ell as laser c control and l... - Page 42 Section n 4: In nstallin ng the e ECC If the e following screen appe ears, click o on Run fusi exe and then n the ion_driver.e install l screen will appear. Click on Epilog ation. You w will need to o choose bet tween Control Cen...
- Page 43 Section n 4: In nstallin ng the e ECC Click on Install. The n next screen w will prompt you to allow w Windows to install the software. Click Yes. Select t Repair and d then Next Click on Finish...
- Page 44 Section n 4: In nstallin ng the e ECC Click on Next in the followin ng three win ndows and th hen click on n Close in th he last windo The E ECC has bee en installed and you w will find the ECC icon o on your des...
- Page 45 The Ethe ernet port is s located at t the back o of the machi ine. Your E Epilog laser r has all of f the versat tility of a N Network cap pable periph heral. As suc...
- Page 46 Section n 4: In nstallin ng the e ECC only m method that t will be de escribed in this manua al. Plug th he cable into o the Ethern net port on t he laser and d then plug th he other end d into the Eth hernet port o...
- Page 47 ction n 5: Inst tallin ng th pilog g Das shbo oard d Pri nt D Drive n This Sect tion Install ling the Dash hboard Print t Driver Usin ng an USB C Connection Install ling the Dash hboard Print t Driver Usin ng an Ethern...
-
Page 48: Section 5: Installing The Epilog Dashboard Print Driver
Section 5: Installing the Epilog Dashboard Print Driver Installing the Dashboard Driver Using the USB Connection using XP or Vista To install the Dashboard print driver using the USB connections with Windows XP or Vista, follow these instructions: Connect your laser system to your computer using the USB cable that came with your machine. - Page 49 Se ection 5: Ins stallin g the E Epilog g Dash board Prin nt Drive Insert the Epilog driv ver install d disk into y your compu uter. One o f the following s creens will appear. For r the USB in nstallation, y you will wa ant to...
- Page 50 Se ection 5: Ins stallin g the E Epilog g Dash board Prin nt Drive If your com mputer is con nnected to th he Internet, i it will take a a few minute es for your compu uter to disp play these w windows.
- Page 51 Se ection 5: Ins stallin g the E Epilog g Dash board Prin nt Drive Select the H Hardware tab Select the d evice Epilog Fusion. Then n click on Pr gEngraverF roperties.
- Page 52 Se ection 5: Ins stallin g the E Epilog g Dashboard Prin nt Drive Click on Ch hange Settin ngs. Click on the e Driver tab.
- Page 53 Se ection 5: Ins stallin g the E Epilog g Dash board Prin nt Drive Click on Up pdate Driver Click on Br rowse my Co omputer for driver softw ware...
- Page 54 Se ection 5: Ins stallin g the E Epilog g Dash board Prin nt Drive Use the Br rowse button n to direct your compu uter to your r disk drive e that contains the e Epilog driv ver disk that you inserted d earlier in th his process.
- Page 55 Se ection 5: Ins stallin g the E Epilog g Dash board Prin nt Drive nce you hav e the proper disk drive s showing clic ck on the Nex xt button. he progress w window will l appear. You will th hen be asked d if you wan nt to install...
- Page 56 Se ection 5: Ins stallin g the E Epilog g Dash board Prin nt Drive Your Epilog g Fusion Da ashboard pri int driver ha as been succ cessfully inst talled on the USB port. Click on Clo ose in the ne ext window a and then Clo ose again.
-
Page 57: Installing The Dashboard Driver Using An Ethernet Connection And A Crossover Cable - Windows 7
Note: The following instructions work only for a direct connection from the computer to the Epilog laser using a Crossover cable. This procedure does not work with a hub or a server. For Ethernet connections that require a hub, server, or multiple machines/computers, please consult with your network administrator. - Page 58 Se ection 5: Ins stallin g the E Epilog g Dash board Prin nt Drive Step 1 1 Setti ing the Ethern net IP Ad ddress on the Laser The e asiest way to o set the IP Address on the Fusion i is to first ins stall the ECC...
- Page 59 Se ection 5: Ins stallin g the E Epilog g Dash board Prin nt Drive From m the Start m menu at the b bottom left c corner of you ur PC nitor, select C Control Pan Click on Netw work and Sharin ng Center...
- Page 60 Se ection 5: Ins stallin g the E Epilog g Dashboard Prin nt Drive Select Local Area ection optio on and then r right Conn click o on Propertie Highl ight Interne et Protocol V Version 4 (T TCP/IP) (Make e sure to se elect Versio n 4.
- Page 61 Se ection 5: Ins stallin g the E Epilog g Dash board Prin nt Drive Select t Use the f following I addre ess: Type in the f following I Addre ess and Subn net mask: 192.16 68.3.3 255.2 55.255.0 Defau ult gateway: eave blank...
- Page 62 Addi itional D Dashboar rd Print Driver Instructi ual. Insert the E Epilog Laser r CD into y your comput ter’s disk d device. It sh hould Auto-Start a and the follo owing windo ow should ap ppear:...
- Page 63 Se ection 5: Ins stallin g the E Epilog g Dash board Prin nt Drive Click on Eth hernet Dash hboard Drive er Install. Click on Ad dd Local Pri inter: Click on Cr Port and then n click on th he dropdown n menu and s select...
- Page 64 Se ection 5: Ins stallin g the E Epilog g Dash board Prin nt Drive number you u use, it mus st be the sam me number th hat you set a as the IP Ad ddress using the Fu usion laser k keypad or the e ECC.
- Page 65 Se ection 5: Ins stallin g the E Epilog g Dash board Prin nt Drive Select Custo om and then n Settings, th hen click on Next Set Protoco ol to LPR. T This is a ver ry importan nt step. You ur download d time will be grea...
- Page 66 Se ection 5: Ins stallin g the E Epilog g Dash board Prin nt Drive Click on Ne Click on Ha ave Disk Click on Br rowse...
- Page 67 Se ection 5: Ins stallin g the E Epilog g Dash board Prin nt Drive Find the dis sk drive with h the Epilog install disk a and click on Open Select the d river folder and then clic ck on Open Click on the e EpilogWin n file and the...
- Page 68 Se ection 5: Ins stallin g the E Epilog g Dash board Prin nt Drive Click on OK Click on Ne You can re ename your r printer he ere. We ha ave not cha anged it for r this document, b but many u users like to...
-
Page 69: Section 6: Using The Epilog Dashboard
Secti on 6 6: U Using g the e Ep pilog Dash hboa n This Sect tion Gener ral Tab Advan nced Tab Color Mapping Ta Addit ional Dashb oard Feature Chang ging Dashbo oard Defaults The E Epilog Dash hboard is th... - Page 70 Sectio on 6: U Using t the Ep pilog D Dashbo oard that you h have printed d a simple job, you a are ready t to gain a b better under standing of f the differe nt printing options ava ailable from m the Dashb board.
- Page 71 Sectio on 6: U Using t the Ep pilog D Dashbo oard ! – The Fusi ion driver is used for bot th CO2 lase er and the Fib ber laser sou urces. Note There are a few f functions in n the driver that only ap pply to one...
-
Page 72: General Tab
Sectio on 6: U Using t the Ep pilog D Dashbo oard neral T Job Ty Type One o of the first t things new u users want t to know is h how the las er system k knows when to engrave a and when to... -
Page 73: Section 6: Using The Epilog Dashboard
Section 6: Using the Epilog Dashboard Raster Raster mode is used for marking or engraving materials. Typical uses would be reproducing clipart, scanned images, photos, text and graphic images. The Raster Speed and Raster Power boxes will be enabled when you have selected Raster under Job Type. - Page 74 Section 6: Using the Epilog Dashboard When using vector mode, it is necessary to design your job to give the intended result. Objects and text should be unfilled and drawn with the thinnest possible outline (other than zero), as shown below. A .001 inch (.025 mm) is recommended.
- Page 75 Sectio on 6: U Using t the Ep pilog D Dashbo oard Resol lution Print quality is co ommonly re ferred to as n, and is one e of the vari iables Resolution that d determine im mage quality. . Resolution n is expresse ed in dots-pe er-inch (DPI...
- Page 76 Section 6: Using the Epilog Dashboard Resolution Settings Uses for different resolution settings: 75 – 150 DPI These resolution values are typically used for non-production purposes where you want to experiment with image location, or if you want to quickly produce a rough draft.
- Page 77 Section 6: Using the Epilog Dashboard The diagram below shows the concept of raster lines and dots-per-inch (DPI). The arrows show the change in direction of the carriage between raster lines. The difference in dot density between 300 DPI and 600 DPI resolution is shown. 300 DPI 600 DPI Helpful Hints...
- Page 78 Sectio on 6: U Using t the Ep pilog D D ashbo o ard 300 D 600 D...
- Page 79 Sectio on 6: U Using t the Ep pilog D Dashbo oard Piece Size Many y users like to create th heir artwork on a page size in Cor relDraw or other softwa are program m that matc ches the siz ze of the p piece that i s to be las...
- Page 80 Sectio on 6: U Using t the Ep pilog D Dashbo oard Auto F Focus Most users prefer to use the A Auto Focus c capability w when focusin ng because it t is so quick and easy to use. To us e auto focus s first measu...
- Page 81 Sectio on 6: U Using t the Ep pilog D Dashbo oard requir red when usi ing the vecto or grid. If a t thickness is not specifie ed the system m will auto f focus to the t top of the ve ector grid, no ot to the top of your mate...
- Page 82 Sectio on 6: U Using t the Ep pilog D Dashbo oard Engra ave Dire ection This f feature appl lies to Raste er engraving g only and allows you to engrave your projec ct either from m the top do own, or the b bottom up.
- Page 83 Sectio on 6: U Using t the Ep pilog D Dashbo oard Raste r Settin Spee The S Speed setting g determines s the travel s speed of the carriage in Raster mode e and is adju ustable in 1% % increment ts from 0 to 100%.
- Page 84 Sectio on 6: U Using t the Ep pilog D Dashbo oard If you u have a mult ti-layered m material that y you can mar rk easily, but t not well, at t high speed s, try loweri ing the speed d to see if th hat produces a better mar...
- Page 85 Section 6: Using the Epilog Dashboard used effectively to remove the washed out appearance of some images (including photographs). Photograph Modes – Floyd Steinberg, Jarvis and Stucki modes are designed to modify an image by replacing the very structured dot patterns with a more random dot pattern.
- Page 86 Sectio on 6: U Using t the Ep pilog D Dashbo oard What is Dithering g? - The bes st way to sh how dithering g is with an n example. I In the examp ple below, w we engraved d the exact sa ame photo i in Standard...
- Page 87 Section 6: Using the Epilog Dashboard Clipart Modes: Standard - This mode is the default mode and will be used for most engraving jobs that include text and clipart at 600 DPI. Brighten – Many users find this mode good for engraving photographs onto wood or marble at 600 DPI.
- Page 88 Sectio on 6: U Using t the Ep pilog D Dashbo oard Vecto or Settin Spee The S Speed setting g determine s the travel speed of th he carriage i in Vector cu utting mode and is adjus stable in 1% % increments from 1 to 1 100%.
- Page 89 Section 6: Using the Epilog Dashboard Freq (Frequency) Frequency is the number of laser pulses that the laser fires per inch of travel and is set in the dashboard and can be adjusted from 1 to 100. A lower frequency number will have the effect of less heat because fewer pulses are being used to cut the material.
-
Page 90: Color Mapping Tab
Sectio on 6: U Using t the Ep pilog D Dashbo oard Colo or Map apping g Tab The C Color Mapp ping feature is an adva anced featur re that mus st be checke ed to activa ate. Color M Mapping is d designed to b be used in e... - Page 91 Section 6: Using the Epilog Dashboard MUST A Note About Colors! You use an RGB color scheme in your artwork with the Color Mapping feature. CMYK values will not translate. It’s best to use one of the six basic colors (red, green, blue, cyan, yellow, magenta) when color mapping, because the values in Color Mapping MUST match exactly the colors that are used in your graphics package.
- Page 92 Sectio on 6: U Using t the Ep pilog D Dashbo oard Color Mapping al llows you to o control the e following l laser functio ons for each color in the Map List: Applie es a speed se etting for all objects of th he same colo Spee...
- Page 93 Section 6: Using the Epilog Dashboard Any time the focus setting is a negative number it means the table is being moved Closer to the focus lens. In other words, a negative number indicates that the gap between the table and the focus lens is getting smaller (decreasing). The Focus slider has a range of -500 to +3000.
- Page 94 Sectio on 6: U Using t the Ep pilog D Dashbo oard Using g Color Mappin Settin ng colors to be mapped is a very e easy process s. The colo r mapping t tab is separa ated into thre ee functions Settin ngs –...
- Page 95 Sectio on 6: U Using t the Ep pilog D Dashbo oard Once the la aser values h have been a adjusted pre ess the Mod dify button i n the Actions area a. The Actio on buttons ar re identified below: Add a a color...
- Page 96 Sectio on 6: U Using t the Ep pilog D Dashbo oard Assign a green outline to o the window f frame and a red out line to the four wind dow panes. Once your vector outlines are e set up in y your artwork k, Select File e/Print and...
- Page 97 Sectio on 6: U Using t the Ep pilog D Dashbo oard We w will set the gr reen color at t a higher sp peed and low wer power th han the red c color. This w will allow us s to raster th he green and vector the r...
- Page 98 Sectio on 6: U Using t the Ep pilog D Dashbo oard Raste r Color r Mappi Raster r Color Map pping usually y has a differ rent purpose e than Vecto or Color Map pping althou ugh the proc cess for setti ing up color rs to be map...
- Page 99 Sectio on 6: U Using t the Ep pilog D Dashbo oard There’s on ne important distinction to recognize e about how w colors are r raster Note: engrav ved in stand ard engravin ng mode vs. Color Mapp ping mode: ...
- Page 100 Sectio on 6: U Using t the Ep pilog D Dashbo oard Dashb board setting gs as a datab ase file allow ws you to re etrieve the jo ob parameter rs at a later t time. This saves you t the trouble of trying to o remember...
- Page 101 Section 6: Using the Epilog Dashboard path Configurations folder shown here: My Documents/Epilog / engraving setting. Give your file a name and then click on Save. You now have a custom Configuration file that can be used the next time you need to run this job or material.
- Page 102 Sectio on 6: U Using t the Ep pilog D Dashbo oard Load ding Con nfiguratio on Files: load a co onfiguration file, clic ck on the Bro owse… butt ton. Browse for Folder wind dow will ope Click k OK. After r selecting g your fold...
-
Page 103: Additional Dashboard Driver Features
Sectio on 6: U Using t the Ep pilog D Dashbo oard Click on the Gene eral tab to se ee the setting gs that the lo aded file bri ings up. ditiona al Das shboa ard Dr river F Featu ures Multip... - Page 104 Sectio on 6: U Using t the Ep pilog D Dashbo oard Multip ple Pag CorelD Draw allows s you to set up and print t multiple pa ages. The s screen shot b below shows s the Corel p print window w that is set u up to print a...
-
Page 105: Changing Dashboard Driver Defaults
Section 6: Using the Epilog Dashboard The list below shows the file names a little more clearly: Job:1. File Name Job:2. Page 2 Job:3. Page 3 – This file shows on the LCD when the file is received at the laser. If you already have jobs in the laser system, the naming structure will change. - Page 106 Section 6: Using the Epilog Dashboard THIS PAGE WAS INTENTIONALLY LEFT BLANK...
-
Page 107: Basic Operations
anual Ba a sic per rati ions... - Page 108 THIS PAGE WAS INTENTIONALLY LEFT BLANK...
-
Page 109: Section 7: Quick Start & Easy Setup
Section 7: Quick Start & Easy Setup In This Section Artwork Setup Job Setup Artwork Setup Create your job in the graphics software of your choice, (for example – CorelDraw). There are three different modes of operation for the laser and the way you setup your artwork will determine if you raster engrave or vector cut. - Page 110 Sect ion 7: Quick k Start t & Ea sy Set r cutting is s a continuo ous path tha at follows th he outline, or profile, o of an Vecto image e. Vector cut tting is norm mally used to o cut compl letely throug gh materials...
- Page 111 Section 7: Quick Start & Easy Setup Note: If your Raster artwork contains thin lines between .001 and .007 inches and you are using Vector or Combined mode, those thin lines will all vector cut. This can be disconcerting when it happens. The most common setup where this occurs is when you have a clipart image with hidden lines that you send to the laser using Combined mode.
-
Page 112: Job Setup
Section 7: Quick Start & Easy Setup Job Setup Your Epilog laser system has a prime reference point that is in the upper-left corner of the laser table. This is the 0,0 (zero, zero), or “Home” position. All artwork and material placement is normally referenced from here. Keep this 0,0 point in mind when measuring and setting up your work. - Page 113 Section 7: Quick Start & Easy Setup Material Orientation Some materials such as wood or plastics that have a grain (brushed look) will look nicer when engraved if the grain of the material runs parallel with the X-stroke of the carriage. The orientation of material without a grain pattern is usually not important.
- Page 114 Sect ion 7: Quick k Start t & Ea sy Set using the Epilog Integrated V Vacuum Tab ble. Simply y place it o on the table flush agains st the upper r and left ha and rulers. Then cover r any remain ning holes i in the...
- Page 115 Section 7: Quick Start & Easy Setup joystick. Once the focus position has been established, remove the gauge. Press the Reset key. If your material has a taper or curve, pick an intermediate point between the highest and lowest points being engraved and focus on that point. In general, the area of the material being engraved needs to be relatively flat.
- Page 116 Sect ion 7: Quick k Start t & Ea sy Set Auto F Focus Most users prefer r to use the Auto Focus s capability for focusing g. It’s quick k and easy t to use. Auto o Focusing g Through h the Dash hboard Activa...
- Page 117 Sect ion 7: Quick k Start t & Ea sy Set RNING: If y you are usin ng Auto Fo ocus and you u know ther re is not en nough cleara ance between n the lens ca arriage and y your materia al, you will n need to lowe...
- Page 118 Sect ion 7: Quick k Start t & Ea sy Set The F Fusion keybo oard will disp play the job: Job: Un ntitled Place your work piece in the e upper left corner of th he engraving g table, clos se the door a and then pre...
-
Page 119: Keyboard Commands
Sect tion Usin ng th he F ront Contr rol P Pane n This Sect tion Keyboard Commands Loading Y Your Work Operation Job Storag Keyb yboard d Com mman Red D Dot Poin nter an d Laser r On Ke eys:... - Page 120 Sectio on 8: U Using the Fr ont Co ontrol Panel Joyst tick The J Joystick is u used to con ntrol, move, or change a all of the avail able features s found in th he Fusion ke eyboard. After r you highlig ght a Functi...
- Page 121 Sectio on 8: U Using the Fr ont Co ontrol Panel To see e how the Jo oystick work ks, let’s pract tice: Use the cur rsor keys on n the keypa ad to highlig ght the Jog function. J og mode moves the l lens carrige.
-
Page 122: Section 8: Using The Front Control Panel
Section 8: Using the Front Control Panel STOP Pressing the STOP key will stop the lens carriage and the laser beam will be shut off. If the STOP key is pressed during raster engraving mode the lens carriage will stop on either the far left or far right of the engraving line that is in process. - Page 123 Sectio on 8: U Using the Fr ont Co ontrol Panel Funct tion Me When n a job has b been printed to the laser r and the JO OB menu is h highlighted, you will be see e the job in the first lin ne of the dis splay.
- Page 124 Section 8: Using the Front Control Panel FOCUS With FOCUS highlighted, use the Joystick to move the table up or down. The display will show a digital readout of the table position. The imagine below shows the table at its zero, zero position (-0.000). The image below also shows two visual indicators that provide addition functionality to the Focus function: JOB: Laser Test...
- Page 125 Sectio on 8: U Using the Fr ont Co ontrol Panel Focu us Sub-Me OB: Las ser Test FOCU US -0.0 The tw wo diamond ds on the bo ottom right o of the displa ay indicate t hat by doub ble center clickin ng the joysti...
- Page 126 Section 8: Using the Front Control Panel your new or temporary Table Home position and want the table to move back to its default Home position so you can start using auto focus again. Note – an alternative method of setting a new Table Home position is to just center click once.
- Page 127 Section 8: Using the Front Control Panel The images below show the display in Jog mode as well as the sub-menu for the Jog function. JOB: Laser Test +0.500 +1.234 Y-axis X-axis position position The image above also shows the double diamonds that are displayed when in Jog mode.
- Page 128 Section 8: Using the Front Control Panel POWER With Power highlighted, the power setting will be displayed. The display will show RP for Raster Power and VP for Vector Power. CONFIG With CONFIG highlighted, use the Joystick to scroll through the available menu items.
- Page 129 Section 8: Using the Front Control Panel Y Home – This is a calibration function that insures your artwork is properly located on the table in the Y-axis. It is set relative to the upper left corner of the table. Increasing this number has the effect of moving your artwork down.
- Page 130 Section 8: Using the Front Control Panel change permanent. Most users find it is easier to make this setting from the ECC. Subnet Mask – This sets the Subnet mask for the laser system. Center click to gain access, tilt the joystick up or down to increment or decrement. Tilt left or right to move to the different sets of three numbers.
- Page 131 Section 8: Using the Front Control Panel Stamp Match – This sets the left-right raster line alignment in Stamp mode. This setting is normally a factory only setting and will not need to be adjusted by the user. ♦ Set XY Home – This sets a new Home Position. Most users find it is easier to make this setting from the sub-menu in Jog mode.
- Page 132 Sectio on 8: U Using the Fr ont Co ontrol Panel Red D Dot Poin nter an d Laser r On Ke eys: ed Dot: e Pointer ke y is a toggle e switch that t turns the la aser systems Red Dot inter on and d off.
-
Page 133: Section 9: Using The Ecc (Epilog Control Center)
ction n 9: Usin ng th he E pilo g Co ontro ol Ce ente n This Sect tion – Stan ndard Featu ures Job Tab Control Ta Configurat tion Tab To ac ccess the EC CC either do ouble click o on the ECC icon on you... - Page 134 Sec ction 9 9: Using g the E ECC (E Epilog Contro ol Cen ter) image elow shows s that Job been compl leted beca ause there is no asteris sk in Time sectio This image also shows s that now #2 is s selected that i...
-
Page 135: Control Tab
ction 9 9: Using g the E ECC (E Epilog Contro ol Cen ter) If you u change a la aser paramet ter you can make that c hange perm anent or you u can use it as a a temporary setting. - Page 136 ction 9 9: Using g the E ECC (E Epilog Contro ol Cen ter) You c can also inpu ut numerical values if yo ou want to m move the carr riage or table e to a specif fic location. You c can use the b buttons at the...
-
Page 137: Section 10: Standard & Optional Machine Features
ction n 10 0: S tand dard d & Opti l Ma achin ne F Feat ures n This Sect tion Standard Fe eatures Front Access Doo Task P Plate Rulers Crash h Bar Emerg gency Stop Optional Ac ccessories... -
Page 138: Task Plate
Section n 10: Stand dard & & Optio onal M achine eature The s truts can be e disconnecte ed if you w wish to open the door m more than its standard 90 deg gree opening g. Remove th he left and r right thumb screws to al... -
Page 139: Emergency Stop
Section n 10: Stand dard & & Optio onal M achine eature ergen ncy St The emer rgency stop can be used d to comple etely shut down the e Fusion syst tem in case of an emer rgency. If the emerg gency stop i is used you... - Page 140 S Section n 10: Stand dard & & Optio onal M achine eature Vacuu um Hol d-down The e xhaust syste em is design ed so that it t evacuates f from both th he top and th he bottom of the vector grid .
-
Page 141: Section 11: Engraving Machine Cleaning
Section 11: Engraving Machine Cleaning In This Section Cleaning Important! Laser Tube This cleaning section may show photos of other Epilog machines. The cleaning process is the same so please use these photos as a reference guide. Cleaning - Important! Fire Warning! Through normal use your laser system can collect debris and soot that are potentially flammable. - Page 142 Section 11: Engraving Machine Cleaning ALWAYS keep a properly maintained and inspected fire extinguisher on hand. Epilog recommends a Halotron fire extinguisher or a multi-purpose dry chemical fire extinguisher. The Halotron extinguishers are more expensive than a dry chemical, but offer certain advantages should you ever need to use an extinguisher.
- Page 143 S Sectio on 11: Engra aving M Machi ne Cle eaning Mirro Focus L Lens To cle ean the optic cs use a high h-quality co otton swab m moistened wi ith the optic cs cleaner suppli ied in the ac ccessory kit.
- Page 144 S Sectio on 11: Engra aving M Machi ne Cle eaning In add dition to the focus lens a and the mirro or directly a above it, ther re is a mirro or located on the e left side of f the X-beam m.
- Page 145 S Sectio on 11: Engra aving M Machi ne Cle eaning The fo ollowing pho otos show cl leaning and l lubing of the e X-axis rail a soft cotto on cloth or cot tton swab t to clean the en ntire length h of the X-axi...
- Page 146 S Sectio on 11: Engra aving M Machi ne Cle e aning g Place a bead of grease along bottom groov ve of the X-axi s rail. X-axis rail. This photo shows locatio on of the X-axi s carriage and th he X-axis bearin ng (which...
- Page 147 S Sectio on 11: Engra aving M Machi ne Cle eaning Clean n the length the rig ght side Y-a axis rail using a s soft cotton oth. Lubric cation is requir red. Clean n the length the le eft side Y-a axis rail using a s...
- Page 148 S Sectio on 11: Engra aving M Machi ne Cle eaning Clean ning th he Exha aust P Plenum Make sure the exhaust bl lower you are using receives p proper main ntenance. Period dically clean n the exhaus st blower an d duct syste em to remov ve built-up d...
- Page 149 S Sectio on 11: Engra aving M Machi ne Cle eaning In add dition to cle eaning the in nside of the machine yo ou should oc ccasionally c clean the exhau ust plenum. The exhaust t plenum ca an be compl letely remov ved from the e Fusion.
-
Page 150: Laser Tube
Section 11: Engraving Machine Cleaning Laser Tube The laser tube used in your system does have a maximum service life, and there is very little maintenance that is required. At some point in the life of the laser you will need to replace it for gas recharge, electrical repair or mechanical repair. -
Page 151: Section 12: Speed And Power Recommendations
Section 12: Speed and Power Recommendations In This Section Speed Power Frequency Focus Recommended Settings Multiple Passes Speed, Power, Frequency and Focus are used in combination to produce the desired mark on the material being used. Different materials require different combinations and these combinations are listed in the tables later in this section. -
Page 152: Power
Section 12: Speed and Power Recommendations type of mark that is desired. In Raster mode, optimization software allows the carriage to skip through horizontal white space, increasing laser on-time rates, which further enhances overall throughput. Power The Power setting is the percentage of the maximum laser output and is adjustable in 1% increments. -
Page 153: Recommendations
If you have difficulty in finding the correct setting you can send a sample to the Epilog Laser Applications lab. We will determine if the material can be marked and provide appropriate setting... -
Page 154: General Metal Engraving / Base Settings
Section 12: Speed and Power Recommendations General Metal Engraving / Base Settings In the world of metals the grade, type, hardness and chemical composition are endless. Metal alloys are engineered for specific applications and have their own strengths and weaknesses. With such an unlimited selection, we’ve yet to come across a metal which proved to be incompatible with the FiberMark. - Page 155 Section 12: Speed and Power Recommendations Polishing of Steel Alloys 50 - 80% Speed 30 - 50% Power 70 - 100% Frequency 0 Focus 600 DPI Some steel alloys are easier to polish than others. For best results, clean off the surface with alcohol prior to processing.
- Page 156 Section 12: Speed and Power Recommendations Aluminum Alloys 15 - 40% Speed 100% Power 1-10% Frequency -.010” to +.010”Focus 400 - 600 DPI Engraving aluminum will result in various shades of gray, not black. Fine tuning the settings can provide a bit more contrast but the range of applicable marks isn’t as broad as steel.
- Page 157 Section 12: Speed and Power Recommendations against environment & rust). The typical plating thickness varies from .001” up to .005”. Our recommended settings for general metal engraving works well for ablating thru the plating; exposing the base metal. Ablating the plating will also provide high contrast.
- Page 158 Section 12: Speed and Power Recommendations Anodized Aluminum 20 - 40% Speed 80 - 100% Power 1 - 15% Frequency Up or down .030” to .050” focus 600 DPI The contrast / brightness of mark achievable on the FiberMark are excellent and are often times much brighter than those done on a C02 laser.
-
Page 159: 10 Watt Fibermark
Section 12: Speed and Power Recommendations 10 Watt FiberMark Marking/Etching SPEED POWER FREQUENCY FOCUS Anodized 10-25% 100% 30-70% -0.03 to +0.03 Aluminum 5 -15% 100% 1-10% -0.01 to +0.01 Stainless Steel 5-15% 100% 1-10% 0.00 Brass 30-40% 40%-100% 50-100% -0.02 to +0.02 Laserable Plastic 5-12% 100%... -
Page 160: Watt Fibermark
Section 12: Speed and Power Recommendations 20 Watt FiberMark Marking/Etching SPEED POWER FREQUENCY FOCUS 20-50% 70-100% 50-100% -0.03 to +0.03 Anodized Aluminum 10-30% 100% 1–35% -0.01 to +0.01 Stainless Steel 5-30% 100% 1–20% 0.00 Brass 40-70% 50%-70% 50-100% -0.02 to +0.02 Laserable Plastic 5-25% 100%... -
Page 161: 30 Watt Fibermark
Section 12: Speed and Power Recommendations 30 Watt FiberMark Marking/Etching SPEED POWER FREQUENCY FOCUS 40-70% 50-100% 50-100% -0.03 to +0.03 Anodized Aluminum 10-50% 100% 1–20% -0.01 to +0.01 Stainless Steel 10-60% 100% 1-5% 0.00 Brass 40-100% 50-100% 50-100% -0.02 to +0.02 Laserable Plastic 5-35% 100%... -
Page 162: 50 Watt Fibermark
Section 12: Speed and Power Recommendations 50 Watt FiberMark Marking/Etching SPEED POWER FREQUENCY FOCUS 40-80% 50-100% 50-100% -0.03 to +0.03 Anodized Aluminum 15-60% 100% 1-20% -0.01 to +0.01 Stainless Steel 15-60% 100% 1-10% 0.00 Brass 50-100% 40 -80% 50-100% -0.02 to +0.02 Laserable Plastic 5-50% 100%... -
Page 163: Technical Support, Troubleshooting And Specifications
Manua nica al S ort, lesh otin ng a ecif fica atio... - Page 164 THIS PAGE WAS INTENTIONALLY LEFT BLANK...
-
Page 165: Contacting Technical Support
ectio on 1 13: I n Ca fficu ulty n This Sect tion Conta acting Techn nical Support ntactin ng Te chnic cal Su uppor The t technical su upport depar rtment at E Epilog is av vailable to assist with h solving proble... -
Page 166: Section 13: In Case Of Difficulty
Section 13: In Case of Difficulty THIS PAGE WAS INTENTIONALLY LEFT BLANK... -
Page 167: Section 14: Specifications
Section 14: Specifications In This Section Epilog Fusion 32 x 20 Specifications Compatibility Recommended PC Other Computer Hardware Recommendations Federal Communications Commission (FCC) Notice Epilog Fusion 32 x 20 Specifications Maximum Engraving Area 32" x 20" (812.8 x 508 mm) Maximum Material Thickness 14"... -
Page 168: Compatibility
Section 14: Specifications Compatibility Your Epilog laser has been designed as an “open architecture” product that can be run from almost any Windows based software. Epilog provides both Windows 32-bit and 64-bit print drivers. Recommended PC For Optimum Computer Performance Investing in a new computer is a great way to make sure you’re getting the most out... - Page 169 Epilog supplies a network Crossover cable with each laser system that allows one computer to print to a single Epilog laser system. Hard Drive This is the permanent memory in your computer. Many users feel that you can never have a large enough hard drive.
-
Page 170: Other Computer Hardware Recommendations
About The Laser Your Epilog CO2 laser system uses the latest in waveguide laser technology to provide a powerful tool that is simple and safe to setup and operate. The Epilog laser can mark, engrave, and cut a variety of non-metallic materials. -
Page 171: Federal Communications Commission (Fcc) Notice
Section 14: Specifications The laser has two basic operating methods. For cutting (vector), the laser is driven along a path and the laser is left on all the time. The path could be the outline of a letter or a geometric shape like a circle. The laser will cut entirely through the material, separating the part from the background. - Page 172 Section 14: Specifications THIS PAGE WAS INTENTIONALLY LEFT BLANK...
-
Page 173: Section 15: Upgrading The Operational Firmware
Section 15: Upgrading the Operational Firmware In This Section Upgrading Your Firmware Installing New Firmware Onto Your Computer Transferring New Firmware From Your Computer To Your Laser System Upgrading The Epilog Dashboard Print Driver Converting Old .Dat Files To Be Compatible With A New Driver Version: Upgrading Your Firmware Your laser system is capable of having its operation firmware upgraded. -
Page 174: Installing New Firmware Onto Your Computer
Sectio on 15: Upgra ading the Op peratio onal Firm mware Insta alling g New w Firm mware e onto o You mpute Firmw ware upgrad es are avail able at any time by do ownloading t the firmwar e file from the Epilog web site -... -
Page 175: Transferring New Firmware From Your Computer To Your Laser
Sectio on 15: Upgra ading the Op peratio onal Firm mware After extraction, t the following g message ap ppears: Click the Oka ay button Once the file is ex xtracted it ch hanges from m an .exe form mat to a .hex x format tha at will be na... - Page 176 Sectio on 15: Upgra ading the Op peratio onal Firm mware next step p is to P Print, sele ect the D d driver, Dashboard click k on Prop perties. Go to o the Advanc ced tab, che ck the Upda re box and then click o on the...
- Page 177 Sectio on 15: Upgra ading the Op peratio onal Firm mware The .h hex will show w in the Upd date Firmwa are File box. Click OK Then Click Print At thi is point, the .hex file wi ill begin tran nsfering to y your laser.
- Page 178 Sectio on 15: Upgra ading the Op peratio onal Firm mware Close your Corel page and yo ou are ready for you next t job!
-
Page 179: Appendix Awarranty Statement
APPENDIX A WARRANTY STATEMENT Epilog Corporation warrants to the original purchaser of Epilog Model 13000 that this product will be free from defects in material or workmanship when purchased, and under proper, normal use within two (2) years from the original date of purchase, with the exception of the motors which are warranted for three (3) years from the original date of purchase. - Page 180 APPENDIX A THIS PAGE WAS INTENTIONALLY LEFT BLANK...
-
Page 181: Appendix B Additional Dashboard Print Driver Instructions
APPE IX B DITIO ONAL L DA ASHB RINT IVER R INS TION n This Sect tion W Windows 8: Installing th he 64-bit Epi ilog Dashbo ard Print Dr river In nstalling the e Dashboard Driver for a an Ethernet C Connection: - Windows... - Page 182 App pendix x B Add ditiona al Dash hboard d Instr ruction Select Chan nge PC Setti ings. Select Gene eral. Scroll to the e bottom of t the General page. Under r “Advanced d Start-Up” s select Restart Now...
- Page 183 App pendix x B Add ditiona al Dash hboard d Instr ruction n s Once the PC C comes bac ck up, select Troublesho oot. Select Adva anced Option Select Start t-Up Settings...
-
Page 184: Installing The Dashboard Driver For An Ethernet Connection: - Windows 8
Ethe ernet Conn nectio on: - W Windo ows 8 Insert the E Epilog Laser r CD into yo our compute r’s disk devi ice. Tap the box in the u upper right c corner of your... - Page 185 App pendix x B Add ditiona al Dash hboard d Instr ruction Click o on Run Fusi ion_driver.ex The follow wing windo ow should a appear. Clic ck on Ethe ernet Dashb board Driver Ins stall. Click on S Stop...
- Page 186 App pendix x B Add ditiona al Dash hboard d Instr r uction n s Click on N Next Select Add d a local pri inter or networ rk printer with manual settings. click Next Click on C Port, then Create New click on th he dropdown...
- Page 187 App pendix x B Add ditiona al Dash hboard d Instr ruction Enter the IP Address you want to o use. Most Epilog user rs will use th he IP Address o f 192.168.3. 4, which is w what we use e in this doc ument.
- Page 188 App pendix x B Add ditiona al Dash hboard d Instr ruction 0. Select Cus then click o on Next stom and the en Settings, Set Protoc col to LPR. This is a very important step. Your dow wnload time e will be greatl ly increase...
- Page 189 App pendix x B Add ditiona al Dash hboard d Instr ruction n s 2. Click on N Next 3. Click on H Have Disk 4. Click on B Browse...
- Page 190 App pendix x B Add ditiona al Dash hboard d Instr ruction 5. Find the d isk drive wit th the Epilog g install disk k and click o on Open 6. Select the driver folde r and then cl lick on Open 7.
- Page 191 App pendix x B Add ditiona al Dash hboard d Instr ruction 8. Click on O 9. Click on N Next You can n rename yo our printer h here. We hav ve not changed d it for this s document, but many users like to...
-
Page 192: Installing The Dashboard Driver Using The Usb Connection Using Windows 8
pendix x B Add ditiona al Dash hboard d Instr ruction Insta alling g the D Dashb board d Driv ver Us sing USB C Conne ection n usin ng Wi indow ws 8 The p process of installing a a USB prin nter when u using Wind... - Page 193 App pendix x B Add ditiona al Dash hboard d Instr ruction Type the w word Contro ol into the se earch bar Click on the Control l Panel box x under App ps in the u upper left of f this window.
- Page 194 App pendix x B Add ditiona al Dash hboard d Instr ruction Right click k on the Fus ion icon. Th hen click on P Properties. Select the Hardware t 0. Select the e device Epil rFusion. Th hen click on P logEngraver Properties.
- Page 195 App pendix x B Add ditiona al Dash hboard d Instr r uction n s 1. Click on C Change Setti ings. 2. Click on th he Driver tab 3. Click on U Update Driv...
- Page 196 App pendix x B Add ditiona al Dash hboard d Instr ruction 4. Click on B Browse my C Computer fo or driver soft ftware 5. Use the B Browse butto on to direct your comp puter to you ur disk drive e that contains th he Epilog dri...
- Page 197 App pendix x B Add ditiona al Dash hboard d Instr ruction 7. The progre ess window will appear. 8. You will t then be aske ed if you wa ant to install l this driver: : Click on In nstall this Driver r Anyway...
- Page 198 App pendix x B Add ditiona al Dash hboard d Instr ruction 0. Click on C Close in the next window w and then C Close again. You w will then see e your Fusio on driver in the Devices s and Printer rs page.
-
Page 199: Index
INDEX Crossover Cable · 33, 43 Crumb Tray · 125 2 D 21 Cfr 1040 · 3, 7 Dashboard · i, xi, 33, 34, 43, 48, 55, 56, 70, 77, 81, 82, 85, 89, 91, 97, 99, 102, 154, 159, 162, 167, 170, 178 A ... - Page 200 INDEX Cleaning Blower And Duct · 134 Exhaust Blower · 22 Exhaust System · 15, 21, 22, 134 Blower · 22 K Explanatory Label · 8 Keyboard Commands · 105 F L Federal Communications Commission (Fcc) Notice · 153, Labels Federal Performance Standards For Light-Emitting Aperture Safety Label ·...
- Page 201 INDEX Federal Performance Standards For Light-Emitting O Products · 3 Fire · 3, 6, 9 Optics · 128 NEVER · ix, 6, 13, 21, 127 Cleaning · 128 OSHA · 4 Osha · 4 Scanned Images · 59, 95 OSHA · 4 Scanner ·...
- Page 202 INDEX Labels · 8, 10 W Warranty · xi, 13, 25, 165 Windows Warning · ix, 8, 10, 21, 25, 127 Vista · 153, 154 Warning Label · 8, 10 Windows 2000 · 4, 33, 153, 154 Warnings Windows XP · 153, 154 DO NOT ·...
Need help?
Do you have a question about the FiberMark Fusion 13000 and is the answer not in the manual?
Questions and answers