
Subscribe to Our Youtube Channel
Related Manuals for Dalsa FA-20-01M1H


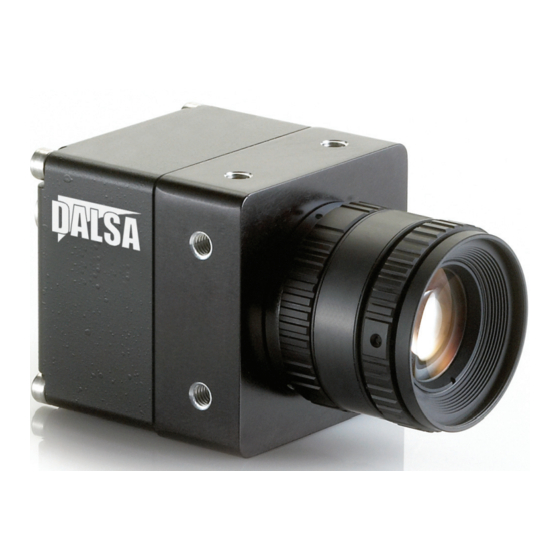
Summary of Contents for Dalsa FA-20-01M1H
- Page 1 Falcon 1.4M100 Camera User’s Manual FA-20-01M1H 1-Apr-09 03-032-20024-01 www.dalsa.com...
- Page 2 Falcon 1.4M100 Camera Manual © 2009 DALSA. All information provided in this manual is believed to be accurate and reliable. No responsibility is assumed by DALSA for its use. DALSA reserves the right to make changes to this information without notice. Reproduction of this manual in whole or in part, by any means, is prohibited without prior permission having been obtained from DALSA.
-
Page 3: Table Of Contents
Camera Serial Command Help Screen................26 Retrieving Information About the Camera ................28 4.3.1 Retrieving Camera Settings..................28 First Power Up Camera Settings ..................29 4.4.1 FA-20-01M1H......................29 Saving and Restoring Settings..................... 29 4.5.1 Factory Settings...................... 29 4.5.2 User Settings ......................30 Camera Output Format...................... - Page 4 6.2.3 Verify Factory Calibrated Settings ................66 6.2.4 Verify Timing and Digital Video Path ..............66 Specific Solutions......................... 66 6.3.1 No Output or Erratic Behavior ................66 6.3.2 Line Dropout, Bright Lines, or Incorrect Frame rate ..........66 03-032-20024-01 DALSA...
-
Page 5: Falcon 1.4M100 Camera Manual
Camera Link Video Timing ........................71 Bit Assignments According to Configuration..................72 Appendix B _________________________________________________________________73 Error Handling and Command List _______________________________________________73 All Available Commands........................73 Appendix C _________________________________________________________________77 EMC Declaration of Conformity ......................77 Appendix D _________________________________________________________________78 Revision History........................... 78 Index ______________________________________________________________________79 03-032-20024-01 DALSA... - Page 6 Falcon 1.4M100 Camera Manual 03-032-20024-01 DALSA...
-
Page 7: Introduction To The Falcon 1.4M100 Camera
Introduction to the Falcon 1.4M100 Camera Camera Highlights 1.1.1 Features • 1.4 megapixels, 1400(H) x 1024(V) resolution • Global shutter (non-rolling shutter) for crisp images • 100 fps model • Compact camera body – 44mm x 44mm x 44mm – fits into the smallest of places •... -
Page 8: Programmability
These features make the Falcon 1.4M100 applicable to: • PCB-AOI inspection • Semiconductor wafer inspection • Electronics inspection • Flat panel display inspection • Industrial metrology • Traffic management • General machine vision 03-032-20024-01 DALSA... -
Page 9: Camera Performance Specifications
8 or 10 user selectable Output Data Configuration Base mini-Camera Link Operating Ranges Units Notes Minimum Frame Rate Maximum Frame Rate Data Rate 2 @ 80 Dynamic Range Ratio 602:1 (10 bits @ nominal gain) Random Noise DN rms Broadband Responsivity DN/(nJ/cm 03-032-20024-01 DALSA... - Page 10 Measured at the front plate. • Based on output at 1023DN • Output over 10-90% • Optical distance. • Flat-field correction applied with 9000 ms exposure at 50 fps in sem 2 • At 80% of camera saturation, 1x digital gain 03-032-20024-01 DALSA...
-
Page 11: Responsivity And Quantum Efficiency
12.0 10.0 1000 Wavelength (nm) The quantum efficiency graph describes the fraction of photons at each wavelength that contribute charge to the pixel. Falcon 1.4M100 QE Curve 70.0% 60.0% 50.0% 40.0% 30.0% 20.0% 10.0% 0.0% 1000 Wavelength (nm) 03-032-20024-01 DALSA... -
Page 12: Camera Cosmetic Specifications
Camera Cosmetic Specifications 1.4.1 Sensor Cosmetic Specifications The following table highlights the current cosmetic specifications for the DALSA sensor inside the Falcon 1.4M100 camera. The monochrome sensor has 1.4 megapixels (1400 x 1024) and global shuttering. Blemish Specifications Maximum Number of Defects... -
Page 13: Cosmetic Specification
• Temperature of camera front plate is 25°C Note: All of the above sensor and camera cosmetic specifications are with flat-field correction turned off (epc 0 0). There are no post flat-field (epc 1 1) camera cosmetic specifications. 03-032-20024-01 DALSA... - Page 14 Falcon 1.4M100 Camera Manual 03-032-20024-01 DALSA...
-
Page 15: Camera Hardware Interface
Note: when unscrewing the mini-Camera Link cable from the Falcon camera, ensure the connector mounting screws do not become attached to the cable thumbscrews; in this case, simply screw the connector mounting screw back into the camera connector mounting. 03-032-20024-01 DALSA... -
Page 16: Input/Output Connectors And Led
As the Camera Link strobe frequency is increased, the maximum allowable cable length will decrease. DALSA does not guarantee good imaging performance with low quality cables of any length. In general, DALSA recommends the use of high quality cables in lengths less than 10 meters. Input/Output Connectors and LED The camera uses: •... -
Page 17: Led Status Indicator
33 . The following tables provide this camera’s principal Camera Link information. See Appendix A for the complete DALSA Camera Link configuration table, and refer to the DALSA Web site, www.dalsa.com, for the official Camera Link documents. Camera Link Hardware Configuration Summary... -
Page 18: Camera Link Connector Pinout
*Exterior Overshield is connected to the shells of the connectors on both ends. **3M part 14X26-SZLB-XXX-0LC is a complete cable assembly, including connectors. Unused pairs should be terminated in 100 ohms at both ends of the cable. Inner shield is connected to signal ground inside camera 03-032-20024-01 DALSA... -
Page 19: Input Signals, Camera Link
These signals indicate when data is valid, allowing you to clock the data from the camera to your acquisition system. These signals are part of the Camera Link configuration and you should refer to the DALSA Camera Link Implementation Road Map, available at www.dalsa.com, for the standard location of these signals. -
Page 20: Power Connector
Incorrect voltages will damage the camera. Protect the camera with a fast- blow fuse between power supply and camera. Visit the www.dalsa.com Web site for a list of companies that make power supplies that meet the camera’s requirements. The companies listed should not be considered the only choices. -
Page 21: Sapera Camexpert Guide
The central section of CamExpert provides access to the Falcon parameters. Five tabs group Falcon parameters depending on their type as described in the summary below. Each Falcon configuration parameter is described in detail following the summary. Camera Information Displays Falcon firmware details such as camera model, version, and serial number. Users can set the User ID and set the power‐up configuration mode. Camera Control Displays both static and variable sensor parameters that are Falcon model specific. Variable parameters control Falcon exposure, gain and exposure controls. The internal test image is selected here. External Trigger Provides controls for trigger source and detection configuration. Image Buffer and ROI Provides controls for buffer pixel depth, image size and cropping. 03-032-20024-01 DALSA... -
Page 22: Camexpert User Interface
The CamExpert application uses 5 windows to simplify choosing and configuring camera files or acquisition parameters for the installed device. • Device pane: View and select from any installed Sapera acquisition device. After a device is selected, CamExpert only presents acquisition parameters applicable to that device. • Camera Information Parameters pane: Allows viewing or changing all acquisition parameters supported by the acquisition device. CamExpert displays parameters only if those parameters are supported by the installed device. This avoids confusion by eliminating parameter choices when they do not apply to the hardware in use. • Display pane: Provides a live or single frame acquisition display. Frame buffer parameters are shown in an information bar above the image window. • Control Buttons: The Display pane includes CamExpert control buttons. These are: Acquisition control button: Click once to start live grab, click again to stop. Single frame grab: Click to acquire one frame from device. Software trigger button: With the I/O control parameters set to Trigger Enabled / Software Trigger type, click to send a single software trigger command. CamExpert display controls: (these do not modify the frame buffer data) Stretch image to fit, set image display to original size, or zoom 03-032-20024-01 DALSA... -
Page 23: Camexpert Lut Controls
To select the type of LUT to use, click the LUT Mode Value field; a drop-down list box displays the available modes. The Lookup Table dialog displays a graph of the input and output values for the selected LUT. A Sapera application can program the Falcon LUT for any required LUT operation. 03-032-20024-01 DALSA... - Page 24 CamExpert available LUT examples are briefly described below. The LUT function graphic simplifies understanding the operation especially when user settings modify the LUT function. • Normal (default): modifies all LUT entries using a linear mapping such that a gray level input is equal to the output • Arithmetic operation: modifies all LUT entries using an arithmetic operation • Binary pattern: modifies some LUT entries based on a binary pattern • Boolean operation: modifies all LUT entries using a Boolean operation • Gamma correction: modifies all LUT entries using Gamma correction function • Linear invert: modifies all LUT entries using a linear mapping with a negative slope • Position shift: modifies LUT entries with a zero position offset • Bit shift: modifies LUT entries with a binary bit shift • Slope within range: modifies part of a LUT with a linear mapping • Single Threshold: modifies all LUT entries using a threshold operation • Double Threshold: modifies all LUT entries using a dual level threshold operation 03-032-20024-01 DALSA...
-
Page 25: Software Interface: How To Control The Camera
OK > Error x: . The is always the last character sent by the camera. Error Message > > • The camera accepts both upper and lower case commands. • The following parameter conventions are used in the manual: 03-032-20024-01 DALSA... -
Page 26: Setting Baud Rate
To view the help screen, use the serial command: Syntax: The help screen lists all commands available. Parameter ranges displayed are the ranges available under the current operating conditions. Note, that certain parameter settings can limit the available range of other parameters. 03-032-20024-01 DALSA... - Page 27 Set sync. frequency 0.1-101.9 Hz Set subtract background 0-0:0-511 Set system gain 0-0:1024-8191 Set video mode 0/4/5/6/7/8/ Upload CBF file Verify temperature Verify voltage Write FPN coefficients Write PRNU coefficients Set window start end iixyxy 0-0:1-1:0-1399: 0-1023:1-1399:1-1023 Write user settings 03-032-20024-01 DALSA...
-
Page 28: Retrieving Information About The Camera
Notes: “Get” supports any command that returns or specifies a setting. Action commands such as “wus” (write user settings) are not supported. Example: get svm – returns the video mode the camera is currently operating in 03-032-20024-01 DALSA... -
Page 29: First Power Up Camera Settings
First Power Up Camera Settings When the camera is powered up for the first time, it operates using the following factory settings: 4.4.1 FA-20-01M1H • Flat field coefficients enabled (Factory FFC coefficients calibrated in exposure mode 2, 10 bit, 50 fps) •... -
Page 30: User Settings
The factory and user settings can be loaded or saved using the Power-Up Configuration dialog, available through the Power-Up Configuration parameter on the Camera Information tab. Set 0 contains the factory settings and Set 1 contains the user settings. Falcon Test Power-Up Configuration – on Camera Information Tab 03-032-20024-01 DALSA... -
Page 31: Camera Output Format
Camera Link Mode Configuration (Controlled by clm Pixel Rate command) Configuration (Controlled by command) Mode Camera Link Camera Link Taps Configuration Depth 2 (clm 2) Base 2 Camera Link taps 40 MHz strobe (sot 80) 80 MHz strobe (sot 160) 03-032-20024-01 DALSA... - Page 32 The factory and user settings can be loaded or saved using the Power-Up Configuration dialog, available through the Power-Up Configuration parameter on the Camera Information tab. Set 0 contains the factory settings and Set 1 contains the user settings. Falcon Test Power-Up Configuration – on Camera Information Tab 03-032-20024-01 DALSA...
-
Page 33: Setting The Camera's Pixel Rate
(that is, they occur serially). Integration is defined as the time period that the camera can be exposed to light and is often referred to as exposure time. Readout refers to the time it takes to read out 03-032-20024-01 DALSA... - Page 34 The Waiting period can be reduced to 0 seconds by starting the low-to-high transition immediately after readout is complete. The readout time is a fixed amount of time that is dependant upon the mode of operation of the camera, but is typically around 10.0ms. 03-032-20024-01 DALSA...
-
Page 35: Setting The Exposure Mode And Time
To select how you want the camera’s frame rate to be generated: You must first set the camera’s exposure mode. Next, depending on the specified exposure mode, set the frame rate and set the exposure time. 03-032-20024-01 DALSA... - Page 36 The camera sends a warning when this occurs. Related Commands: sem, ssf, eec, clm Example: set 5500 Refer to section 4.6.1 How to Configure Camera Output on page 31 for more information on the clm and (sets pixel rate) commands. 03-032-20024-01 DALSA...
- Page 37 Falcon 1.4M100 Camera Manual CamExpert Parameters The exposure mode can be specified using the Exposure Control dialog, available through the Exposure Control parameter on the Camera Control tab. Falcon Exposure Control – on Camera Control Tab Falcon Exposure Control Dialog 03-032-20024-01 DALSA...
-
Page 38: Exposure Modes In Detail
EXSYNC marks the beginning of the exposure and the falling edge initiates readout. There is a 100μs delay between the trigger and the start of the exposure. The minimum delay between consecutive exposure times is 150μs. The minimum pulse width (exposure time) is 40μs. 03-032-20024-01 DALSA... -
Page 39: Exposure Time
10μs. The minimum delay between the end of readout and the next EXSYNC is 1μs. Note, the exposure and readout time cannot overlap. In addition, the camera will ignore the falling edge of EXSYNC if the prior frame’s integration or readout is not complete. 03-032-20024-01 DALSA... - Page 40 100μs delay between the trigger and the start of the exposure. The minimum exposure time is 7μs. The minimum delay between the readout and the next EXSYNC is 1μs. Note, the exposure and readout time cannot overlap. 03-032-20024-01 DALSA...
-
Page 41: Setting The Frame Rate
Range increases when using a window of interest. Related Commands: sem, set Example: ssf 25.0 CamExpert Parameter The frame rate can be specified using the Frame Rate (Hz) parameter available through the Camera Control tab. Falcon Frame Rate (Hz) – on Camera Control Tab 03-032-20024-01 DALSA... -
Page 42: Setting A Vertical Window Of Interest
The equation used to determine the frame rate from active rows is: Frame rate = (9.5 x # of rows) + 71 Serial Command To set a window of interest: • Set the window coordinates, using the window start end command: wse 0 1 x y x y 03-032-20024-01 DALSA... - Page 43 After adjusting the window size, you can change the frame rate for improved performance. In general, the smaller the window size, the higher the possible frame rate. The frame rate can be specified using the Frame Rate (Hz) parameter available through the Camera Control tab. 03-032-20024-01 DALSA...
-
Page 44: Flat Field Correction
White paper is often not sufficient because the grain in white reference the white paper will distort the correction. White plastic or white ceramic will lead to does not extend better balancing. the full field of view of the camera, the camera will send a warning. 03-032-20024-01 DALSA... - Page 45 Large dark offsets will result in PRNU-correction-induced FPN and should therefore be avoided. Increase the offset (camera in dark) on all cameras (sao command) until they are the dame and reach at least 4 DN (10 bit). 03-032-20024-01 DALSA...
- Page 46 (dark spot) and overcorrecting where the shadow used to be (white spot). While the dark spot can be potentially cleaned, the white spot is an FFC artifact that can only be corrected by another FFC calibration. 03-032-20024-01 DALSA...
-
Page 47: Camexpert Calibration Wizard
Calibration Wizard or the camera serial commands. To launch the Calibration Wizard, click on the Flat Field Correction parameter “Setting…” field, available on the Camera Control tab. Falcon Flat Field Correction – on Camera Control Tab 03-032-20024-01 DALSA... -
Page 48: Selecting Factory Or User Coefficients
0 = PRNU coefficients disabled 1 = PRNU coefficients enabled Notes: The coefficient set that you are enabling or disabling is determined by the csn value. Refer to the previous section for an explanation of the csn command. Example: epc 1 1 03-032-20024-01 DALSA... -
Page 49: Selecting The Calibration Sample Size
Syntax: css i Syntax Elements: Number of frames to sample. Allowable values are 32 (default), 64, 128 , 256, 512, or 1024. Notes: To return the current setting, use the gcp command. Example: css 1024 03-032-20024-01 DALSA... -
Page 50: Performing Fpn Calibration
The LED flashes green while coefficients are computed. After completion, the LED should return to solid green, unless an error occurred during calibration. Example: FPN correction can only be performed in exposure modes sem 2, sem 9 and sem 10. 03-032-20024-01 DALSA... - Page 51 (csn 0). You must select the user coefficient set (csn 1) before you can perform FPN calibration. An error message is returned if you attempt to perform FPN calibration when using csn 0. Example: sfc 10 50 03-032-20024-01 DALSA...
-
Page 52: Performing Prnu Calibration
(csn 0). You must select the user coefficient set (csn 1) before you can perform PRNU calibration. An error message is returned if you attempt to perform PRNU calibration when using csn 0. Example: cpa 2 700 03-032-20024-01 DALSA... -
Page 53: Saving, Loading And Resetting Coefficients
(csn 1) before you can save FPN coefficients. An error message is returned if you attempt to save FPN coefficients when using csn 0. To return the current csn number, send the command get csn. Example: 03-032-20024-01 DALSA... - Page 54 CamExpert Parameters The user flat field coefficient settings can be loaded or saved using the Power-Up Configuration dialog, available through the Power-Up Configuration parameter on the Camera Information tab. Falcon Test Power-Up Configuration – on Camera Information Tab 03-032-20024-01 DALSA...
- Page 55 Falcon 1.4M100 Camera Manual Falcon Test Power-Up Configuration Dialog Set 0 contains the factory settings and Set 1 contains the user settings. Enable the Flatfield FPN and PRNU coefficients checkbox to load or save the user flat field coefficients. 03-032-20024-01 DALSA...
-
Page 56: Gain Adjustments
Digital Gain = 1024 For example, to set a digital gain of 2.0, i equals 2048. Notes: • Entering a large value gain will cause the camera to digitally saturate the output image Example: ssg 0 1024 03-032-20024-01 DALSA... -
Page 57: Subtracting Background
Subtracted value in a range in DN from 0 to 511. Notes: When subtracting a digital value from the digital video signal the output can no longer reach its maximum. Use the command to correct for this where: max output value ssg value = max output value ‐ ssb value Related Commands: Example ssb 0 25 03-032-20024-01 DALSA... -
Page 58: Generating A Test Pattern
Test pattern horizontal ramp Test pattern vertical ramp Test pattern diagonal ramp: Reserved for DALSA product support. Reserved for DALSA product support. When switching the camera from video mode (svm 0) to one of the test pattern modes (svm 4 thru 8), the camera "turns off"... - Page 59 (svm 0), the digital gain, background subtract and exposure control settings are returned to their prior state. Example: svm 5 Test 8-Bit 10-Bit Pattern Horizontal Ramp (svm 4) Vertical Ramp (svm 5) Diagonal Ramp (svm 5) 03-032-20024-01 DALSA...
- Page 60 Camera Control tab, then select one of the available patterns from the Test Image Selector drop menu. Select live grab to see the pattern output. Falcon Test Image Selector – on Camera Control Tab 03-032-20024-01 DALSA...
-
Page 61: Optical And Mechanical Considerations
Falcon 1.4M100 Camera Manual Optical and Mechanical Considerations Mechanical Interface Camera Mechanical Dimensions (in mm) 03-032-20024-01 DALSA... -
Page 62: Lens Mounts
C-Mount 17.52 Note that the use of certain C-Mount lenses will cause vignetting due to the size of the image sensor. The full resolution of the CMOS sensor is between 2/3 inch and 1 inch C- Mount standards 03-032-20024-01 DALSA... -
Page 63: Optical Interface
Factors include the nature, speed, and spectral characteristics of objects being imaged, exposure times, light source characteristics, environmental and acquisition system specifics, and more. DALSA’s Web site, www.dalsa.com, provides an introduction to this potentially complicated issue. See “Practical Radiometry” in the Application Notes and Technology Primers found under the Knowledge Center link. -
Page 64: Magnification And Resolution
45mm, and requires that 100μm in the object space correspond to each pixel in the image sensor. Using the preceding equation, the object distance must be 450mm (0.450m). μ 0 450 μ 03-032-20024-01 DALSA... -
Page 65: Troubleshooting
Troubleshooting The information in this chapter can help you solve problems that may occur during the setup of your camera. Remember that the camera is part of the entire acquisition system. You may have to troubleshoot any or all of the following: •... -
Page 66: Troubleshooting Using The Serial Interface
(for example EXSYNC, if camera is using an internal signal for synchronization). 6.3.2 Line Dropout, Bright Lines, or Incorrect Frame rate Verify that the frequency of the internal sync is set correctly. 03-032-20024-01 DALSA... -
Page 67: Noisy Output
The goal is to prevent solvent from evaporating from the window surface, as this will end up leaving residue and streaking behind. Repeat steps 2-6 using a clean tissue until the entire window has been cleaned. Blow off any adhering fibers or particles using dry, filtered compressed air. 03-032-20024-01 DALSA... -
Page 68: Product Support
Detailed description of problem please attach description with as much detail as encountered. appropriate In addition to your local DALSA representative, you may need to call DALSA Technical Sales Support: North America Europe Asia Voice: 519-886-6000... -
Page 69: Appendix A
The DALSA Camera Link Implementation Road Map (available in the Knowledge Center at www.dalsa.com) details how DALSA standardizes its use of the Camera Link interface. LVDS Technical Description Low Voltage Differential Signaling (LVDS) is a high-speed, low-power general purpose interface standard. -
Page 70: Camera Control Signals
The software API will provide functions to enumerate boards and send or receive a character string. See Appendix B in the Official Camera Link specification on the www.dalsa.com Web site. 03-032-20024-01 DALSA... -
Page 71: Camera Link Video Timing
( clm 2/3, sot 80 ) tOVERHEAD The number of pixels that must elapse after the falling edge of FVAL before the EXSYNC falling edge can occur. tLINE The line time µs ( clm 2 / 3, sot 80 ) 03-032-20024-01 DALSA... -
Page 72: Bit Assignments According To Configuration
Not used Port B7 Not used Port C0 Not used Port C1 Not used Port C2 Not used Port C3 Not used Port C4 Not used Port C5 Not used Port C6 Not used Port C7 Not used 03-032-20024-01 DALSA... -
Page 73: Appendix B
These coefficients can be deleted or modified. calibration Sets the number of lines to sample when sample size performing FPN and PRNU calibration where m is 32 (factory setting), 64 , 128 , 256 , 512 , or 1024 03-032-20024-01 DALSA... - Page 74 2: each pixel value is formed from 2 adjacent pixels, effectively reducing the frame width in half. set baud rate Set the speed of the serial communication port. Baud rates: 9600 , 19200 , 57600 , and 115200 . Default baud: 9600. 03-032-20024-01 DALSA...
- Page 75 Enables or disables mirroring mode: mode" 0 : disabled 1 : enabled set output Sets the output throughput. Possible values throughput are 80 or 160 MHz. Set PRNU x = 1-1400 x y i coefficient y = 1-1024 i = 0-255 03-032-20024-01 DALSA...
- Page 76 . Ranges from 1 - 1023. write FPN Saves the FPN coefficients coefficients write PRNU Saves the PRNU coefficients coefficients write user Write all of the user settings to non-volatile settings memory. 03-032-20024-01 DALSA...
-
Page 77: Appendix C
Falcon 1.4M100 Camera Manual Appendix C EMC Declaration of Conformity 03-032-20024-01 DALSA... -
Page 78: Appendix D
Falcon 1.4M100 Camera Manual Appendix D Revision History Revision Change Description Number Preliminary release First release edition 03-032-20024-01 DALSA... -
Page 79: Index
63 connector, 16 incorrect line rate, 66 Camera Link, 17 input/output, 16 power, 20 inputs (user bus), 19 connectors installation, 15 Camera Link, 18 interface control configuration, 70 electrical, 9 control signals, 70 mechanical, 9, 12, 13, 62 03-032-20024-01 DALSA... - Page 80 33 timing ranges, 9 programmed, 73 optical interface, 63 standard, 71 optical specifications, 9 troubleshooting, 65 line rates, 66 serial interface, 66 pixel rate, 32 power connector, 20 video data, 69 guidelines, 20 power supply, 20 PRNU, 44 03-032-20024-01 DALSA...
Need help?
Do you have a question about the FA-20-01M1H and is the answer not in the manual?
Questions and answers