Dalsa Piranha4 Series Manual
Color 2k and 4k trilinear and quadlinear cmos
Hide thumbs
Also See for Piranha4 Series:
- User manual (111 pages) ,
- Manual (137 pages) ,
- User manual (102 pages)
Table of Contents
Advertisement
Quick Links
Download this manual
See also:
User Manual
Advertisement
Table of Contents

Subscribe to Our Youtube Channel
Related Manuals for Dalsa Piranha4 Series


Summary of Contents for Dalsa Piranha4 Series
- Page 1 Piranha4 Cameras Color 2K and 4K Trilinear and Quadlinear CMOS sensors | cameras | frame grabbers | processors | software | vision solutions 03-032-20180-06 www.teledynedalsa.com 03-032-20180-06 Teledyne DALSA...
- Page 2 The information contained herein is proprietary to Teledyne DALSA and is to be used solely for the purpose for which it is supplied. It shall not be disclosed in whole or in part, to any other party, without the express permission in writing by Teledyne DALSA 03-032-20180-06...
-
Page 3: Table Of Contents
Step 3. Establish Communication with the Camera ..........47 Power on the camera .................. 47 Connect to the frame grabber ..............47 Connect to the camera ................47 Check LED status ..................47 Software interface ..................47 Using Sapera CamExpert with Piranha4 Cameras ..........48 Teledyne DALSA 03-032-20180-06... - Page 4 Piranha4 2K and 4K Camera Color User's Manual CamExpert panes ..................49 Review a test image ..................51 4. Camera Operation _____________________________________________________________________________________ 52 Factory Settings ....................... 52 Check Camera and Sensor Information ..............52 Verify Temperature and Voltage ................53 Saving and Restoring Camera Settings ..............
- Page 5 Setting up communication between the camera and the frame grabber ..131 Appendix C: Error and Warning Messages ____________________________________________________________________ 134 BiST: Built in Self-Test ................134 EC & FCC Declaration ___________________________________________________________________________________ 136 Revision History _________________________________________________________________________________________ 137 Index _________________________________________________________________________________________________ 138 Teledyne DALSA 03-032-20180-06...
-
Page 6: System Precautions
Piranha4 2K and 4K Camera Color User's Manual System Precautions Precautions Read these precautions and this manual carefully before using the camera. Confirm that the camera’s packaging is undamaged before opening it. If the packaging is damaged please contact the relevant logistics personnel. Do not open the housing of the camera. -
Page 7: The Piranha4 Color Camera
1. The Piranha4 Color Camera Camera Highlights Based on Teledyne DALSA's unique CMOS color line scan sensor architecture, the Piranha4 2k and 4k Trilinear and Quadlinear color cameras provide outstanding signal-to-noise performance for high speed imaging. The Piranha4 4k model has 4k resolution with a 10 µm x 10 µm pixel size for optimized optical design. -
Page 8: Camera Performance Specifications
Piranha4 2K and 4K Camera Color User's Manual Models The camera is available in the following configurations: Table 1: Camera Models Overview Model Number Description P4-CC-02K04T-00-R 2k resolution, 40 kHz line rate, 14.08 µm x 14.08 µm pixel size, trilinear P4-CC-02K07T-00-R 2k resolution, 70 kHz line rate, 14.08 µm x 14.08 µm pixel size, trilinear P4-CC-02K07Q-00-R... - Page 9 4.39nJ / cm2 6.80 nJ / cm2 3.64 nJ / cm2 3.2 pJ / cm2 3.6 pJ / cm2 5.6 pJ / cm2 3.0 pJ / cm2 Antiblooming > 100 x Saturation Integral non- < 2% DN linearity Teledyne DALSA 03-032-20180-06...
-
Page 10: Flash Memory Size
Piranha4 2K and 4K Camera Color User's Manual Table 5: P4-CC-04K Operating Ranges Operating Ranges Performance Green Blue Dynamic Range 61.8 dB 61.8 dB 61.8 dB Random Noise 3.25 DN** rms 3.25 DN rms 3.25 DN rms Responsivity Refer to graph Gain 1x to 10x Nominal Range (not including individual RGB gains for white balance) DC Offset... -
Page 11: Supported Industry Standards
TDI Mode. 1200 2K Trilinear Color Spectral Responsivity No White Balance, 12 Bit, 1x Gain 1000 Green Blue Wavelength (nm) Figure 1: 2k Trilinear Spectral Responsivity Teledyne DALSA 03-032-20180-06... - Page 12 Piranha4 2K and 4K Camera Color User's Manual 1200 P4 2K Quad Linear Color Spectral Responsivity No White Balance, 12 bit, gain 1x 1000 Green Blue Mono Wavelength (nm) Figure 2: 2k Quadlinear Spectral Responsivity P4 4k Trilinear Color Spectral Responsivity No White Balance, 12 bit, gain 1x Wavelength (nm) Figure 3: 4k Trilinear Spectral Responsivity...
- Page 13 Piranha4 2K and 4K Color Camera User's Manual QE vs Wavelength 2K Quadlinear Green Blue Mono 1050 Wavelength (nm) Figure 4: 2k Quadinear QE Vs Wavelengh QE vs Wavelength 2K Trilinear Green Blue 1050 Wavelength (nm) Figure 5: 2k Trilinear QE Vs Wavelength Teledyne DALSA 03-032-20180-06...
- Page 14 Piranha4 2K and 4K Camera Color User's Manual P4 4K Trilinear Quantum Efficiency vs. Wavelength Wavelength (nm) Figure 6: 4k Trilinear QE Vs Wavelengh 03-032-20180-06...
- Page 15 Piranha4 2K and 4K Color Camera User's Manual Figure 7: Calibration Source Relative Intensity vs. Wavelength Teledyne DALSA 03-032-20180-06...
-
Page 16: Spatial Correction And Trilinear Sensor Design
Piranha4 2K and 4K Camera Color User's Manual Spatial correction and trilinear sensor design The P4-CC-04K07T-00-R camera uses a trilinear sensor where three separate 4K lines of pixels are used— one for red, the center for blue and the last for green. 10.56um 21.12um 10.56um... - Page 17 The setting can be adjusted from 0 to 5 to compensate for rectangular pixels—whether they are too long or to short. The following examples of image artefacts show black to white image transitions and the associated corrected image after applying a specific ssa setting. Teledyne DALSA 03-032-20180-06...
- Page 18 Piranha4 2K and 4K Camera Color User's Manual Example 1. Target speed adjusted for square pixels Line Spatial Correction = 3 (ssa = 3). This is the default condition. Example 2. Target running slower than example 1, same EXSYNC (trigger) frequency Line Spatial Correction = 3 (ssa = 3) Line Spatial Correction = 4.3 (ssa = 4.3) Example 3.
- Page 19 Line Spatial Correction = 3 (ssa = 3) Line Spatial Correction = 1 (ssa = 1) Example 5. Target running faster than EXSYNC Line Spatial Correction = 3 (ssa = 3) Line Spatial Correction = 5 (ssa = 5) Teledyne DALSA 03-032-20180-06...
-
Page 20: Parallax Correction
Piranha4 2K and 4K Camera Color User's Manual Parallax correction When the camera it is not perpendicular to the object surface the P4 color camera will exhibit color. The parallax distortion increases when imaging at steep angles relative to the cameras imaging plain. This is an optical effect caused by the line spacing of the three individual colors. -
Page 21: Camera Direction
Selectable camera direction accommodates an object direction change on a web and allows you to mount the camera “upside down”. Note: The example here assumes the use of a lens (which inverts the image). Figure 15: Object Movement and Camera Direction Example, with a Lens Teledyne DALSA 03-032-20180-06... -
Page 22: Mechanicals
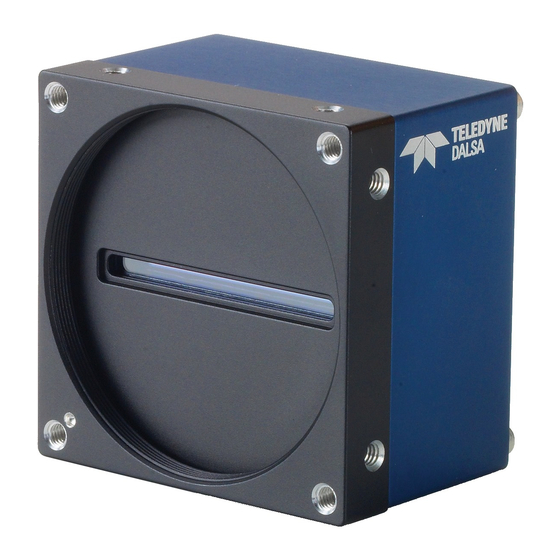
Piranha4 2K and 4K Camera Color User's Manual Mechanicals Figure 16: P4-CC-02K04T-00-R and P4-CC-02K07T-00-R Camera Mechanicals 03-032-20180-06 Teledyne DALSA... - Page 23 Piranha4 2K and 4K Color Camera User's Manual Figure 17: P4-CC-04K04T-00-R and P4-CC-04K07T-00-R Camera Mechanicals (shown with optional heat sink below) Teledyne DALSA 03-032-20180-06...
- Page 24 Piranha4 2K and 4K Camera Color User's Manual 03-032-20180-06 Teledyne DALSA...
- Page 25 Piranha4 2K and 4K Color Camera User's Manual Figure 18: P4-CC-02K04T-01-R Small Body Camera Mechanical Teledyne DALSA 03-032-20180-06...
- Page 26 Piranha4 2K and 4K Camera Color User's Manual Figure 19: P4-CC-04K04T-01-R Small Body Camera Mechanical 03-032-20180-06 Teledyne DALSA...
- Page 27 Part No. Description AC-LN-00002 M58 to F-mount adapter, heavy duty, 12mm BFD, for 4K model AC-LC-00001 M42x1 to C-mount adapter, 12mm BFD, for 2K model AC-LA-00115 M42x1 to F-mount adapter, heavy duty, 12mm BFD, for 2K model 03-032-20180-06 Teledyne DALSA...
-
Page 28: Camera Mounting And Heat Sink Considerations
Teledyne DALSA recognises that each customer’s application can be unique. In consideration, the P4 camera heat sinks have been designed in such a way that they can be repositioned on the different faces of the camera or removed entirely, depending on the mounting configuration and its heat sinking potential. -
Page 29: Quick, Simple Steps To Acquire An Image
Piranha4 camera, an overview of the steps required to get this camera operational and acquiring images quickly can be found in Appendix C: Quick Setup and Image Acquisition. Teledyne DALSA 03-032-20180-06... -
Page 30: Software And Hardware Setup
ASCII-based commands. A complete list of the commands can be found here, Appendix B: ASCII Commands. 4. Operate the camera At this point you will be ready to start operating the camera in order to acquire images, set camera functions, and save settings. 03-032-20180-06 Teledyne DALSA... -
Page 31: Step 1. Install And Configure The Frame Grabber And Software
These cameras implement the Camera link specification, which defines the device capabilities. The Camera link XML device description file is embedded within the camera firmware allowing Camera link-compliant applications to recognize the cameras’ capabilities immediately after connection. Teledyne DALSA 03-032-20180-06... -
Page 32: Step 2. Connect Data, Trigger, And Power Cables
Figure 22: Input and Output, trigger, and Power Connectors WARNING! Grounding Instructions Static electricity can damage electronic components. It’s critical that you discharge any static electrical charge by touching a grounded surface, such as the metal computer chassis, before handling the camera hardware. 03-032-20180-06 Teledyne DALSA... -
Page 33: Data Connector: Camera Link
Camera Link configurations. For detailed information on Camera Link please refer to the Camera Link Road Map available from the Knowledge Center on the Teledyne DALSA Web site. Figure 23. SDR26 Camera Link Connector Data 2 Control / Data 1... -
Page 34: Camera Link Bit Definitions
µs. Spare Direction Spare Table 6: Camera Control Configuration For additional Camera Link documentation refer to the Teledyne DALSA Web site’s Knowledge Center application notes. Camera Timing Note: Information on setting up the camera’s AOI can be found here, Area of Interest (AOI) Setup. - Page 35 Green 4094 Green 4096 Green 2 Green 8 CL Port E D0..D7 D0..D7 D0..D7 D0..D7 D0..D7 D0..D7 Blue 4 Blue 6 Blue 4094 Blue 4096 Blue 2 Blue 8 CL Port F D0..D7 D0..D7 D0..D7 D0..D7 D0..D7 D0..D7 Teledyne DALSA 03-032-20180-06...
- Page 36 RGB data from the frame grabber buffer by the host application. Line rates up to 70 kHz can be achieved by using the Area of Interest (AOI) feature; where the smaller the AOI, the greater the potential line rate. 03-032-20180-06 Teledyne DALSA...
- Page 37 D0..D7 D0..D7 D0..D7 D0..D7 D0..D7 D0..D7 D0..D7 Mono/IR Mono/IR Blue 8 Green 11 Blue 2048 Mono/IR 8 Mono/IR 16 Green 3 Red 6 2040 2048 CL Port H D0..D7 D0..D7 D0..D7 D0..D7 D0..D7 D0..D7 D0..D7 D0..D7 D0..D7 Teledyne DALSA 03-032-20180-06...
- Page 38 RGB data from the frame grabber buffer by the host application. Line rates up to 70 kHz can be achieved by using the Area of Interest (AOI) feature; where the smaller the AOI, the greater the potential line rate. 03-032-20180-06 Teledyne DALSA...
- Page 39 RGB data from the frame grabber buffer by the host application. Line rates up to 70 kHz can be achieved by using the Area of Interest (AOI) feature; where the smaller the AOI, the greater the potential line rate. Teledyne DALSA 03-032-20180-06...
- Page 40 The RGB output format is compatible with the Camera Link specification for Medium RGB. Line rates up to 70 kHz can be achieved by using the Area of Interest (AOI) feature; where the smaller the AOI, the greater the potential line rate. 03-032-20180-06 Teledyne DALSA...
- Page 41 The RGB output format is compatible with the Camera Link specification for Medium RGB. Line rates up to 70 kHz can be achieved by using the Area of Interest (AOI) feature; where the smaller the AOI, the greater the potential line rate. Teledyne DALSA 03-032-20180-06...
-
Page 42: Cl Port A
The RGB output format is not defined in the Camera Link specification Deca. The RGB format is such that when using a Camera Link frame grabber compatible with the Deca format configured for the mono standard, the R, G and then B pixels will be written sequentially into the frame grabber buffer. This 03-032-20180-06 Teledyne DALSA... - Page 43 RGB data from the frame grabber buffer by the host application. Line rates up to 70 kHz can be achieved by using the Area of Interest (AOI) feature; where the smaller the AOI, the greater the potential line rate. Teledyne DALSA 03-032-20180-06...
- Page 44 1, 2 .., 511 (i.e. 8, 960 are allowed, 12 is not allowed). 3) In mirror mode, the first pixel of each AOI (AOI right edge) must have the location 8i + 7, where i = 0,1,2 .., 511 (i.e. 7, 15, 4095 are allowed, 8 is not allowed). 03-032-20180-06 Teledyne DALSA...
-
Page 45: Camera Link Cable Quality And Length
These signals are part of the Camera Link configuration and you should refer to the Camera Link Implementation Road Map, available at our Knowledge Center, for the standard location of these signals. Clocking Signal Indicates Teledyne DALSA 03-032-20180-06... -
Page 46: Power Connector
LED states. When more than one condition is active, the LED indicates the condition with the highest priority. Color of Status LED Meaning No power or hardware malfunction Blinking Green Powering up or calibrating Green Ready 03-032-20180-06 Teledyne DALSA... -
Page 47: Step 3. Establish Communication With The Camera
If the camera is operating correctly at this point, the diagnostic LED will shine green. Software interface All the camera features can be controlled through the CamExpert interface. For example, under the Sensor Control menu in the camera window you can control the line rate and exposure times. Teledyne DALSA 03-032-20180-06... -
Page 48: Using Sapera Camexpert With Piranha4 Cameras
Note: The availability of the features is dependent on the CamExpert user setting. A note on the CamExpert examples shown here: The examples shown for illustrative purposes and may not entirely reflect the features and parameters available from the camera model used in your application. 03-032-20180-06 Teledyne DALSA... -
Page 49: Camexpert Panes
Piranha4 2K and 4K Color Camera User's Manual CamExpert panes Figure 26. CamExpert’s Camera Control Window Teledyne DALSA 03-032-20180-06... - Page 50 Control Buttons: The Display pane includes CamExpert control buttons. These are: Acquisition control button: Click once to start live grab, click again to stop. Single frame grab: Click to acquire one frame from device. 03-032-20180-06 Teledyne DALSA...
-
Page 51: Review A Test Image
Green Value: {102, 103, 104…} Blue Value: {204, 205, 206…} Values roll over at 255. At this point you are ready to start operating the camera in order to acquire images, set camera functions, and save settings. Teledyne DALSA 03-032-20180-06... -
Page 52: Camera Operation
CamExpert GUI shown in the following examples. Parameters such as camera model, firmware version, sensor characteristics, etc. are read to uniquely identify the connected device. The camera information parameters are grouped together as members of the Camera Information set. 03-032-20180-06 Teledyne DALSA... -
Page 53: Verify Temperature And Voltage
LED will turn red. Once you have diagnosed and remedied the issue use the reset camera function. The voltage displayed is the camera’s input voltage. Note: The voltage measurement feature of the camera provides results typically within 1%. This measurement can be used to set the applied voltage to the camera. Teledyne DALSA 03-032-20180-06... -
Page 54: Saving And Restoring Camera Settings
User Set Default Selector. The chosen set automatically saves as the default setting and is the set loaded when the camera is reset or powered up. The relationship between these three settings is illustrated in Figure 29. Relationship between the Camera Settings: 03-032-20180-06 Teledyne DALSA... - Page 55 The command User Set Save saves the current settings to non-volatile memory as a User Set. The camera automatically restores the last saved user settings when it powers up. To restore the last saved user settings, select the User Set parameter you want to restore and then select the User Set Load parameter. Teledyne DALSA 03-032-20180-06...
-
Page 56: Camera Link Configuration
The start of exposure can be an internal timer signal (free-running mode) or an external trigger signal. The exposure duration can be programmable (such as the case of an internal timer) or controlled by the external trigger pulse width. 03-032-20180-06 Teledyne DALSA... - Page 57 Line Start event. Exposure Time Selector Internally generated. Allows for an independent exposure time to be applied to each individual color. Exposure Time Sets the exposure time (in microseconds). Exposure Mode feature must be set to Timed Teledyne DALSA 03-032-20180-06...
-
Page 58: Exposure Modes In Detail
In this mode, the line rate is set externally with the falling edge of EXSYNC generating the rising edge of a programmable exposure time. GenICam parameters to set: I / O Controls > Trigger Mode > On Sensor Control > Exposure Mode > Timed 03-032-20180-06 Teledyne DALSA... - Page 59 Exposure = X Sensor Sensor Sensor Readout Readout Readout LVAL 27.5us Notes: 1. Exposure time > 7 micro-seconds 2. Sensor Readout time = 14 micro-seconds 3. One additional falling edge during exposure is latched Figure 31. Exposure Modes Teledyne DALSA 03-032-20180-06...
-
Page 60: Color Exposure Time Guidelines
Note: The line rate must be less than 1 / (Exposure time + 1500ns). Entering a value that violates this condition will return an error (“Invalid Parameter”). You must adjust these two parameters in the correct sequence to maintain this condition. 03-032-20180-06 Teledyne DALSA... - Page 61 41 kHz (2k models only) Full 55 kHz (4k models only) Deca 68.5 kHz (Deca RGB8) Note: 70 kHz line rate can be achieved using AOI mode for all Camera Link Mode. For more information, see Area of Interest (AOI) Setup. Teledyne DALSA 03-032-20180-06...
- Page 62 Max: 70KHz 62 MHz 62000000 Rate = AOIwidth1 Medium RGB8 Max: 70KHz 62000000 Rate = 0.5 x AOIwidth1 Full RGB8 Max: 70KHz 62000000 Rate = 0.375 x AOIwidth1 Deca RGB8 Max: 70KHz 62000000 Rate = 0.3 x AOIwidth1 03-032-20180-06 Teledyne DALSA...
- Page 63 0.375 x (AOIwidth1 + AOIwidth2) Deca RGB8 Max: 70KHz 62000000 Rate = 0.3 x (AOIwidth1 + AOIwidth2) 85 MHz Base RGB8 Max: 70KHz 62 MHz 62000000 Rate = (AOIwidth1 + AOIwidth2 + AOIwidth3) Medium RGB8 Max: 70KHz Teledyne DALSA 03-032-20180-06...
- Page 64 (AOIwidth1 + AOIwidth2 + AOIwidth3 + AOIwidth4) Medium RGB8 Max: 70KHz 62000000 Rate = 0.5 x ( AOIwidth1 + AOIwidth2 + AOIwidth3 + AOIwidth4 Full RGB8 Max: 70KHz 62000000 Rate = 0.375 x ( AOIwidth1 + AOIwidth2 + AOIwidth3 + AOIwidth4 03-032-20180-06 Teledyne DALSA...
- Page 65 Max: 70KHz 40 MHz 40000000 Rate = AOIwidth1 Medium RGB8 Max: 70KHz 40000000 Rate = 0.5 x AOIwidth1 Full RGB8 Max:70KHz 40000000 Rate = 0.375 x AOIwidth1 Deca RGB8 Max: 70KHz 40000000 Rate = 0.3 x AOIwidth1 Teledyne DALSA 03-032-20180-06...
- Page 66 0.375 x (AOIwidth1 + AOIwidth2) Deca RGB8 Max: 70KHz 40000000 Rate = 0.3 x (AOIwidth1 + AOIwidth2) 66 MHz Base RGB8 Max: 70KHz 40 MHz 40000000 Rate = (AOIwidth1 + AOIwidth2 + AOIwidth3) Medium RGB8 Max: 70KHz 03-032-20180-06 Teledyne DALSA...
- Page 67 (AOIwidth1 + AOIwidth2 + AOIwidth3 + AOIwidth4) Medium RGB8 Max: 70KHz 40000000 Rate = 0.5 x ( AOIwidth1 + AOIwidth2 + AOIwidth3 + AOIwidth4 Full RGB8 Max: 70KHz 40000000 Rate = 0.375 x ( AOIwidth1 + AOIwidth2 + AOIwidth3 + AOIwidth4 Teledyne DALSA 03-032-20180-06...
-
Page 68: Set Exposure Time
To set the height of the image, and therefore the number of lines to scan, use the parameters grouped under the Image Format Control set. Image Format Control Control the size of the transmitted image Width Width of the image. Height Height of the image in lines. Pixel Format 8 bit depth to Camera Link. 03-032-20180-06 Teledyne DALSA... -
Page 69: Set Baud Rate
Image Format Control Parameter Description Pixel Format RGB8, RGB10, RGB12 Binning Note: the binning feature is used by the 4K model of camera only. (This feature does not apply to the 2K models.) Teledyne DALSA 03-032-20180-06... - Page 70 This feature represents the number of horizontal photo- sensitive cells that must be combined (added) together. More charge Brighter pixel Charge in 2 Charge binned: 1 adjacent pixels Normal Image Binned Image pixel output Figure 32. Horizontal Binning 03-032-20180-06 Teledyne DALSA...
-
Page 71: Camera Direction Control
The feature Camera Reset, part of the Transport Layer set, resets the camera. The camera resets with the default settings, including a baud rate of 9600. Camera Information Parameter Description Camera Reset Resets the camera and puts in the default settings, including a 9600 baud rate. Teledyne DALSA 03-032-20180-06... -
Page 72: Calibrating The Camera
Fixed pattern noise (FPN) calibration is used to subtract any residual dark level that may occur in the application. Photo response non uniformity (PRNU) calibration is used to correct for variations in the illumination intensity and / or lens vignetting. When performed, this calibration will cause the 03-032-20180-06 Teledyne DALSA... - Page 73 Gretag Macbeth® ColorChecker® illuminated by the application’s light source and processing the image using a color correction demonstration tool provided as part of Teledyne DALSA’s Sapera Processing software. This tool will generate the desired color correction file that can be downloaded to the camera.
- Page 74 Use this algorithm if the calibration target is not uniform white or it s not possible to defocus the image. Because of the low pass filter this algorithm is not able to correct pixel-to-pixel variations and 03-032-20180-06 Teledyne DALSA...
- Page 75 1. Floating point digital multiplier applied to each pixel 2. Range 1x to 10x Note: An application note describing a color transformation matrix calibration (document #03-032- 20181) is available. Please contact Teledyne DALSA Support for more information. Teledyne DALSA 03-032-20180-06...
-
Page 76: Appendix A: Genicam Commands
Beginner, Expert, or Guru. Features listed in the description table but tagged as Invisible are usually for Teledyne DALSA or third party software usage—not typically needed by end user applications. -
Page 77: Camera Information Feature Descriptions
The following table describes these parameters along with their view attributes and in which version of the device the feature was introduced. Additionally the Device Version column will indicate which parameter is a member of the DALSA Features Naming Convention (using the tag DFNC), verses the GenICam Standard Features Naming Convention (SFNC not shown). - Page 78 Select the User-defined Configuration space UserSet6 to save to or load from features settings previously saved by the user. UserSet7 UserSet7 Select the User-defined Configuration space UserSet7 to save to or load from features settings previously saved by the user. 03-032-20180-06 Teledyne DALSA...
- Page 79 Displays the input voltage to the camera at 1.00 the power connector (RO) DFNC Beginner Refresh Voltage refreshVoltage Press to display the current input voltage of 1.00 the camera at the power connector DFNC Beginner License Key securityUpgrade 1.00 DFNC Guru Teledyne DALSA 03-032-20180-06...
-
Page 80: Camera Configuration Selection Dialog
UserSetSelector). To reset the camera to the factory configuration, select Factory Setting and click Load. To save a current camera configuration, select User Set 1 to 8 and click Save. Select a saved user set and click Load to restore a saved configuration. 03-032-20180-06 Teledyne DALSA... -
Page 81: Camera Control Category
Parameters in gray are read only, either always or due to another parameter being disabled. Parameters in black are user set in CamExpert or programmable via an imaging application. Teledyne DALSA 03-032-20180-06... -
Page 82: Camera Control Feature Descriptions
The following table describes these parameters along with their view attribute and minimum camera firmware version required. Additionally the firmware column will indicate which parameter is a member of the DALSA Features Naming Convention (DFNC), versus the GenICam Standard Features Naming Convention (SFNC not shown). - Page 83 Green Gain10 Gain11 Gain12 Offset2 Gain10 Blue Gain30 Gain31 Gain32 Offset3 Gain11 Gain12 Gain20 Gain21 Gain22 Offset1 Offset2 Offset3 Color ColorTransformationValue Value entered as pointed to by 1.00 Transformation ColorTransformationValueSelector, -16 < value Beginner Value < 16 Teledyne DALSA 03-032-20180-06...
-
Page 84: Independent Exposure Control
The trilinear cameras feature independent exposure control. This feature allows the user to set a different exposure times for each color. The screenshot above shows the blue color selected. Green and red are selected from the same drop-down box. 03-032-20180-06 Teledyne DALSA... - Page 85 For example, if the revised blue value is less than the current blue value, enter the green and red values first. If the new blue value is greater than the current blue value, enter the blue value first. Teledyne DALSA 03-032-20180-06...
-
Page 86: Digital I/O Control Feature Descriptions
The following table describes the digital I / O control parameters along with their view attributes and the minimum camera firmware version required. Additionally, the firmware column indicates which parameter is a member of the DALSA Features Naming Convention (DFNC), versus the GenICam Standard Features Naming Convention (SFNC not shown). The Device Version number represents the camera software functional group, not a firmware revision number. -
Page 87: Flat Field Category
Parameters in gray are read only, either always or due to another parameter being disabled. Parameters in black are user set in CamExpert or programmable via an imaging application. Features listed in the description table but tagged as Invisible are usually for Teledyne DALSA or third party software usage—not typically needed by end user applications. - Page 88 DFNC ROI Width flatfieldCalibrationROIWidth Sets the width of the region on 1.00 interest where a flat field Beginner calibration will be performed DFNC Calibrate FPN flatfieldCalibrationFPN Initiates the FPN calibration 1.00 process Beginner DFNC 03-032-20180-06 Teledyne DALSA...
-
Page 89: Region Of Interest (Roi)
Parameters in gray are read only, either always or due to another parameter being disabled. Parameters in black are user set in CamExpert or programmable via an imaging application. Features listed in the description table but tagged as Invisible are usually for Teledyne DALSA or third party software usage—not typically needed by end user applications. -
Page 90: Image Format Control Feature Description
The following table describes these parameters along with their view attribute and minimum camera firmware version required. Additionally the firmware column will indicate which parameter is a member of the DALSA Features Naming Convention (DFNC), versus the GenICam Standard Features Naming Convention (SFNC not shown). -
Page 91: Area Of Interest (Aoi) Setup
To set up each AOI individual use the AOI Selector to point to the AOI to be set up. AOI Offset X is used indicate the starting pixel of the AOI. AOI Width is used to indicate the width of the that AOI. Teledyne DALSA 03-032-20180-06... - Page 92 1. Must be off to 2. Set up the number of set up the AOI. AOI desired to max of 4. 3. Select area to set up. 4. Select beginning of selected area 5. Set up width of selected area 03-032-20180-06 Teledyne DALSA...
- Page 93 The AOI mode must be changed to Active. Be sure to set the frame grabber image width to the sum of all AOI widths set up in the camera. Once all AOI are set up change to active. Teledyne DALSA 03-032-20180-06...
-
Page 94: Instructions On Using The Camera Scan Direction To Control Camera Parameters
Internal and the Internal Direction set to reverse. Set up all the desired parameters, including flat field corrections. First, setup parameters for reverse direction. Save the camera parameters to a User set other than the default user set. 03-032-20180-06 Teledyne DALSA... - Page 95 CC3 and the Direction Source set to external or by having the Direction Source set to Internal and the Internal Direction set to forward. Set up all the desired parameters including doing a flat field. Setup parameters for forward direction. Teledyne DALSA 03-032-20180-06...
- Page 96 Save to a different user set than the one selected for reverse direction. Set the Flat Field mode to Scan direction Controlled. In the Flat Field area change the mode to Scan Direction Controlled. 03-032-20180-06 Teledyne DALSA...
-
Page 97: Transport Layer Control Category
Parameters in gray are read only, either always or due to another parameter being disabled. Parameters in black are user set in CamExpert or programmable via an imaging application. Features listed in the description table but tagged as Invisible are usually for Teledyne DALSA or third party software usage—not typically needed by end user applications. -
Page 98: Transport Layer Feature Descriptions
The following table describes these parameters along with their view attribute and minimum camera firmware version required. Additionally the firmware column will indicate which parameter is a member of the DALSA Features Naming Convention (DFNC), versus the GenICam Standard Features Naming Convention (SFNC not shown). -
Page 99: Acquisition And Transfer Control Category
Parameters in black are user set in CamExpert or programmable via an imaging application. Features listed in the description table but tagged as Invisible are usually for Teledyne DALSA or third party software usage—not typically needed by end user applications. -
Page 100: Serial Port Control Category
The Serial Port control in CamExpert allows the user to select an available camera serial port and review its settings. Features listed in the description table but tagged as Invisible are usually for Teledyne DALSA or third party software usage—not typically needed by end user applications. -
Page 101: File Access Control Category
The supported data files are for firmware updates, flat field coefficients, LUT data tables, and a custom image for use as an internal test pattern. Features listed in the description table but tagged as Invisible are usually for Teledyne DALSA or third party software usage—not typically needed by end user applications. -
Page 102: File Access Control Feature Descriptions
FileAccessOffset Controls the mapping offset between the 1.00 device file storage and the file access buffer. Guru File Access Length FileAccessLength Controls the mapping length between the 1.00 device file storage and the file access buffer. Guru 03-032-20180-06 Teledyne DALSA... -
Page 103: File Access Via The Camexpert Tool
Represents the size of the selected file in bytes. 1.00 Guru File Access via the CamExpert tool Click on the “Setting…” button to show the file selection menu. From the Type drop menu, select the file type that will be uploaded to the camera. Teledyne DALSA 03-032-20180-06... -
Page 104: Download A List Of Camera Parameters
Go to File Access Control Click on Settings In the “Type” drop down box select “Miscellaneous.” In the “File selector” drop down box select “CameraData.” Hit “Download” Save the text file and send the file to Teledyne DALSA customer support. 03-032-20180-06 Teledyne DALSA... - Page 105 Piranha4 2K and 4K Color Camera User's Manual Teledyne DALSA 03-032-20180-06...
-
Page 106: Appendix B: Ascii Commands
Piranha4 2K and 4K Camera Color User's Manual Appendix B: ASCII Commands The following commands can be used to control the Teledyne DALSA Piranha4 cameras. Accessing the Three Letter Commands (TLC) To access the TLC an ASCII-based communications interface application, such as HyperTerminal. -
Page 107: Port Configuration
To enter a floating point number prefix it with a “F” – for example “ssg 0 f1.5” Error codes returned are the same as the GenICam™ interface – see Diagnostics | Error Codes Follow each command with the carriage return character – 0x0D Teledyne DALSA 03-032-20180-06... -
Page 108: Commands
Description Camera Link Mode Full Name Color Matrix Selector Mnemonic Argument(s) Device Factory User # of lines to average 0 or 1, when factory selected above then White LED No correction (unity matrix) Description Color matrix selector 03-032-20180-06 Teledyne DALSA... - Page 109 10. k offset 11. k offset Floating Point Value Gains: -16 to +16 Offsets: 0 to 255 Description Color Transformation Matrix Notes Value must be immediately preceded with a “F” (e.g. ctv 0 f1.5) Teledyne DALSA 03-032-20180-06...
- Page 110 PRNU coefficients to one Scan direction controlled user set loading Description Set flat field mode Notes Full Name Set Flatfield Scan Direction Reverse Set Mnemonic Argument(s) User Set Number 1 to 8 Description Set scan direction controlled reverse set Notes 03-032-20180-06 Teledyne DALSA...
- Page 111 USER> Full Name Get Value Mnemonic Argument(s) <’parameter> Description The “get” command displays the current value(s) of the feature specified in the string parameter. Note that the parameter is preceded by a single quote “’”. Using this Teledyne DALSA 03-032-20180-06...
- Page 112 0: sensor video, 1: mono ramp, 2: color ramp Default User Set Set number 0-8 Load User Set Last set loaded 0-8 Save User Set Last set saved 0-8 Temperature No value returned Input Voltage No value returned 03-032-20180-06 Teledyne DALSA...
- Page 113 - Gain <0-System/1-Red/2-Green/3-Blue/4-Mono> f<gain> - External Trigger <0:Off 1:On> - Set User ID '<string> - Test Pattern <0-2> - Default User Set <0-8> - Load User Set <0-8> - Save User Set <1-8> - Temperature - Input Voltage USER> Teledyne DALSA 03-032-20180-06...
- Page 114 Pixel coefficients outside this region are not changed Last pixel must be greater than or equal to first pixel Full Name Reset Flatfield Coefficients Mnemonic Argument(s) Description Reset all user FPN values to zero and all user PRNU coefficients to one Notes 03-032-20180-06 Teledyne DALSA...
- Page 115 230400 460800 921600 Description Set baud rate Notes Send command and then change speed of HyperTerminal Full Name Direction Mnemonic Argument(s) Direction Forward Reverse External – controlled by CC3 signal Description Set sensor scan direction Notes Teledyne DALSA 03-032-20180-06...
- Page 116 Line time > ( Exposure time + 1,500 ns ) Full Name Set Horizontal Alignment Mnemonic Argument(s) Selector Green Pixels 0 to 3 Description The value entered will stretch the chosen color to align the colors. Notes 03-032-20180-06 Teledyne DALSA...
- Page 117 3. Adjust the ssa value until you remove the red and blue halos above and below a black on white horizontal line in order to set the line delay. Values entered must be between 0 and 5. Decimal places are valid for sub-pixel correction. Teledyne DALSA 03-032-20180-06...
- Page 118 Full Name External Trigger Mnemonic Argument(s) Mode Internal External Description Set trigger mode Notes In internal mode line rate is controlled by SSF command In external mode readout starts on falling edge of CC1 signal 03-032-20180-06 Teledyne DALSA...
- Page 119 Notes Saves all the current settings listed by the GCP command plus the user FPN coefficients, user PRNU coefficients, and color correction matrix Full Name Temperature Mnemonic Argument(s) Description Display internal temperature in degrees Celsius Notes Teledyne DALSA 03-032-20180-06...
- Page 120 Piranha4 2K and 4K Camera Color User's Manual Full Name Voltage Mnemonic Argument(s) Description Display supply voltage Notes 03-032-20180-06 Teledyne DALSA...
-
Page 121: Appendix C: Quick Setup And Image Acquisition
CamExpert provides an easy-to-use GUI that can be used to set up and evaluate the camera. The camera also comes with Teledyne DALSA’s three letter command (TLC) interface option, which can be accessed using a suitable terminal program such as HyperTerminal™. - Page 122 The image may be darker at the edges due to lens vignetting, but this will be improved once the camera is calibrated. Calibration is performed using a white reference where your object is normally located. Use a white material that has no texture, such as a non glossy plastic. 03-032-20180-06 Teledyne DALSA...
- Page 123 A software tool to generate this is available with the Sapera Essentials processing applications, which can be downloaded from the Teledyne DALSA web site (60 day free trial). You will require a Gretag Macbeth ColorChecker with 4 x 6 color elements that you can scan past the camera to complete the generation of the matrix.
-
Page 124: Appendix D: The Sensor Window
(dark spot) and overcorrecting where the shadow used to be (white spot). While the dark spot can be potentially cleaned, the white spot is an FFC artifact that can only be corrected by another FFC calibration. 03-032-20180-06 Teledyne DALSA... -
Page 125: Cleaning The Sensor Window
This procedure requires you to use multiple swabs. Discard the swab after both sides of the swab have been used once. Repeat until there is no visible contamination present. Teledyne DALSA 03-032-20180-06... -
Page 126: Appendix E. Color Deca And Full Mode Acquisition
Supported Sapera LT Sapera 7.10 or later is required. Programming Deca Mode The RGB 9.1 Deca mode uses Camera Link 10-tap, 8-bit mode to achieve RGB formatting. Below is the Camera Link port assignment of Deca mode. 03-032-20180-06 Teledyne DALSA... -
Page 127: A Simple Workaround Accomplishes This
2) Treat acquired buffer as SapFormatRGBR888 (24bit/pixel). Sapera LT provides a feature to share buffer components between two SapBuffer objects. Buffer type may be different between the two SapBuffer objects. This can be a trick to convert buffer format without buffer copy. Teledyne DALSA 03-032-20180-06... - Page 128 = m_Buffers->GetWidth(); height = m_Buffers->GetHeight(); m_ViewBuffers = new SapBuffer(NUMBUFFERS, pData, width / 3, height,SapFormatRGB888); m_ViewBuffers->Create(); If you declare above m_ViewBuffer as the source buffer of SapView object, you can display RGB image without any additional processing. 03-032-20180-06 Teledyne DALSA...
-
Page 129: Programming Full Mode
CCF files pixel format can’t be used by the programs to process the image correctly. A simple workaround accomplishes this: 1) Acquire as if the P4 camera was a 8-bit mono, 24,576 (4096 x 3) pixels linescan camera Teledyne DALSA 03-032-20180-06... - Page 130 = m_Buffers->GetWidth(); height = m_Buffers->GetHeight(); m_ViewBuffers = new SapBuffer(NUMBUFFERS, pData, width / 3, height,SapFormatRGB888); m_ViewBuffers->Create(); If you declare above m_ViewBuffer as the source buffer of SapView object, you can display RGB image without any additional processing. 03-032-20180-06 Teledyne DALSA...
-
Page 131: Appendix F: Camera, Frame Grabber Communication
Teledyne DALSA Camera Link cameras support the GenCP Camera Link standards. To configure Teledyne DALSA GenCP Camera Link Cameras: Install the Teledyne DALSA frame grabber in the host computer; refer to the hardware installation manual. Install Sapera LT and the Teledyne DALSA frame grabber driver. - Page 132 Piranha4 2K and 4K Camera Color User's Manual Start the CamExpert application. In the Device tab, select CameraLink Medium Color RGB #1. 03-032-20180-06 Teledyne DALSA...
- Page 133 Modify the camera and frame grabber parameter settings as required. At present, when using GenCP cameras, the camera and frame grabber parameters must be adjusted separately. Test the image acquisition by clicking the Grab button. Save the frame grabber configuration to a new *.ccf file. Teledyne DALSA 03-032-20180-06...
-
Page 134: Appendix C: Error And Warning Messages
1,0000,0000,0000 NO_FPN Correction 10,0000,0000,0000 NO_FPN Correction 100,0000,0000,0000 NO_PRNU Correction 1000,0000,0000,0000 NO_FEED Through Correction 1,0000,0000,0000,0000 NO_LINEARITY Correction 10,0000,0000,0000,0000 SYNC_ERROR 100,0000,0000,0000,0000 OVER_TEMPERATURE 1000,0000,0000,0000,0000 SPI Failure 1,0000,0000,0000,0000,0000 NO_USER_FPN 10,0000,0000,0000,0000,0000 PLL_LOCK_FAILED 100,0000,0000,0000,0000,0000 INVALID_CCI 1000,0000,0000,0000,0000,0000 No LUT 1,0000,0000,0000,0000,0000,0000 Incompatible FPGA code 10,0000,0000,0000,0000,0000,0000 03-032-20180-06 Teledyne DALSA... - Page 135 Piranha4 2K and 4K Color Camera User's Manual Operational Error Codes Code Description 0X8002 Invalid Parameter 0xC01C CPA_TOO_MANY_OUTLIERS 0x401E USER_FPN_CLIPPING 0x401F FLAT_FIELD_CLIPPING Teledyne DALSA 03-032-20180-06...
-
Page 136: Ec & Fcc Declaration
Piranha4 2K and 4K Camera Color User's Manual EC & FCC Declaration 03-032-20180-06 Teledyne DALSA... -
Page 137: Revision History
-Environmental specifications added. -RGB 12 bit CL Deca, maximum line rate value revised to 41.5 kHz (4K) 3 May 2019 from 69. -EC & FCC Declaration of Conformity updated to include P4-CC-02K04T- 01-R and P4-CC-04K04T-01-R camera models. Teledyne DALSA 03-032-20180-06... -
Page 138: Index
Declaration of Conformity, 136 input/output, 32 direction interface sensor shift, 21 mechanical, 8 web movement, 21 direction control, 71 definitions, 46 environmental specifications, error and warning messages, mean time between failures exposure (MTBF), 10 control, 56 mechanical camera, 22 03-032-20180-06 Teledyne DALSA... - Page 139 8 quantum efficiency performance, 8 storage temperature, 10 graph, 11 rebooting, 71 temperature requirements verify, 53 test patterns, 51 PC, 30 responsivity trigger modes, 56 graph, 11 revision history, 137 voltage verify, 53 safety, 6 Teledyne DALSA 03-032-20180-06...
Need help?
Do you have a question about the Piranha4 Series and is the answer not in the manual?
Questions and answers