
Related Manuals for Emerson wirelessHART Rosemount Series


Summary of Contents for Emerson wirelessHART Rosemount Series
- Page 1 Quick Start Guide 00825-0100-4393, Rev AA April 2021 ™ Rosemount Series of 4390 Corrosion and Erosion Wireless Transmitters...
-
Page 2: Table Of Contents
The products described in this document are not designed for nuclear-qualified applications. Using non-nuclear-qualified products in applications that require nuclear-qualified hardware or products may cause inaccurate readings. ™ For information on Rosemount nuclear-qualified products, contact an Emerson sales representative. Contents Overview............................3 Wireless considerations........................6... -
Page 3: Overview
The device can also be used with the Emerson’s unique multiple elements combined intrusive probes to provide both corrosion and erosion measurements. - Page 4 What's in the box? Required tools and equipment for installation What's in the box? The device is delivered in a cardboard box containing: • 1x Rosemount 4390 Series of Corrosion and Erosion Wireless Transmitter • 1x mounting bracket kit Emerson.com/Rosemount...
- Page 5 For more information, refer to the ™ 701P SmartPower website Emerson.com/SmartPower. Required tools and equipment for installation This section lists the required tools and equipment for physical installation, configuration, and commissioning of the Rosemount 4390 Wireless Transmitter.
-
Page 6: Wireless Considerations
This results in a simpler and faster network installation. Enable active advertising on the gateway to ensure new devices join the network faster. For more information, see the Emerson Wireless 1410 Gateway and 781S Smart Antenna Reference Manual. - Page 7 April 2021 Quick Start Guide Conduit connection Upon installation, ensure that the extra conduit entry on the housing is sealed with a conduit plug, and that the probe cable conduit entry on the junction box has an installed conduit fitting or cable gland. The device is delivered with a conduit plug for sealing the extra conduit entry on the housing and can be delivered with an optional cable gland for installation of the probe cable.
-
Page 8: Configuration And Commissioning
Wireless Transmitter during configuration and commissioning For HART communication a Device Description (DD) file is required. The latest DD file version is available at Rosemount 4390 Wireless Transmitter website Emerson.com/4390. WARNING Electrical shock could cause death or serious injury. Use extreme caution when contacting the leads and terminals. - Page 9 April 2021 Quick Start Guide Engineering units The Rosemount 4390 Wireless Transmitter supports only engineering units according to the International System of Units (SI). The following engineering units are used during configuration and commissioning: Table 3-1: Supported engineering units Variable Unit Electrical resistance mΩ...
- Page 10 4. Power-up the AMS Trex Device Communicator. 5. Start configuring the device following the steps beginning from Joining to a wireless network of this guide. Any configuration changes must be sent to the transmitter by using the Send key. Refer Figure 3-1. Emerson.com/Rosemount...
- Page 11 April 2021 Quick Start Guide Figure 3-1: Connection with AMS Trex Device Communicator A. Rosemount 4390 Wireless B. Lead and clip connector kit C. AMS Trex Device Communicator WARNING Providing power to a WirelessHART device from AMS Trex can damage the device. Do not use the AMS Trex unit to power the Rosemount 4390 Wireless Transmitter.
- Page 12 If the Network ID and Join Key are not identical, the transmitter will not communicate with the network. The Network ID and Join Key can be obtained from the Gateway on the System Settings → Network → Network Settings page of the Wireless Gateway web-based user interface. Emerson.com/Rosemount...
- Page 13 April 2021 Quick Start Guide Figure 3-3: Joining a Wireless Network A. Network ID B. Join Key Device identification The user must configure the basic identification parameters for the device being commissioned. The Rosemount 4390 Wireless Transmitter supports both Tag (8 characters) and Long Tag (32 characters), that can be set in the Device Information tab.
- Page 14 1. Select the Probe Type compatible with the transmitter model being configured. Table 3-3: Supported probe types Transmitter model Supported probe types 4391 Corrosion Wireless Transmitter • Single element ER probe • Double or triple electrode LPR probe • Galvanic probe Emerson.com/Rosemount...
- Page 15 April 2021 Quick Start Guide Table 3-3: Supported probe types (continued) Transmitter model Supported probe types 4392 Erosion Wireless Transmitter • Multiple element ER sand erosion probe • Multiple element ER combined probe 2. Set the Acquisition Rate. The acquisition rate is the time interval between each sensor data point measurement and can be selected from 1 minute up to 24 hours.
- Page 16 8 device variables, depending on the HART command configured by the user during the Update rate configuration process. Depending on the number of variables to transmit, all 3 burst messages might not be needed. Emerson recommends that you disable unused messages. Note The Burst messages have a default update rate set to 60 seconds (1 minute).
- Page 17 April 2021 Quick Start Guide Note The alert "Probe life" is available only for ER probes. Table 3-5: Advisory alerts Advisory alerts Device status Description (Byte :: Bit) Measurement disabled 0 :: 6 Measurements are disabled. Instrument board 0 :: 7 The instrument board is set to ignore power saving.
- Page 18 Deadband allows the user to add a tolerance range for the trigger value • The user must select if the alert is activated when the measurement is either Below or Above the selected trigger point Refer to Figure 3-6. Emerson.com/Rosemount...
- Page 19 April 2021 Quick Start Guide Figure 3-6: Alert setup tab – AMS Device Manager Quick Start Guide...
-
Page 20: Physical Installation
The length of the cable must be selected in accordance with the intrinsically safe electrical parameters of the system. Figure 4-1: Typical remote mounting corrosion monitoring system A. Probe cable assembly B. Rosemount 4390 Wireless Transmitter C. Access system D. Intrusive corrosion probe E. Monitored pipe / equipment Emerson.com/Rosemount... - Page 21 Configure sensor type and parameters. The wiring color schemes presented in the tables below considers the two probe cable types offered by Emerson, Standard cable Multicable and Quick Start Guide...
- Page 22 Quick Start Guide April 2021 Heavy-duty cable BFOU(c). Different cable models may vary its wires colors. Contact your Emerson representative for assistance when using different cable models. Table 4-1: Wiring scheme - single element ER probe Junction box Signal name...
- Page 23 April 2021 Quick Start Guide Table 4-4: Wiring scheme - Multiple element ER sand/erosion probe Junction box Signal name Standard cable Heavy-duty cable (Terminal :: Pin) Multicable BFOU(c) J1 :: 1 Iret / ERE+ Black Black1 J1 :: 2 I1 / ERE1- Orange/yellow Black2 J1 :: 3...
- Page 24 H. Back plate (1x) I. U-bolt 2-inch UNC 5/16-18 (2x) The mounting bracket kit supports two options for installing the instrument: 1. Mount the instrument on a wall, rack, or flat surface. 2. Mount the instrument on a 2-inch mounting pole. Emerson.com/Rosemount...
- Page 25 April 2021 Quick Start Guide Related information Assembling the instrument bracket Wall and rack mounting 2-inch pole mounting Attaching the instrument bracket and the back plate 4.2.1 Assembling the instrument bracket Procedure Attach the instrument bracket on the Rosemount 4390 Wireless Transmitter back and tighten 4x M5x12 screws.
- Page 26 Mount the instrument bracket with the stamped arrow sign pointing up. Not following this instruction results in an inadequate mounting of the instrument. Emerson recommends using fasteners that can withstand the process environment. The required bolts for both wall and rack mounting are not included as part of the mounting bracket kit.
- Page 27 April 2021 Quick Start Guide Note Mount the instrument bracket with the stamped arrow sign pointing up. Not following this instruction results in an inadequate mounting of the instrument. Figure 4-6: 2-inch pole mounting 4.2.4 Attaching the instrument bracket and the back plate Procedure 1.
- Page 28 If the signal appears either noisy or erratic, grounding the transmitter at a single point may solve the problem. Grounding of the electronics enclosure should be done in accordance with both local and national installation codes. Emerson.com/Rosemount...
- Page 29 Figure 4-8: Installing the power module A. Emerson 701P SmartPower Module – Black, model 701PBKKF B. Extended cover Note The power module can be replaced in a hazardous area.
- Page 30 The Black Power Module can be damaged if dropped from heights in excess of 20 ft (6 m). Use caution when handling the Black Power Module. WARNING Battery hazards remain when the battery is discharged. Use care in handling batteries that are being replaced. Emerson.com/Rosemount...
-
Page 31: Operation And Maintenance
The Black Power Module life can be extended to up to 10 years with the proper configuration. For more details, see Emerson.com/Power-Module- Life-Estimator. Emerson recommends that you replace the power module if the battery voltage is below 5.5 volts. When power module replacement is required, follow the instructions from Installing the power module. - Page 32 If any condition persists after applying the recommended actions, please contact the service center. 5.3.1 Troubleshooting – device variables • Measurement disabled • The instrument board is always ON • Device variable simulation active • Power supply conditions out of range Emerson.com/Rosemount...
- Page 33 April 2021 Quick Start Guide • Environmental conditions out of range • Device configuration locked • Radio failure • Probe malfunction • Instrument board measurement failure • Instrument board software error • Non-volatile memory defect • Probe life reached 0% Measurement disabled Alert Measurement disabled...
- Page 34 2. Protect the device from excess heat or cold beyond the allowable limits. 3. Reset the device. Device configuration locked Alert Device configuration locked Cause The device is in write protect mode. Recommended actions Verify write protect check box in Service Tools → Maintenance. Radio failure Alert Radio failure Emerson.com/Rosemount...
- Page 35 April 2021 Quick Start Guide Cause The wireless radio has detected a failure or stopped communicating. Recommended actions Reset the device. Probe malfunction Alert Probe malfunction Cause Measurement values are not consistent with the selected probe type. Recommended actions 1. Check that the correct probe type is set and perform a measurement.
- Page 36 2. Inspect the probe and replace it, if necessary. 5.3.2 Troubleshooting – wireless network • Device not joining the network • Event notification overflow • Capacity denied • Bandwidth allocation pending Device not joining the network Alert Device not joining the network Cause Measurements are disabled. Emerson.com/Rosemount...
- Page 37 April 2021 Quick Start Guide Recommended actions 1. Verify network ID and join key. 2. Verify network is in active network advertise. 3. Wait longer (30 minutes). 4. Check power module. 5. Verify the device is within range of at least one other device. 6.
- Page 38 5. Create a new network with an additional wireless gateway. Spare parts This section lists all spare parts available for the Rosemount 4390 Wireless Transmitter. Figure 5-2: Spare parts overview Note For spare parts numbers, refer to Table 5-1. Emerson.com/Rosemount...
- Page 39 April 2021 Quick Start Guide Table 5-1: Spare parts list Spare part Description ROXA20085693 Junction box cover ROXA20064359 Cable gland kit, M20x1.5, Nickel-plated brass – Option 2 (12.5-20.5mm OD / 8.4-14.3mm ID) ROXA20064360 Cable gland kit, M25x1.5, Nickel-plated brass – Option 3 (16.9-26mm OD / 11.1-19.7mm ID) ROXA20064367...
- Page 40 O-ring 3¼" x ⅛", Buna-N 70 ROXA20085691 O-ring 112 x 2.65 mm, Buna-N 70 Power module extended cover assembly ROXA20085683 Cover retainer clamp Screw M4x16 ROXA20085693 O-ring 3¼" x ⅛", Buna-N 70 The junction box cover is delivered with locking screws. Emerson.com/Rosemount...
-
Page 41: Reference Data
Visit the product website to view the current Rosemount 4390 Wireless Transmitter ordering information and documentation. The product data sheet, general arrangement drawing, and other relevant documents are available in the Documents & Drawings section at Emerson.com/4390. Related information Physical specifications... - Page 42 Estimated weight 10.14 lb (5 kg) 6.3.7 Enclosure ratings IP66 6.3.8 Mounting The Rosemount 4390 Wireless Transmitter is designed for remote mounting and can be installed on wall, rack, or pipe mounting configuration. For more information, see Field mounting. Emerson.com/Rosemount...
- Page 43 April 2021 Quick Start Guide Performance specifications Electromagnetic compatibility (EMC) 6.4.1 All models of the Rosemount 4390 Series of Corrosion and Erosion Wireless Transmitters meet all industrial environment requirements of EN61326-1:2013. 6.4.2 Vibration effect Wireless output unaffected when tested per the requirements of IEC 60068-2-6 (Endurance sweep, 5 to 2000 Hz, 50 sweep cycles at 1.0 g).
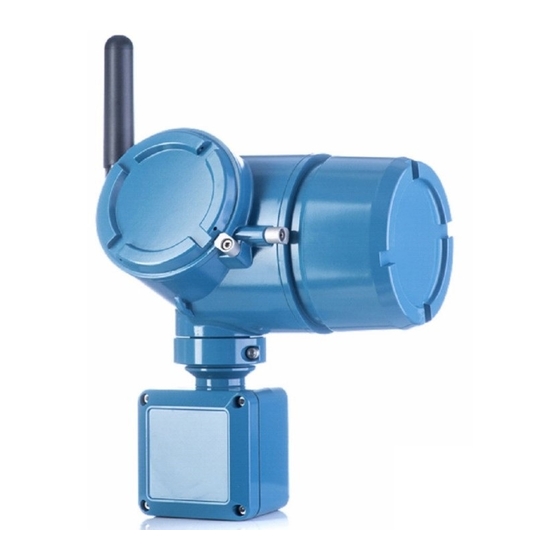
- Page 44 Figure 6-1: Dimensions for the Rosemount 4390 Wireless Transmitter A. Probe cable gland (optional) B. Grounding lug C. 2.4 GHz external antenna D. Power module extended cover E. Electronics cover F. 2.4 GHz extended range, external antenna G. Mounting bracket kit H. Junction box for probe connection Emerson.com/Rosemount...
-
Page 45: Product Certifications
RF spectrum. Nearly every country requires this type of product certification. Emerson is working with governmental agencies around the world to supply fully compliant products and remove the risk of violating country directives or laws governing wireless device usage. - Page 46 Uo: 5.9V Maximum output current Io: 12.64mA Maximum output power Po: 18.65mW Maximum external capacitance Co: 420nF Maximum external inductance Lo: 223mH Maximum ratio Lo/Ro for cable Max. 1.9mH/Ω Maximum input voltage Ui: 1.9V Maximum input current Ii: 32µA Emerson.com/Rosemount...
- Page 47 April 2021 Quick Start Guide Table 7-4: Ex safety parameters - HART service port (continued) Safety parameters Group IIC Maximum input power Pi: 61µW Maximum internal capacitance Ci: 1µF Maximum internal inductance Li: Negligible Note The transmitter can only be powered with 701PBKKF SmartPower Module - Black.
- Page 48 Ex marking Ex ia IIC T4 Ga, Ambient temperature -40°C ≤ Ta ≤ 70°C Warnings WARNING See the manual for battery change, for use with 701PBKKF SmartPower Module - Black. Use electrostatic discharge to protect against possible electrical shock. Emerson.com/Rosemount...
- Page 49 April 2021 Quick Start Guide Table 7-6: ATEX Intrinsic Safety (continued) Specific conditions for safe use (x) - The external connections must be connected to intrinsically safe circuits with parameters complying with the parameters specified in this certificate and the manufacturer’s installation manual.
-
Page 50: Declaration Of Conformity
Digitally signed by Stig Sigdestad Date: 2021.03.04 17:33:47 +01'00' (signature) Stig Sigdestad (name printed) March 04, 2021 Director Quality & HSE (date of issue) (function name – printed) ROX000108719 2.0 EU and UK DOC template Page 1 of 2 Emerson.com/Rosemount... - Page 51 April 2021 Quick Start Guide Schedule EU Declaration of Conformity No: ROXA20082507/AA Directive 2014/30/EU Electromagnetic compatibility (EMC) Harmonized Standards: EN 61326-1: 2013 Directive 2014/53/EU Radio Equipment Directive (RED) Harmonized Standards: EN 300 328 V2.1.1 Other standards: EN 301 489-1 V3.2.1 EN 301 489-17: V3.2.1 EN 62311: 2008 Directive 2011/65/EU...
-
Page 52: Mapping Of Device Variable Index Numbers
Metal loss average Used for Multiple ER probes Corrosion rate Used for LPR probes LPR currrent LPR voltage Metal loss ER Used for Multiple ER probes and Single ER probes ER element Reference for ER element Battery voltage None Emerson.com/Rosemount... - Page 53 April 2021 Quick Start Guide Table B-1: Device variables index (continued) Device variable Index Notes Battery life None Table B-2: Device variable mapping index Device variable Index Metal loss average for Multiple ER probe Metal loss for Single ER probe Corrosion rate for LPR probe Galvanic current for Galvanic probe Board temperature...
- Page 54 Quick Start Guide April 2021 Emerson.com/Rosemount...
- Page 55 April 2021 Quick Start Guide Quick Start Guide...
- Page 56 For more information: www.emerson.com © 2021 Emerson. All rights reserved. Emerson Terms and Conditions of Sale are available upon request. The Emerson logo is a trademark and service mark of Emerson Electric Co. Rosemount is a mark of one of the Emerson family of companies.
Need help?
Do you have a question about the wirelessHART Rosemount Series and is the answer not in the manual?
Questions and answers