Emerson Rosemount 3051S Quick Start Manual
High static differential pressure transmitter
Hide thumbs
Also See for Rosemount 3051S:
- Reference manual (240 pages) ,
- Manual (96 pages) ,
- Quick start manual (60 pages)

Related Manuals for Emerson Rosemount 3051S


Summary of Contents for Emerson Rosemount 3051S
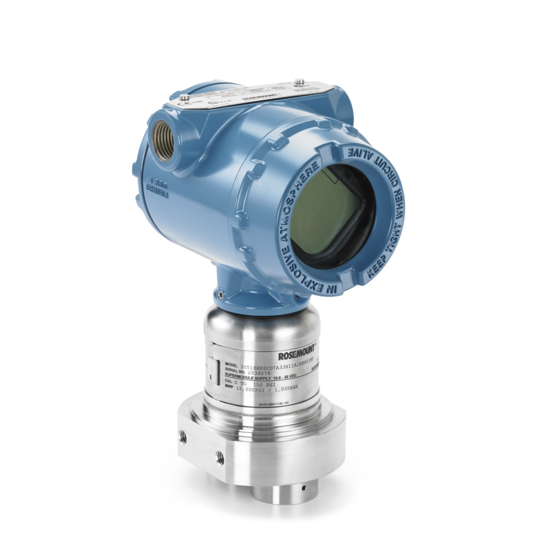
- Page 1 Quick Start Guide 00825-0100-4851, Rev AG September 2017 ™ Rosemount 3051S High Static Differential Pressure Transmitter...
-
Page 2: Table Of Contents
Quick Start Guide NOTICE This guide provides basic guidelines for Rosemount 3051S High Static Differential Pressure Transmitter (3051SHP). It does not provide instructions for configuration, diagnostics, maintenance, service, troubleshooting, Explosion-proof, Flameproof, or intrinsically safe (I.S.) installations. Refer to the Rosemount 3051SHP Reference Manual for more instruction. -
Page 3: System Readiness
Rosemount 3051S device revisions and drivers Table 1 provides the information necessary to ensure you have the correct device driver and documentation for your device. Table 1. Rosemount 3051S Device Revisions and Files Review Identify device Find device driver Review functionality... -
Page 4: Mount The Transmitter
The images below provide instructions on how to properly mount the transmitter ™ using the Emerson provided mounting brackets. Use only bolts provided with the transmitter or sold as Emerson spare parts. Bolts should be tightened to a torque of 125 in-lb. Panel mount Pipe mount Housings ™... - Page 5 2.6 Wireless considerations (if applicable) Power up sequence The power module should not be installed on any wireless device until the Emerson Smart Wireless Gateway (Gateway) has been installed and functioning properly. See “Power up transmitter” on page 10 for more details.
- Page 6 If the supplied remote mount antenna kit is not installed per these instructions, Emerson is not responsible for wireless performance or non-compliance with spectrum regulations.
- Page 7 6. Ensure the mounting mast and lightning arrestor are grounded according to local/national electrical code. Any spare lengths of coaxial cable should be placed in 1 ft. (0,3 m) coils. Figure 2. Rosemount 3051S with High Gain, Remote Antenna A. Lightning arrestor B. Antenna C.
-
Page 8: Consider Housing Rotation
September 2017 Quick Start Guide Figure 3. Applying Coaxial Sealant to Cable Connections 3.0 Consider housing rotation To improve field access to wiring or to better view the optional LCD display: 1. Loosen the housing rotation set screw. 2. First rotate the housing clockwise to the desired location. If the desired location cannot be achieved due to thread limit, rotate the housing counter clockwise to the desired location (up to 360°... -
Page 9: Set Switches And Jumpers
Quick Start Guide September 2017 4.0 Set switches and jumpers If alarm and security adjustment option is not installed, the transmitter will operate normally with the default alarm condition alarm “high” and the security “off”. 1. Do not remove the transmitter covers in explosive atmospheres when the circuit is live. -
Page 10: Power Up Transmitter
September 2017 Quick Start Guide 5.0 Power up transmitter This section provides the steps needed to power up transmitters. These steps are unique based on the specific protocol used. Steps for HART transmitters begin on page ™ Steps for F Fieldbus transmitters begin on page ... - Page 11 Quick Start Guide September 2017 Figure 6. Transmitter Wiring PlantWeb housing wiring Junction box housing wiring With optional process temperature connection A. RL ≥ 250 Ω B. Power Supply Note Installation of the transient protection terminal block does not provide transient protection unless the transmitter case is properly grounded.
- Page 12 September 2017 Quick Start Guide Figure 7. Wiring A. Insulate shield D. Trim shield and insulate B. Minimize distance E. Safety ground C. Connect shield back to the power supply ground 3. Replace the housing cover. It is recommended the cover be tightened until there is no gap between the cover and the housing.
- Page 13 AWM Style 2549 cable. Alternate cable may be used as long as the transmitter with remote display and cable is configured according to the installation control drawing or certificate. Refer to appropriate approval certificate or control drawing in the Rosemount 3051S Reference Manual for remote cable IS requirements.
- Page 14 September 2017 Quick Start Guide Figure 8. Remote Mount Display Wiring (white) 24 AWG (blue) 24 AWG (black) 22 AWG (red) 22 AWG 4-20 mA A. Remote mount display B. Junction box housing C. 4–20 mA Note Wire colors provided on Figure 8 are per Madison AWM Style 2549 cable.
- Page 15 Quick Start Guide September 2017 Figure 9. Rosemount Quick Connect Exploded View (1)(2) A. Straight field wireable connector D. Cordset B. Right angle field wireable connector E. Coupling nut C. Quick connect housing F. Quick connect coupling nut 1. Order part number 03151-9063-0001. 2.
-
Page 16: Power Supply
September 2017 Quick Start Guide Note For other wiring details, refer to pin-out drawing and the cordset manufacturer’s installation instructions. Power supply The DC power supply should provide power with less than two percent ripple. The total resistance load is the sum of the resistance of the signal leads and the load resistance of the controller, indicator, and related pieces. - Page 17 Quick Start Guide September 2017 Figure 12. Transmitter RTD Wiring Connection A. Pt 100 RTD sensor B. RTD cable assembly wires C. Ground lug 5.3 Connect wiring and power up F Fieldbus OUNDATION transmitter Cable connection The segment cable can enter the transmitter through either conduit connection on the housing.
- Page 18 The enclosed conduit plug must be installed in unused conduit opening with a minimum of five thread engagement to comply with explosion-proof requirements. Refer to the Rosemount 3051S F Fieldbus Reference Manual for more information. This manual is also OUNDATION available electronically on Emerson.com/Rosemount.
-
Page 19: Verify Configuration
Gateway, beginning with the closest. This will result in a simpler and faster network installation. Enable active advertising on the Gateway to ensure new devices join the network faster. For more information, see the Emerson Smart Wireless Gateway 1420 Reference Manual. - Page 20 September 2017 Quick Start Guide 6.1 Verify with Field Communicator Connecting to a Field Communicator For the Field Communicator to interface with the transmitter, power must be supplied to the transmitter. For wireless configuration, the communicator connections are located behind the power module on the terminal block (see Figure 15, image A).
- Page 21 L I M - O P Note It may take several minutes for the device to join the network. For advanced troubleshooting of the wireless network or Gateway, see the Rosemount 3051S WirelessHART Reference Manual, Emerson Smart Wireless Gateway 1410...
-
Page 22: Trim The Transmitter
If zero offset is greater than 3% of true zero, follow the Using the transmitter zero adjustment button instructions below to rerange. If hardware adjustments are not available, see the Rosemount 3051S Reference Manual to perform a rerange using the Field Communicator. Using the Field Communicator 1. -
Page 23: Product Certifications
A copy of the EU Declaration of Conformity can be found at the end of the Quick Start Guide. The most recent revision of the EU Declaration of Conformity can be found at Emerson.com/Rosemount. 9.3 Installing Equipment in North America ®... - Page 24 September 2017 Quick Start Guide 9.5 Canada E6 Canada Explosion-proof, Dust Ignition-proof, Division 2 Certificate: 1143113 Standards: CAN/CSA C22.2 No. 0-10, CSA C22.2 No. 25-1966 (R2014), CSA C22.2 No. 30-M1986 (R2012), CSA C22.2 No. 94.2-07, CSA C22.2 No. 213-M1987 (R2013), CAN/CSA-C22.2 No. 61010-1-12, ANSI/ISA 12.27.01-2011 Markings: Class I, Groups B, C, D, –50 °C ≤...
- Page 25 500 V test as defined in Clause 6.3.13 of EN 60079-11:2012. This must be taken into account during installation. 2. The terminal pins of the Rosemount 3051S SuperModule must be provided with a degree of protection of at least IP20 in accordance with IEC/EN 60529.
- Page 26 500 V test as defined in Clause 6.3.13 of EN 60079-11:2012. This must be taken into account during installation. 2. The terminal pins of the Rosemount 3051S SuperModule must be provided with a degree of protection of at least IP20 in accordance with IEC/EN 60529.
- Page 27 7. Cable entries and blanking plugs must be suitable for the ambient temperature range of the apparatus and capable of withstanding a 7 J impact test. 8. The Rosemount 3051S SuperModule must be securely screwed in place to maintain the ingress protection of the enclosure.
- Page 28 500 V test as defined in Clause 6.3.13 of EN 60079-11:2012. This must be taken into account during installation. 2. The terminal pins of the Rosemount 3051S SuperModule must be provided with a degree of protection of at least IP20 in accordance with IEC/EN 60529.
- Page 29 500 V test as defined in Clause 6.3.13 of EN 60079-11:2012. This must be taken into account during installation. 2. The terminal pins of the Rosemount 3051S SuperModule must be provided with a degree of protection of at least IP20 in accordance with IEC/EN 60529.
- Page 30 September 2017 Quick Start Guide 9.8 EAC - Belarus, Kazakhstan, Russia EM Technical Regulation Customs Union (EAC) Flameproof and Dust Certificate: RU C-US.AA87.B.00378 Markings: Ga/Gb Ex d IIC T6…T4 X Ex tb IIIC T105 °C T 95 °C Db X Ex ta IIIC T105 °C T 95 °C Da X See Certificate for Special Conditions for Safe Use...
- Page 31 Quick Start Guide September 2017 Figure 17. Rosemount 3051SHP Declaration of Conformity...
- Page 32 September 2017 Quick Start Guide...
- Page 33 Quick Start Guide September 2017...
- Page 34 September 2017 Quick Start Guide Rosemount 3051SHP China RoHS List of Rosemount 3051SHP Parts with China RoHS Concentration above MCVs / Hazardous Substances Hexavalent Polybrominated Polybrominated Part Name Lead Mercury Cadmium Chromium biphenyls diphenyl ethers (Pb) (Hg) (Cd) (Cr +6) (PBB) (PBDE) Electronics...
- Page 35 Quick Start Guide September 2017...
- Page 36 1 Pandan Crescent Singapore 128461 Standard Terms and Conditions of Sale can be found at +65 6777 8211 www.Emerson.com/en-us/pages/Terms-of-Use The Emerson logo is a trademark and service mark of Emerson +65 6777 0947 Electric Co. Enquiries@AP.EmersonProcess.com MultiVariable, PlantWeb, SuperModule, Rosemount, and Rosemount logotype are trademarks of Emerson.
Need help?
Do you have a question about the Rosemount 3051S and is the answer not in the manual?
Questions and answers