Energizer EZG Series User Manual
Hide thumbs
Also See for EZG Series:
- Manual (122 pages) ,
- Original instructions manual (46 pages) ,
- User manual (76 pages)
Table of Contents
Advertisement
Quick Links
Advertisement
Table of Contents

Subscribe to Our Youtube Channel
Related Manuals for Energizer EZG Series


Summary of Contents for Energizer EZG Series
- Page 1 EZG SERIES EZG3300i USER GUIDE...
- Page 2 Energizer Brands, LLC and related subsidiaries and are used under license by Builder SAS. All other brand names are trademarks of their respective owners. Neither Builder SAS nor Energizer Brands, LLC is afiliated with the respective owners of their trademarks.
-
Page 3: Table Of Contents
CONTENTS 8. MAINTENANCE .................. 31 8.1 ENGINE OIL CHANGE ..............32 1. SAFETY INFORMATION ..............05 8.2 AIR CLEANER SERVICE ..............34 1.1 OPERATOR ATTENTION ..............05 8.3 SPARK PLUG SERVICE ..............35 1.2 EXHAUST FUMES HAZARDS ............06 8.4 SPARK ARRESTER MAINTENANCE ..........36 1.3 ELECTRIC SHOCK HAZARDS ............06 8.5 CLEANING FUEL TANK FILTER ............ - Page 4 This manual will provide you with a good basic understanding of the operation and maintenance of this machine. Read this manual carefully before operating this generator. We continually seek advancements in product design and quality. This manual should stay with this generator if it is sold. Therefore, while this manual is the newest, there may be slight difference between your generator and this manual.
-
Page 5: Safety Information
1.2 EXHAUST FUMES HAZARDS 1. SAFETY INFORMATION Exhaust fumes contains poisonous carbon monoxide (CO), a 1.1 OPERATOR ATTENTION colorless and odorless gas. Breathing CO can cause loss of consciousness and may lead to death. Never run your generator inside a garage or house, even if door or window is open. -
Page 6: Connection Notes
2. IMPORTANT LABEL LOCATIONS The generator is allowed to be put down, but ONLY lay down on the Drawbar Side. If lay down on other side, OIL may leak and damage the engine or your property. Also, Please read the following labels carefully before operating this FUEL may leak and cause FIRE or an EXPLOSION. - Page 7 The generator uses a system of air-cooling, and it is necessary to clean The operator must know the principles of functioning and the structure of its components regularly, including the grilles, the cover of the fan and the generator and the motor. He must know how to stop the motor in case the fan itself so as to ensure cooling.
- Page 8 Security measures when filling the fuel tank Additional requirements for low-power generating sets for use by laymen The fuel is extremely flammable and poisonous. This generator only uses petrol (gasoline); any other kind of fuel will Protect children by keeping them at a safe distance from the generating damage the motor.
- Page 9 Protection of the environment To avoid electric shock, you must follow the following instructions: You must periodically check the silencer (before doing this, switch off the Do not touch the generator with wet hands. generator and let it cool completely). A damaged silencer increases Do not run the generator under rain or snow.
-
Page 10: Unit Description
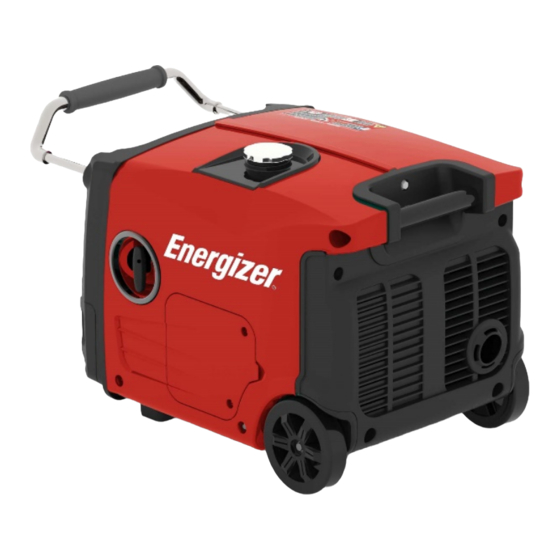
3.2 CONTROL PANEL 3. UNIT DESCRIPTION 3.1 COMPONENTSIDENTIFICATION Telescoping Handle Hour meter DC Terminal DC Protector Indicator Lights ECON. SW Fuel Switch Engine Switch AC Receptacle Ground Terminal 4. PREPARATION 4.1 ENGINE OIL The engine has been shipped from our factory without oil. Add oil before starting. -
Page 11: Fuel
Add Engine Oil: The engine is equipped with a low oil sensor that will prevent the engine from running. If the oil level falls below a critical threshold, the engine will stop automatically. When the engine shuts down automatically by the low oil protection, the LOW OIL LEVEL LED (yellow) will come on, and unless you re-fill with oil, the engine will not start again. -
Page 12: Starting The Engine
5. STARTING THE ENGINE Add Fuel: (1). Remove the Fuel Cap and fill the fuel into the tank. 5.1 CHECK ENGINE OIL (2). The fuel level in the fuel tank can be checked through the Fuel Gauge. (3). After ill the fuel, make sure the Fuel Cap is tightened securely. Use only unleaded gasoline. -
Page 13: Check Fuel
(1). Open the Oil Maintenance Cover. (2). Remove the Oil Cap and wipe the Dipstick clean. Do not smoke or allow flames or sparks where the generator (3). Check the oil level by inserting the Dipstick into the filler neck without screwing it in. -
Page 14: Start The Engine
(1). Turn the Engine Switch (Red)to “ON” position. (2). Turn the ECO Switch (Black) to Exhaust fumes contain poisonous carbon monoxide (CO), a colorless “OFF” position. and odorless gas. Breathing CO can cause loss of consciousness and 5.4 ENGINE START BUTTON may lead to death. -
Page 15: Ac Operation
The ECO Switch must be turned to “OFF” position when using 6. AC OPERATION electric devices that require a large starting current, such as a heavy compressor or some high electrical loads. Be sure all electric devices including the lines and plug connections are in good condition before connection to the generator. -
Page 16: Shut Down The Generator
7. DC OPERATION 6.2 SHUT DOWN THE GENERATOR: Never smoke, open flame sparks or make and break connections at the battery while charging. Sparks may ignite the battery gas. Batteries give off explosive hydrogen gas while recharging. Provide adequate ventilation when charging or using batteries. Wear protective goggles and gloves when working around a battery. -
Page 17: Disconnecting The Battery Charging Cable
positive (+) battery terminal. (3). Connect the Red Charger Jack to positive (+) battery terminal and the (4). Disconnect the Battery Charging Cable from the 12V DC Receptacle of the Black Charger Jack to negative (-). generator. (4). Turn the ECO Switch to the “OFF” position. (5). -
Page 18: Maintenance
8. MAINTENANCE Clean ⊙ Spark arrester Check-adjust Periodic maintenance will keep your generator in the best operating condition. Valve Clearance ⊙(3) Combustion Clean ⊙(3) Chamber Read the instructions before you begin, and make sure you have the Clean tools and skills required. ⊙... -
Page 19: Air Cleaner Service
(6). With the engine in a level position, fill to the UPPER LIMIT of the Oil Filler Neck with the recommended oil. (7). Reinstall the Oil Cap/Dipstick securely. (8). Reinstall the Oil Cover. COVER SCREW Do not tilt the generator when adding engine oil. This could result in overfilling and damage to the engine. -
Page 20: Spark Plug Service
(6). Check that the Spark Plug sealing washer is in good condition. (7). After the Spark Plug is seated; tighten with a Spark Plug Wrench to Operating the engine without an air filter, or with a damaged air filter, will compress the washer. -
Page 21: Cleaning Fuel Tank Filter
9. TRANSPORTATION AND STORAGE 8.5 CLEANING FUEL TANK FILTER Transport or store the generator only if it has cooled completely. Before transporting and storing the generator, proceed as follows: (1). Allow the generator to cool off before moving or storing. (2). -
Page 22: Drain The Fuel From Fuel Tank
(1). Turn the Fuel Cap Vent Lever to the “ON” position. 9.2 DRAIN THE FUEL FROM FUEL TANK (2). Turn the Fuel Tap to the “ON” position. (3). Put the Drain Hose into a suitable container. (4). Loosen the Drain Screw counterclockwise. (5). -
Page 23: Trouble Shooting
Engine starts, and then shuts down: 10. TROUBLE SHOOTING Add fuel to tank Is the fuel level low? When the engine cannot be started: Is there fuel in the tank? Refill the fuel tank Open fuel cap vent lever Is fuel cap vent lever closed? Turn the two switches on Are the engine switch and fuel Check engine oil level, add or... - Page 24 Fuel leaks from drain hoses. No AC output: Reduce loads and push reset Is the generator overloaded? Is the pressure in fuel tank Open fuel tank vent to balance Button to reset module pressure Verify the choke is on run position, and check fuel in the fuel tank and Is the carburetor drain in bowl not Is AC voltage low?
-
Page 25: Specifications
11. SPECIFICATIONS GENERATOR Rated Voltage 230 V DIMENSIONS AND WEIGHT Rated Frequency 50 Hz Overall Length 540 mm (21.3 in) Rated Current 12.2 A AC Output Rated Output Overall Width 405 mm (15.9 in) 2.8 kW Maximum Output Overall Height 420 mm (16.5in) 3.2 kW Dry Weight... -
Page 26: Wiring Diagram
12. WIRING DIAGRAM 13. ENVIRONMENT CORRECTION The generator output specifications are based on the standard environment as follows: Altitude: 0m Ambient temperature: 25°C Relative humidity: 30% Factor of environment correction C: Ambient temperature °C Altitude(m) 0.98 0.96 0.93 0.90 0.93 0.91 0.89 0.87... - Page 27 As a result, the product may differ from the information contained herein, but any alteration will only be implemented without prior notice if it is classified as an improvement of the previous specification. READ THE MANUAL CAREFULLY BEFORE USING THE MACHINE. When ordering spare parts, please quote the part number or code, this can be WARRANTY found in the parts list included in this manual.
- Page 28 CE DECLARATION BUILDER SAS ZI, 32 RUE ARISTIDE BERGES – 312070 CUGNAUX – FRANCE Declares that the machinery designated below: Inverter Generating set Model: EZG3300i Serial number: Complies with the provisions of the Directive “machinery” 2006/42/EC and national laws transposing it: Also complies with the following European directives: EMC Directive 2014/30/EU ROHS Directive 2011/65/EU...
Need help?
Do you have a question about the EZG Series and is the answer not in the manual?
Questions and answers