Table of Contents
Advertisement
Quick Links
Advertisement
Table of Contents

Related Manuals for Husqvarna P 535HX


Summary of Contents for Husqvarna P 535HX
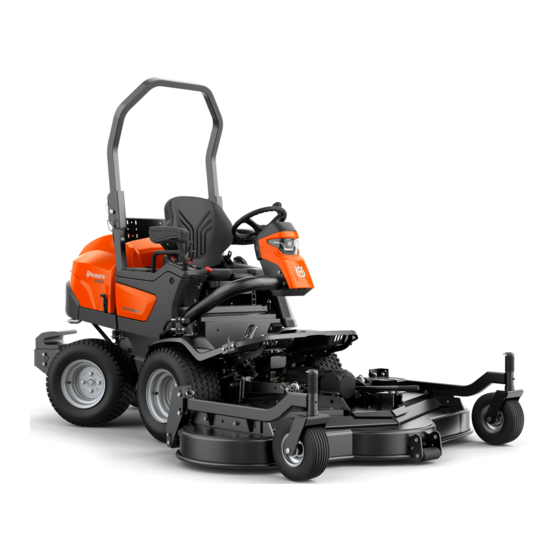
- Page 1 P 535HX Operator's manual 2-69...
-
Page 2: Table Of Contents
The product has all-wheel drive (AWD) Insure your product and automatic brake. You can use the product with different types of cutting decks or other Husqvarna Make sure that you have insurance coverage for your approved equipment. new product. Speak to your insurance company if you Intended use are not sure. - Page 3 Product overview 17 16 15 25 24 1. Forward pedal 14. Optional switch for accessories 2. Rearward pedal 15. Optional switch for accessories 3. Hydraulic coupling and power outlet for the auxiliary 16. Power switch for the power outlet system. 17.
- Page 4 Electrical system Electrical system overview 48 V 1. Wheel motors 7. Cooling fan for the 48 V batteries 2. Motor controls 8. Servicing plug 3. DC/DC converter, 48 V / 12 V 9. Fuse 4. Batteries 10. Vehicle control unit (VCU) 5.
- Page 5 Electrical system overview 12 V 1. Battery, 12 V 10. Fuse box 2. Glow plug relay, engine 11. Mower control module 3. Main switch, 12 V 12. USB outlet, 5 V 4. Fuses, 12 V electrical system 13. Power outlet, 12 V 5.
- Page 6 Fuse overview 3 4 5 6 7 8 9 10 To replace the fuses in the fuse box on page 46 for how to replace a fuse. A: Fuse box. Refer to To replace the fuses of the 48 V electrical system on page 46 for how to B: Fuses, 48 V electrical system.
- Page 7 Display overview The display shows the status of the product. When an with information and instructions. Also refer to Display - Troubleshooting on page 58 . indication light comes on, an information box will show 1. Time, language and system menu. This symbol 21.
- Page 8 PTO rpm drops and can cause decreased The cooling fan for the motor control unit for the performance or an engine stop. hydraulic system operates when the power key is in the ON position. You find the cooling fan for the motor •...
- Page 9 Operator presence control (OPC) (B) is used to move rearward. The product brakes when the pedals are released. The OPC is engaged when the operator lifts from the seat. The OPC indicator in the display comes on. The Safety circuit OPC engages the safety circuit.
- Page 10 the operator's manual of the cutting deck or other equipment. Warning: rotating belt pulley. Keep body parts away when the engine is on. Warning: risk of crush injuries. Warning: risk of crush injuries. The lift arms will move with great force, keep body parts away.
- Page 11 European Community's Directive. The product's emission is specified in the Technical data chapter and on the label. 1. Husqvarna Identity (HID) with article number, factory and line, date, sequence number and control number Scannable code 2. Model name 3.
-
Page 12: Safety
10. Product weight, unladen • the product is incorrectly repaired. 11. Maximum front axle weight (GAWR) • the product is repaired with parts that are not from the manufacturer or not approved by the 12. Maximum rear axle weight (GAWR) manufacturer. - Page 13 Husqvarna. property. • Do not apply too much load to • Do not transport passengers. the product. For example do...
- Page 14 • Do not let the product stay unsupervised with the engine or the electrical motors on. Always stop the blades, apply the parking brake, stop the engine and the electrical motors, and remove the • Do not let children or other power key before you let the persons not approved for product stay unsupervised.
- Page 15 safe maneuvering of the Safety instructions regarding product. children • Do not let children operate WARNING: Read the the product. warning instructions that follow before you use the product. • Serious accidents can occur if you are not on your guard for children in the vicinity of the product.
- Page 16 grass and dirt. If the cold air electrical cables become intake is blocked, there is a very hot during risk of engine damage. operation. Risk of burn • Before you operate the injuries, electrical shock, product, make sure that the fire and damage to air intake to the battery property or adjacent...
- Page 17 cause injury or death. It is bumps. There is a higher risk necessary to cut the grass that the product overturns on carefully on all slopes. If you ground that is not flat. Long cannot reverse up a slope or grass can hide obstacles.
- Page 18 Long-term exposure to noise can result in permanent • Wear gloves when necessary, hearing impairment. for example when you attach, Husqvarna recommends that examine or clean the cutting operators use hearing equipment. protectors when using • Do not wear loose-fitting...
- Page 19 48 V batteries: • Do not short circuit batteries. Do not keep batteries in • The Husqvarna 48 V storage where they can short batteries, are exclusively circuit each other or be short used as power supply for the circuited by other metal Husqvarna hybrid P 535HX.
- Page 20 To avoid injury, the battery • Do not fill fuel near sparks or must not be used as a power naked flames. source for other devices. • If there are leaks in the fuel • Never use batteries or system, do not start the appliances that is faulty, engine until the leaks are modified or damaged.
- Page 21 maintenance should be carried service. If the retailer who sells out to ensure that it operates your product is not a servicing correctly. See instructions dealer, ask him for the Product under the heading address of your nearest overview on page 3 to find service agent.
- Page 22 • The operator lifts from the Husqvarna service agent. seat while the product is stationary and the manual To do a check of the forward parking brake is disengaged.
- Page 23 5. Do the same procedure for 2. Pull the parking brake lever the rearward pedal. fully rearward into the parking brake holder. Parking brake The product has a manual parking brake and an automatic parking brake. The automatic parking brake engages when the product is stationary.
- Page 24 Protective covers To do a check of the muffler Missing or damaged protective • Examine the muffler regularly covers increase the risk of injury to make sure that it is on moving parts and hot attached correctly and not surfaces. Do a check of the damaged.
- Page 25 • Let the product become cool contain carbon before you do maintenance monoxide, an odorless, near the engine. poisonous and very • The blades are sharp and can dangerous gas. Do not cause cuts. Wind protection use the hybrid drive in around the blades or use closed spaces or spaces protective gloves when you...
-
Page 26: Assembly
during transport. Refer to Transport safety safely attach the product on a • Use an approved transport trailer for transport on page vehicle for transportation of 60 . the product. • A markets national or local Note: To move the product with regulations can set limit to the the power off, the automatic transportation of the product. - Page 27 b) For the R180 cutting deck: 11. Pull back the coupling of the drive shaft and attach the drive shaft to the bevel gear shaft of the cutting deck. 7. Remove the 2 screws and remove the bottom plate. 12. Fold the rubber casing onto the shaft joint. 13.
- Page 28 b) For the R180 cutting deck: Attach the lifting eyelets to the cutting deck (A) with the bolt (B) and the pin (C). To remove the cutting deck 1. Park the product on level ground. 21. Do a check of the parallelism of the cutting deck. 2.
- Page 29 To start the 7. Start the electrical drive. Refer to a) For the Combi cutting decks: product on page 33 . 8. Put the lever for the hydraulic lifting arms to the position (B) to lower the lift arms. b) For the R180 cutting deck: WARNING: Do not put the lever for the hydraulic lifting arms to the float position (A).
-
Page 30: Operation
To engage 4. Engage or disengage the ROPS. Refer to • Always use the seat belt when the ROPS is and disengage the Roll Over Protection Structure engaged. (ROPS) on page 30 . To engage and disengage the Roll Over Protection Structure (ROPS) •... - Page 31 5% in mineral oil-based fuels. Note: It is necessary to use fuel for cold weather if the temperature is below 0°C / +32°F. Speak to your Husqvarna servicing dealer for more information. 1262 - 004 - 04.06.2020...
- Page 32 • Do a check of the fuel level before each use and • To adjust the suspension of the seat, pull the lever refuel if necessary. (C) to the left. Push the lever up for more suspension and push the lever down for less suspension. Push •...
- Page 33 To start the product • To adjust the armrests up and down, turn the adjustment screw. 1. Push down and turn the main switch to the ON position. To apply and release the parking brake 2. Turn the power key to the ON position. Wait until the 1.
- Page 34 5. Turn the power key to the STOP position. The CAUTION: Do not use the product if the hydraulic system pressure releases. temperature in the 48 V batteries are less than 0 °C/32 °F. WARNING: When the hydraulic motor stops, the product is in operation and without noise.
- Page 35 3. Carefully push down 1 of the speed pedals. The 2. If the cutting deck is engaged, push the PTO button speed increases the more the pedal is pushed down. in to disengage the drive on the cutting deck. Use pedal (A) to move forward, and pedal (B) to move rearward.
- Page 36 3. Move the lever for the hydraulic lifting arms rearward 7. Tighten the cutting height adjustment knob. to fully lift the hydraulic lifting arms. 8. Do steps 5-7 on the other side of the cutting deck. 4. Turn the power key to the STOP position. 9.
- Page 37 4. Move the lever for the auxiliary system forward and 5. Remove the locking pin on the adjustment lever for rearward to adjust the cutting height. cutting height. 6. Lift the adjustment lever for cutting height and pull Note: The selected cutting height is shown with the the lever horizontally.
- Page 38 To get a good cutting result • For best performance, do maintenance on the product regularly as given in the maintenance Maintenance schedule on page schedule. Refer to 39 . • Do not cut a wet lawn. Wet grass can give a bad cutting result.
-
Page 39: Maintenance
Maintenance Introduction X = Maintenance done by the operator. The instructions are given in this operator's manual. WARNING: Before you do any maintenance O = Maintenance done by the service agent. The work you must read and understand the instructions are not given in this operator's manual. safety chapter. - Page 40 Maintenance First Maintenance interval in hours Daily hours Replace the hydraulic oil filter. Replace the hydraulic oil. Engine Make sure that the cold air intake of the engine is not blocked. Do a check of the coolant level. Replace the coolant. Do a check of the engine oil level.
- Page 41 Quick maintenance guide 3,0L 3,3L Quick maintenance guide - Combi cutting decks 1262 - 004 - 04.06.2020...
- Page 42 Quick maintenance guide - R180 cutting deck Symbols on the quick maintenance guide Replace the blades Lubrication, general information Replace the filter • Remove the power key to prevent accidental movements during lubrication. • Use engine oil when you lubricate with an oil can. •...
- Page 43 To clean the cold air intake of the right side CAUTION: Do not use a high-pressure cover washer or a steam cleaner. Water can go into bearings and electrical connections and • Make sure that the cold air intake grille is not cause damage to the product.
- Page 44 To remove the covers To remove the cover of the battery cooling system To remove and install the front cover of the 1. Remove the 2 screws and remove the cover. steering column 1. Remove the 2 screws and tilt the front cover of the steering column forward.
- Page 45 To remove the cover of the fuse box To remove the transmission cover 1. Turn and remove the 3 screws and remove the 1. Remove the screws. cover. 2. Lift and remove the transmission cover. To remove the right side cover To tilt the seat forward 1.
- Page 46 To replace the headlights To replace the fuses in the fuse box A broken fuse is identified by a burned connector. 1. Remove the front cover of the steering column. To remove and install the front cover of the Refer to To remove the 1.
- Page 47 3. Push the snap locks on each side of the fuse cover 6. Hit the air filter cartridge carefully against a hard and pull out the fuse cover. surface. Replace the air filter if it does not become clean or if it is damaged. 7.
- Page 48 To change the engine oil and the oil Disposal Note: For safe disposal of used engine oil, see on page 61 . filter If the engine is cold, start the engine for 1–2 minutes To replace the fuel prefilter before you drain the engine oil. This makes the engine oil warm and easier to drain.
- Page 49 2. Lift up the expansion tank and put it to the side. • Only use clean oil that has been kept in sealed containers. • Do not use drained oil again. • Obey the oil and filter change intervals specified in Maintenance the maintenance schedule.
- Page 50 3. Remove the side hose (A) from the coupling. 5. Install the lid, drain plug and covers in opposite sequence. To replace the hydraulic oil filter To drain the 1. Drain the hydraulic system. Refer to hydraulic system on page 50 . 2.
- Page 51 Tire pressure 3. Attach the service stay to the red attach point below the bottom plate. Technical data on page 63 for the correct tire Refer to pressure. 4. Pull the pin on the other end of the service stay. Attach the service stay to the red mark on cross tube on the cutting deck.
- Page 52 2. Remove the 3 screws that hold the BioClip plug and 4. Assemble the new blade with the ends that have an remove the plug. angle in the direction of the cutting deck. WARNING: Incorrect blade type can cause objects to eject from the cutting deck and cause serious injury.
- Page 53 To do a 2. Park the product on a level surface. 3. Do a check of the parallelism. Refer to check of the parallelism of the cutting deck on page 3. Lower the cutting deck to mow position. 52 . 4.
- Page 54 To replace the blades 3. Drain the oil. Use a suction device with a plastic hose. Make sure that the plastic hose gets the oil at 1. Lock the blade with a wooden block (A). the bottom of the bevel gear. 2.
- Page 55 To adjust the parallelism of the cutting deck 4. Install the belt around the pulleys as shown in the illustration. 1. Loosen the lock nut. 5. Tighten the nut until the belt has the correct tension. 2. Turn the track rod to extend it or make it shorter. Extend the track rod to lift the rear edge of the cover.
-
Page 56: Troubleshooting
Troubleshooting Troubleshooting If you cannot find a solution to your problems in this manual, speak to your Husqvarna service agent. Problem Cause You can start the product, but The temperature in the 48 V batteries is less than 0 °C/32 °F. - Page 57 The the fuel injection pump is not synchronized. The engine is defective. The 12 V battery does not The 12 V battery is defective. Speak to your Husqvarna service agent. charge. The connection at the cable connectors on the 12 V battery terminals is bad.
- Page 58 The symbol and Operate the product to where you can park safely. Do information text Critical error not use the product and speak to your Husqvarna servic- shows. ing dealer. The engine temperature is too high. The symbol Engine is too hot shows.
- Page 59 (<20%). The 48 V batteries can only be 48 V batteries re- charged with the power supply. Do not use the product serve and speak to your Husqvarna servicing dealer if this symbol shows. PTO (Power Take- The symbol The PTO button is engaged.
-
Page 60: Transportation, Storage And Disposal
Shows on the Symbol Name Cause / Action display The symbol is The fuel level is in the correct range. white. The symbol is The fuel level is low. Fuel level yellow. The symbol is The fuel tank is empty. red. - Page 61 To tow the product 6. Put the first strap through the rear transmission frame. To move the product with the power off, the automatic parking brake must be disengaged. To disengage the automatic parking brake, it is necessary to use a special servicing tool.
- Page 62 Obey the local disposal requirements and applicable regulations. • Do not discard the batteries as domestic waste. • Send the batteries to a Husqvarna service agent or discard it at a disposal location for used batteries. 1262 - 004 - 04.06.2020...
-
Page 63: Technical Data
500ppm or 0,05% of weight. Please refer to the Kubota Operators Manual for further information regarding fuel quality P 535HX is delivered with fossil free oil. Husqvarna recommends you to contiue to use fossil free oil. 1262 - 004 - 04.06.2020... - Page 64 P 535HX Model Oil, class UTTO SAE 10W-30 / SAE 80 Oil capacity front, total, l Oil capacity rear, total, l Electrical system, 12 V Type 12 V, negative earthed Battery 12 V, 60 Ah AGM type Electrical system, 48 V...
- Page 65 P 535HX Combi 155 Combi 155 X R180 Vibration level in the seat, m/s Cutting deck Combi 155 Combi 155 X R180 Cutting width, mm 1550 1550 1800 Cutting height, mm 30-112, 7 positions 30-112, 7 positions 30-90, 6 positions...
- Page 66 Product dimensions Dimensions, mm P 535HX 1337 1157 2038 35° 1060 2089 1081 1262 - 004 - 04.06.2020...
-
Page 67: Service
Refer to the operator's manual for the accessory or equipment for which cutting decks that are available for this product. instructions. Speak to your Husqvarna dealer for more information about the cutting decks or other equipment that are available. Service... -
Page 68: Ec Declaration Of Conformity
Husqvarna AB, SE-561 82 Huskvarna, Sweden, tel: +46-36-146500, declares that the ride-on lawn mower Husqvarna P 535HX from 2020's serial numbers and onwards (the year is clearly stated in plain text on the rating plate with subsequent serial number), comply with the requirements of the COUNCIL’S DIRECTIVE:... - Page 69 Registered trademarks ® Bluetooth word mark and logos are registered Bluetooth SIG, inc. and any use of trademarks owned by such marks by Husqvarna is under license. 1262 - 004 - 04.06.2020...
- Page 70 1262 - 004 - 04.06.2020...
- Page 71 1262 - 004 - 04.06.2020...
- Page 72 Original instructions 1141503-26 2020-06-09...
Need help?
Do you have a question about the P 535HX and is the answer not in the manual?
Questions and answers