Sign In
Upload
Download
Table of Contents
Contents
Add to my manuals
Delete from my manuals
Share
URL of this page:
HTML Link:
Bookmark this page
Add
Manual will be automatically added to "My Manuals"
Print this page
×
Bookmark added
×
Added to my manuals
Manuals
Brands
Cisco Manuals
Server
CDE 220 Series
Hardware installation manual
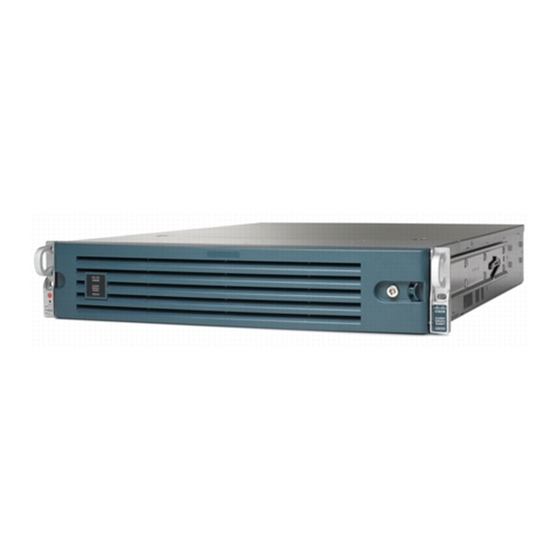
Cisco CDE 220 Series Hardware Installation Manual
Content delivery engine
Hide thumbs
1
2
3
4
5
6
7
8
9
10
11
12
13
14
15
16
17
18
19
20
21
22
23
24
25
26
27
28
29
30
31
32
33
34
35
36
37
38
39
40
41
42
43
44
45
46
47
48
49
50
51
52
53
54
55
56
57
58
59
60
61
62
63
64
65
66
67
68
69
70
71
72
73
74
75
76
77
78
79
80
81
82
83
84
85
86
87
88
89
90
91
92
93
94
95
96
97
98
99
100
101
102
103
104
105
106
107
108
109
110
111
112
113
114
115
116
117
118
119
120
121
122
123
124
125
126
127
128
129
130
131
132
133
134
135
136
137
138
139
140
141
142
143
144
145
146
147
148
149
150
151
152
153
154
155
156
157
158
159
160
161
162
163
164
165
166
167
168
169
170
171
172
173
174
175
176
177
178
179
180
181
182
183
184
185
186
187
188
189
190
191
192
193
194
195
196
197
198
199
200
201
202
203
204
205
206
207
208
209
210
211
212
213
214
215
216
217
218
219
220
221
222
223
224
225
226
227
228
229
230
231
232
233
234
235
236
237
238
239
240
241
242
243
244
245
246
247
248
page
of
248
Go
/
248
Contents
Table of Contents
Troubleshooting
Bookmarks
Table of Contents
Document Revision History
Related Documentation
Warning Definition
Obtaining Documentation and Submitting a Service Request
Hardware Features
Front Panel Leds
Storage Drive Leds
Input/Output Ports and Connectors
Site Requirements
Preventing Electrostatic Discharge Damage
Environmental and Physical Specifications
Safety Warnings
Safety Guidelines
Emissions Disclaimer
Intended Uses
If AC Power Supplies Are Installed
If DC Power Supplies Are Installed
Temperature and Ventilation
Tools and Parts Required
Unpacking the Box
Inspecting for Damage
Replacing a Power Supply
Installing Sfps
Unpacking and Inspecting the Server
Preparing for Server Installation
Rack Requirements
Equipment Requirements
Slide Rail Adjustment Range
Installing the Server in a Rack
Installing the Cable Management Arm (Optional)
Reversing the Cable Management Arm (Optional)
Making Physical Connections
Connecting Power Cords
Server Types
Connecting Network Cables
Before You Begin
Bios Settings
Technical Specifications
Connector Pin Assignments
Serial Port Connector
KVM Console
Ethernet Connector Pin Assignments
Ethernet Port Connector
Cable Pin Assignments
Power Cord Specifications
Supported Power Cords and Plugs
AC Power Cord Illustrations
Troubleshooting Tips
Display of System Event Log Events
Display of Sensor Readings
Display of CIMC Log
Common Troubleshooting Scenarios Host Does Not Boot
Common Troubleshooting Scenarios - BMC
Connecting to the Console
Firmware Upgrade
Advertisement
Quick Links
1
Document Revision History
2
Hardware Features
3
Input/Output Ports and Connectors
4
Storage Drive Leds
Download this manual
Cisco Content Delivery Engine
205/220/250/280/285/420/460/475 Hardware
Installation Guide
October 05, 2018
Cisco Systems, Inc.
www.cisco.com
Cisco has more than 200 offices worldwide.
Addresses, phone numbers, and fax numbers
are listed on the Cisco website at
www.cisco.com/go/offices.
Table of
Contents
Previous
Page
Next
Page
1
2
3
4
5
Advertisement
Table of Contents
Troubleshooting
Troubleshooting Tips
209
Common Troubleshooting Scenarios Host Does not Boot
215
Need help?
Do you have a question about the CDE 220 Series and is the answer not in the manual?
Ask a question
Questions and answers
Related Manuals for Cisco CDE 220 Series
Server Cisco CDE100 Hardware Installation Manual
Content delivery engine (56 pages)
Server Cisco CDE 250 Series Hardware Installation Manual
Content delivery engine (248 pages)
Server Cisco CSACS-1121-K9 Reference Manual
Reference guide (190 pages)
Server Cisco c240 Installation And Service Manual
Ucs c240 m4 server (162 pages)
Server Cisco C880 Hardware Installation Manual
(31 pages)
Server Cisco C800 Series Service Supplement Manual
M4 storage subsystem (27 pages)
Server Cisco expressway ce1100 Installation Manual
(20 pages)
Server Cisco CSACS-1121 series Troubleshooting Manual
(8 pages)
Server Cisco C880 M5 Configuration Manual
(87 pages)
Server Cisco C880 M5 Service Manual
(174 pages)
Server Cisco C880 M5 Installation Manual
(87 pages)
Server Cisco C220 M3 Setup
Rack server (10 pages)
Server Cisco Business Edition 7000 Series Quick Start Manual
(29 pages)
Server Cisco UCS C Series Installing Manual
(19 pages)
Server Cisco CRS-16 DC Installing And Removing
Installing and removing power components (84 pages)
Server Cisco C220 Setup
(10 pages)
This manual is also suitable for:
Cde 220 2a-c
Cde 220 2a-f
Cde 220 2c1-c
Cde220 2c1-f
Cde 220 2c2-c
Cde 220 2d1-c
...
Show all
Cde 220 2d1-f
Cde 220 2g2-c
Cde 220 2g2-f
Cde 220 2s1-c
Cde 220 2s1-f
Cde 220 2s3-c
Cde 220 2s3-f
Cde 220 2s3i-c
Cde 220 2s3i-f
Cde 250 series
Cde 250 2a4
Cde 250 2a2
Cde 250 2g3
Cde 250 2м0
Cde 250 2s5
Cde 250 2s6
Cde 250 2s8
Cde 250 2s9
Cde 250 2s10
Cde 250 2v0
Cde 285 series
Cde 285-s
Cde 285-l
Cde 420 series
Cde 420 4a-с
Cde 420 4a-f
Cde 420 4g-c
Cde 420 4g-f
Cde 460 series
Cde 460
Cde 460-4r1
Cde 460-4r3
Cde 205
Cde 280
Cde 475
Table of Contents
Print
Rename the bookmark
Delete bookmark?
Delete from my manuals?
Login
Sign In
OR
Sign in with Facebook
Sign in with Google
Upload manual
Upload from disk
Upload from URL


Need help?
Do you have a question about the CDE 220 Series and is the answer not in the manual?
Questions and answers