
Subscribe to Our Youtube Channel
Related Manuals for Hanseatic HHI6417SM


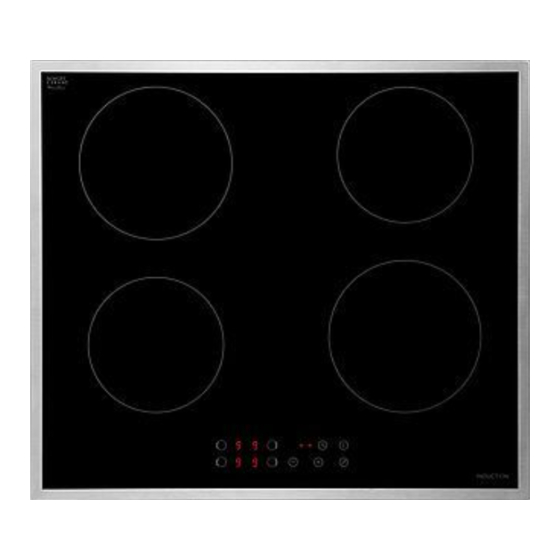
Summary of Contents for Hanseatic HHI6417SM
- Page 1 HHI6417SM Gebrauchsanleitung Induktives Glaskeramik-Kochfeld Anleitung_Version: 196194 DE 20190110 Bestell-Nr.: 91780119 Nachdruck, auch aus zugs wei se, nicht ge stat tet!
-
Page 2: Table Of Contents
Seite DE-2 Inhaltsverzeichnis Lieferung ......DE-3 Fehlersuche ..... . . DE-22 Lieferumfang . -
Page 3: Lieferung
Lieferung Seite DE-3 Lieferung Lieferumfang – Einbau-Glaskeramik-Induktions-Kochfeld – Gebrauchsanleitung – Montagematerial; bestehend aus 2 Halteklammern und 2 Schrauben Lieferung kontrollieren 1. Nehmen Sie das Gerät aus der Verpa- ckung. 2. Prüfen Sie, ob die Lieferung vollständig ist. 3. Kontrollieren Sie, ob das Gerät Transport- schäden aufweist. -
Page 4: Bedienelemente Und Geräteteile
Seite DE-4 Bedienelemente und Geräteteile Bedienelemente und Geräteteile (1) vorne links (2) hinten links (3) hinten rechts (4) vorne rechts (5) Sensorfeld (6) Auswahlsensoren für die Kochzonen (7) Timer-Sensor (8) Ein-/Aus-Sensor (9) Sensor Kindersicherung (10) „+“ Sensor (11) „-“ Sensor (11) (10) Zu Ihrer Sicherheit... -
Page 5: Sicherheitshinweise
Zu Ihrer Sicherheit Seite DE-5 getrennt werden kann, muss eine all- HINWEIS polige Trennvorrichtung gemäß Über- Dieser Signalbegriff warnt vor möglichen spannungskategorie III in der Haus- Sachschäden. installation mindestens 3 mm Kontaktabstand vorgeschaltet sein; hier- Tipps, zusätzliche Informationen. zu zählen Sicherungen, LS-Schalter und Dieser Signalbegriff zeigt an, dass Schütze. - Page 6 Seite DE-6 Zu Ihrer Sicherheit fel ds läuft, kann unter Spannung ste- ■ Die Gardauer möglichst kurz halten. hen! Wenn Ihr Glaskeramikfeld Risse ■ Die Lebensmittel nur leicht anbräunen, aufweist, trennen Sie das Koch feld vom starke Verfärbung vermeiden. Stromnetz ( Sicherung herausnehmen), ■...
- Page 7 Zu Ihrer Sicherheit Seite DE-7 ■ Sicherstellen, dass Kinder keinen Zugriff ■ Nach dem Er lö schen des Feu ers das Ge- auf das Kochfeld haben, wenn sie unbe- rät durch unseren Service über prü fen aufsichtigt sind. lassen (siehe „Unser Service“ auf Seite DE-24).
-
Page 8: Symbolerklärungen
Seite DE-8 Zu Ihrer Sicherheit ■ Vorsicht beim Auspacken und Einbau- ■ Vor dem Reinigen Kochfeld vollständig en des Kochfeldes. Die Kanten sind sehr abkühlen lassen. scharf. ■ Keine scharfen Reinigungsmittel, Scheuer- mittel, Scheu er pul ver oder Stahlschwäm- HINWEIS me verwenden;... -
Page 9: Das Kochfeld
Das Kochfeld Seite DE-9 Das Kochfeld Wirkungsprinzip eines Mögliche Geräusche: induktiven Kochfelds – Tiefes Brummen wie bei einem Trafo Dieses Geräusch kann auftreten, wenn Unterhalb der Glaskeramik-Oberfläche be- eine hohe Heizstufe eingestellt ist. Ursache findet sich eine Spule, die von Strom durch- hierfür ist, dass eine hohe Energiemenge flossen wird. -
Page 10: Das Richtige Kochgeschirr
Seite DE-10 Das Kochfeld auf der anderen nicht. Sogar bei demselben Verwenden Sie Gefäße Topf auf derselben Kochzone kann es sein, – mit ausreichender Bodenstärke, z. B. email- dass das Geräusch nicht jedes Mal auftritt. lierte Stahltöpfe mit 2-3 mm und Edelstahl- Es kann auftreten, wenn ein bestimmter töpfe mit 4-6 mm. -
Page 11: Kochfeld Einschalten
Kochzonen und Sensoren Seite DE-11 Kochzonen und Sensoren Kochfeld einschalten Wenn Sie einen Topf verwenden, der etwas größer als die Kochzone ist, erreichen Sie die – Um das Kochfeld einzuschalten, berühren effizienteste Energienutzung. Sie ca. drei Sekunden lang den Ein-/Aus- Sensor (8). -
Page 12: Heizstufe Einer Kochzone Erhöhen Oder Verringern
Seite DE-12 Kochzonen und Sensoren Berühren Sie den „-“-Sensor (11) (ggf. 1. Berühren Sie den Sensor der gewünsch- mehrmals hintereinander) oder halten Sie ten Kochzone. den Finger länger darauf, um die Heizstufe Die Anzeige neben der Kochzone blinkt. der ausgewählten Kochzone zu verringern 2. -
Page 13: Kochfeld Ausschalten
Kochzonen und Sensoren Seite DE-13 Steigt die Wärme zu stark an, wird das Koch- Kochzone nehmen, wird sie wieder aktiv, feld automatisch abgeschaltet. sobald ein Topf oder ein anderer Gegen- stand aus ferromagnetischem Metall da- rauf gestellt wird. Betriebsdauerbegrenzung Jede Kochzone ist zur Sicherheit mit einer Betriebsdauerbegrenzung versehen. -
Page 14: Timer-Funktion / Garzeitbegrenzung
Seite DE-14 Kochzonen und Sensoren Einige Sekunden später schaltet sich das verbleibende Zeit angezeigt und blinkt für Kochfeld ganz ab. Alle Anzeigen erlöschen. 5 Sekunden. Nur für die kürzlich verwendeten Kochfelder Wenn die Zeit abgelaufen ist, ertönt für 30 blinken weiterhin die Restwärmesymbole „H“. Sekunden ein Signalton. -
Page 15: Kindersicherung
Kochzonen und Sensoren Seite DE-15 Kindersicherung Ihr Kochfeld ist mit einer Kindersicherung aus- gestattet, die vor der Benutzung des Koch- felds oder Veränderung der Einstellungen zu- nächst deaktiviert werden muss. Damit wird 6. Wenn die eingestellte Zeit abgelaufen ist, unbefugtes Einschalten verhindert. ertönt ein Signalton und die Kochzone wird ausgeschaltet. -
Page 16: Heizstufentabelle
Seite DE-16 Heizstufentabelle Heizstufentabelle In diesem Kapitel erfahren Sie, welche Heizstufen für welche Verwendung geeignet ist. Die ge- naue Einstellung ist jedoch von verschiedenen Faktoren abhängig, z. B. vom Kochgeschirr und von Art und Menge der Speisen abhängig. Deshalb sind Abweichungen möglich. Heizstufe geeigneter Kochvorgang 1–2... -
Page 17: Kochfeld Reinigen
Kochfeld reinigen Seite DE-17 Kochfeld reinigen Leichte, nicht fest eingebrannte VORSICHT! Verschmutzungen Verbrennungsgefahr! 1. Schalten Sie das Kochfeld ab. Unsachgemäße Reinigung kann zu Ver- 2. Wischen Sie leichte Verschmutzungen brennungen führen. nach dem Abkühlen mit einem feuchten Vor dem Reinigen Kochfeld vollständig ■... - Page 18 Seite DE-18 Heizstufentabelle Zucker- oder stärkehaltige Speise- re ste, Kunststoffe oder Alufolien entfernen HINWEIS Entfernen Sie Zucker- oder stärkehaltige Speisereste sowie Reste von Kunststoffen oder Alufolien sofort. Sie können das Koch- feld sonst dauerhaft und irreparabel be- schädigen. 1. Entfernen Sie Rückstände möglichst in heißem Zustand mit einem geeigneten Klingenschaber von der heißen Kochzo- nenoberfläche.
-
Page 19: Einbau
Einbau Seite DE-19 Einbau Wichtige Benutzer-Information Arbeitsplatte vorbereiten Das Glaskeramik-Kochfeld ist für den Einbau Folgende Voraussetzungen müssen erfüllt in eine Küchen-Arbeitsplatte oder Ähnliches sein, um einen sachgerechten Betrieb zu ge- vorgesehen. Wenn Ihre handwerklichen Fä- währleisten: higkeiten ausreichen, können Sie den Einbau –... -
Page 20: Kochfeld Einsetzen
Seite DE-20 Einbau Kochfeld einsetzen – Im hinteren Teil der Sicherungsplatte muss eine quadratische Öffnung mit einem Sei- 1. Nehmen Sie das Koch feld aus der Ver pa- tenmaß von mindestens 80 mm herausge- c kung. schnitten werden. 2. Entfernen Sie alle Schutz- und Verpa- –... -
Page 21: Netzanschluss Hinweise Für Den Installateur
Einbau Seite DE-21 Anschlussbedingungen – Das Kochfeld ist für Wechselspannung Kochfeld Arbeitsplatte 220 – 240 V~ / 380 – 415 V 3N~ / 50 Hz ausgelegt. (12) – Es ist eine separate Stromversorgung er- forderlich. Durch die beiden Halteklammern (12) wird –... -
Page 22: Fehlersuche
Seite DE-22 Fehlersuche Fehlersuche Fehlersuchtabelle Problem Mögliche Lösungen/Tipps Das Kochfeld kann nicht Die Stromzufuhr ist unterbrochen. Prüfen Sie die Sicherung für den eingeschaltet werden, das Herd am Si che rungs ka sten in der Wohnung. Verständigen Sie im Display zeigt nichts an. Zweifelsfall unseren Service (siehe „Unser Service“... -
Page 23: Fehleranzeige Im Display
Fehlersuche Seite DE-23 WARNUNG! Das Kochfeld arbeitet mit gefährlicher Netzspannung. Unsachgemäßer Umgang, fehler- hafte Elektroinstallation oder zu hohe Netzspannung kann zu elektrischem Schlag oder Kurzschluss führen. Ver su chen Sie nie mals, das de fek te – oder ver meint lich defekte – Ge rät selbst zu re pa rie- ■... -
Page 24: Unser Service
Unser Service Unser Service Damit wir Ihnen schnell helfen können, nennen Sie uns bitte: Gerätebezeichnung Modell Bestellnummer Induktives Glas keramik-Kochfeld HHI6417SM 91780119 Beratung, Bestellung und Reparaturen und Ersatzteile Reklamation Kunden in Deutschland Wenden Sie sich bitte an die Produktberatung – Wenden Sie sich bitte an unseren Technik-... -
Page 25: Umweltschutz
Umweltschutz Seite DE-25 Umweltschutz Elektro-Altgeräte Energiespartipps umweltgerecht entsorgen Lassen Sie beim Kochen möglichst immer den Deckel auf dem Topf. Flüssigkeiten wer- Elektrogeräte enthalten Schadstoffe den mit Deckel schneller zum Kochen ge- und wertvolle Ressourcen. bracht als ohne. Jeder Verbraucher ist deshalb ge- Verwenden Sie nur hoch- und neuwertige setzlich verpflichtet, Elektro-Altge- Töpfe und Pfannen. -
Page 26: Technische Daten
Seite DE-26 Technische Daten Technische Daten Datenblatt für Haushaltskochmulden nach der Verordnung (EU) Nr. 66/2014 Marke Modellkennung: HHI6417SM Bestellnummer: 91780119 Art der Kochfeldes: Elektrische Kochmulde Anzahl der Kochzonen: Heiztechnik: Induktionskochzonen Kochzone vorne links: Ø 16,0 cm; 1,4 kW Kochzone hinten links: Ø... - Page 27 HHI6417SM User manual Inductive glass ceramic hob Manual_version: 196194 GB 20190110 Order no.: 91780119 Reproduction, even of excerpts, is not permitted!
- Page 28 Page GB-2 Table of contents Delivery ......GB-3 Troubleshooting ....GB-22 Package contents .
-
Page 29: Delivery
Delivery Page GB-3 Delivery Package contents – Fitting the glass ceramic induction hob – User manual – Fitting material; consisting of 2 retaining clamps and 2 screws Check the delivery 1. Take the appliance out of the packaging. 2. Check that the delivery is complete. 3. -
Page 30: Controls And Appliance Parts
Page GB-4 Controls and appliance parts Controls and appliance parts (1) front left (2) rear left (3) rear right (4) front right (5) Sensor field Selection sensors for the cooking zones Timer sensor On/Off sensor Child safety sensor (10) ‘+’ sensor (11) ‘-’... -
Page 31: Safety Notices
For your safety Page GB-5 Tips, additional information. This sym- ■ Before connecting the hob, switch off bol indicates that you will be provided the relevant power circuit or turn off with useful additional information. the relevant fuses. Before accessing the terminals, all supply circuits must be switched off. - Page 32 Page GB-6 For your safety WARNING WARNING The appliance will become hot during op- Danger to children and persons with re- eration. If you touch parts which are hot, duced physical, sensory or mental abilities you could burn yourself on them! (for example, people with disabilities to The cooking zones get very hot during some extent, older persons with impaired...
- Page 33 For your safety Page GB-7 ■ Always switch off the hob or cooking CAUTION zone yourself if you wish to stop a cook- Risk of burns! ing process. Cancelling the cooking time There is a risk of burns as a result of im- limit does not end the cooking process proper handling of this appliance.
-
Page 34: Symbol Declarations
Page GB-8 For your safety ■ Avoid getting sugar, citric acid, plastic, NOTICE salt, etc. in solid and liquid states onto Risk due to improper operation! the hot glass ceramic. If this happens, re- Improper handling of the appliance may move the dirt from the still-hot glass ce- result in damage. -
Page 35: The Hob
The hob Page GB-9 The hob Operating principle of an The sound will disappear or be reduced as soon as the heat setting is reduced. inductive hob – Slight whistling This sound may occur when an emp- Located beneath the glass ceramic surface ty cooking device is placed on a cooking is a coil, through which current flows. -
Page 36: The Right Cookware
Page GB-10 The hob – Fan noise You should not use: For the electronics inside the hob to work – Indented or battered pans. properly, a certain ambient temperature – Pans with a rough base. must not be exceeded. For this reason –... -
Page 37: Switching The Hob On
Cooking zones and sensors Page GB-11 Cooking zones and sensors Pot recognition The hob has four cooking zones. A sensor in the control panel is assigned to each cooking Pot recognition is installed in the cooking zone. zones. Pot recognition ensures that the cook- You can use the ‘+’... -
Page 38: Increasing Or Reducing The Heat Setting Of A Cooking Zone
Page GB-12 Cooking zones and sensors If you do not press a sensor or do not When the ‘ ’ indicator and not the heat set- place suitable cookware on the cook- ting is blinking in the display, this may have ing zone within one minute of switching the the following causes: hob on, the hob will switch off automatically. -
Page 39: Switching The Hob Off
Cooking zones and sensors Page GB-13 Switching the hob off switched off and the residual heat symbol ‘H’ is activated. – Press the on/off sensor (8) to switch off the The maximum operating time is set in accord- entire hob. ance with the most recently selected heat set- You will hear an acoustic signal and all of ting. -
Page 40: Using The Timer Function / Cooking Time Limit
Page GB-14 Cooking zones and sensors Changing / cancelling the countdown If the temperature of the cooking zones falls below a specific value, the residual heat sym- You can change or cancel the countdown of bol ‘H’ will go out. the timer at any time. -
Page 41: Child Safety
Cooking zones and sensors Page GB-15 Child safety If other cooking zones are likewise switched on, these will remain active. Your hob is equipped with a child safety de- 7. To shut off a signal tone early, press ei- vice, which must be deactivated prior to using ther the ‘+’... -
Page 42: Heat Settings Table
Page GB-16 Heat settings table Heat settings table This chapter will explain which heat settings are suitable for which use. The precise setting de- pends, however, on various factors, for example the type of cookware and the quantity of food. For this reason, variations are possible. -
Page 43: Cleaning The Hob
Cleaning the hob Page GB-17 Cleaning the hob Slight soiling which is not burnt on CAUTION! 1. Switch the hob off. Risk of burns! 2. After it has cooled down, wipe light dirt Improper cleaning can result in burns. with a damp cloth. Prior to cleaning, allow the hob to cool 3. - Page 44 Page GB-18 Cleaning the hob Removing sugary or starchy food waste, plastics or aluminium foil NOTICE Remove sugary or starchy food waste, plas- tics or aluminium foil immediately. Other- wise, these may cause permanent and ir- reparable damage to the hob. 1.
-
Page 45: Type Of Fitting
Type of fitting Page GB-19 Type of fitting Important user information Preparing food The glass ceramic hob is intended to be fitted To ensure proper operation, the following re- in a kitchen worktop or the like. If you have quirements must be met: the requisite skills, you can fit the hob your- –... -
Page 46: Installing The Hob
Page GB-20 Type of fitting – If the hob is installed over an oven with ventilation, the clearance between the (13) base of the appliance and the cover of the oven must be at least 50 mm. – At the front of the hob there must be an air (12) outlet at least 5 mm in size between the hob and the oven or floor unit. -
Page 47: Connection To The Power Supply; Notes For The Installer
Type of fitting Page GB-21 Connection to the power Connecting the power cord 1. Before accessing the terminals, switch supply; notes for the installer off all supply circuits and secure them against being switched on again. WARNING 2. Make sure that the connection cables are voltage-free on all poles. -
Page 48: Troubleshooting
Page GB-22 Troubleshooting Troubleshooting Troubleshooting table Problem Possible solutions / tips The hob cannot be The power supply has been interrupted. Check the fuse for the stove switched on; the display in the fuse box in the apartment. If in doubt, contact our Customer is blank. -
Page 49: Error Message In The Display
Troubleshooting Page GB-23 WARNING! The hob operates with dangerous mains voltages. Improper use, faulty electrical installation or excessive mains voltage may result in an electric shock or short-circuiting. Never try to repair a defective or suspected defective appliance yourself. You can put your ■... -
Page 50: Our Customer Service
In order for us to help you quickly, please tell us: Name of appliance Model Order number Inductive glass ceramic hob HHI6417SM 91780119 Advice, order and complaint Repairs and spare parts Please contact your mail order company’s customer service centre if Customers in Germany –... -
Page 51: Environmental Protection
Environmental protection Page GB-25 Environmental protection Disposing of old Energy saving tips electrical devices in an When cooking, always leave the lid on the saucepan wherever possible. Liquids can be environmentally-friendly brought to the boil more quickly with the lid manner on than without. -
Page 52: Technical Specifications
Page GB-26 Technical specifications Technical specifications Datasheet for domestic hobs pursuant to (EU) regulation no. 66/2014 Brand Model identifier: HHI6417SM Order number: 91780119 Type of hob: Electrical hob Number of cooking zones: Heating technology: Induction cooking zones Cooking zone to the front left: Ø...
Need help?
Do you have a question about the HHI6417SM and is the answer not in the manual?
Questions and answers