Table of Contents
Advertisement
Quick Links
Installation and operating instructions
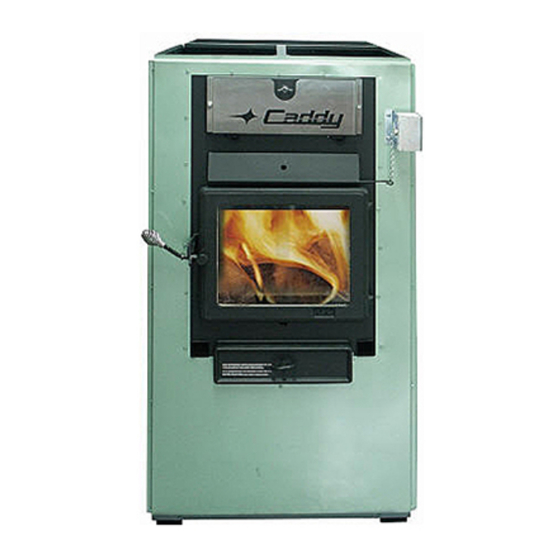
for the MAX CADDY WOOD ADD-ON
Read these instructions carefully before installing
You have purchased one of the finest wood add-on available
on the market. We are confident that your add-on will provide years of comfort
Verified and tested for Canada by an
accredited laboratory.
Eco-energy at the hearth
of your home
Printed in Canada
(PF01102 model)
Certified according to CSA B415.1-10, CSA B366.1
and operating your Add-on.
CONGRATULATIONS!
and safe operation.
Please keep this document!
This manual is available for free download on the manufacturer's
web site. It is a copyrighted document. Re-sale is strictly
prohibited. The manufacturer may update this manual from time
to time and cannot be responsible for problems, injuries, or
damages arising out of the use of information contained in any
manual obtained from unauthorized sources.
St-Augustin-de-Desmaures (Quebec)
PSG
250, de Copenhague,
CANADA G3A 2H3
04-02-2020
46174A
Advertisement
Table of Contents

Related Manuals for PSG CADDY MAX CADDY WOOD ADD-ON PF01102


Summary of Contents for PSG CADDY MAX CADDY WOOD ADD-ON PF01102
- Page 1 Installation and operating instructions for the MAX CADDY WOOD ADD-ON (PF01102 model) Certified according to CSA B415.1-10, CSA B366.1 Read these instructions carefully before installing and operating your Add-on. CONGRATULATIONS! You have purchased one of the finest wood add-on available on the market.
-
Page 2: Table Of Contents
TABLE OF CONTENT INTRODUCTION ..................................4 APPLIANCE PERFORMANCE ..............................5 GENERAL FEATURES ................................6 SPECIFICATIONS ..................................6 LABEL PLATE ................................... 7 MAX CADDY ADD-ON TECHNICAL DATA ..........................9 ADD-ON DIMENSIONS ................................9 CHIMNEY AND DRAFT ................................10 SAFETY RULES ..................................10 9.1. - Page 3 SMOKE SMELL ................................44 20.9. THE LCD TOUCH SCREEN DOES NOT LIGHTUP......................44 20.10. AUXILIARY OVERRIDE ..............................44 EXPLODED VIEW AND PART LIST ............................45 PSG LIMITED LIFETIME WARRANTY (REGULAR) ....................... 53 PSG LIMITED LIFETIME WARRANTY (PRIVILEGE) ......................54...
-
Page 4: Introduction
IMPORTANT NOTE: THE INSTALLATION OF THIS CENTRAL HEATING SYSTEM MUST BE PERFORMED BY A QUALIFIED TECHNICIAN. PSG RESERVES ITSELF THE RIGHT TO VOID ITS WARRANTY OR DENY TECHNICAL ADVICE IF THE ADD-ON HAS NOT BEEN SOLD OR INSTALLED BY A PROFESSIONAL. -
Page 5: Appliance Performance
2. APPLIANCE PERFORMANCE Fuel type Dry cordwood Recommended heating area[*] 1,500 to 3,500 ft² (139 to 325 m²) Firebox volume 4.9 ft³ (0.139 m³) Maximum burn time[*] 17 h Maximum input capacity (dry cordwood)(2) 421,000 BTU Overall heat output rate (min. to max.)(3) 18,436 BTU/h to 66,620 BTU/h (5.6 kW to 19.6 kW) Nominal heat output at 15lb/ft³... -
Page 6: General Features
3. GENERAL FEATURES Maximum log length 25 in (635 mm) / north-south* Diameter of the flue collar 6 in (152 mm) Recommended chimney diameter 6 in (152 mm) Required type of chimney CAN/ULC S629 (2100 °F) Baffle material C-Cast Alcove installation Not approved ‡... -
Page 7: Label Plate
5. Label plate... -
Page 9: Max Caddy Add-On Technical Data
6. MAX CADDY ADD-ON TECHNICAL DATA TEMP MODEL STATIC PRESSURE VAR. (OF) MIN. MAX. INCH H2O MAX CADDY ADD-ON (SERIE) 7. ADD-ON DIMENSIONS TOP VIEW FRONT VIEW SIDE VIEW... -
Page 10: Chimney And Draft
8. CHIMNEY AND DRAFT This add-on must be connected to a chimney certified for use with wood burning heating appliances. A 6-inch chimney is recommended. The unit is not to be connected to a chimney flue serving another appliance. If the chimney draft exceeds 0.06 IN.W.C., a barometric draft control should be installed on the smoke pipe. -
Page 11: Odour From The Paint
9.7. GLASS SPECIFICATIONS The glass is made of 5/32" (4 mm) thick ceramic glass. Do not operate your wood add-on with a broken glass, as this could seriously damage your add-on. You can purchase a replacement glass from your PSG dealer. -
Page 12: Ash Drawer
9.8. ASH DRAWER Your add-on is equipped with an ash drawer to collect ashes produced by the combustion of wood. This drawer must not be left open during combustion as this may cause over firing and serious damages to the add-on. Moreover, the additional air created could cause the dispersion of ashes in the ventilation system. -
Page 13: Max Caddy Add-On (Serial Installation For Canada Only) Pf01102
INSTALLATION AND OPERATION INSTRUCTIONS MAX CADDY ADD-ON PF01102 (SERIAL INSTALLATION FOR CANADA ONLY) -
Page 14: Safety Precaution
10. SAFETY PRECAUTION CAUTION THE OPERATION OF A GAS ADD-ON MUST BE VERIFIED FOR ACCEPTABLE OPERATION BEFORE AND AFTER INSTALLATION OF THE MAX CADDY ADD-ON APPLIANCE BY A GAS FITTER WHO IS RECOGNIZED BY THE REGULATORY AUTHORITY. CAUTION DO NOT CONNECT TO ANY GAS ADD-ON THAT HAS NOT BEEN CERTIFIED INITIALLY AS COMPLYING WITH CGA STANDARD CAN/CGA-2.3 OR ITS PRECEDENTS. - Page 15 OPTION 3 and OPTION 4 are permitted when installing the MAX CADDY add-on with an existing furnace whose hot air plenum ducts are downwards flowing. The hot air plenum of the MAX CADDY add-on must be above the add-on and cannot be directed downward. Do not install connecting ducts in a way that would allow inversion of the air flow (see example 1 and 3).
- Page 16 Option 3 Option 4...
- Page 17 Prohibited Prohibited EXAMPLE 1 Prohibited EXAMPLE 2 WARNING DO NOT REMOVE, RELOCATE OR BYPASS ANY OF THE SAFETY CONTROLS IN THE ORIGINAL FURNACE INSTALLATION.
-
Page 18: Minimum Clearances To Combustible Materials And Floor Protection
You must determine the air flow through the existing furnace before installing the MAX CADDY add-on: 1. Run the add-on to which the MAX CADDY add-on is connected until it reaches its regular heating temperature. 2. With a thermometer, measure the temperature of the fresh air entering the furnace and that of the air exiting the add-on in the hot air plenum. -
Page 19: Pipe Connector And Damper
12.4. PIPE CONNECTOR AND DAMPER The Max Caddy Add-on must be connected to a duct system and chimney that are in good condition and suitable for wood burning. the use of a 6" connecting pipe and chimney is recommended. It is strictly forbidden to connect a solid fuel burning appliance to a chimney already connected to a propane or natural gas appliance. -
Page 20: Electrical Diagram For Serial Add-On (Via Control)
13. ELECTRICAL DIAGRAM FOR SERIAL ADD-ON (VIA CONTROL) Important Note: It is essential to use the three (3) SBI # 51035 relays to make the connection as in 3-relay diagrams. It is possible to use only two relay White Rodger (SPNC / SPNO # 90-380) for the two-relay diagram. The use of another brand or model of relay is not recommended since very limited technical support may be provided. - Page 21 REQUIRES 2 RELAY SPNO/SPNC (WHITE ROGERS P/N 90-380) (NOT INCLUDED) AND 24V AVAILABLE ON EXISTING FURNACE.
-
Page 22: Electrical Diagram For Serial Add-On (Via Motor)
14. ELECTRICAL DIAGRAM FOR SERIAL ADD-ON (VIA MOTOR) REQUIRES 1 RELAY (51035) WITH 1 JUNCTION BOX (NOT INCLUDED). - Page 23 REQUIRES 2 RELAY SPNO/SPNC (WHITE ROGERS P/N 90-380) WITH 1 JUNCTION BOX (NOT INCLUDED) AND 24V AVAILABLE ON EXISTING FURNACE.
-
Page 24: Installation Instructions
15. INSTALLATION INSTRUCTIONS 15.1. LINK BOARD INSTALLATION AND CONNECTION The following installation instructions are identical whether the add-on controls are located on the left or on the right of the add-on. The most accessible side is preferred to facilitate the connection of auxiliary heating sources or for servicing. -
Page 25: Touchscreen Installation And Connection
15.2. TOUCHSCREEN INSTALLATION AND CONNECTION The touch screen is used to operate the system. It must be installed on the support provided at the back of the add-on, on the same side as the link board housing. Connect link board with the touch screen using the telecommunication wire provided with the user manual. Plug the telecommunication wire in connector labeled LCD and pull it out of the board housing through the top grommet. -
Page 26: Hot Air Plenum Temperature Probe Installation And Connection (Rtd)
15.3. HOT AIR PLENUM TEMPERATURE PROBE INSTALLATION AND CONNECTION (RTD) On the Max Caddy add-on, a RTD has to be installed on the side of the add-on using the support provided with the unit. The RTD is a sensor that reads the temperature inside the hot air plenum. It is critical to the good operation of the add-on. -
Page 27: Servomotor Installation And Connection
15.4. SERVOMOTOR INSTALLATION AND CONNECTION Your Max Caddy add-on is equipped with a servomotor. To install it, simply screw it in place in the two pre-drilled holes in the front of the add-on using two screws as shown below. Once installed, install the chain linking the servomotor with the air inlet damper as shown above. The chain must have a set of 1/8". -
Page 28: Unit Location
15.5. UNIT LOCATION For a safe and quiet operation, the add-on must be leveled in both directions and supported evenly to ensure stability. The add-on must be installed where outside air supply will be sufficient for proper combustion. In airtight houses, it might be necessary to install an outside air inlet (See Section 15.13 - COMBUSTION AIR AND FRESH AIR INTAKE ADAPTER INSTALLATION (OPTIONAL)) The add-on must be positioned so that the connector is as short as possible. -
Page 29: Minimum Clearances To Combustibles Materials For Hot Air Plenum
MINIMUM CLEARANCES 12" (305 mm) 8" (203 mm) 18" (457 mm) 1 1/2" (38 mm) 6" (152 mm) 6" (152 mm) 1" (25mm) 79" (2 007 mm) 72" (1 829 mm) 24" (610 mm) HEAT SHIELD 15.8. MINIMUM CLEARANCES TO COMBUSTIBLES MATERIALS FOR HOT AIR PLENUM Plenums installed on the add-on must be made of metal in accordance with CSA B365. -
Page 30: Floor Protection
15.9. FLOOR PROTECTION If the floor is made of non-combustible material, no floor protector is required. If the floor is made of combustible material, a non- combustible material floor protector is required (see table below). FLOOR PROTECTION* CANADA 18" (457 mm) From door opening 8"... -
Page 31: Flue And Barometric Draft Control Connection
15.10. FLUE AND BAROMETRIC DRAFT CONTROL CONNECTION Before connecting the stove pipe, make sure you have removed any accessory from the flue pipe such as the scraper, shovel, and the poker. The flue outlet on the Max Caddy add-on is 6" in diameter must be installed with a 6" chimney approved for use with wood burning heating appliances (2100°F). -
Page 32: Electrical Connections
15.11. ELECTRICAL CONNECTIONS The following instructions do not replace those of the local code. Installation and verification of this appliance must be done by a qualified service man. All wiring from the service panel to the heating unit must comply with the electrical code in force and all local regulations. -
Page 33: Hot Air Plenum
NOTE: It is recommended to install an outside air inlet with a diameter of at least 4" in the room where the heating appliance is installed (see drawing below). Insulated pipe It is preferable to choose a wall which is not (full length) exposed to dominant winds, depending on the conditions surrounding your house. -
Page 34: Thermostat Installation
16. THERMOSTAT INSTALLATION 16.1. WOOD ADD-ON ONLY The add-on must be connected to a thermostat. You can use the one provided with the unit or use one that is already installed in your home. The thermostat must be installed on an inside wall and located where it is not likely to be affected by the draft coming from an air outlet. -
Page 35: Installation Of A Domestic Water Pre-Heating System
16.2. INSTALLATION OF A DOMESTIC WATER PRE-HEATING SYSTEM A water heating loop option is also available to pre-heat domestic water using the energy produced by the Max Caddy wood add-on. This water loop kit will be inserted between the wood combustion chamber and the heat exchangers. When heating with wood, the heat from the add-on will pre-heat domestic water that will be stored in a feed tank before entering your existing water heater. -
Page 36: Icons Description
Home page – Add-on in function Home page – Add-on off 17.4. ICONS DESCRIPTION Icons Description Icons Description Settings Wood heating Green: Heating mode Yellow: Auxiliary heating mode Temperature in the Possible states of the add-on: hot air plenum HEAT: When the word HEAT is green, the add-on is in heating mode. If the add-on is waiting for a demand for heating, the word HEAT is written in yellow. -
Page 37: Wood Heating
17.7. WOOD HEATING 17.8. LIGHTING 1. Open the add-on door Note: If there is already a bed of coals in the firebox, go to pre-heating. 2. Place one or two dry kindlings at the front of the add-on. 3. Place newspaper strips on top of the kindlings. 4. -
Page 38: Wood As Heating Fuel
17.12. WOOD AS HEATING FUEL WARNING NEVER BURN WASTE, GASOLINE, NAPHTA, MOTOR OIL OR ANY OTHER SIMILAR PRODUCT. We recommend that you burn dry hard wood only. There are two important factors to be considered when choosing a type of wood: the moisture content and the wood density. -
Page 39: Maintenance
18. MAINTENANCE 18.1. MAINTENANCE OF THE EXCHANGERS Heat exchangers must be cleaned thoroughly at the end of every heating season. During summer, the air in basements is damper and with minimal air circulation within the add-on, it can mix with creosote and/or sooth deposits in the exchangers to form an acid that could accelerate the corrosion process and induce premature decay of the steel. -
Page 40: Chimney Maintenance
19. REPLACEMENT PARTS Your PSG add-on is designed to burn clean and requires little maintenance. It is recommended to conduct a visual inspection at least once a month to uncover any damage to the unit. Any defect must be repaired without delay using genuine PSG replacement parts. -
Page 41: Door Glass
• If you have to change your door glass, you must use Pyroceram 5/32" (4mm) thick. Use genuine parts sold by a PSG authorized dealer. • To replace the glass, remove the screws that hold the glass retainers in place. Removed these retainers and replace the defective glass;... -
Page 42: Validating Status Of A Component
20.1. VALIDATING STATUS OF A COMPONENT When using your add-on, you can validate at any time, the status of any of the following components: • Air damper • Temperature probe (RTD) • Hot water system 20.2. AIR DAMPER AND HOT WATER To check the status of the air damper or hot water, go to the main menu under "TROUBLESHOOT LINK"... -
Page 43: Unit Overheat
20.5. UNIT OVERHEAT The temperature probe (RTD) is disconnected or defective: If the displayed plenum temperature on the touch screen is 0 ̊ F or 1140 ̊ F , the temperature probe is either disconnected or defective. Check the probe connection (see Section 15.3 - HOT AIR PLENUM TEMPERATURE PROBE INSTALLATION AND CONNECTION (RTD) or replace if necessary. -
Page 44: Communication Error
20.7. COMMUNICATION ERROR Communication error: The information from the touch screen cannot be read by the link board. It is possible that the telecommunication wire is not plugged in. Make sure each end of the wire makes good contact in the connector. It is also possible that the wire is damaged. -
Page 45: Exploded View And Part List
21. EXPLODED VIEW AND PART LIST... - Page 50 IMPORTANT: THIS IS DATED INFORMATION. When requesting service or replacement parts for your add-on, please provide the model number and the serial number. We reserve the right to change parts due to technology upgrade or availability. Contact an authorized dealer to obtain any of these parts. Never use substitute materials. Use of non- approved parts can result in poor performance and safety hazards.
- Page 51 5" FRESH AIR INTAKE ADAPTER PA08550 HOT WATER LOOP KIT FOR PRE-HEATING OF DOMESTIC WATER SE45833 MAX CADDY ADD-ON INSTRUCTION MANUAL KIT AC05961 PSG GREY 424C SPRAY PAINT AC05963 METALLIC BLACK STOVE PAINT - 85 g (3oz) AEROSOL PL48170 HEAT EXCHANGER SCRAPER PL48171...
- Page 52 Given the importance of the installation, PSG recommends that it is carried out by a professional certified in the Building Code so that the add-on delivers its full potential. This is why PSG offers an additional warranty that covers the cost of labor if your add-on has been purchased through an authorized PSG dealer.
-
Page 53: Psg Limited Lifetime Warranty (Regular)
Firebrick *Pictures required Shall your unit or a component be defective, contact immediately your PSG dealer. Prior to your call make sure you have the following information necessary to your warranty claim treatment: • Your name, address and telephone number;... -
Page 54: Psg Limited Lifetime Warranty (Privilege)
1 year ceramic fibre blankets. Firebrick *Pictures required Shall your unit or a components be defective, contact immediately your PSG dealer. Prior to your call make sure you have the following information necessary to your warranty claim treatment: • •...
Need help?
Do you have a question about the CADDY MAX CADDY WOOD ADD-ON PF01102 and is the answer not in the manual?
Questions and answers