Table of Contents
Advertisement
Quick Links
PSG
1700, Léon-Harmel
Québec (Québec)
G1N 4R9
Installation and Operating Instructions
for models MINI-CADDY wood furnaces and
wood/electric combination
READ THE MANUAL THOROUGHLY
BEFORE OPERATING THE FURNACE
FURNACE MODELS INCLUDED IN THIS MANUAL
MINI-CADDY WOOD AND WOOD/ELECTRIC COMBINATION
11.25 Kw
Read these instructions carefully before installing
and operating your furnace.
CONGRATULATIONS!
You have purchased one of the finest wood
or wood/electric furnaces available on the market.
We are confident that your furnace will provide years of comfort and safe
operation.
Please keep this document
45154
Advertisement
Table of Contents

Related Manuals for PSG MINI-CADDY


Summary of Contents for PSG MINI-CADDY
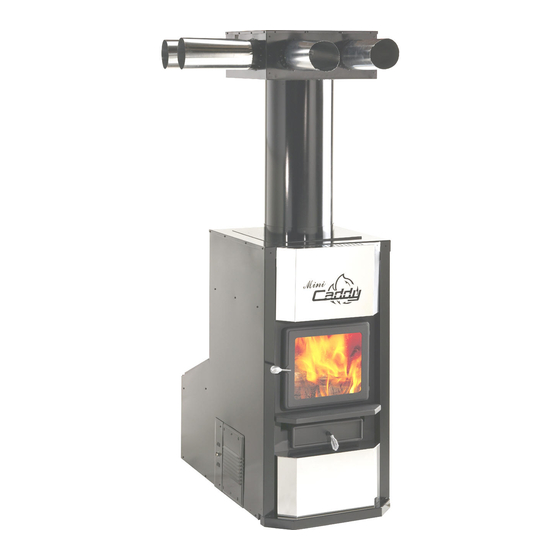
- Page 1 1700, Léon-Harmel Québec (Québec) G1N 4R9 Installation and Operating Instructions for models MINI-CADDY wood furnaces and wood/electric combination READ THE MANUAL THOROUGHLY BEFORE OPERATING THE FURNACE FURNACE MODELS INCLUDED IN THIS MANUAL MINI-CADDY WOOD AND WOOD/ELECTRIC COMBINATION 11.25 Kw Read these instructions carefully before installing and operating your furnace.
-
Page 2: Table Of Contents
F- ELECTRICAL CONNECTION ......................12 MINI-CADDY WOOD ONLY ........................12 MINI-CADDY WOOD/ELECTRIC ......................12 G- ELECTRIC ELEMENT (MINI-CADDY WOOD / ELECTRIC) ............13 INSIDE VIEW OF THE ELECTRIC ELEMENT ..............13 H- THERMOSTAT ..........................14 ... - Page 3 GASKET ..............................22 7. WIRING DIAGRAM ..........................23 MINI CADDY WOOD ONLY ......................... 23 8. MINI-CADDY TECHNICAL DATA ....................24 GENERAL TECHNICAL DATA ......................24 TECHNICAL DATA – ELECTRIC MODE .................... 24 9. DUCTS AND DAMPERS DIMENSIONS (EXAMPLES OF CALCULATION) ......25 ...
-
Page 4: Introduction
1. CHIMNEY AND DRAFT This furnace must be connected to a chimney certified for wood burning heating appliances; a 6 inch inside diameter chimney and connector is recommended for the Mini-Caddy. Never install a manual damper. If a barometric control must installed, it must be adjusted so that the maximum draft measured at the furnace outlet does not exceed -0.06 in. -
Page 5: Odour From The Paint
W A R N I N G -THE ASH DRAWER AND EXCHANGERS ACCESS PANEL GET VERY HOT. -DO NOT MANIPULATE WITH BARE HANDS. ODOUR FROM THE PAINT It is normal that a smoke odour emanate from the unit when you first light it. It is recommended to burn it at high rate and ventilate the building until the odour resorbs. -
Page 6: Smoke Detector
SMOKE DETECTOR We highly recommend the use of a smoke detector. It should be installed at least 15 feet (4,57 m) from the appliance in order to prevent undue triggering of the detector when reloading. DOOR GLASS To maintain a clean and safe installation, do not build your fire too close to the glass or allow the fire logs to lean on the glass. -
Page 7: Ash Drawer
ASH DRAWER Your appliance is equipped with an ash drawer to collect ashes produced by the combustion of wood. This drawer must not be left open during combustion as this may cause over firing and serious damages to the furnace. The drawer must be cleaned regularly. -
Page 8: B- Clearances To Combustible Materials
B- CLEARANCES TO COMBUSTIBLE MATERIALS N.B. This appliance must be installed according to the instructions on the unit’s certification plate. MINIMUM CLEARANCES TO COMBUSTIBLE MATERIALS FOR MINI-CADDY FURNACE CEILING 1" 72" 3" 18" HOT AIR PLENUM 8" MIN. FIGURE BELOW 45°... -
Page 9: C- Pipe Connector
C- PIPE CONNECTOR The Mini-Caddy must be connected to a 6” chimney. If draft exceed –0.06 w.c., you must install a barometric control. The barometric control must be adjusted so that the maximum draft measured at the furnace outlet is limited to -0.06 in. -
Page 10: D- Damper
D- DAMPER The barometric control must be adjusted so that the maximum draft measured at the furnace outlet is limited to - 0.06 in. w.c. Please note that a draft higher than -0.06 in. H O could result in an uncontrollable fire. On the other hand, the minimum draft to be respected is -0.04 in. -
Page 11: Parallel Installation
PARALLEL INSTALLATION The installation of this furnace with another furnace using the same ductwork is not allowed in Canada. This type of installation is only allowed in the United States. Ideally, the maximum BTU input of the existing oil, gas, or electric furnace should be equal or higher than the maximum BTU input of the wood furnace. -
Page 12: F- Electrical Connection
F- ELECTRICAL CONNECTION MINI-CADDY WOOD ONLY To install the Mini-Caddy in wood only configuration, the use of the PSG “fan limit kit for wood only furnaces” option (PA00500) is required and it has to be ordered separately. The combined limit control is part of that wiring kit and it must be mounted near the flue outlet, where holes are set for the control’s sensor and mounting screws. -
Page 13: G- Electric Element (Mini-Caddy Wood / Electric)
G- ELECTRIC ELEMENT (MINI-CADDY WOOD / ELECTRIC) The WOOD / ELECTRIC combined model is installed with two thermostats: one thermostat controls the electric heating, the other one controls the wood heating. With this system, the electric heating has priority over the wood heating. -
Page 14: H- Thermostat
OUTSIDE VIEW OF THE ELECTRIC ELEMENT H- THERMOSTAT The thermostat must be installed on an inside wall in a location where it is not likely to be affected by the draft coming from an air outlet. It must be installed at a minimum of 55 inches above the floor. N.B. -
Page 15: Operating Instructions
4. OPERATING INSTRUCTIONS CONTROL SYSTEM On the wood only furnaces, the thermostat controls the air inlet damper. When the thermostat calls for heat, the damper opens and the fire stirs up. When the furnace gets hot enough, the combined limit control activates the blower motor at the speed selected for heating. -
Page 16: Heating
HEATING 1. When loading the furnace, lower the kindled pieces of wood and place them at the center of the combustion chamber before adding new logs. 2. Do not overload. Air must circulate freely in the upper part of the combustion chamber in order to obtain an efficient operation of the appliance. -
Page 17: Chimney Fires
Whenever a substantial amount of smoke is noticed in the room, you must: 1. Open doors and windows. 2. Make sure the furnace door is closed as well as the damper (if necessary, lower the thermostat starting point or unhook the damper chain, and close the barometric draft control manually). 3. -
Page 18: Maintenance
5. MAINTENANCE MAINTENANCE OF THE EXCHANGERS The evacuation pipe and the exchangers should be inspected regularly during the burning season. Easy access is provided (without the use of tools): unscrew the wing nut on the exchangers access door. See pictures below. Before cleaning the three exchanger pipes, move the upper plate of the combustion chamber forward (see drawing on next page). -
Page 19: Mini-Caddy
MINI-CADDY SECTION VIEW SCRAPER DIRT FLUE OUTLET BAFFLE BOARD MOVED FOWARD FOR CLEANING REAR BRICK PURPOSE ONLY... -
Page 20: Maintenance Of The Blower Motor
Filters dimensions 15” x 20” x 1” filters (Mini-Caddy) #21044 DOOR GASKET MAINTENANCE It is important to maintain the door gasket in good condition. With time, the gasket might sag and if a door... -
Page 21: Replacement Parts
6. REPLACEMENT PARTS Your PSG furnace is designed to burn clean and requires little maintenance. It’s recommended to conduct a visual inspection at least once a month to uncover any damage to the unit. Necessary repairs must be done as soon as possible with the original parts. -
Page 22: Door Glass
• If you have to change your door glass, you must use Pyroceram 3/16”(5mm) thick. Use genuine parts sold by a PSG authorized dealer. • To replace the glass, removed screws that hold the glass retainers in place. Removed these retainers and replace glass. -
Page 23: Wiring Diagram
7. WIRING DIAGRAM MINI CADDY WOOD ONLY HONEYWELL L6064 LIMIT ON 150°F OFF 110°F LINE LOAD LIMIT 250°F HIGH LINE THERMOSTAT SERVO-MOTOR 24 V.A.C. 24 V.A.C. JUNCTION BOX BLUE BLACK BLOWER 120 V.A.C. BLACK WHITE 4 SPEED MOTOR DIRECT-DRIVE TERMINAL WHITE 120 V.A.C. -
Page 24: Mini-Caddy Technical Data
8. MINI-CADDY TECHNICAL DATA MINI-CADDY "E" "F" 43 5/8” 23 3/8” 45 5/8” 13 3/8” x 22 3/8” "C" "D" 12” "G" 12” 40 1/4” * 6” TUYAU 403 Lbs POIDS "B" "A" * Reducer required GENERAL TECHNICAL DATA TEMP... -
Page 25: Ducts And Dampers Dimensions (Examples Of Calculation)
9. DUCTS AND DAMPERS DIMENSIONS (EXAMPLES OF CALCULATION) SIMPLIFIED METHOD WARM AIR SYSTEM INSTALLATION DISTRIBUTION SYSTEM HOUSE DIMENSIONS Example: 28 x 40 bungalow: 1,120 sq. ft. Ducts size (heat) 28 x 40 x 8: 8,960 cu. ft. x 1.8 Ch. air/hr: 16,128 Btu 4 inch outlet reduce by 1”... -
Page 26: Mini-Caddy Bricks Layout
10. MINI-CADDY BRICKS LAYOUT ITEM PART # DESCRIPTION 21212 Vermiculite baffle board 24089 Ash grate 29001 BRICK 8" X 4" X 1 1/4" 29011 BRICK 9" X 4" X 1 1/4" 29020 BRICK 9" X 4 1/2" X 1 1/4"... -
Page 27: Trouble Shooting
11. TROUBLE SHOOTING PROBLEM CAUSES SOLUTIONS Heating inefficient during the first Improper adjustment of the Adjust the damper, minimize the combustions. Lack of draft. barometric damper (opened too smoke pipe length and use 45 wide). Chimney flue restriction (too elbows. long. -
Page 28: Psg Limited Lifetime Warranty
1 year and ceramic fibre blankets. Firebrick *Pictures required Shall your unit or a components be defective, contact immediately your PSG dealer. Prior to your call make sure you have the following information necessary to your warranty claim treatment: • •...
Need help?
Do you have a question about the MINI-CADDY and is the answer not in the manual?
Questions and answers