Table of Contents
Advertisement
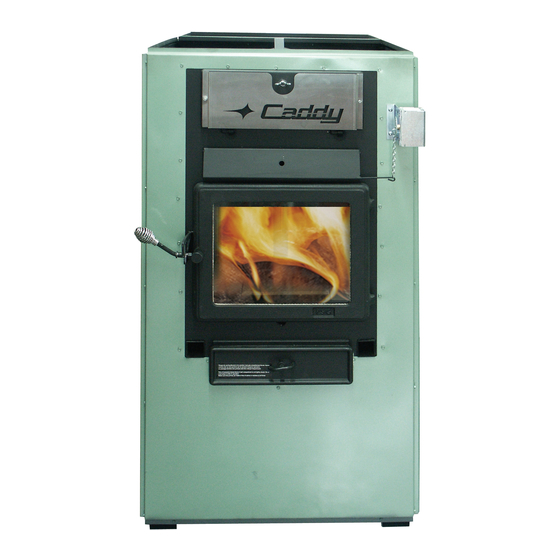
PSG
1700, Léon-Harmel
Québec (Québec)
G1N 4R9
Installation and Operating Instructions
for the CADDY ADD-ON wood burning
furnace
READ THE MANUAL THOROUGHLY
BEFORE OPERATING THE FURNACE
CONGRATULATIONS!
You have purchased one of the finest wood
add-on furnaces available on the market.
Your furnace will provide years of satisfaction and safe operation.
Please keep this document
Certified for Canada and the United States by
Omni-Test Laboratories.
Revised : October 21st, 2009
45215
.
Advertisement
Table of Contents

Related Manuals for PSG CADDY


Summary of Contents for PSG CADDY
- Page 1 1700, Léon-Harmel Québec (Québec) G1N 4R9 Installation and Operating Instructions for the CADDY ADD-ON wood burning furnace READ THE MANUAL THOROUGHLY BEFORE OPERATING THE FURNACE CONGRATULATIONS! You have purchased one of the finest wood add-on furnaces available on the market.
-
Page 2: Table Of Contents
3. APPLIANCE INSTALLATION ......................5 UNIT LOCATION ............................5 MATCHING THE TRANSFER DUCT BETWEEN THE TWO HEAT GENERATORS ......5 MINIMUM CLEARANCES TO COMBUSTIBLE MATERIALS FOR CADDY ADD-ON ..... 7 PIPE CONNECTOR AND DAMPER ......................8 DAMPER ..............................9 COMBUSTION AIR ........................... 9 ELECTRICAL CONNECTIONS ...................... -
Page 3: Introduction
(see General Technical data, static pressure). The wood burning Caddy Add-on furnace is approved for in-line connection to an existing oil furnace with a firing rate of 0.8 G.P.H. (US) to 1.2 G.P.H. (US) or any gas or electric furnace with comparable heat output. -
Page 4: Odour From The Paint
WARNING -THE ASH DRAWER AND EXCHANGERS ACCESS PANEL GET VERY HOT, DO NOT HANDLE WITH BARE HANDS. ODOUR FROM THE PAINT The furnace will release some smoke and odors when first fired; this is normal and will stop when the paint has finished curing. Burn the unit at high rate with windows opened until the smoke and smell is vented out. -
Page 5: Smoke Detector
Do not operate your furnace with a broken glass, as this could seriously damage your appliance. You can purchase a replacement glass from your PSG dealer. ASH DRAWER Your appliance is equipped with an ash drawer to collect ashes produced by the combustion of wood. -
Page 6: Appliance Installation
3. APPLIANCE INSTALLATION Before installation, please read the instructions carefully and make sure you understand them: The furnace must be installed in a state of the art manner. Installation must be made in accordance with the CSA B.365(Canada) and NFPA 211(USA) standards concerning the normalization of solid fuel units. - Page 7 You must determine the air flow through the existing furnace before installing the Caddy add-on: 1. Run the oil furnace for at least 15 minutes, or until it reaches its maximum temperature. 2. With a thermometer, measure the temperature of the cold air entering the furnace and that of the air exiting the furnace in the hot air plenum.
-
Page 8: Minimum Clearances To Combustible Materials For Caddy Add-On
MINIMUM CLEARANCES TO COMBUSTIBLE MATERIALS FOR CADDY ADD-ON N.B. This appliance must be installed in accordance with the instructions on the certification plate applied on the unit. CEILING 1" 72" 6" 18" HOT AIR 12" MIN. PLENUM FIGURE BELOW STATIC PRESSURE CHECK POINT MIN. -
Page 9: Pipe Connector And Damper
PIPE CONNECTOR AND DAMPER Before proceeding to connection, remove all accessories, such as scraper, shovel and poker from the evacuation pipe of the furnace. This furnace must be connected to a duct system and a chimney that are in good condition; the use of separate chimneys is recommended. -
Page 10: Damper
2. A minimum upward slope of 1/4 inch per horizontal foot must be respected. DAMPER The barometric damper must be adjusted so that the maximum draft measured at the furnace outlet is limited to -0.06 in. w.c.. However, the minimum draft to be respected at all times is -0.04 in. -
Page 11: Electrical Connections
ELECTRICAL CONNECTIONS The following instructions do not replace those of the local code. CADDY ADD-ON Installation and verification of this appliance must be done by a qualified service man. Mount the fan limit control on the side of the furnace opposed to the transfer duct between the two heat generators. -
Page 12: Fan Control
FAN CONTROL The fan control settings vary depending on the type of installation. The “fan off” setting is preset at 110 F at the factory. This setting should provide a proper operation in most installations. The “fan on” setting is factory set at 150 It is preferable for a prolonged operation of the blower that the “fan off”... -
Page 13: Lighting
LIGHTING NEVER USE CHEMICALS OR FLAMMABLE LIQUIDS TO LIGHT THE FURNACE 1. Open the door Note: If there already is a good ember bed in the furnace, go to step b) Pre-heating. 2. Remove the steel plate on the ash grate and empty the ashes in the ash drawer. 3. -
Page 14: Early Signs Of Overfired Furnace
PROCEDURE TO OPEN THE LOADING DOOR TO MINIMIZE THE RISK OF SMOKE SPILLAGE, OPEN THE DOOR 1” AND WAIT ABOUT 10 SECONDS BEFORE OPENING COMPLETELY. THE PURPOSE IS TO STABILIZE THE PRESSURE INSIDE THE FURNACE EARLY SIGNS OF OVERFIRED FURNACE 1. -
Page 15: Chimney Fires
CARBON MONOXYDE IS A LETHAL GAS (ODOURLESS AND COLOURLESS), WHICH YOU MUST BEWARE OF. CHIMNEY FIRES This might occur when the fire gets extremely hot and may be triggered by the burning of cardboard, branches or small pieces of wood when the flame ignites the creosote residues accumulated in the evacuation system. -
Page 16: Maintenance
5. MAINTENANCE MAINTENANCE OF THE EXCHANGERS The smoke pipe and the exchangers should be inspected regularly during the heating season. Easy access is provided (without the use of tools): simply unscrew the wing nut on the exchangers’ access panel (see pictures below). Wing nut Insulation Exchangers’... -
Page 17: Chimney Maintenance
CHIMNEY MAINTENANCE One of the most efficient methods to sweep the chimney is using a hard brush. Brush downwards so soot and creosote residues will come off the inner surface and fall at the bottom of the chimney where they may be easily removed. The chimney must be checked regularly and if creosote has accumulated, it must be removed to prevent chimney fires. -
Page 18: Wiring Diagram Caddy Add-On
6. Wiring diagram Caddy Add-On HONEYWELL L6064 LIMIT ON 150°F OFF 110°F LINE LOAD LIMIT 250°F EXISTING UNIT THERMOSTAT HIGH LINE DAMPER MOTOR FAN MOTOR(EXISTING UNIT) WOOD THERMOSTAT BURNER RELAY BROWN BLACK INTERLOCK... -
Page 19: Technical Data Caddy Add-On Furnace
7. TECHNICAL DATA CADDY ADD-ON FURNACE CADDY ADD-ON 29 1/2"(750mm) 25 1/2"(648mm) 47 1/4"(1200mm) 28 1/2"(724mm) 24 1/2"(622mm) 44"(1118mm) 22 1/8”(562mm) 14 3/8”(365mm) FLUE 6"(152mm) WEIGHT 445Lb (202kg) TECHNICAL DATA MODELE TEMP. BTU/HR STATIC PRESSURE VARIABLE (BOIS) MIN. MAX. °C(°F) -
Page 20: Ducts And Dampers Dimensions
8. DUCTS AND DAMPERS DIMENSIONS SIMPLIFIED METHOD WARM AIR SYSTEM INSTALLATION DISTRIBUTION SYSTEM HOUSE DIMENSIONS Ducts size (heat) Example: 28 x 40 bungalow: 1,120 sq. ft. 4 inch outlet reduce by 1” 28 x 40 x 8: 8,960 cu. ft. x 1.8 Ch. air/hr: 16,128 Btu 5 inch outlet reduce by 2”... -
Page 21: Caddy Add-On Bricks Layout
9. CADDY ADD-ON BRICKS LAYOUT WARNING: INSTALL THE CERAMIC BLANKET PANEL BEFORE PUTTING BRICKS UP IN THE COMBUSTION CHAMBER 1 1 4 " 4 1 2 " 3 1 2 " 3 5 16 " 4 1 2 " 9"... -
Page 22: Appendix 1
10. APPENDIX 1 INSTALLATION OF ADD-ON CADDY OPTION #1 CADDY EXISTING ADD-ON FURNACE OPTION #2 DIVIDER CADDY EXISTING ADD-ON FURNACE * MINIMUM DUCT SIZE 320 SQUARE INCHES ** R = MINIMUM RADIUS 6 INCHES... -
Page 23: Troubleshooting
11. TROUBLESHOOTING PROBLEMS CAUSES SOLUTIONS 1. Sudden drop in heating performance Ash build-up in front of the lower air Unclog the air inlet and clean the after normal heating sequences. inlet that prevents the combustion air exchangers and flue pipe. from entering the combustion chamber, sooting up the exchangers and flue. -
Page 24: Psg Limited Lifetime Warranty
1 year and ceramic fibre blankets. Firebrick *Pictures required Shall your unit or a components be defective, contact immediately your PSG dealer. Prior to your call make sure you have the following information necessary to your warranty claim treatment: • •...
Need help?
Do you have a question about the CADDY and is the answer not in the manual?
Questions and answers