
Related Manuals for Advanced Energy THYRO-AX


Summary of Contents for Advanced Energy THYRO-AX
- Page 1 THYRO-AX THYRISTOR-LEISTUNGSSTELLER / THYRISTOR POWER CONTROLLER 8000030962 DE/EN - V5 DEZEMBER 2014 / DECEMBER 2014...
-
Page 2: Table Of Contents
1.5 Lieferumfang 6.1 Betriebsarten 1.6 Lagerung 6.1.1 Vollschwingungstakt TAKT 1.7 Montage 6.1.2 Phasenanschnitt VAR (nur Thyro-AX 1A und Thyro-AX 3A) 1.8 Anschluss 6.1.3 SST Rampe in der Betriebsart TAKT 1.9 Wartung, Service, Störung 6.1.4 Halbschwingungstakt QTM (nur Thyro-AX 1A) 1.10 Wechsel der Halbleitersicherung 6.1.5 Schalterbetrieb SWITCH... -
Page 3: Abbildungs- Und Tabellenverzeichnis
Anschlussplan Thyro-AX 1A Abb. 2 Anschlussplan Thyro-AX 2A 9. Lastüberwachung Abb. 3 Anschlussplan Thyro-AX 3A mit Last in Stern- oder Dreieckschaltung ohne N Abb. 4 Anschlussplan Thyro-AX 3A mit Last in Sternschaltung mit N 10. Multi I/O Abb. 5 Anschlussplan Thyro-AX 3A mit Last in offener Dreieckschaltung Abb. -
Page 4: Abkürzungen
ABKÜRZUNGEN BESONDERE MERKMALE AN1 - Anschnitt 1. Halbwelle • Eingebaute Halbleitersicherung SST - Soft-Start-Zeit • Typenreihe 230-600V~, 16-1500A, 1-phasig, 2-phasig und 3-phasig • Lastspannung ab 24V~ SYT - Synchrotakt • Vollgrafikfähiges Touch-Display T0 - Taktperiodendauer • Elektronikversorgung mit 230V~/110V~ (85V - 265V zulässig) TS - Einschaltzeit •... -
Page 5: Sicherheitshinweise
Montage, Installation und der ersten Inbetriebnahme des die Verwendung von nicht durch Advanced Energy zugelassenen Thyro-AX von den Personen sorgfältig zu lesen, die mit bzw. an dem Ersatz- und Austauschteilen, sowie jede andere Verwendung, ist zu Thyro-AX arbeiten. Diese Betriebsanleitung ist Bestandteil des Thyro-AX. -
Page 6: Lieferumfang
1.9 WARTUNG, SERVICE, STÖRUNG Insbesondere dürfen werksseitig eingestellte Parameter nicht so ver- Die nachstehend verwendeten Symbole sind im Kapitel Sicherheitsbe- stellt werden, dass der Thyro-AX überlastet wird. stimmungen erklärt. Um Personen- und Sachschäden zu vermeiden, muss der Anwender 1.5 LIEFERUMFANG folgende Punkte vor sämtlichen Arbeiten beachten:... -
Page 7: Wechsel Der Halbleitersicherung
ACHTUNG 2. SICHERHEITSBESTIMMUNGEN Verschiedene Leistungsteil-Bauteile sind funktionsbedingt mit exakten Drehmomenten verschraubt. Aus Sicherheitsgründen sind Leistungsteil- Reparaturen bei Advanced Energy Industries GmbH durchzuführen. Reparaturen durch Personal des Anwenders bedürfen einer schriftlichen Bewilligung des Herstellers. 2.1 WICHTIGE ANWEISUNGEN UND ERLÄUTERUNGEN Vorschriftsmäßiges Bedienen und Instandhalten, sowie das Einhalten 1.10 WECHSEL DER HALBLEITERSICHERUNG... -
Page 8: Allgemeine Gefahrenhinweise
Die Warnhinweise können noch durch ein spezielles Gefahrenzeichen GEFAHR (z. B. „Elektrischer Strom“ oder „Heißes Gerät“) ergänzt werden, z. B. GEFAHREN BEI INSTALLATION Nichtbeachtung der Sicherheitsbestimmungen in den Betriebsanlei- bei Gefahr durch elektrischen Strom oder tungen der eingesetzten Leistungssteller führt zur Verletzungsgefahr/ Beschädigungsgefahr des Gerätes bzw. -
Page 9: Qualifiziertes Personal
2.3 QUALIFIZIERTES PERSONAL die Verwendung nicht von der Advanced Energy zugelassener Ersatz- und Austauschteile, sowie jede andere Verwendung des Thyro-AX, sind Der Thyro-AX darf nur von Fachkräften verwendet werden, die die nicht gestattet. gültigen Sicherheits- und Errichtungsvorschriften bzgl. • Transport Diese Betriebsanleitung enthält alle Informationen, die für Fachkräf-... -
Page 10: Hinweise Zur Vorliegenden Betriebsanleitung
3.3 HANDHABUNG Thyro-AX 2A Thyristorsteller mit 2-phasigem Leistungsteil, geeignet Diese Betriebsanleitung für den Thyro-AX ist so aufgebaut, dass alle für für symmetrische Lasten im 3-phasigen Betrieb in der die Inbetriebnahme, Wartung und Instandsetzung notwendigen Arbeiten Drehstromsparschaltung (Anschluss an L1 und L3). -
Page 11: Gewährleistungsverlust
4.1 TECHNISCHE FRAGEN gen können nicht berücksichtigt werden. Bei technischen Fragen, zu den in dieser Betriebsanleitung behandelten Advanced Energy wird sämtliche von Advanced Energy und seinen Themen, wenden Sie sich bitte an unser Team für Leistungssteller: Händlern eingegangenen etwaigen Verpflichtungen, wie Gewährleis- Tel. -
Page 12: Inbetriebnahme
3. Last an Anschlussklemmen anschließen (T1 + T3 bei Thyro-AX 2A, 5.1.5 STEUERSIGNALE T1 + T2 + T3 bei Thyro-AX 3A Geräten oder nur T1 bei Thyro-AX 1A) Die Steuersignale beeinflussen die Funktionsweise des Gerätes. Für 4. Am Trennschalter die Klemmen L1, L2 und L3 anschließen. -
Page 13: Usb-Schnittstelle
.2 Impulssperre .3 Steuermasse .4 Analog-Sollwerteingang 1, max. 10 V, max. 20 mA / Die kurze Leitungsseite (Stecker – Filter, ca. 30cm) ist an den Thyro-AX Multi I/O 4 (In) anzustecken, die längere Seite (Filter – Stecker) ist mit dem USB-An- .5 Steuermasse... -
Page 14: Anschlusspläne
5.1.8 ANSCHLUSSPLÄNE X3 1 2 3 X3 1 2 3 ABB. 1 ANSCHLUSSPLAN Thyro-AX 1A ABB. 2 ANSCHLUSSPLAN Thyro-AX 2A... - Page 15 X3 1 2 3 X3 1 2 3 ABB. 3 ANSCHLUSSPLAN Thyro-AX 3A MIT LAST IN STERN- ODER ABB. 4 ANSCHLUSSPLAN Thyro-AX 3A MIT LAST IN STERNSCHALTUNG DREIECKSCHALTUNG OHNE N MIT N...
-
Page 16: Lastkonfiguration
LoadConf) vorgenommen werden. Für eine dauerhafte Nutzung muss die Änderung im Gerät gespeichert werden. X3 1 2 3 Settings -> Hardware -> LoadConf -> Stern mit N (nur Thyro-AX 3A Version) ABB. 5 ANSCHLUSSPLAN Thyro-AX 3A MIT LAST IN OFFENER... -
Page 17: Berührungsschutz Ip20
Spannungsführende Teile. Die Installation darf nur im spannungslosen Zustand durchgeführt werden. Der Thyro-AX ist entsprechend der Schutzart IP20 ausgelegt. Um den Schutz für den Betrieb zu gewährleisten, ist die ordnungsgemäße Befestigung des beigelegten Berührungsschutzes an den Anschluss- öffnungen notwendig. Die in den folgenden Abbildungen gezeigte Anbringung der Berührungsschutzkappen, gilt in gleicher Weise für die... - Page 18 Für die Geräte 130 A/170 A/240 A/280 A/350 A gilt: Bei nicht verwendeten Anschlüssen: • Blendklappe an den nicht verwendeten Anschlüssen in die Öffnung einhaken Bei verwendeten Anschlüssen (Kabel ist angeschraubt): • Berührungsschutzkappe entsprechend der in der Abbildung ange- zeigten Pfeilrichtungen am Gerät anbringen. •...
- Page 19 Für die Geräte 1000 A/1400 A/1500 A gilt: Um das Gerät anzuschließen, ist die Abdeckung oben und/oder die Abdeckung unten als auch die Frontabdeckung vorher abzuschrauben. Die kundenseitig verwendeten Anschlüsse sind an die Kupfer-Schienen des Gerätes anzuschließen. Danach sind, mit einem Seitenschneider, die entsprechenden Bereiche um die Kupfer-Schienen-Anschlüsse in den Abdeckungen durch freischneiden der Perforation auszuschneiden.
-
Page 20: Funktionsbeschreibung
6. FUNKTIONSBESCHREIBUNG Diese können durch Schaltungsvarianten verringert bzw. erheblich reduziert werden. Damit der Thyro-AX an die gewünschte Applikation optimal angepasst werden kann, ist er mit einer Vielzahl von Funktionen ausgestattet. 6.1.3. SST RAMPE IN DER BETRIEBSART TAKT Nach dem Einschalten der Leistungsversorgung am Leistungssteller (oder einem Reset bzw. -
Page 21: Sollwertverarbeitung
6.2 SOLLWERTVERARBEITUNG Der Leistungssteller Thyro-AX verfügt über vier Sollwerteingänge. Alle Sollwerteingänge sind galvanisch vom Netz getrennt. Für die analogen Sollwerte 1 und 2 ist eine individuelle Steuerkennlinie über die Parame- ter Steueranfang und Steuerende einstellbar. Alle Sollwerte werden vorzeichengerecht addiert. Voraussetzung für den Einfluss eines Sollwertes auf den Summensollwert ist, dass er durch... -
Page 22: Regelungsarten
Schaltsignal oder einem Summensollwert ab 50% wird eingeschaltet und bei einer Unterschreitung ausgeschaltet. 6.3 REGELUNGSARTEN Der Thyro-AX stellt unterschiedliche Regelungsarten zur Verfügung. Die Regelung hat Einfluss auf die Ausgangsgröße des Leistungsstellers. Vor Inbetriebnahme des Leistungsstellers und Auswahl einer Regelungsart, sollte die Arbeitsweise bzw. Wirkung auf die Anwendung bekannt sein. -
Page 23: Begrenzungen
Takt-Impuls (im TAKT-Betrieb) mit der Soft-Start- Größen. Funktion durchlaufen. Das ist wichtig für Transformatorlast, sofern sie vorher undefiniert abgeschaltet wurde (Remanenz). Bei Thyro-AX 2A bzw. Thyro-AX 3A wird die Impulssperre nur am Master (L1, links) ver- REGELUNGS- LASTWIDERSTAND LASTWIDERSTAND drahtet. -
Page 24: Anzeige Über Analogausgang
U RANGE ÜBERSCHRITTEN RANGE EXCEEDED 6.8 FEHLER-, STATUS- UND MONITORING-MELDUNGEN I-MESSBEREICH I MEASURING I RANGE Der Thyro-AX verfügt intern über Fehler-, Status- und benutzerdefinierte ÜBERSCHRITTEN RANGE EXCEEDED Monitoring-Meldungen. Deren Auswirkungen können mit der Software NEGATIVE LEISTUNG NEGATIVE POWER NEG POWER Thyro-Tool AX konfiguriert werden. -
Page 25: Störmelderelais K1
TAB. 6 MONITORING MAXIMALER MAXIMUM OUTPUT MAXCONTROL STELLWERT ERREICHT REACHED Die Ereignisse, die durch den Thyro-AX erfasst werden, werden auf BUSMODUL SOLLWERT AKTIV BUSMODULE BUS SETP SETPOINT ACTIVE dem Touch-Display in verkürzter Form als Liste dargestellt. Sie gleichen BUSMODUL VERBUNDEN... -
Page 26: Überwachungen
Thyro-Tool AX geändert werden. Leistungssteller und Lastkreis werden auf Störungen überwacht. Meldungen erfolgen über das Touch-Display, per Bus oder durch das Der Thyro-AX ist mit einer Temperaturüberwachung ausgestattet. Wird die vom Leistungssteller abhängige Temperatur überschritten, erfolgt Störmelderelais K1 (siehe Kapitel Störmelderelais K1). -
Page 27: Anzeige- Und Bedienelemente
7. ANZEIGE- UND BEDIENELEMENTE Über das integrierte Touch-Display lassen sich die Parameter des Leistungsstellers ändern. : Aktuelle Auswahl bestätigen und Darüber hinaus zeigt es die aktuellen Werte des Thyro-AX an. zurück zum letzten Bildschirm. VORSICHT : Aktuelle Auswahl verwerfen und Keine spitzen oder scharfkantigen Gegenstände für die Bedienung... -
Page 28: Istwertansicht Und Istwerttaste
Phasenanzahl des Leistungsstellers wird die Istwertansicht für alle Phasen dargestellt. Der zum Schluss erscheinende Bildschirm gibt die Typinformationen des Thyro-AX aus. Die letzte Zeile auf diesem Bild- schirm gibt die EasyStart Kennung aus. Die Istwertansicht kann über Menu -> ActVal erreicht werden. -
Page 29: Easystart
REACHED Mit der Taste Yes werden die Werkseinstellungen des * = kann nicht deaktiviert werden jeweiligen Thyro-AX Typs geladen. Mit No wird auf Basis ** = Werkseinstellung Störmelderelais K1: Ruhestromprinzip der im Thyro-AX eingestellten Daten weitergearbeitet. Wenn EasyStart bereits einmal gestartet wurde, dann... - Page 30 Steuerungsendwert: Lastart, Dynamik der Last: Dieser Bildschirm erscheint nur bei vorher gewählter Rege- Dieser Bildschirm erscheint nur bei vorher gewählter lung, nicht bei Off. Einstellung R-Load. Beim Einstellen einer thermisch Der Steuerungsendwert ist der maximale Wert auf den trägen Last mit Slow (T = 1 s) steigert sich der Abstand geregelt und begrenzt wird.
-
Page 31: Easystart Kennung
USB-Stick zu lesen (wenn Parameter für diesen Gerätetyp auf dem USB-Stick vorhanden sind und das Gerät nicht durch einen Sperrcode 7.6 SPERRCODES FÜR PARAMETRIERUNG UND [s. Kap. 7.6] geschützt ist) oder die aktuellen Parameter des Thyro-AX DIGITALER SOLLWERT 2 zu speichern (auf dem USB-Stick werden ggf. vorhandene Parameter Der Zugang über das Touch-Display kann für die folgenden Inhalte... -
Page 32: Menüstruktur
Hauptbildschirm der aktuellen Werteansicht. Erscheint auch eignet sich zum Parametrieren und Visualisieren von angeschlossenen automatisch nach einer Zeit keiner Änderung von 30 Sek. Geräten vom Typ Thyro-AX. Parameter wie auch Liniendiagramme kön- Event Liste aller zur Zeit aktiven Meldungen (Events). OK hat die nen gespeichert werden. - Page 33 Das Feld mit den Statusmeldungen des Tools kann für eine bessere Übersicht in ein externes Fenster hin und zurück überführt werden. Hierzu ist die längliche Schaltfläche auf der linken Seite des Statusbe- reichs anzuklicken. ABB. 11 STATUSMELDUNGEN MINIMIERT ABB. 12 STATUSMELDUNGEN MAXIMIERT ABB.
-
Page 34: Geräte Und Dateien Verwalten
Angeschlossene Geräte über USB werden direkt, mit dem jeweiligen Ein Doppelklick auf den Eintrag Parameter öffnet das passende Fenster virtuellen COM-Port, Explorer angezeigt. Die Thyro-AX Geräte im Netz- auf der rechten Seite des Tools. werk listen ihre IP-Adresse stattdessen auf. Ein Anschließen ist vor und nach dem Programmstart möglich. - Page 35 ABB. 19 FELD Beim Feld werden Werte mit 2 Stellen hinter dem Dezimaltrennzeichen angezeigt. Für die interne Verwendung können allerdings noch weite- ren Stellen eingegeben werden, da diese für die Berechnung verwen- det werden. Ein Schweben mit dem Mauszeiger über das Feld zeigt den Wert genau und ohne Stellenbegrenzung an.
- Page 36 Die Softwaresynchronisation wird durch die Eingabe dASM-BUSMODUL eines Parameters eingestellt und verursacht eine Verzögerung des ersten Zündens nach dem Einschalten des Thyro-AX. Arbeiten Leistungssteller nach dem Prinzip der Vollschwingungspaket- • Voraussetzung ist die Gleichheit der Taktperiodendauer T , dazu steuerung (TAKT) so kann dieses, bedingt durch eine ungünstige Ver-...
- Page 37 mithilfe eines entsprechenden Schalters/Schützes an die Lastversor- gung eingeschaltet werden. Eine Verzögerungszeit bis zum 1. Einschalten wird eingestellt. Der Zah- lenwert wird in Perioden angegeben. Die Zeit bis zum 1. Einschalten ist bei jedem Leistungssteller dadurch unterschiedlich lang. Dieses Verfahren ermöglicht ein langsames Zuschalten der Belastung, z.
- Page 38 9. LASTÜBERWACHUNG 3. Manuelle Eingabe eines linearen Lastwiderstandswertes über das Display Zur manuellen Eingabe des linearen Lastwiderstandswertes R_Max über das Display gelangt man über die Menüpunkte Settings -> Monitoring. R_Max zeigt bei eingeschalteter Lastüberwachung den arithmetischen Mittelwert der 10 Werte der Widerstandskennlinie an. Bei der Lastbruchüberwachung handelt es sich um die Erkennung im Bei ausgeschalteter Lastüberwachung zeigt R_Max den Wert 0.
- Page 39 Thyro-AX 3A (Last mit gemeinsamem Sternpunkt mit N-Leiter / Offene Thyro-AX 1A, Thyro-AX 2A und Thyro-AX 3A (Last mit getrenntem Dreiecksschaltung) Sternpunkt ohne N-Leiter) ANZAHL WIDERSTANDS- EMPFOHLENE ANZAHL WIDERSTANDS- EMPFOHLENE LAST NENN LAST NENN LAST NENN LAST NENN PARALLELER ÄNDERUNG IM...
- Page 40 Ein- und Ausgängen zu geräteinternen Funktionen bzw. Status- Betriebsarten VAR und TAKT (Zuvor muss informationen. VAR als Betriebsart aktiviert sein). Dieses ermöglicht die Anpassung des Thyro-AX auf sehr spezielle kun- Dig_SW2_UP Digitalen Sollwert 2 mit externem Taster erhöhen. den- und anwendungsspezifische Anforderungen.
- Page 41 11. MAßBILDER Thyro-AX Thyro-AX Thyro-AX 1A...16A Thyro-AX 1A...30A...
- Page 42 X2 X22 X2 X22 Thyro-AX Thyro-AX X2/X22 X2/X22 Thyro-AX 1A...45A, ...60A Thyro-AX 1A...100A...
- Page 43 Thyro-AX 1A...130A, ...170A Thyro-AX 1A...230A, ...240A, ...280A, ...350A...
- Page 44 Thyro-AX 1A...1000A Thyro-AX 1A...1400A, ...1500A...
- Page 45 Thyro-AX Thyro-AX Thyro-AX Thyro-AX Thyro-AX 2A...16A Thyro-AX 2A...30A...
- Page 46 X2 X22 X2 X22 X2 X22 X2 X22 Thyro-AX Thyro-AX Thyro-AX Thyro-AX X2/X22 X2/X22 Thyro-AX 2A...45A, ...60A Thyro-AX 2A...100A...
- Page 47 Thyro-AX 2A...130A, ...170A Thyro-AX 2A...230A, ...240A, ...280A, ...350A...
- Page 48 Thyro-AX 2A...1000A Thyro-AX 2A...1400A, ...1500A...
- Page 49 Thyro-AX Thyro-AX Thyro-AX Thyro-AX Thyro-AX Thyro-AX Thyro-AX 3A...16A Thyro-AX 3A...30A...
- Page 50 X2 X22 X2 X22 X2 X22 X2 X22 X2 X22 X2 X22 Thyro-AX Thyro-AX Thyro-AX Thyro-AX Thyro-AX Thyro-AX X2/X22 X2/X22 Thyro-AX 3A...45A, ...60A Thyro-AX 3A...100A...
- Page 51 Thyro-AX 3A...130A, ...170A Thyro-AX 3A...230A, ...240A, ...280A, ...350A...
- Page 52 Thyro-AX 3A...1000A Thyro-AX 3A...1400A, ...1500A...
- Page 53 BETRIEBSARTEN 12.1 TECHNISCHE DATEN TAKT = Vollschwingungstakt TYPENSPANNUNG H RLP2 VAR = Phasenanschnitt (nur für die Typen Thyro-AX 1A und Thyro-AX 3A) 24V bis 230V + 10% QTM = Schneller Halbschwingungs-Taktbetrieb 24V bis 400V + 10% (nur für den Typ Thyro-AX 1A)
- Page 54 GENAUIGKEIT DER REGELUNG: Spannung ± 1,5%* Im Bereich -15% bis +10% der Typenspannung: Strom ± 1,5%* * bezogen auf den jeweiligen Endwert (auf Basis des digitalen Sollwertes) MESSWERTERFASSUNG Strangleistungen und Strangwiderstände werden gemessen. Damit werden auch unsymmetrische Lasten und Änderungen präzise erfasst. ABB.
- Page 55 1 Pound-Force Inch = 0.112985 Newton Meter ANSCHLUSSDATEN LEISTUNGSANSCHLUSS Erdungsschraube/-mutter für Schutzleiteranschluss am Kühlkörper. Anzugsmomente für elektrische Verbindungen in Nm Die Erdung dient auch EMV-Mitteln (Y - Kondensator 4,7 nF). SCHRAUBEN- MIN.-WERT NENN- MAX.-WERT LEISTUNGS- ERDANSCHLUSS SICHERUNG STEUER- ANSCHLUSS ERDUNGS- LEITERQUER- GEWINDE [NM]...
- Page 56 UL-Applikationen bis +40°C Schalter, VDE 0105 T1 beachten) betrieben werden. Belastungsklasse 100% Dauerbetrieb DIN EN 60 146-1-1 Zulassungen und Konformitäten liegen für Thyro-AX vor: Feuchte Wärme EN 600721-3-3 • Qualitätsstandard nach EN ISO 9001 Überspannungskategorie III DIN EN 50 178 •...
- Page 57 4 x 900 1400 1721 *64/80 285 550 565 33,5 4 x 900 * 50/60 HZ 1500 1761 *64/80 285 550 565 33,5 4 x 900 TAB. 16 Thyro-AX 2A ...H RLP2 * 50/60 HZ TAB. 15 Thyro-AX 1A ...H RLP2...
- Page 58 *64/80 618 550 565 72,0 2 x 1000 1400 1212 1455 5102 *127/180 618 550 565 72,0 4 x 900 1500 1040 5223 *127/180 618 550 565 72,0 4 x 900 * 50/60 HZ TAB. 17 Thyro-AX 3A ...H RLP2...
- Page 59 6.1 Operating modes 1.6 Storage 6.1.1 Full wave mode TAKT 1.7 Assembly 6.1.2 Phase angle firing VAR (only Thyro-AX 1A and 3A) 1.8 Connection 6.1.3 SST ramp in operating mode TAKT 1.9 Maintenance, service, faults 6.1.4 Quick takt mode QTM (only Thyro-AX 1A) 1.10 Replacement of the integrated semiconductor fuse...
-
Page 60: List Of Illustrations And Tables
Fig. 2 Connection diagram Thyro-AX 2A 9. Load monitoring Fig. 3 Connection diagram Thyro-AX 3A with load in delta or star connection without N 10. Multi I/O Fig. 4 Connection diagram Thyro-AX 3A with load in star connection with N Fig. -
Page 61: Abbreviations
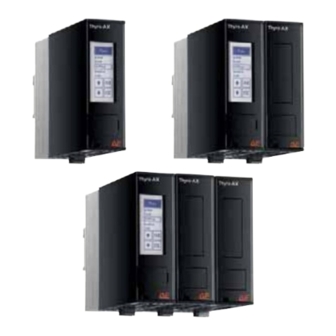
ABBREVIATIONS KEY FEATURES AN1 - phase angle of the 1st half wave • Integrated semiconductor fuse SST - soft-start time • Type range 230-600 V~, 16-1500 A, single phase, two phase uand three phase SYT - synchronized clock • Load voltage from 24 V~ •... -
Page 62: Safety Notes
1. SAFETY NOTES hazards of the product. • The Thyro-AX may only be used for the purpose for which it was The safety notes and the operating instructions are to be read carefully before installing and intended, as persons may otherwise be exposed to dangers (e.g. -
Page 63: Scope Of Supply
The electrical ATTENTION connection is made at the points labelled on the Thyro-AX. Different power components are screwed in place with exact torques according to their function. For safety reasons repairs to power com- 1.9 MAINTENANCE, SERVICE, FAULTS... -
Page 64: Replacement Of The Integrated Semiconductor Fuse
1.10 REPLACEMENT OF THE INTEGRATED SEMI- 2. SAFETY REQUIREMENTS CONDUCTOR FUSE The device has got an integrated semiconductor fuse F1 for each power unit which is designed protection reasons for the thyristor. If it has to be replaced, the device shall immediately be disconnected from the power supply. -
Page 65: General Danger Information
The warnings can also be supplemented with a special danger symbol DANGER (e.g. „Electric current“ or „Hot device“) , e.g. HAZARDS DURING INSTALLING Not adhering to the safety requirements in the operating instructions of in case of risk of electric current or the power controllers being used can lead to danger of injury/danger of damaging the device or system. -
Page 66: Qualified Personnel
Regulations and definitions for specialists are included in DIN EN CAUTION 50110-1. The Thyro-AX may only be used for the purpose for which it was inten- ded, as persons may otherwise be exposed to dangers (e.g. electric Safe separation in accordance with EN 50178. -
Page 67: Notes On These Operating Instructions
...280 with 280A type current 16 ... 1500 A the Thyro-AX at the time of issue. The content is not the subject of the with integrated semiconductor fuse contract, but rather serves to provide information. We reserve the right with fan... -
Page 68: Loss Of Warranty
Claims made later cannot receive consideration. 4.1 TECHNICAL QUERIES Advanced Energy will rescind all possible obligations such as warranty If you have any technical queries regarding the subjects dealt with in agreements, service contracts, etc. entered into by Advanced Energy... -
Page 69: Commissioning
The control signals influence the functional mode of the device. Shielded Thyro-AX 2A, T1 + T2 + T3 in the case of 3A devices, or only T1 in control cables must be used for the connection of the control signals. -
Page 70: Usb Interface
The shorter part of the wiring cable (plug - filter, approx. 30 cm) has control ground to be connected to Thyro-AX while the longer part of the wiring cable sync. Out (internal mains load optimization) / multi I/O 2 (Out) (filter - plug) has to be connected to the USB plug of the PC. -
Page 71: Connection Diagrams
5.1.7 CONNECTION DIAGRAMS X3 1 2 3 X3 1 2 3 FIG. 1 CONNECTION DIAGRAM Thyro-AX 1A FIG. 2 CONNECTION DIAGRAM Thyro-AX 2A... - Page 72 X3 1 2 3 X3 1 2 3 FIG. 3 CONNECTION DIAGRAM Thyro-AX 3A WITH LOAD IN DELTA FIG. 4 CONNECTION DIAGRAM Thyro-AX 3A WITH LOAD IN STAR OR STAR CONNECTION WITHOUT N CONNECTION WITH N...
-
Page 73: Load Configuration
Settings -> Hardware -> LoadConf -> Star connection with N (only Thyro-AX 3A version) X3 1 2 3 Star or delta connection without N (factory setting) FIG. 5 CONNECTION DIAGRAM Thyro-AX 3A WITH LOAD IN OPEN Open delta connection DELTA CONNECTION... -
Page 74: Ip20 Protection
The device shall immediately be disconnected from the power supply before installation. The Thyro-AX is designed according to IP20 protection code. To ensure protection during operation, the correct mounting is necessary of the added protection devices at each electric connection. In the following pictures the mounting of the protection devices is shown, this handling also applies to 2- or 3- phase units of Thyro-AX. - Page 75 Devices of 130A/170A/240A/280A/350A : For non-used connections: • The blind cover for non-used connections has to be inserted into the plug-in edge of the device For used connections (cable is connected): • The protection covers have to be mounted according to the direction arrows in the figure.
- Page 76 For devices 1000A/1400A/1500A: Before connecting the device all coverages (above and / or below as well as in the front) have to be removed. The connections coming from the customer side have to be connected to the copper bars of the device. Afterwards the according parts have to be removed with a side cutter so that the area around the copper bars to free for connection.
-
Page 77: Description Of Functionality
After switching-on the power supply of the power controller (or after So that the Thyro-AX can be fitted to the desired application optimally it is equipped with a reset or re-start of control electronics) , the switching-on of load starts variety of functions. - Page 78 All setpoints are added up taking into consideration any preceding modifying symbols. The prerequisite for the influence of a setpoint on the overall setpoint is that it is approved through the setpoint enable Set point register. • setpoint 1 analog signal: (X2.4, X2.3 ground) 0-20 mA as default Set point configuration local settings Set point 1...
-
Page 79: Control Modes
6.3 CONTROL MODES Thyro-AX provides various types of control. The control has an influence on the size of the output of the power controller. Before commissioning the power controller and selection of a control mode the mode of func- Set point [%] tionality and effect on the application should be known. -
Page 80: Limitations
This is important for transformer load if it was switched off in an undefined way (remanence). In the case of the Thyro-AX 2A or Thyro-AX 3A the pulse inhibition is only wired to the CONTROL LOAD RESISTANCE LOAD RESISTANCE master (L1, left). -
Page 81: Display Via Analog Output
6.8 FAULT, STATUS AND MONITORING MESSAGES FOR TYPE INCOMPATIBLE U-MEASURING RANGE U MEASURING U RANGE The Thyro-AX has internal fault, status and user-defined monitoring mes- IS EXCEEDED RANGE EXCEEDED sages. Their effects can be configured with the Thyro-Tool AX software. U-MEASURING RANGE I MEASURING... -
Page 82: Fault Signaling Relay K1
SETPOINT ACTIVE BUSMODULE IS CONNECTED BUSMODULE BUS CONN The events, which are captured by the Thyro-AX, are shown on the CONNECTED touch display in abbreviated form in a list. They correspond with the full CLOCK IST NOT SET CLOCK NOT SET NO CLOCK forms in their meaning and can be discerned using the table above. -
Page 83: Monitoring
Power controller and load circuit are monitored for errors. Messages are sent via the touch display, via a bus, or through the fault signaling The Thyro-AX is fitted with temperature monitoring. If the power con- relay K1 (see chapter Fault signaling relay K1). -
Page 84: Display And Operational Elements
7. DISPLAY AND OPERATIONAL ELEMENTS The parameters of the power controller can be altered via the integrated touch display. In addition it shows the current values of the Thyro-AX. : Confirm current selection and back to last screen. CAUTION Do not use any pointed or sharp-edged objects to operate. They can : Reject current selection and back damage the surface of the screen. -
Page 85: Actual Value View And Actual Value Button
7.2 ACTUAL VALUE VIEW AND ACTUAL VALUE BUTTON When pressing the actual value button several times the current values Actual value of the Thyro-AX are displayed over several screens. By pressing several button times the screens are alternately displayed and start from the begin- ning again if pressed again. -
Page 86: Easystart
MAXCONTROL OUTPUT IS REACHED REACHED The button Yes sets the Thyro-AX back to its default settings. When pressing the button No, the Thyro-AX * = cannot be deactivated ** = default setting of fault signaling relay K1: closed circuit principle continues EasyStart feature on basis of its current settings. - Page 87 Load type, dynamic of the load: Control end value: This screen appears only if the configuration R-Load has This screen only appears if the control mode has been been selected beforehand. selected beforehand, not if Off is selected. When configuring a load with heat inertia load with The control end value is the maximum value for control and Slow (T = 1 s) the distance between the ignition cycles...
-
Page 88: Easystart Identification
USB stick and the device has not been locked by password protection 7.6 RESTRICTION CODES FOR PARAMETERIZATION (s. chapter 7.6)) or to save the current parameters of Thyro-AX (on the AND DIGITAL SETPOINT 2 USB stick while existing parameters of the same device type will be The access via the touch display can be disabled and enabled for the overwritten). -
Page 89: Menu Structure
ActVal Main menu of the current value overview. Also appears automatically after a period of 30 sec. of not changing Thyro-AX. Parameter and line charts can be saved. During installation Event List of all current active messages (events). a server (Windows service: ThyroWindowsService) and client will be OK has the function of acknowledging the relevant message. - Page 90 button on the left side of the status field. FIG. 11 MINIMIZE STATUS MESSAGES FIG. 12 MAXIMIZED STATUS MESSAGES The order of tabs within the window is flexible. The following order is possible: - Next to each other - Above the other FIG.
-
Page 91: Manage Device And Files
Connected devices are shown directly with their virtual COM port By one double click on parameter entry, the suitable window will open under device port explorer when connected via USB. Thyro-AX devices on the right side of the tool. within the network list their IP address. Devices can be connected befo- re and after the software start. - Page 92 FIG. 19 FIELD In those fields, values are displayed to the second decimal place. For internal purposes further decimal places can be entered which will be used for calculation. With mouse-over the precise value of each field can be seen without any limitations. This is of particular importance to control parameters.
- Page 93 X2.6 remains free. (connection in series). The illustration 7 has to be The software synchronization is configured by inputting a parameter considered when changing the internal mains load optimization. and causes a delay of the initial ignition following the Thyro-AX being switched on. 8.2 SYNCHRONIZATION WITH dASM MODULE •...
- Page 94 rent for each power controller. This procedure enables a slow switching on of the load, e.g. with a slow cycle time of 1 sec. The values at an interval of 100 lead to a switching on phase delayed by a cycle period T (group formation).
- Page 95 Through TeachIn feature the load monitoring is active. 2. Manual entry or change of nonlinear load characteristic with Thyro-AX 1A, Thyro-AX 2A and Thyro-AX 3A (load with separate star Thyro-Tool AX point without neutral conductor)
- Page 96 Thyro-AX 2A and Thyro-AX 3A (load with common star point without NOTE neutral conductor) - In operating mode VAR, the monitoring is blocked for large control angles (for load with neutral conductor alpha > 140°, for load wit- NUMBER OF...
- Page 97 OPERATE Input for switching operating mode between This allows the adjustment of Thyro-AX for very specific customer and VAR and TAKT. Prior VAR must be active as operating mode. application related requirements.
- Page 98 11. DIMENSION DRAWINGS Thyro-AX Thyro-AX Thyro-AX 1A...16A Thyro-AX 1A...30A...
- Page 99 X2 X22 X2 X22 Thyro-AX Thyro-AX X2/X22 X2/X22 Thyro-AX 1A...45A, ...60A Thyro-AX 1A...100A...
- Page 100 Thyro-AX 1A...130A, ...170A Thyro-AX 1A...230A, ...240A, ...280A, ...350A...
- Page 101 Thyro-AX 1A...1000A Thyro-AX 1A...1400A, ...1500A...
- Page 102 Thyro-AX Thyro-AX Thyro-AX Thyro-AX Thyro-AX 2A...16A Thyro-AX 2A...30A...
- Page 103 X2 X22 X2 X22 X2 X22 X2 X22 Thyro-AX Thyro-AX Thyro-AX Thyro-AX X2/X22 X2/X22 Thyro-AX 2A...45A, ...60A Thyro-AX 2A...100A...
- Page 104 Thyro-AX 2A...130A, ...170A Thyro-AX 2A...230A, ...240A, ...280A, ...350A...
- Page 105 Thyro-AX 2A...1000A Thyro-AX 2A...1400A, ...1500A...
- Page 106 Thyro-AX Thyro-AX Thyro-AX Thyro-AX Thyro-AX Thyro-AX Thyro-AX 3A...16A Thyro-AX 3A...30A...
- Page 107 X2 X22 X2 X22 X2 X22 X2 X22 X2 X22 X2 X22 Thyro-AX Thyro-AX Thyro-AX Thyro-AX Thyro-AX Thyro-AX X2/X22 X2/X22 Thyro-AX 3A...45A, ...60A Thyro-AX 3A...100A...
- Page 108 Thyro-AX 3A...130A, ...170A Thyro-AX 3A...230A, ...240A, ...280A, ...350A...
- Page 109 Thyro-AX 3A...1000A Thyro-AX 3A...1400A, ...1500A...
- Page 110 OPERATING MODES 12.1 TECHNICAL DATA TAKT = full wave mode VAR = phase angle firing (only for types Thyro-AX 1A and Thyro-AX 3A) TYPE VOLTAGE ...H RLP2 QTM = quick half wave cycle operation (only for type Thyro-AX 1A) 24V to 230V + 10%...
- Page 111 DATA LOGGING Phase power and phase resistances are measured. Therefore also asymmetrical loads and changes are recorded precisely. As an option for pure inductive loads, the measurement can be set to an virtual star point. LIMITATIONS FIG. 24 DIGITAL SET POINT 2 VIA EXTERNAL BUTTONS voltage limitation U current limitation I power limitation P...
- Page 112 1 Pound-Force Inch = 0.112985 Newton Meter CONNECTION DATA OF THE POWER CONNECTION Grounding screw/bolt for protective conductor connection to the heat Tightening torques for electric connections in Nm sink. The grounding also serves EMC means (Y - capacitor 4.7 nF). SCREW MIN.
- Page 113 -10 °C - +55 °C with reduced type current -2%/°C necting device (e.g. breaker, observe VDE 0105 T1). with UL applications up to +40 °C The Thyro-AX has the following approvals and conformities: Load category 100% permanent DIN EN 60 146-1-1 •...
- Page 114 4 x 900 1400 1721 *64/80 285 550 565 33.5 4 x 900 * 50/60 HZ 1500 1761 *64/80 285 550 565 33.5 4 x 900 TAB. 16 Thyro-AX 2A ...H RLP2 * 50/60 HZ TAB. 15 Thyro-AX 1A ...H RLP2...
- Page 115 *64/80 618 550 565 72,0 2 x 1000 1400 1212 1455 5102 *127/180 618 550 565 72,0 4 x 900 1500 1040 5223 *127/180 618 550 565 72,0 4 x 900 * 50/60 HZ TAB. 17 Thyro-AX 3A ...H RLP2...
- Page 116 World Headquarters 1625 Sharp Point Drive Fort Collins, CO 80525 USA Specifications are subject to change without notice. 970.221.4670 Main © 2014 Advanced Energy Industries, Inc. All rights reserved. Advanced Energy ® and Thyro-AX ™ 970.221.5583 Fax trademarks of Advanced Energy Industries, Inc.
Need help?
Do you have a question about the THYRO-AX and is the answer not in the manual?
Questions and answers