
Subscribe to Our Youtube Channel
Related Manuals for Omron XG Series


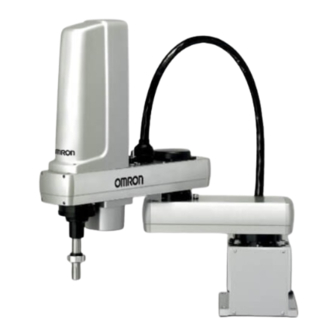
Summary of Contents for Omron XG Series
- Page 1 Cat. No. I158E-EN-02A SCARA Robots ZX-T Series XG Series R6Y - XGC/XGP series INSTALLATION MANUAL...
-
Page 3: Table Of Contents
CONTENTS XGC/XGP Installation Manual Safety Instructions 1. Safety Information 2. Signal words used in this manual 3. Warning labels 3.1 Warning labels 3.1.1 Warning label messages on robot and controller 3.1.2 Supplied warning labels 3.2 Warning symbols 4. Major precautions for each stage of use 4.1 Precautions for using robots and controllers 4.2 Design 4.2.1... - Page 4 CONTENTS XGC/XGP Installation Manual Introduction Before using the robot (Be sure to read the following notes.) Introduction Chapter 1 Functions 1. Robot manipulator 1.1 Manipulator movement 1.2 Part names 2. Robot initialization number list Chapter 2 Installation 1. Robot installation conditions 1.1 Sucking from the base rear side of the clean room model 1.2 Protection ratings for moisture and dust on dust/drip proof models 1.2.1...
- Page 5 CONTENTS XGC/XGP Installation Manual 8. Passing the user wiring and tubing through the spline 2-23 9. Detaching or attaching the covers 2-24 R6YXGLC(P)250, R6YXGLC(P)350, R6YXGLC(P)400, R6YXGLC(P)500, R6YXGLC(P)600 2-24 9.2 R6YXGP500, R6YXGP600, R6YXGHP600, R6YXGP700, R6YXGP800, R6YXGP900, R6YXGP1000 2-29 1 0. I nstalling the tool flange 2-31 11.
- Page 6 CONTENTS XGC/XGP Installation Manual 1.2.6 R6YXGP500 7-14 1.2.7 R6YXGP600 7-16 1.2.8 R6YXGHP600 7-18 1.2.9 R6YXGP700 7-20 1.2.10 R6YXGP800 7-22 1.2.11 R6YXGP900 7-24 1.2.12 R6YXGP1000 7-26...
- Page 7 Safety Instructions Contents Safety Information Signal words used in this manual Warning labels Warning labels 3.1.1 Warning label messages on robot and controller 3.1.2 Supplied warning labels Warning symbols Major precautions for each stage of use Precautions for using robots and controllers Design 4.2.1 Precautions for robots...
-
Page 9: Safety Information
Industrial robots are highly programmable, mechanical devices that provide a large degree of freedom when performing various manipulative tasks. To ensure safe and correct use of OMRON industrial robots and controllers, carefully read and comply with the safety instructions and precautions in this "Safety Instructions" guide. Failure to take necessary safety measures or incorrect handling may result in trouble or damage to the robot and controller, and also may cause personal injury (to installation personnel, robot operator or service personnel) including fatal accidents. -
Page 10: Signal Words Used In This Manual
Signal words used in this manual This manual uses the following safety alert symbols and signal words to provide safety instructions that must be observed and to describe handling precautions, prohibited actions, and compulsory actions. Make sure you understand the meaning of each symbol and signal word and then read this manual. DANGER THIS INDICATES AN IMMEDIATELY HAZARDOUS SITUATION WHICH, IF NOT AVOIDED, WILL RESULT IN DEATH OR SERIOUS INJURY. -
Page 11: Warning Labels
Warning labels Warning labels shown below are attached to the robot body and controller to alert the operator to potential hazards. To ensure correct use, read the warning labels and comply with the instructions. Warning labels WARNING IF WARNING LABELS ARE REMOVED OR DIFFICULT TO SEE, THEN THE NECESSARY PRECAUTIONS MAY NOT BE TAKEN, RESULTING IN AN ACIDENT. - Page 12 Warning label 3 (SCARA robots) WARNING IMPROPER INSTALLATION OR OPERATION MAY CAUSE SERIOUS INJURY. BEFORE INSTALLING OR OPERATING THE ROBOT, READ THE MANUAL AND INSTRUCTIONS ON THE WARNING LABELS AND UNDERSTAND THE CONTENTS. Instructions on this label • Be sure to read the warning label and this manual carefully to make you completely understand the contents before attempting installation and operation of the robot.
- Page 13 "Read instruction manual" label (Controller)* * This label is attached to the front panel. CAUTION Refer to the manual. Instructions on this label This indicates important information that you must know and is described in the manual. Before using the controller, be sure to read the manual thoroughly.
-
Page 14: Supplied Warning Labels
3.1.2 Supplied warning labels Some warning labels are not affixed to robots but included in the packing box. These warning labels should be affixed to an easy-to-see location. Warning label is attached to the robot body. Warning label comes supplied with the robot and should be affixed to an easy-to-see location on the door or gate of the safety enclosure. -
Page 15: Warning Symbols
Warning symbols shown below are indicated on the robots and controllers to alert the operator to potential hazards. To use the OMRON robot safely and correctly always follow the instructions and cautions indicated by the symbols. Electrical shock hazard symbol WARNING TOUCHING THE TERMINAL BLOCK OR CONNECTOR MAY CAUSE ELECTRICAL SHOCK, SO USE CAUTION. -
Page 16: Major Precautions For Each Stage Of Use
Precautions for using robots and controllers General precautions for using robots and controllers are described below. Applications where robots cannot be used OMRON robots and robot controllers are designed as general-purpose industrial equipment and cannot be used for the following applications. DANGER OMRON ROBOT CONTROLLERS AND ROBOTS ARE DESIGNED AS GENERAL-PURPOSE INDUSTRIAL EQUIPMENT AND CANNOT BE USED FOR THE FOLLOWING APPLICATIONS. -
Page 17: Design
Design 4.2.1 Precautions for robots Restricting the robot moving speed WARNING RESTRICTION ON THE ROBOT MOVING SPEED IS NOT A SAFETY-RELATED FUNCTION. TO REDUCE THE RISK OF COLLISION BETWEEN THE ROBOT AND WORKERS, THE USER MUST TAKE THE NECESSARY PROTECTIVE MEASURES SUCH AS ENABLE DEVICES ACCORDING TO RISK ASSESSMENT BY THE USER. Restricting the movement range See “7.1 Movement range”... -
Page 18: Moving And Installation
Do not use in locations exposed to flammable gases WARNING • OMRON ROBOTS ARE NOT DESIGNED TO BE EXPLOSION-PROOF. • DO NOT USE THE ROBOTS IN LOCATIONS EXPOSED TO EXPLOSIVE OR INFLAMMABLE GASES, DUST PARTICLES OR LIQUID. FAILURE TO FOLLOW THIS INSTRUCTION MAY CAUSE SERIOUS ACCIDENTS INVOLVING INJURY OR DEATH, OR LEAD TO FIRE. -
Page 19: Precautions For Robot Controllers
Installation environment WARNING OMRON ROBOTS ARE NOT DESIGNED TO BE EXPLOSION-PROOF. DO NOT USE THE ROBOTS AND CONTROLLERS IN LOCATIONS EXPOSED TO EXPLOSIVE OR INFLAMMABLE GASES, DUST PARTICLES OR LIQUID SUCH AS GASOLINE AND SOLVENTS. FAILURE TO FOLLOW THIS INSTRUCTION MAY CAUSE SERIOUS ACCIDENTS INVOLVING INJURY OR DEATH, AND LEAD TO FIRE. - Page 20 Wiring ■ Connection to robot controller The controller parameters are preset at the factory before shipping to match the robot model. Check the specified robot and controller combination, and connect them in the correct combination. Since the software detects abnormal operation such as motor overloads, the controller parameters must be set correctly to match the motor type used in the robot connected to the controller.
-
Page 21: Safety Measures
Safety measures 4.4.1 Safety measures Referring to warning labels and manual WARNING • BEFORE STARTING INSTALLATION OR OPERATION OF THE ROBOT, BE SURE TO READ THE WARNING LABELS AND THIS MANUAL, AND COMPLY WITH THE INSTRUCTIONS. • NEVER ATTEMPT ANY REPAIR, PARTS REPLACEMENT AND MODIFICATION UNLESS DESCRIBED IN THIS MANUAL. THESE TASKS REQUIRE SPECIALIZED TECHNICAL KNOWLEDGE AND SKILLS AND MAY ALSO INVOLVE HAZARDS. -
Page 22: Installing A Safety Enclosure
WARNING • DURING STARTUP OR MAINTENANCE TASKS, DISPLAY A SIGN "WORK IN PROGRESS" ON THE PROGRAMMING BOX AND OPERATION PANEL IN ORDER TO PREVENT ANYONE OTHER THAN THE PERSON FOR THAT TASK FROM MISTAKENLY OPERATING THE START OR SELECTOR SWITCH. IF NEEDED, TAKE OTHER MEASURES SUCH AS LOCKING THE COVER ON THE OPERATION PANEL. -
Page 23: Operation
Operation When operating a robot, ignoring safety measures and checks may lead to serious accidents. Always take the following safety measures and checks to ensure safe operation. DANGER CHECK THE FOLLOWING POINTS BEFORE STARTING ROBOT OPERATION. • NO ONE IS WITHIN THE ROBOT SAFETY ENCLOSURE. •... - Page 24 Working inside safety enclosures Before starting work within the safety enclosure, always confirm from outside the enclosure that each protective function is operating correctly (see the previous section 2.3). DANGER NEVER ENTER WITHIN THE MOVEMENT RANGE WHILE WITHIN THE SAFETY ENCLOSURE. See “7.1 Movement range”...
-
Page 25: Automatic Operation
4.5.2 Automatic operation Check the following points when operating the robot in AUTO mode. Observe the instructions below in cases where an error occurs during automatic operation. Automatic operation described here includes all operations in AUTO mode. Checkpoints before starting automatic operation Check the following points before starting automatic operation DANGER •... - Page 26 Use caution when releasing the Z-axis (vertical axis) brake WARNING THE VERTICAL AXIS WILL SLIDE DOWNWARD WHEN THE BRAKE IS RELEASED, CAUSING A HAZARDOUS SITUATION. TAKE ADEQUATE SAFETY MEASURES IN CONSIDERATION BY TAKING THE WEIGHT AND SHAPE INTO ACCOUNT. • BEFORE RELEASING THE BRAKE AFTER PRESSING THE EMERGENCY STOP BUTTON, PLACE A SUPPORT UNDER THE VERTICAL AXIS SO THAT IT WILL NOT SLIDE DOWN.
-
Page 27: Inspection And Maintenance
Inspection and maintenance Always perform daily and periodic inspections and make a pre-operation check to ensure there are no problems with the robot and related equipment. If a problem or abnormality is found, then promptly repair it or take other measures as necessary. -
Page 28: Precautions During Service Work
4.6.2 Precautions during service work Be careful when removing the Z-axis motor (SCARA robots) WARNING THE Z-AXIS WILL SLIDE DOWNWARD WHEN THE Z-AXIS MOTOR IS REMOVED, CAUSING A HAZARDOUS SITUATION. • TURN OFF THE CONTROLLER AND PLACE A SUPPORT UNDER THE Z-AXIS BEFORE REMOVING THE Z-AXIS MOTOR. -
Page 29: Disposal
Disposal When disposing of robots and related items, handle them carefully as industrial wastes. Use the correct disposal method in compliance with your local regulations, or entrust disposal to a licensed industrial waste disposal company. Disposal of lithium batteries When disposing of lithium batteries, use the correct disposal method in compliance with your local regulations, or entrust disposal to a licensed industrial waste disposal company. -
Page 30: Emergency Action When A Person Is Caught By Robot
Make a printout of the relevant page in the manual and post it a conspicuous location near the controller. Cautions regarding strong magnetic fields Some OMRON robots contain parts generating strong magnetic fields which may cause bodily injury, death, or device malfunction. Always comply with the following instructions. -
Page 31: Using The Robot Safely
Using the robot safely Movement range When a tool or workpiece is attached to the robot manipulator tip, the actual movement range enlarges from the movement range of the robot itself (Figure A) to include the areas taken up by movement of the tool and workpiece attached to the manipulator tip (Figure B). -
Page 32: Robot Protective Functions
Robot protective functions Protective functions for OMRON robots are described below. Overload detection This function detects an overload applied to the motor and turns off the servo. If an overload error occurs, take the following measures to avoid such errors: 1. -
Page 33: Residual Risk
Residual risk To ensure safe and correct use of OMRON robots and controllers, System integrators and/or end users implement machinery safety design that conforms to ISO12100. Residual risks for OMRON robots and controllers are described in the DANGER or WARNING instructions provided in each chapter and section. -
Page 35: Warranty
Warranty description ■ If a failure or breakdown occurs due to defects in materials or workmanship in the genuine parts constituting this OMRON robot and/or related product within the warranty period, then OMRON shall supply free of charge the necessary replacement/ repair parts. -
Page 37: Introduction
Introduction Contents Before using the robot (Be sure to read the following notes.) Introduction... - Page 39 Thank you for purchasing OMRON XGC/XGP series SCARA robot. This manual describes only the points that are different from the standard models. For details about other explanations, see the Installation Manual and Maintenance Manual for XG series standard models. If the Z-axis spline vibrates.
- Page 40 Put timer during Z-axis operation. If the tip load attached to the spline tip of the R6YXGLC(P)250, R6YXGLC(P)350, R6YXGLC(P)400, R6YXGLC(P)500 or R6YXGLC(P)600 exceeds 2kg, the Z-axis may be overloaded depending on the operation pattern. In this case, put a timer during operation as shown in the Fig. below to prevent overload of the Z-axis. The reference timer values are shown below.
- Page 41 Be sure to explain to the new user the need to read through this manual. For explanations not described in this manual, see the Installation Manual and Maintenance Manual for XG series. Additionally, for details about safety instructions, see also these manuals.
-
Page 43: Chapter 1 Functions
Chapter 1 Functions Contents Robot manipulator Manipulator movement Part names Robot initialization number list... -
Page 45: Robot Manipulator
The XG series robots are available in 4-axis models having an X/Y-axis arm (equivalent to human arm) and a Z/R-axis (equivalent to human wrist). With these 4 axes, the XG series robots can move as shown in the Fig. below. By attaching different types of end effector (gripper) to the end of the arm, a wide range of tasks can be performed with high precision at high speeds. -
Page 46: Part Names
Part names R6YXGLC(P)250, R6YXGLC(P)350, R6YXGLC(P)400, R6YXGLC(P)500, R6YXGLC(P)600 User tubing 3 ( 4 blue) Connector for user wiring User tubing 4 ( 4 white) (No. 1 to 10 usable) User tubing 1 ( 4 black) User tubing 2 ( 4 red) Bellows Ball screw Machine harness... - Page 47 R6YXGP500, R6YXGP600, R6YXGHP600, R6YXGP700, R6YXGP800, R6YXGP900, R6YXGP1000 Connector for user wiring User tubing 3 ( 6 blue) (No. 1 to 20 usable) User tubing 1 ( 6 black) User tubing 2 ( 6 red) Ball screw Machine harness R-axis motor Y-axis motor Y-axis arm Y-axis speed...
-
Page 48: Robot Initialization Number List
(For details about standard coordinates, see "4. Setting the standard coordinates" in Chapter 3 of the Installation Manual for XG series standard models.) If you do not want to change the origin position by initializing, make a note of the "ARM LENGTH"... -
Page 49: Installation
Chapter 2 Installation Contents Robot installation conditions Sucking from the base rear side of the clean room model Protection ratings for moisture and dust on dust/drip proof models 1.2.1 Plug 1.2.2 Air purge piping 1.2.3 Exhaust port Installation Checking the product Moving the robot 2.2.1 R6YXGLC(P)250, R6YXGLC(P)350, R6YXGLC(P)400, R6YXGLC(P)500, R6YXGLC(P)600... -
Page 51: Robot Installation Conditions
NOTE This chapter describes only the points that are different from the standard models. For details about other explanations, see the Installation Manual for XG series standard models. Sucking from the base rear side of the clean room model Suck from the suction air joint on the base rear side at a suction air flow of 30N /min. as shown in the Fig. below. -
Page 52: Protection Ratings For Moisture And Dust On Dust/Drip Proof Models
Protection ratings for moisture and dust on dust/drip proof models The protection ratings for moisture and dust on the R6YXGLP250, R6YXGLP350, R6YXGLP400, R6YXGLP500, R6YXGLP600, R6YXGP500, R6YXGP600, R6YXGHP600, R6YXGP700, R6YXGP800, R6YXGP900 and R6YXGP1000 dust/drip proof models are equivalent to IP65. WARNING •... -
Page 53: Air Purge Piping
1.2.2 Air purge piping WARNING BE SURE TO TURN THE CONTROLLER POWER AND THE AIR SUPPLY OFF BEFORE PERFORMING PIPING WORK. The R6YXGP500, R6YXGP600, R6YXGHP600, R6YXGP700, R6YXGP800, R6YXGP900, R6YXGP1000 models are equipped with an air supply port (for air purging) at the X and Y axis joint areas on the rear face of the base. This air purging keeps dust out of the joint areas. -
Page 54: Exhaust Port
1.2.3 Exhaust port WARNING BE SURE TO TURN THE CONTROLLER POWER OFF BEFORE PERFORMING PIPING WORK. The R6YXGP500, R6YXGP600, R6YXGHP600, R6YXGP700, R6YXGP800, R6YXGP900, R6YXGP1000 models are equipped with a 38 exhaust port on rear face of the base. This provides the air path for the Z-axis bellows action. A blocked exhaust port will prevent proper bellows action, possibly damaging the bellows. -
Page 55: Installation
Installation Checking the product After unpacking, check the product configuration and conditions. The following configurations are typical examples, so please check that the product is as specified in your order. CAUTION If there is any damage due to transportation or insufficient parts, please notify your distributor immediately. ●... -
Page 56: R6Yxgp500
● Controller : YRCX Robot : R6YXGP500, R6YXGP600, R6YXGHP600, R6YXGP700, R6YXGP800, R6YXGP900, R6YXGP1000... -
Page 57: R6Yxglc(P)500
● Controller : YRC Robot : R6YXGLC(P)250, R6YXGLC(P)350, R6YXGLC(P)400, R6YXGLC(P)500, R6YXGLC(P)600 Product configurations Standard Robot manipulator User’s Manual Warning label (×1) Mounting bracket (×2) Connector for user wiring (×2) YRC controller Origin position stickers Standard coordinate setting jig (option) Option PB programming box... -
Page 58: R6Yxgp600
● Controller : YRC Robot : R6YXGP500, R6YXGP600, R6YXGHP600, R6YXGP700, R6YXGP800, R6YXGP900, R6YXGP1000 Product configurations Standard Robot manipulator User’s Manual Warning label (×1) Connector for user wiring (×2) Origin position stickers YRC controller Standard coordinate setting jig (option) Option PB programming box... -
Page 59: Moving The Robot
Moving the robot WARNING SERIOUS INJURY MAY OCCUR IF THE ROBOT FALLS AND PINS SOMEONE UNDER IT. • DO NOT ALLOW ANY PART OF YOUR BODY TO ENTER THE AREA BENEATH THE ROBOT DURING WORK. • ALWAYS WEAR A HELMET, SAFETY SHOES AND GLOVES DURING WORK. 2.2.1 R6YXGLC(P)250, R6YXGLC(P)350, R6YXGLC(P)400, R6YXGLC(P)500, R6YXGLC(P)600... -
Page 60: R6Yxgp500, R6Yxgp600, R6Yxghp600, R6Yxgp700, R6Yxgp800, R6Yxgp900, R6Yxgp1000
Secure the robot main body firmly. Secure the robot main body firmly with the four hex socket head bolts as shown in the Fig. below. WARNING WHEN INSTALLING THE ROBOT, BE SURE TO USE THE SPECIFIED SIZE AND QUANTITY OF BOLTS THAT MATCH THE DEPTH OF TAPPED HOLES IN THE INSTALLATION BASE, AND SECURELY TIGHTEN THE BOLTS TO THE CORRECT TORQUE. -
Page 61: User Wiring And User Tubing
User wiring and user tubing WARNING ALWAYS TURN OFF THE CONTROLLER AND SHUT OFF AIR SUPPLY BEFORE ATTEMPTING WIRING AND PIPING WORK. IF AIR OR POWER IS SUPPLIED DURING THIS WORK, THE MANIPULATOR MAY MOVE ERRONEOUSLY CAUSING A HAZARDOUS SITUATION. The XGC/XGP series robots are equipped with user wires and air tubes in the machine harness. -
Page 62: R6Yxgp700
Signal wiring connections in the machine harness ■ • R6YXGLC(P)250, R6YXGLC(P)350, R6YXGLC(P)400, R6YXGLC(P)500, R6YXGLC(P)600 Connector pins 1 to 10 can be used. Signal Connector Connection Connector Color Brown Orange Blue Violet Grey White User signal line (Base side) Brown (Arm side) Orange Grey Flame Ground... - Page 63 The following describes how to make the wiring to the connector supplied with the robot. Solder the user signal wires to the connector as shown in Fig. below and assemble the connector. Then, connect it to the user wiring connector. Tighten each connector screw to its specified torque. If the outer diameter of the cable is small, use tape or an equivalent item to thicken the cable clamp.
-
Page 64: R6Yxgp800
Connector for user wiring Plug • Connector for user wiring supplied with the robot at shipment R6YXGLC(P)250, R6YXGLC(P)350, R6YXGLC(P)400, R6YXGLC(P)500, R6YXGLC(P)600 Part Name OMRON Model No. Model No. Quantity User wiring connector at base side KDM-M4872-000 NJW-24-16-PF-15 (Nanaboshi Electric Mfg.Co.,Ltd.) -
Page 65: Limiting The Movement Range With X- And Y-Axis Mechanical Stoppers
Limiting the movement range with X- and Y-axis mechanical stoppers WARNING ALWAYS TURN OFF THE CONTROLLER BEFORE CHANGING THE MOVEMENT RANGE WITH MECHANICAL STOPPERS. CAUTION When the mechanical stopper positions are changed, the soft limits must be set to a point inside the mechanical stopper positions. For details about soft limits, see "3. -
Page 66: R6Yxgp900
Stopper position in plus direction R6YXGP500, R6YXGP600, R6YXGHP600, R6YXGP700, R6YXGP800, R6YXGP900, R6YXGP1000 Stopper position in minus direction R6YXGP500, R6YXGP600, R6YXGHP600, R6YXGP700, R6YXGP800, R6YXGP900, R6YXGP1000 As option parts are ordered, and then they are installed, the movement ranges of the X-axis and Y-axis can be narrowed. The movement range of the X-axis can be narrowed by moving only the existing stopper. -
Page 67: R6Yxgp1000
After changing the mechanical stopper positions, set the soft limits to the values shown below. Soft limits ■ • R6YXGLC(P)250, R6YXGLC(P)350, R6YXGLC(P)400, R6YXGLC(P)500, R6YXGLC(P)600 Standard stopper Additional stopper Stopper position in X-axis plus or minus direction 131° 119° Maximum movement position in X-axis plus or 129°... -
Page 68: Installing The X-Axis/Y-Axis Additional Mechanical Stoppers
Installing the X-axis/Y-axis additional mechanical stoppers 4.1.1 R6YXGLC(P)250, R6YXGLC(P)350, R6YXGLC(P)400, R6YXGLC(P)500, R6YXGLC(P)600 Follow the steps below to install the X-axis/Y-axis additional mechanical stoppers. Install the X-axis additional mechanical stopper by moving only the existing stopper. Use the optional bolts and nuts listed below to install the Y-axis additional mechanical stopper. Part No. - Page 69 CAUTION When adding the stopper in one direction of the Y-axis, do not remove the standard stopper. If this stopper is removed, the stopper on the opposite side is lost. Install the bolt and washer in the Step 6 Installing the bolt in the standard stopper blank tapped hole in the standard stopper.
-
Page 70: R6Yxgp500, R6Yxgp600, R6Yxghp600, R6Yxgp700, R6Yxgp800, R6Yxgp900, R6Yxgp1000
Installing the additional stoppers in both the plus and minus directions ■ Install the additional stoppers in both the plus and minus directions while referring to the Fig. below. Installing the additional stoppers in both the plus and minus directions Use the bolt and seal washer to protect the tapped hole. -
Page 71: Limiting The Movement Range With Z-Axis Mechanical Stopper
Limiting the movement range with Z-axis mechanical stopper The Z-axis additional mechanical stopper cannot be installed in the R6YXGLC(P)250, R6YXGLC(P)350, R6YXGLC(P)400, R6YXGLC(P)500 and R6YXGLC(P)600 as they are equipped with bellows. Because the R6YXGP500, R6YXGP600, R6YXGHP600, R6YXGP700, R6YXGP800, R6YXGP900 and R6YXGP1000 models are equipped with bellows, they have a Z-axis additional mechanical stopper for the "minus"... -
Page 72: Installing The User Wiring And Tubing Newly
Installing the user wiring and tubing newly Use the user wiring and tubing in the machine harness as much as possible by considering the durability of the machine harness. If the user wiring and tubing incorporated into the machine are insufficient, add new user wiring and tubing using cable ties. -
Page 73: Passing The User Wiring And Tubing Through The Spline
Passing the user wiring and tubing through the spline In the R6YXGLC(P)250, R6YXGLC(P)350, R6YXGLC(P)400, R6YXGLC(P)500 and R6YXGLC(P)600, the user wiring and tubing can be passed through the spline. The following Fig. shows a reference example. The wiring at the top end of the spline can be detached or attached easily when replacing the spline, R-axis speed reduction unit or R-axis motor. -
Page 74: Detaching Or Attaching The Covers
Detaching or attaching the covers R6YXGLC(P)250, R6YXGLC(P)350, R6YXGLC(P)400, R6YXGLC(P)500, R6YXGLC(P)600 To detach the covers, remove the bolts and screws. It is recommended to replace the O-rings and seals shown below with new ones. Part name Part number Q’ty O-ring 90200-01J350 O-ring 90990-17J025 Seal washer... - Page 75 Z-axis. O-ring (1) NOTE For details about how to release the Z-axis brake, see the "OMRON Robot Controller User's Manual". Step 8 Removing the rolling mechanism part Rolling mechanism part Hex socket head bolt M3, length 10, 4 pcs.
- Page 76 Turn off the controller. Disconnecting the connector for the user wiring Step 12 Remove the mounting bracket, and removing the plate, seal, and seal washer disconnect the connector for the user Connector for user wiring wiring, and remove the plate, seal (4) Mounting bracket (5), and seal washer (3).
- Page 77 Place the cover on the base side. Step 14 Placing the cover Reattach the cover in the reverse Place the cover so that it is not damaged order of detachment. It is recommended to replace the O-rings and seals with new ones. If these parts are not replaced or reattached, the dust/drip proof performance or the degree of cleanliness may lower.
- Page 78 Base cover ■ It is recommended to replace the seals with new ones. If these parts are not replaced or reattached, the dust/drip proof performance or the degree of cleanliness may lower. Removing the base front cover Base front cover Seal (9) Base front cover clamping bolt Hex socket head bolt M4, length 12, stainless, 4 pcs.
-
Page 79: R6Yxgp500, R6Yxgp600, R6Yxghp600, R6Yxgp700, R6Yxgp800, R6Yxgp900, R6Yxgp1000
R6YXGP500, R6YXGP600, R6YXGHP600, R6YXGP700, R6YXGP800, R6YXGP900, R6YXGP1000 To detach the covers, remove the bolts and screws shown in the Fig. below. WARNING WHEN THE COVERS HAVE BEEN REMOVED FOR THE MAINTENANCE WORK, BE SURE TO RETURN THE COVERS TO THEIR ORIGINAL POSITIONS USING THE SCREWS AND BOLTS THAT HAVE SECURED THEM. IF ANY SCREW IS LOST, USE THE SPECIFIED SCREWS AND QUANTITIES TO SECURE THE COVERS WHILE REFERING TO THE FIG. - Page 80 R6YXGHP600, R6YXGP700, R6YXGP800, R6YXGP900, R6YXGP1000 Y-axis arm cover rear plate securing screws & seal washers Hex socket head bolt M3×8 stainless Seal washer Y-axis arm cover Y-axis arm cover side-face securing screws Hex socket head bolt M3×8 stainless Seal washer Y-axis arm cover securing screws (front side) Z200 : Hex socket head bolt M3×20 stainless...
-
Page 81: 0. I Nstalling The Tool Flange
10. Installing the tool flange A tool flange can be installed later on the R6YXGLC(P)250, R6YXGLC(P)350, R6YXGLC(P)400, R6YXGLC(P)500 and R6YXGLC(P)600 models. The following option parts are needed. Part No. Q'ty Remarks KCY-M1790-000 Tool flange 91312-05014 Bolt 92A08-05308 Set screw Turn off the controller. Place a sign indicating the robot is being adjusted. -
Page 82: 11. Permissible Spline Load
11. Permissible spline load Due to the strength factors of the spline, and the X, Y, Z, R axes, do not apply loads which exceed those shown below during an all-axis servo hold status, or during ultra-slow-speed operations. "F " includes the load of the tip load's weight. Permissible spline loads R6YXGLC(P)250 R6YXGLC(P)350... - Page 83 R6YXGLC(P)250, R6YXGLC(P)350, R6YXGLC(P)400, R6YXGLC(P)500, R6YXGLC(P)600 R6YXGLC(P)600 (kgf) (kgf) R (mm) R (mm) * The vertical distance from the Z-axis origin position to the load must not exceed 150mm. R6YXGP500 R6YXGP600 (kgf) (kgf) Z=0~230mm Z=0~220mm Z=300mm Z=300mm Z=350mm Z=350mm R (mm) R (mm) R6YXGP500, R6YXGP600 (kgf)
- Page 84 R6YXGHP600 R6YXGP700 (kgf) (kgf) Z=0~270mm Z=0~270mm Z=360mm Z=360mm Z=450mm Z=450mm R (mm) R (mm) R6YXGHP600, R6YXGP700 (kgf) R (mm) * The vertical distance from the Z-axis origin position to the load must not exceed 400mm. R6YXGP800 R6YXGP900 (kgf) (kgf) Z=0~300mm Z=0~350mm Z=370mm Z=400mm...
-
Page 85: Chapter 3 Robot Settings
Chapter 3 Robot settings Contents Overview Adjusting the origin Standard coordinate setting using a standard coordinate setup jig R6YXGLC(P)250, R6YXGLC(P)350, R6YXGLC(P)400, R6YXGLC(P)500, R6YXGLC(P)600 R6YXGP500, R6YXGP600, R6YXGHP600, R6YXGP700, R6YXGP800, R6YXGP900, R6YXGP1000... -
Page 87: Overview
• To check the operation after the settings have been made, refer to the section "4.5.1 Trial Operation" in Chapter "Safety Instructions" of this manual. This chapter describes only the points that are different from the standard models. For details about other explanations, see the Installation Manual for XG series standard models. -
Page 88: Adjusting The Origin
Adjusting the origin This section describes only the origin adjustment points that are different from the standard models. For details about other explanations, see the Installation Manual for XG series standard models. Adjusting the origin of the R6YXGLC(P)250, R6YXGLC(P)350, R6YXGLC(P)400, R6YXGLC(P)500, or ■... -
Page 89: Standard Coordinate Setting Using A Standard Coordinate Setup Jig
Press the emergency stop button on the PBEX/PB to put the robot in the emergency stop status. NOTE For details about emergency stop and how to cancel the emergency stop, see the "OMRON Robot Controller User's Manual". Place a sign indicating the robot is being adjusted. -
Page 90: R6Yxgp500, R6Yxgp600, R6Yxghp600, R6Yxgp700, R6Yxgp800, R6Yxgp900, R6Yxgp1000
Make a note of the Y-axis position pulse value. 1. Enter "MANUAL>POINT" mode. 2. Lightly apply a clockwise torque to the Y-axis while holding the X-axis arm. 3. Make a note of the Y-axis position pulse value displayed on [POS] when the torque is unloaded. 4. -
Page 91: Chapter 4 Periodic Inspection
Chapter 4 Periodic inspection Contents List of inspection items... -
Page 93: List Of Inspection Items
ONLY QUALIFIED ENGINEERS WHO HAVE RECEIVED THE ROBOT TRAINING COURSE CONDUCTED BY YOUR DISTRIBUTOR ARE ALLOWED TO INSPECT THE ITEMS NEEDING THE COVER REMOVAL WORK WHILE REFERRING TO THE SEPARATE MAINTENANCE MANUAL FOR XG SERIES. : Conduct. : Conduct if trouble is found as a result of inspection. - Page 94 *5: If any object is found through the visual inspection, remove it. If noise is heard even when no object is found, contact your distributor. Bolt tightening torque Bolt size Tightening torque (kgfcm) Tightening torque (Nm) M3 button head bolt M4 set screw 15.3 45.0...
-
Page 95: Chapter 5 Harmonic Drive Replacement Period
Chapter 5 Harmonic drive replacement period Contents Overview Replacement period... -
Page 97: Overview
Overview The XG series robots listed below use a harmonic drive as the speed reduction gear for the X, Y and R axes. Harmonic drives need to be replaced after specified operation hours have elapsed. Use the guideline explained below to determine the replacement period and replace the harmonic drive periodically. -
Page 98: Replacement Period
Replacement period The harmonic drive replacement period is determined by the total number of turns of the wave generator used in the harmonic drive. It is recommended to replace the harmonic drive when the total number of turns has reached 8.4×10 (at ambient operating temperatures of 0°C to +40°C). -
Page 99: Torque Limit Designated Z-Axis Pushing Action
Chapter 6 Torque limit designated Z-axis pushing action Contents Torque limit designated Z-axis pushing action... - Page 101 Torque limit designated Z-axis pushing action Z-axis pushing action can be executed from the program by using the DRIVE statement's torque limit setting. The table below shows the various tip load weights and the corresponding recommended torque limit (%), torque offset (gravity offset for tip load weight), and speed limit (%) values relative to the motor's rated torque.
- Page 102 R6YXGP500, R6YXGP600 Z300mm stroke specifications Tip Load Weight Torque Limit Pushing Force Speed Limit Torque Offset (kg) Value (%) Value (%) 60% to 100% 120 to 200 50% to 100% 100 to 200 50% to 100% 100 to 200 40% to 100% 80 to 200 40% to 100% 80 to 200...
- Page 103 R6YXGHP600, R6YXGP700, R6YXGP800, R6YXGP900, R6YXGP1000 Z400mm stroke specifications Speed Limit Value (%) Tip Load Torque Limit Pushing Force Torque Offset R6YXGHP600, Weight (kg) Value (%) R6YXGP800 R6YXGP900 R6YXGP1000 R6YXGP700 18kg 60 to 100% 240 to 400 17kg 50 to 100% 200 to 400 16kg 50 to 100%...
-
Page 105: Specifications
Chapter 7 Specifications Contents Manipulator Basic specification External view and dimensions 1.2.1 R6YXGLC(P)250 1.2.2 R6YXGLC(P)350 1.2.3 R6YXGLC(P)400 1.2.4 R6YXGLC(P)500 7-10 1.2.5 R6YXGLC(P)600 7-12 1.2.6 R6YXGP500 7-14 1.2.7 R6YXGP600 7-16 1.2.8 R6YXGHP600 7-18 1.2.9 R6YXGP700 7-20 1.2.10 R6YXGP800 7-22 1.2.11 R6YXGP900 7-24 1.2.12 R6YXGP1000 7-26... -
Page 107: Manipulator
Manipulator Basic specification Robot model R6YXGLC(P)250 R6YXGLC(P)350 R6YXGLC(P)400 R6YXGLC(P)500 R6YXGLC(P)600 Arm length 100mm 200mm 250mm 250mm 350mm X-axis Rotation angle ±129° Arm length 150mm 250mm Axis Y-axis specifications Rotation angle ±134° ±144° Z-axis Stroke 150mm R-axis Rotation angle ±360° X-axis 200W Y-axis 150W... - Page 108 Robot model R6YXGP500 R6YXGP600 Arm length 200mm 300mm X-axis Rotation angle ±130° Arm length 300mm Axis Y-axis specifications Rotation angle ±145° Z-axis Stroke 200mm/300mm R-axis Rotation angle ±360° X-axis 400W Y-axis 200W Motor Z-axis 200W R-axis 200W XY resultant 7.6m/sec 8.4m/sec Maximum speed Z-axis...
- Page 109 Robot model R6YXGHP600 R6YXGP700 R6YXGP800 R6YXGP900 R6YXGP1000 Arm length 200mm 300mm 400mm 500mm 600mm X-axis Rotation angle ±130° Arm length 400mm Axis Y-axis specifications Rotation angle ±150° Z-axis Stroke 200mm/400mm R-axis Rotation angle ±360° X-axis 750W Y-axis 400W Motor Z-axis 400W R-axis 200W...
-
Page 110: External View And Dimensions
External view and dimensions 1.2.1 R6YXGLC(P)250 User tubing 3 ( 4 blue) Connector for user wiring User tubing 4 ( 4 white) 4-M3×0.5 Depth 5 (No. 1 to 10 usable. Cable clamp size, (There is no phase relationship with the R-axis origin.) 13.1 to 15) Since this tapped hole is used for the wiring or tubing If not used, cover the connectors with... - Page 111 R6YXGLC250, R6YXGLP250 Tool flange mount type 50.5 ±2 99.5 Clean room model, dust/drip proof model with tool flange 4- 4.5 through-hole ↑E 30h7 - 0.021 0.012 through-hole Detailed drawing D Scale 1 : 1 View of E R6YXGLC250, R6YXGLP250 Working envelope Option : •...
- Page 112 1.2.2 R6YXGLC(P)350 User tubing 3 ( 4 blue) Connector for user wiring User tubing 4 ( 4 white) 4-M3×0.5 Depth 5 (No. 1 to 10 usable. Cable clamp size, (There is no phase relationship with the R-axis origin.) 13.1 to 15) Since this tapped hole is used for the wiring or tubing If not used, cover the connectors with clamp, do not apply a large load.
- Page 113 R6YXGLC350, R6YXGLP350 Tool flange mount type 50.5 ±2 99.5 Clean room model, dust/drip proof model with tool flange 4- 4.5 through-hole ↑E 30h7 - 0.021 + 0.012 Detailed drawing D through-hole Scale 1 : 1 View of E R6YXGLC350, R6YXGLP350 Working envelope Option : •...
-
Page 114: R6Yxglc(P)400
1.2.3 R6YXGLC(P)400 Connector for user wiring 4-M3×0.5 Depth 5 User tubing 3 ( 4 blue) (No. 1 to 10 usable. Cable clamp size, (There is no phase relationship with the R-axis origin.) 13.1 to 15) User tubing 4 ( 4 white) Since this tapped hole is used for the wiring or tubing If not used, cover the connectors with clamp, do not apply a large load. - Page 115 R6YXGLC400, R6YXGLP400 Tool flange mount type 50.5 ±2 99.5 Clean room model, dust/drip proof model with tool flange 4- 4.5 through-hole ↑E 30h7 - 0.021 + 0.012 through-hole Detailed drawing D Scale 1 : 1 View of E R6YXGLC400, R6YXGLP400 Working envelope Option : •...
- Page 116 1.2.4 R6YXGLC(P)500 Connector for user wiring 4-M3×0.5 Depth 5 User tubing 3 ( 4 blue) (No. 1 to 10 usable. Cable clamp size, (There is no phase relationship with the R-axis origin.) 13.1 to 15) User tubing 4 ( 4 white) Since this tapped hole is used for the wiring or tubing If not used, cover the connectors with clamp, do not apply a large load.
- Page 117 R6YXGLC500, R6YXGLP500 Tool flange mount type 63.5 ±2 86.5 Clean room model, dust/drip proof model with tool flange ↑E 30h7 - 0.021 + 0.012 through-hole Detailed drawing D Scale 1 : 1 View of E R6YXGLC500, R6YXGLP500 Working envelope Option : •...
-
Page 118: R6Yxglc(P)600
1.2.5 R6YXGLC(P)600 Connector for user wiring 4-M3×0.5 Depth 5 User tubing 3 ( 4 blue) (No. 1 to 10 usable. Cable clamp size, (There is no phase relationship with the R-axis origin.) 13.1 to 15) User tubing 4 ( 4 white) Since this tapped hole is used for the wiring or tubing If not used, cover the connectors with clamp, do not apply a large load. - Page 119 R6YXGLC600, R6YXGLP600 Tool flange mount type 63.5 ±2 86.5 Clean room model, dust/drip proof model with tool flange ↑E 30h7 - 0.021 + 0.012 through-hole Detailed drawing D Scale 1 : 1 View of E R6YXGLC600, R6YXGLP600 Working envelope Option : •...
-
Page 120: R6Yxgp500
1.2.6 R6YXGP500 Connector for user wiring (No.1 to 20 usable, cable clamp size: 16 to18) Cover with the caps provided when not used. Note. Insert the plug User tubing 1 ( 6 black) 4- 11 provided when User tubing 2 ( 6 red) M10 bolt for installation, 4 bolts used not used. - Page 121 R6YXGP500 Working envelope Working envelope of left-handed system Working envelope of right-handed system • Note that the robot cannot be used at a position where the base flange, robot cable, spline, and bellows interfere with each other in the working envelope shown above. •...
-
Page 122: R6Yxgp600
1.2.7 R6YXGP600 Connector for user wiring (No.1 to 20 usable, cable clamp size: 16 to18) Cover with the caps provided when not used. User tubing 1 ( 6 black) Note. Insert the plug 40 120 4- 11 provided when User tubing 2 ( 6 red) M10 bolt for installation, 4 bolts used not used. - Page 123 R6YXGP600 Working envelope Working envelope of left-handed system Working envelope of right-handed system • Note that the robot cannot be used at a position where the base flange, robot cable, spline, and bellows interfere with each other in the working envelope shown above. •...
-
Page 124: R6Yxghp600
1.2.8 R6YXGHP600 Connector for user wiring (No.1 to 20 usable, cable clamp size: 16 to18) Cover with the caps provided when not used. User tubing 1 ( 6 black) Note. Insert the plug 4- 14 provided when User tubing 2 ( 6 red) M12 bolt for installation, 4 bolts used not used. - Page 125 R6YXGHP600 Working envelope Working envelope of left-handed system Working envelope of right-handed system • Note that the robot cannot be used at a position where the base flange, robot cable, spline, and bellows interfere with each other in the working envelope shown above. •...
-
Page 126: R6Yxgp700
1.2.9 R6YXGP700 Connector for user wiring (No.1 to 20 usable, cable clamp size: 16 to18) Cover with the caps provided when not used. User tubing 1 ( 6 black) Note. Insert the plug 4- 14 4-f14 provided when User tubing 2 ( 6 red) M12 bolt for installation, 4 bolts used M12 bolt for installation, 4 bolts used not used. - Page 127 R6YXGP700 Working envelope Working envelope of left-handed system Working envelope of right-handed system • Note that the robot cannot be used at a position where the base flange, robot cable, spline, and bellows interfere with each other in the working envelope shown above. •...
- Page 128 1.2.10 R6YXGP800 Connector for user wiring (No.1 to 20 usable, cable clamp size: 16 to18) Cover with the caps provided when not used. User tubing 1 ( 6 black) Note. Insert the plug 4- 14 provided when User tubing 2 ( 6 red) M12 bolt for installation, 4 bolts used not used.
- Page 129 R6YXGP800 Working envelope Working envelope of left-handed system Working envelope of right-handed system • Note that the robot cannot be used at a position where the base flange, robot cable, spline, and bellows interfere with each other in the working envelope shown above. •...
- Page 130 1.2.11 R6YXGP900 Connector for user wiring (No.1 to 20 usable, cable clamp size: 16 to18) Cover with the caps provided when not used. User tubing 1 ( 6 black) Note. Insert the plug 4- 14 provided when User tubing 2 ( 6 red) M12 bolt for installation, 4 bolts used not used.
- Page 131 R6YXGP900 Working envelope Working envelope of left-handed system Working envelope of right-handed system • Note that the robot cannot be used at a position where the base flange, robot cable, spline, and bellows interfere with each other in the working envelope shown above. •...
- Page 132 1.2.12 R6YXGP1000 Connector for user wiring (No.1 to 20 usable, cable clamp size: 16 to18) Cover with the caps provided when not used. User tubing 1 ( 6 black) Note. Insert the plug 4- 14 User tubing 2 ( 6 red) provided when M12 bolt for installation, 4 bolts used User tubing 3 ( 6 blue)
- Page 133 R6YXGP1000 Working envelope Working envelope of left-handed system Working envelope of right-handed system • Note that the robot cannot be used at a position where the base flange, robot cable, spline, and bellows interfere with each other in the working envelope shown above. •...
- Page 134 Revision history A manual revision code appears as a suffix to the catalog number on the front cover manual. The following table outlines the changes made to the manual during each revision. Revision code Date Description October 2013 Original production July 2016 YRCX controller was added August 2019...
- Page 136 Authorized Distributor: Cat. No. I158E-EN-02A Note: Specifications subject to change without notice. Printed in Europe...
Need help?
Do you have a question about the XG Series and is the answer not in the manual?
Questions and answers