
Related Manuals for Denso BHT-1361QWB-CE


Summary of Contents for Denso BHT-1361QWB-CE
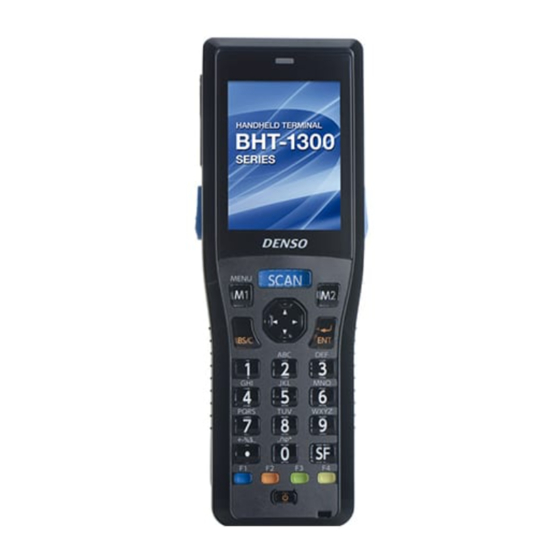
- Page 1 Barcode / Barcode / 2D code Handy Terminal 2D code Handy Terminal BHT-1361QWB-CE BHT-1361QWB-CE BHT-1361Q-CE BHT-1361Q-CE BHT-1361BWB-CE BHT-1361BWB-CE BHT-1361B-CE BHT-1361B-CE Software User’s Manual Software User’s Manual...
- Page 2 All rights reserved. The copyright of this Reference Manual belongs to DENSO WAVE INCORPORATED. BHT, QR Code, iQR Code, SQRC, and QBdirect are trademarks of DENSO WAVE INCORPORATED. Microsoft, ActiveSync, Windows Mobile Device Center, Windows and Window logo are either registered trademarks or trademarks of Microsoft Corporation in the United States and/or other countries.
- Page 3 -RDP Plug-in Reference Manual For inquiry and latest information For the latest information on this manual and DENSO WAVE products, visit the DENSO WAVE website at: http://www.denso-wave.com/ More information is available from our special website “QBdirect” for the registered users at: http://www.qbdirect.net/.
- Page 4 Customer Registration and Inquiries Customer Registration To allow us to provide our customers with comprehensive service and support, we request that all customers complete a Member Registration Form. Registered members will be offered the following privileges. • The latest upgrade information •...
-
Page 5: Table Of Contents
Table of Contents Outline ............................1 1.1. Application Implementation Steps ................. 1 1.2. System Components ..................... 2 1.2.1. Hardware Components ....................2 1.2.2. Software Components....................2 1.3. Usage Precaution......................3 Setup ............................4 2.1. BHT operations that lead to data loss ................4 2.2. - Page 6 6.4.3. Power Management ....................53 6.4.4. Reset Menu ......................... 54 6.4.5. Key ..........................55 6.4.6. Status Display......................58 6.4.7. Taskbar........................58 6.4.8. BHT Backup ........................ 59 6.4.9. Startup Config......................63 6.4.10. Registry Editor (RegEdit) .................... 69 6.4.11. OS Update........................76 6.4.12.
-
Page 7: Outline
1. Outline 1.1. Application Implementation Steps The following steps illustrate a typical process from purchase to implementation of a business application using the BHT. Step 1 Confirm that the BHT works properly. Refer to the BHT-1300CE Series Operator’s Guide or User’s Manual. Step 2 Determine a setup procedure considering the application environment then create the application program for the BHT. -
Page 8: System Components
1.2. System Components This section illustrates the hardware and software components required for the BHT code data collection system. 1.2.1. Hardware Components The following figure shows the required hardware for the BHT code data collection system. The required hardware varies depending on the communication used. Wireless communication Ethernet Wireless LAN access... -
Page 9: Usage Precaution
1.3. Usage Precaution Data backup Non-volatile memory (flash memory) is used to store user data for the BHT. Flash memory has a finite number of program-erase cycles, therefore frequent access concentrated on the specific memory area may lead to data loss. -
Page 10: Setup
2. Setup This section explains how to set up the BHT efficiently and effectively. 2.1. BHT operations that lead to data loss The data stored in the BHT is deleted after the following operations. In order to ensure stable operations, the BHT must be set up to restore or recover the deleted data. Operation Description Data in process will be deleted. -
Page 11: Support Functions For Setup
2.2. Support functions for setup The BHT provides the following functions to easily accomplish the setup. Functions or tools for backup* The “BHTBackup.exe” is a backup and restore tool for data Backup and restore tool (BHTBackup.exe) in the RAM and the registry. Refer to “0 BHT Backup”. - Page 12 Program auto execution The " Program auto execution" function is used to automatically execute programs such as setup applications or the CAB files, which are deployed "¥Flash¥Setup" *** in the auto execution folder "¥Flash¥Setup". Note: To control the program execution order, create a bat file as shown below.
- Page 13 Cancellation of the The” Cancellation of the application auto execution at reset” function is application auto execution used to cancel the application auto execution at reset. at reset. To activate the function: Perform a reset by pressing the M1+Right Trigger+Power+SCAN keys. Then release all keys except for the SCAN key.
-
Page 14: Restoring The Registry
2.3. Restoring the registry Setup procedures for the registry restore varies depending on the backup method as explained below. Using the backup and restore tool (BHTBackup.exe) Step 1 Back up data after the initial setup. Step 2 Select the “File & Registry (BHT Backup)” in the Startup Config menu. -
Page 15: Basic Operation
3. Basic Operation 3.1. Power ON Press the power ( ) key to turn ON the BHT. When turning ON the BHT for the first time or after a long period of time, if any dialog box is not displayed, first perform a “full reset”. Refer to “3.3.2 Full Reset”... -
Page 16: Power Off
3.2. Power OFF Use one of the following three methods to turn OFF the BHT. Normal power OFF Press the power ( ) key. The BHT turns OFF after the message on the left is displayed. Power OFF with Hold down the SF key and press the power ( ) key for 3 registry backup seconds or more. -
Page 17: Reset And Full Reset
3.3. Reset and Full Reset 3.3.1. Reset Reset the BHT when the BHT does not respond to any entry from the touch screen or keys. With the BHT power ON, press the M1 key + Right Trigger + Power key at the same time. -
Page 18: Screen Image
3.4. Screen image All screen images in this Manual are simulated. Actual screens may differ depending on user settings and other factors. The taskbar in this manual varies from the actual BHT screen. 3.4.1. Taskbar icons The following icons are displayed in the taskbar to show the program status, operation modes and notifications. Shows a battery power level in four levels. - Page 19 Shows that the alphabet entry mode is ON. (To change entry mode, press the Alpha key.) Refer to the BHT Class Library Reference Manual “Chapter 9 Keyboard” for the input character details while in the ALP mode To display the desktop while an application is running, tap this icon. Tap again to go back to the original application screen.
-
Page 20: Battery Power Level Indicator
3.5. Battery Power Level Indicator The battery power level can be checked with the icon (battery power level indicator) shown in the taskbar. The icon shows the battery power in four levels. These levels are only a rough estimate of battery power, make sure to charge the battery before running out of power. -
Page 21: Using Backlight
3.6. Using backlight To enable or disable the backlight, press the M3 Key while holding down the SF key. Press the Right trigger key Backlight OFF or dim while holding down the SF key. (backlight is enabled) No key is pressed Press any key or tap for more than 3 the touch screen. -
Page 22: Using The Menu Key
3.7. Using the MENU key The MENU key is used to set up the BHT basic configuration listed below. Step 1 Press the MENU key. Step 2 Select the menu by moving the cursor vertically with the ▲ (up) or ▼ (down) keys. The selected menu is highlighted. -
Page 23: Using The Keypad
3.8. Using the Keypad 3.8.1. Entering Numerical Data The default entry mode is numeric, enabling numbers written on the top of numeric keys to be entered. To enter “120” for example, press the 1, 2 and 0 keys sequentially. To delete the wrong number entered, press the BKSP key and then re-enter the correct number. Numeric entry mode can also be changed with the program. -
Page 24: Using The Fn Key
3.8.4. Using the FN key The FN key is used to activate the function keys such as the F5 to F12 keys that are printed in blue on the keypad. When the FN key is pressed, the keypad is switched to the FN key mode. For example;... -
Page 25: Activesync/Windows Mobile Device Center
3.9. ActiveSync/Windows Mobile Device Center The ActiveSync/the Windows Mobile Device Center (WMDC) enables the following features by connecting the BHT to a host computer via a USB. - Synchronize data - Backup data - Copy or move data. - Backup user programs Download the software for the host computer operating system from the Microsoft web site. - Page 26 Creating a new partnership For WDMC The windows mobile center starts up after connections established between the host computer and the BHT. Step 1 Click “Connect without setting up your device”. Step 2 Click “Browse the contents of your device” in “File Management”.
- Page 27 For ActiveSync The partnership wizard pops up on the host computer after connections established between the host computer and the BHT. To create a new partnership between the host computer and the BHT, Select Yes(Y) then click Next(N). To synchronize files, Check the checkbox next to “File”...
-
Page 28: Desktop And Start Menu
4. Desktop and Start menu 4.1. Desktop The windows desktop is displayed after the initial setup. The following is an explanation of all the icons on the desktop. The icons on the desktop are application icons, and start up a program by double tapping each icon. My Device: Microsoft WordPad: Displays the root folder with... -
Page 29: Start Menu
4.2. Start Menu The Start menu is used to run programs installed in the BHT and set up system settings. Tap the button located in the taskbar (most-left). Menu Description Reference section Programs App Launcher Application guard tool that restricts Windows 6.12 Application Launcher desktop operation to prevent the end users from... -
Page 30: Recycle Bin
(*) When connecting the BHT to the (remote) host computer via a windows - Note- network, set the time and date of the BHT properly. If both the BHT and the (remote) host computer do not have the same date and time, the BHT may not log into the (remote) host computer. -
Page 31: Internet Explorer
4.2.3. Internet Explorer .2.3. Internet Explorer Desktop Browse web pages. Browse web pages. An internet connection is required to set up before using An internet connection is required to set up before using Note Note Internet Explorer. Setting up a wireless connection and opening Internet Explorer. -
Page 32: Remote Desktop Connection
4.2.4. Remote Desktop Connection .2.4. Remote Desktop Connection Desktop Remote Desktop Connection is used to control other computers Remote Desktop Connection is used to control other computers remotely. Refer to the BHT RDP Plug-in Reference Manual to control local devices such as barcodes, beeper, LED and so on for the BHT operating in the Microsoft Windows terminal service/desktop environments. -
Page 33: Remote Display
4.2.6. Remote Display .2.6. Remote Display The BHT can be manipulated via a network. The BHT can be manipulated via a network. The following application files “CERDISP.exe” and “CERHOST.exe” must be run respectively on the BHT The following application files “CERDISP.exe” and “CERHOST.exe” must be run respectively on the BHT and the host computer in order to manipulate the BHT remotely. -
Page 34: Screen Capture Tool [Captbht.exe]
The BHT desktop shown in fig.6 is displayed on the computer after the application is launched. The computer can manipulate the BHT with this BHT desktop. Cerhost screen (fig.4) Connect dialog (fig.5) BHT desktop (fig.6) 4.2.7. Screen Capture tool [captbht.exe] The screen capture tool (captbht.exe) captures the BHT screen images. -
Page 35: Control Panel
5. Control Panel Control Panel is used to set up a windows operating environment. In the Start menu, tap Settings(S) then Control Panel(C) to open Control Panel. Double tap each icon to set up DW: DANSO WAVE feature MS: Microsoft windows feature Icon Name Description Backlight... - Page 36 Mouse Sets up a mouse. √ Network and Dial-up Sets up a new dial-up Internet connection. √ Connections Refer to “5.4Network and Dial-up Connection ” Owner Views or sets up the owner properties (that is required to √ access the network resource). Password Sets a windows startup password as security guard.
-
Page 37: Backlight Settings
5.1. Backlight settings Control Panel Sets up the backlight. - Note - (*)Whenever the backlight ON/OFF keys pressed, backlight switches between ON and OFF regardless of the backlight settings in this menu. Refer to “3.6 Using backlight”. General tab menu LCD/Keypad tab menu Item Meaning... -
Page 38: System
5.2. System Control Panel Views the windows System Properties and device information and changes the RAM memory allocation. General menu General menu shows the windows system information and the device information. Memory menu The Memory menu shows the memory allocation and free space of the RAM memory, and is used to change the RAM memory allocation by using the slider. -
Page 39: Stylus
5.3. Stylus Control Panel Sets up the touch screen. Double-Tap menu The Double-Tap tab menu is used to set the double tapping speed. Calibration menu The Calibration tab menu is used to adjust the touch screen sensitivity Tap the Recalibrate button, then follow the instructions displayed on the screen. -
Page 40: Network And Dial-Up Connection
5.4. Network and Dial-up Connection Control Panel Sets up a network and dial-up connection. To connect the BHT to a network, tap the “Network and Dial-up Connection” icon in the control panel. Icon name Description Make New Connection Creates a new network connection. Double tap the icon, then enter a new connection name and select a connection type by following the instructions given by the... -
Page 41: Power
5.5. Power Control Panel Views the battery or device status and sets a wakeup event. Sets the SCAN key as a wakeup event from suspend, if checked. Wakeup menu 5.6. Volume and Sounds Properties Control Panel Changes sound settings and adjusts the sound volume. ... - Page 42 Sound menu Sets up sounds for various events. Application menu Sets the notification pattern for code scanning completion, application and system warning. Beeper: Beeper only (default) Vibration: Vibrator only Beeper & Vibration: Beeper and Vibrator - 36 -...
-
Page 43: Regional Settings
5.7. Regional Settings Control Panel Changes the display language and the format that windows uses to display dates, times, currency, values and Uniscribe for complex text layout such as Thai language. - Note - Refer to the following URLs (Microsoft MSDN: English) for details of Uniscribe. -
Page 44: Display
5.9. Display Control Panel Changes the display settings to customize the desktop. Background menu Changes the desktop background (wallpaper). Appearance menu Customizes the desktop appearance. - 38 -... -
Page 45: System Menu (Bhtshell)
6. System Menu (BhtShell) The System Menu is used to set up BHT operating environment, and is accessible from the BhtShell in the desktop or the BHTSettings in the control panel. BHTSettings icon BhtShell icon in the control panel in the desktop 6.1. - Page 46 Network Settings Sets up network-related configuration. Internet Explorer Sets up additional function for Internet Explorer. Options Remote Desktop Sets up Remote Desktop. Log Manager Retrieves the BHT operation logs. SCANNER Performs a scanner reading test. BEEPER Performs a beeper scale test. AGING Performs an aging test.
-
Page 47: Execute Program
6.2. Execute Program System menu The Execute Program menu is used to run applications and open folders or files. Tap “1: Execute Program” in the System Menu. The screen shown on the left is displayed. Tap “Browse…”. Select a file from the My Device list, or enter a file name. Make sure that the file name displayed in the “Name:”... -
Page 48: Communication
6.3. Communication System menu The Communication menu is used to connect the BHT to a host computer. Tap 2: Communication in the System Menu. The BHT can connect to a host computer using the following three methods. 1.Ymodem*: Communicates with a host computer via an RS-232C port using Ymodem. (currently not available) 2.ActiveSync(USB)**: Communicates with a host computer via a USB using ActiveSync or... -
Page 49: Activesync(Usb)
6.3.1. ActiveSync(USB) .3.1. ActiveSync(USB) System menu The ActiveSync (USB) menu is used to connect a BHT to a host computer via a USB. The ActiveSync (USB) menu is used to connect a BHT to a host computer via a USB. Tap the ActiveSync (USB) in the Communication menu. -
Page 50: Ftp
6.3.2. FTP .3.2. FTP System menu The FTP menu is a FTP Client software program (FTPClient), and is used when the BHT transfers files from or The FTP menu is a FTP Client software program (FTPClient), and is used when the BHT transfers files from or to the FTP server. - Page 51 Downloading files using FTP To download files from the FTP server, follow the steps below. Step 1 Tap the Ref... button in the Download section. The Select file menu is displayed. Step 2 In the Select file menu, select the folder and file to download the tap OK button.
- Page 52 Uploading files using FTP To upload files to the FTP server, follow the steps below. Step 1 Tap the Ref... button in the upload section. The Select file menu is displayed. Step 2 In the Select file menu, select the folder and file to download the tap OK button.
- Page 53 Changing the FTP Client Configuration To change the FTP Client Configuration, tap the Config... button. The FTP Client Configuration is displayed. Change the settings as explained in the FTP Client Configuration section. Error messages during FTP download or upload. Message Problem Solution...
-
Page 54: System Properties
6.4. System Properties The System Properties is used to set up various settings that control how the BHT works. The System Properties is accessible from both the BHTShell in the desktop and the BHTSettings in the Control Panel. 6.4.1. Scanner settings System Properties Double tap the Scanner icon in the System Properties to set up how the BHT reads barcodes or QRcodes. - Page 55 [3], [4], [5] ITF, STF and CODABAR The minimum number of digits to be read for ITF, STF and CODABAR is selectable. Setting smaller numbers for each code increases probability of missing digits or misreading, depending on various factors such as barcode reading conditions and barcode quality. Setting larger numbers for each code decreases probability of missing digits or misreading.
- Page 56 [2] REVERSE (Mirror image 2D code reading function) Mirror image code is a code viewed from a reversed side of a 2D code, and can be read by setting the “REVERSE” to “ON”. (default: OFF) Note Enabling the mirror image 2D code reading may increase reading time for 2D codes. [3] DECODE LEVEL (Acceptable code quality level) The decode level is selectable from 1 to 9.
- Page 57 [7] OPTION Set to ON to enable the optional data to be added to the end of 2D code data read. Point The setting is always effective when the BHT is used. Changing the settings is not recommended unless necessary. Option data format Example code: QR code, Model 2, Version 5, Error correction level M, and mask number 6.
-
Page 58: File System
6.4.2. File System System Properties The File System menu is used to initialize the Flash memory, registry and RAM memory. The BHT restarts after initializing the registry or the RAM memory. To initialize, double tap the File System icon in the System Properties. Select the memories to initialize, then tap the Initialize button. -
Page 59: Power Management
6.4.3. Power Management .4.3. Power Management System Properties The Power Management menu is used to set the automatic power-off timer and st The Power Management menu is used to set the automatic power-off timer and st andby andby timer timer ouble tap the Power Management icon in the System Properties to open the Power ouble tap the Power Management icon in the System Properties to open the Power Management menu. -
Page 60: Reset Menu
6.4.4. Reset Menu The Reset Menu is used to set up the Reset/Full reset related configuration. Enables or disables the reset/full reset buttons in the Enable reset buttons basic configuration menu (MENU). in the MENU Refer to “3.7 Using the MENU key3” for details. Reset/Full Reset unchecked Disables the reset/full reset buttons in... -
Page 61: Key
6.4.5. Key .4.5. Key System Properties The Key menu is used to set up how the keypad keys work. The Key menu is used to set up how the keypad keys work. Double tap the Key icon in the System Properties to set up the keypad key functions. Double tap the Key icon in the System Properties to set up the keypad key functions. - Page 62 Assignin a user defined k The magic keys are assignable to user-d efined virtual keys. To assign the user-defined virtual key, follow the steps below. Step 1 Write a program code for a virt ual key as a text file. Step 2 Save the file in the BHT FLASH folder with the filename “MKeyDef.txt”.
- Page 63 Key Enable/Disable menu The keys checked are enabled. o disable a key, uncheck the box. Input Mode tab menu Enables or disables the mu ltipress input method for the alphabet input ode. Enable multipress i nput with timeout: A text selected is entered after the specified time has elapsed, if checked.
-
Page 64: Status Display
6.4.6. Status Display System Properties The Status Displa y is used to display or hide the fo llowing status indicators in the taskbar. To set up, double tap the Status Display icon in the S ystem Properties. he default values are given in parentheses. attery: Battery voltage level (Displayed) LAN:... -
Page 65: Bht Backup
6.4.8. BHT Bac System Properties he BHT Backup is used to back up and restore the data (files) in the RAM memory and e registry. Data or files in the flash memory and the microSD card are not supported by e BHT Backup. - Page 66 Restoring data Step 1 Select a file to restore from the back file list. Step 2 Press the Restore button. The popup screen is displayed. Step 3 Tap th e Restore button. -The b ackup file is not compatible with different versions of OS ...
- Page 67 Viewing the bac kup file information To view the backup file information details, follow the steps below. Step 1 Select the file from the backup list in the BHT Backup initial screen. tep 2 Tap VIEW bu tton to display the information details. he information shown on the left is displayed.
- Page 68 Command line for data backup > BHTBackup [/b] [/r] [/f] [/bf] [/a] [/p] [/m] [/e] Backup Backup with the specif ied "folder" and "backup filename". Backup file is created in "¥<folder>¥Syst em¥Backup¥<filename>.dbk". Restore Restore with the s pecified "folder" and "backup filename".
-
Page 69: Startup Config
6.4.9. Startup Config System Properties The S tartup Config is used to define how the BHT starts up after rest and full-reset, and enable or disable error messages. To set up, double tap the Startup Config icon in the System Prope rties Refer to “2.2 Support functions for setup”, and “7 Error Messages”. - Page 70 Launcher menu Setup Launcher: Performs the Automatic Application Launch, if checked The application will not be performed if no files exist in the folder “ ”, even if the box is checked. ¥Flash¥Setup Reboot after Setup: Resets the system after the execution of program, if checked. Startup Launcher: Wait N Second: Execute a startup application after waiting spe cified...
- Page 71 Warning Message menu The Warning Message tab menu is used to enable or disable error messages explained below. Registry settings have been lost: If checked, the message below is displayed only when the BHT is not set to back up the registry at full reset. (default: checked) Service life warning for backup battery: If checked, the message below is displayed at power ON when th battery level is low.
- Page 72 Password menu The Password tab menu is used to restrict use of the BHT at reset, full-reset or power-on, and has two functions; Device lock (password protection) and Application Launcher. (1) Device lock function The password is prompted to restrict use of the BHT a t reset, full-reset nd power-on.
- Page 73 (2)Application Launch er function Enable Application Launcher Starts up the application launcher at reset/full-reset, if checked. (default: unchecked) Disable ActiveSync auto connect Disa bles the ActiveSync /WMDC auto connect while the application launcher is activated, if checked. (unchecked) - Note - ActiveSync/WMDC tomatic connection setting in the System Properties precedes this setting.
- Page 74 Configuration File (Startup.in The configuration file does not exist at default. The following file is created as the configuration file when the OK button is pressed in the General, Warning essage or Password tab. (The file is not a registry file.) ¥Flash¥system¥Startup.ini The sample c onfiguration file:...
-
Page 75: Registry Editor (Regedit)
6.4.10. Registry Editor (RegEdit) System Properties The RegEdit is used to add, modify, de lete, import or export the registry. The following three methods are available to use the RegEdit. - Using the GUI (grap hical user interface) to add, modify, delete, import or export the registry. - Page 76 nd hold the registry data in the lower half of the RegEdit screen until the edit menu pops up. Then select one from the following edit menu. Add: Adds the registry data with the registry type. DWORD STRING - Single (without linefeed code) - Multi (with linefeed code) Delete: Deletes the registry da...
- Page 77 Using command line w ith Re gEdit e command prompt can be used to import or export the registry from or to the regi stry file. To use the command prom pt, follow t he steps b low. The following file and folder nam es ar e used in the steps below •...
- Page 78 Command line for exporting the regi stry Export function (/E option) > RegEdit [/H] /E filepath [sub-key] No message is displayed while exporting the registry (d efault: display) filepath The registry path and file name to e xport. sub-key The registry sub-key to export.
- Page 79 DataValue Format the DataValue the way shown i n “Data type and format list” on the next page. Add a linefeed "¥" at the end of the line, when starting a new line. For example: [HKEY_LOCAL_MACHINE/Time Zones/Pacific Standard Time] "TZI"=hex:/ a4,01,00,00,00,00,00,00,c4,ff,ff,ff,00,00,0b,00 00,00,01,00,02,00,00,00,00,00,00,00,00,00,03,00,/ 00,00,02,00,02,00,00,00,00,00,00,00...
- Page 80 Error Mes sages for Registry Editor Message Error No. Problem Soluti Import failed. The specified registry file Check if the specified registry file exists. does not exist. Err Code = X The specified sub-key or Check if the specified sub-key or value exists. value to delete does not exist.
- Page 81 Messag Error No. Problem Solution Import failed. The sub-key path is not pecify the sub-key path or correct the re gistry specified. file format. Err Code = X The following errors are examples. The sub-key path is not specified. [NG] lank line "Battery"=dword:00000001 [OK]...
-
Page 82: Os Update
6.4.11. OS Update System Properties The OS Upda te is used to update the Operatin g System. Double tap th e OS Update icon in the tem Properties to open the OS Update menu. File Name: OS update file name The default OS update folder is "¥Flash¥OSUpdate". - Page 83 - Note - The file system in the RAM and the registry in the Flash memory will be deleted after reboot. For this reason, setting up the registry to automatically restore is strongly recommended. The steps are shown below. Step 1 Create the registry file (*.reg) as explained in “6.4.10. Registry Editor”.
- Page 84 Command line for OS Update > OSUpdate /e [/r] [/f] /e : Execute command line mode (none): Execute GUI mode (default) : Command line mode without th e battery power check. : Command line mode with the battery powe r check.
-
Page 85: Wireless Lan
6.4.12. Wireless LAN Wireless LAN is a wireless LAN setup tool called Wlan Manager, and is used to connect the BH T via a wireless network. To open the Wlan Mana ger, double tap the Wireless LAN icon in the System Properties. Refer to “6.8 Wlan Manager ”... -
Page 86: Network Settings
6.4.14. Network Setting System Properties The Network Settings is used to enable or disable IPv6 (Internet Protocol version 6). IPv6 is set to “Enable” as default. Double-tap the Network Settings icon in the System Properties Follow the steps below. Step 1 Select either “Enable” or “Disable”. Enable: IPv6 is activated. -
Page 87: Internet Explorer Options
6.4.15. Internet Explorer Op .4.15. Internet Explorer Op ions ions System Properties The Internet Explorer Options is used to set up the FullScreen web browser. The Internet Explorer Options is used to set up the FullScreen web browser. Tap the Internet Explorer Option Tap the Internet Explorer Option s icon in the System Properties to open. -
Page 88: Log Manager
6.4.17. Log Manager .4.17. Log Manager System Prop erties The Log Manager is a tool for retrieving the BHT operation logs. The Log Manager is a tool for retrieving the BHT operation logs. Double tap the Log Manager icon in the System P roperties to display the enu shown on the left. -
Page 89: Resetting The Backup Battery Discharge Counter
6.4.18. Resetting the B .4.18. Resetting the B ckup Battery Dis ckup Battery Dis charge Counter charge Counter System Properties Hold down the SHIFT key and press the 0 key Hold down the SHIFT key and press the 0 key while the System menu is while the System menu is open. -
Page 90: Test
6.5. Test System Menu The Test menu is used to perform various hardware tests for the BHT. o open the test menu, tap the 4:Test in the System Menu. Refer to “6.5 Test ” for details. Note ntact your sales dealer if an error occurs during the tests. 6.6. -
Page 91: Wlan Manager
6.8. Wlan Manager System Properties The “Wlan Manag er” is a wireless LAN setup tool that is used to connect the BHT via a wirele ss network a nd check the network information. o open the Wlan Manager, double tap the Wireless LAN icon in the System Properties. -
Page 92: Information Menu
6.8.1. Information menu Wireless LAN The information tab menu is used to display the wireless device information and connection status. Associated Access Point: Information of an associated access point is displayed. BSSID: Current BSSID Signal Strength: Current signal strength uality: Quality Description Excellent... -
Page 93: Network Menu
6.8.2. Network menu Wireless LAN he Network tab menu is used to display network information, and sets up the IP address and the name servers. IP Type: IP address type, DHCP or Static IP Address: BHT IP address mask Subnet mask: Subnet Gateway: Default... -
Page 94: Settings Menu
6.8.3. Settings menu Wirel ess LAN Power: Select the wireless module power save mode from the pull-down list. Constantly awake mode The wireless module is constantly powered ON. FastPSP: Power save mode (Default) The wireless mode swit ches between the power save mode and CAM mode depend ing on network traffic volume. - Page 95 Advanced Settings menu reamble: Select the “Short” or “Long” radio button for the preamble Length. Default is “Long”. Note Select the same preamble length as the access point. If both the BHT and access point are not set to th e same reamble length, the BHT may not connect to the access...
-
Page 96: Profiles Menu
6.8.4. Profiles menu Wireless LAN The Profiles tab menu is us ed to set up the wireless network security. The profile onnected is shown as an active profile on the Status section in the inform ation tab page. The BHT at tempts to reconnect to the highest priority profile available until connected if the wireless network is disconnected. - Page 97 Creating a new network profile To create a new network profile, tap the New button in the Profiles tab enu. The Profiles menu is displayed. The menus shown in the Profiles menu will vary dependi ng on the ettings selected for the Authentication, Encryption and EAP type. SSID Enter an SID that identifies the wireless SSID.
- Page 98 Security Configuration The network security is set with the combination of Encryption and Authentication as listed below. The security combination is changeab Security Parameter PEAP EAP-TLS LEAP EAP-FAST (802.1x) (802.1x) (802.1x) (802.1x ESSID √ Authentication Open Encryption None 802.1x Disab Disable PEAP...
- Page 99 Security (WPA2) Parameter PEAP EAP-TLS LEAP EAP-FAST ESSID √ Authentication WPA2-1 WPA2-PSK Encryption TKIP / AES 802.1x PEAP EAP-TLS LEAP P-FAST Disable Pre Shared Key √ - - - - WEP Key - - - - - User ID √ √...
- Page 100 Profile menu Images - 94 -...
- Page 101 Selecting a certific he Select C ertificate button in the Profile menu is used to import a certificate. This menu button is displayed in the s pecific Profile menu as shown below. To import a certificate, follow the steps below. Step 1 Tap Select Certificate button in the profiles menu.
- Page 102 Using Cert & PAC (Certifi cates & PACs) The Cert & PAC (Certificates & PACs) button in the Profile tab menu is u sed to import, view or remove the certificates and secret keys (PACs). The following table shows the required certificates and secret keys for each EAP type. EAP type Root certificate Client certificate (with secret key)
- Page 103 Importing a root certificate Step 1 Tap the Import button in the Trusted Authorities tab. The Import menu shown on the left is displayed. Step 2 Tap the Browse button to select a root ce rtificate file, or enter the full path of the root certificate file.
- Page 104 Scanning access points To scan access points, tap the Scan button in the Profiles tab me The scan menu is displayed. his menu provides the following features. [1] Rescan Rescans surrounding acce ss points. [2] Save Saves the r esult of a scan.
-
Page 105: Ping Test
6.8.5. Ping test The Ping menu is used to per form a ping test. estination IP or Name: Enter the IP addr or name of the host computer in order to ping. etting: O pens the p ing settings. Start Start the ping test. - Page 106 Details of the Ping parameter The settings menu is used to set up the ping command parameters. Tap the Settings button in the ping menu to dis play the Ping settings enu. Tap the Default button to restore the default settings. Item Value Range Default Va Data size [byte]...
- Page 107 Ping echo request transmissio n timing Two types of echo reques t transmissi n timing are available: Type 1 and Type 2. (Default: Type 2) ype1 Type 1 sets the interval for a definite period of time between ping echo requests regardless of the timeout occurrence.
-
Page 108: Version
6.8.6. Version The Version tab menu is used to view the versions of the wire less LAN driver. Tap the Version tab in the WLAN Manager to view the versions. Driver Version: Version of the wireless LAN driver. Firmware Version: Firmware version of the wireless LAN driver. Regio n Code: Country code (Country name, organization name for Standardization) -
Page 109: Bluetooth Manager
6.9. Bluetoo th Manager The Bluetooth Manager is a Bluetooth communication setup tool to connect the BHT to other Bluetooth device To open the Bluetooth Manag er, double tap the “Bluetooth” icon in the System Properties. The Bluetoo th Manager is displayed with a toolbar and status bar. Tool Bar The current battery power level. -
Page 110: Device Inquiry
6.9.1. Device Inquiry Tap the “Device inquiry” icon in the tool bar to search for remote Bluetooth devices. The devices found are listed as device icons (such as a computer, laptop, PDA, audio device) in the main window. The same remote device list is displayed next time the Bluetooth Manager is opened (to save time searching for the sam e devices). -
Page 111: Device Pairing
6.9.2. Device pairing The following are three w ays of pairing the BHT with a remote device. 1. Pairing with a remote device from the BHT (local device). Step 1 Select a remote device from the remote device list. Step 2 Then hold down the device icon with the stylus to open the contextual menu. -
Page 112: Properties And Configuration
6.9.3. P .9.3. Properties and configuration The Bluetooth Manager provides the SPP (Serial Port), OPP (Object Push) and FTP (File Transfer) functions The Bluetooth Manager provides the SPP (Serial Port), OPP (Object Push) and FTP (File Transfer) functions s local services. s local services. - Page 113 FTP Profile To activate the FTP Profile, double tap the File Transfer icon in the main window, or select “Start” in the contextual menu shown by holding down the File Transfer icon with the stylus. o change the FTP ser directory where the remote devices access, elect the “Properties”...
-
Page 114: Local Device Properties And Configuration
6.9.4. Local de vice properties and configuration Tap the Setup icon in the Bluetooth Manager, to open the local device (BHT) properties. This menu provides the following fea tures. - Viewing the local device prop erties (MAC address, device name, device type). - Setting up the local devi ce security - Setting up the Bluetooth... -
Page 115: Remote Device Services
6.9.5. Remote device services .9.5. Remote device services Remote device properties Remote device properties To open the remote device properties, sele To open the remote device properties, sele ct “Properties” in the ct “Properties” in the contextual menu shown by holding down th contextual menu shown by holding down th e remote device icon in the e remote device icon in the... - Page 116 Serial Port service To use the serial port service, double tap the Serial Port icon or select “Connect” in the contextual menu shown by holding down the icon. The COM port selection prompt dialog is displayed when the “Aut Client COM Port”...
- Page 117 File Transfer To use the file transfer service, double tap the File Transfer icon or select the “Connect” in the contextual menu shown by holding down t The root directory that contains the shared folder of the remote devic e is displayed in the list view when the connection is successfully established with the remote device.
- Page 118 Object Push To use the object push service, double- tap the Object Push icon or select Push file in the contextual menu shown by holding down the The file selection dialog shown on the left is displayed then select the file to transfer. o change the transfer speed, select “Properties”...
- Page 119 HSP The HSP (Headset Profile) is used to connect to the Bluetooth Headsets. To use HSP service, double tap the “HSP” icon or select "Connect" in contextual menu shown by holding down the HSP icon. he paring and connection status with the remote device is shown as elow.
- Page 120 Servi ce connection shortcuts The service connection shortcut provides an easy connection to the remote device. To create a shortcut, select the “Create Shortcut” in the c ontextual menu hown by holding down the service icon. The mess age shown on the right is displayed wh the shortcut is...
-
Page 121: Version Information
delete the shortcuts, select “Delete” in the contextual menu shown by holding down the shortcut icon. he message dialog is displayed. Tap Yes to proceed with deletion. The message “Shortcut deleted” is displayed when the deletion is completed. contents of the shortcut list are saved while the Bluetooth Manag er is running. -
Page 122: Scanner Reading Parameters
6.10. Scanner Re ading Pa rameters The setup menu for the scanner reading parameters is launched from the System Properties or the Test menu in the System menu. se the settings: Enables or disables the menu. Default is unchecked (disabled). Read Mode: Sets the scann er reading mode. - Page 123 Alternate switching mode: The illumination LED turns on when the trigger key is press ed, and does not turn off until the code device file is losed or the trigger key is pressed again. he illumin ation LE D turns ON and OFF alternately by pressing the trigger key. The BHT reads a ode while the illumination LED is turned on, but does not read a next code until the scanned...
-
Page 124: Read Code
6.10.2. Read Code The Read Code menu is used to set up the readable codes and parameters. The codes grayed out are not available. The parameter for each code is displayed when a check box is checked. BHT-1300Q BHT-1300B EAN/UPC (EAN-13/UPC-A, EAN-8, UPC-E) The parameter shown on the left is displayed when “EAN/UPC”... - Page 125 CODE39, CODAB AR, ITF, STF The parameter screen shown on the left is displayed when “CODE39”, “CODABAR”, “ITF” or “S TF” is checked in the Read Code menu. Code: Enables the code reading. Specify the minimum and maximum numbers of digits to be read , if the code is enabled.
- Page 126 RSS (RSS-14, RSS Limited, RSS Expanded) The parameter shown on the left is displayed when “RSS” is chec ked in e Read Code menu. Tap each tab, to set up the parameters for RS S-14, RSS Limited or RSS Expanded.
- Page 127 QR (Model1, Model2, MicroQR, SQRC), iQR The parameter screen shown on the left is displayed when “QR” or “iQR” is checked in the Read Code menu. Code: Enables the code reading. Specify the minimum and maximum versions to be read if the code is enabled.
-
Page 128: Data Edit
6.10.3. Data Edit The Data Edit menu is us ed to set up the parameters for each code to edit the scanned data. Tap each button to open the par amet ers. BHT-1300B BHT-1300Q EAN/UPC The screens shown belo w are displayed when the EAN/UPC button is tapped in the Data Ed it menu. - Page 129 CODE 39 The screen shown on the left is displayed when the CODE 39 button is tapped in the Data Edit menu. heck Digit: Adds the check digit to the CODE39 data if checked. tart/Stop Character: Adds start/stop characters to the CODE39 data if checked.
-
Page 130: Test Menu
6.11. Test Menu The Test menu is used to perform the following hardware tests for the BHT. To open the Test menu, t ap “4:Test” in the System Menu. 1:SCANNER: Performs a barcode scanning test. 2: BEEPER: Performs a b eeper scale test. - Page 131 - Point - QR code and iQR code can be divided up to 16 codes from a single code. The multiple codes divided are called spli t codes. The split codes are reconstructed as a single code when all spl codes are re The beep er sounds differently when the split codes are read.
- Page 132 Code mark list Code mark Code type 1300B 1300Q Type1 Type2 No add-on √ √ EAN-13 2-digit add-on √ √ (JAN-13) 5-digit add-on √ √ No add-on √ √ UPC-A 2-digit add-on √ √ 5-digit add-on √ √ No add-on √...
- Page 133 Code mark Type2 is a code mark system that complies with “Guidelines on Symbology Identifiers” of AIM USA. The last character “m” varies depending on the data format of the barcode system, a s shown in th e table on the xt page.
-
Page 134: Beeper Scale Test
6.11.2. Beeper Scale Test Tap the 2:BEEPER button in the Test menu to perform the beeper scale test. The screen shown on the right is displayed, and the beeper sounds two octav e major scales shown as below. The BHT automatically returns to the HardTest menu after two octave major scales are played. -
Page 135: Communication Test
6.11.4. Communication Tes ap the 4:COM button in the Test menu to perform the communication test for the USB interface port. 1:USB: Performs the USB interface test. Tap the 1:US B butt on in the CO M men u to start the USB interface test. -
Page 136: Lcd And Led Indicator Test
6.11.5. LCD and LED Indicator Test Tap the 5:DISPLAY button in th e Test menu to perform the LCD and ED indicator test. he test pattern on the left is displayed, and the LED indicator illuminates in blue. ress the ENT key to proceed to the next test pattern. ress the BS key to return to the previous test pattern. -
Page 137: Key Entry And Vibrator Test
6.11.6. Key Entry and Vibrator test Tap the 6:KEY VIBRATION button in the Test menu to perform a key entry and vibrator test. The screen shown on the upper left is displayed and the B HT waits for a key entry. Any key pressed is displ ayed on the s creen and stays displayed until all keys are pressed. -
Page 138: Application Launcher
6.12. Application Launcher he Application Launcher is an application guard tool that is used to restrict the use of applications for the BHT end users. The end users are allowed to use specific applications determined by the administr ator. The Application Launcher also restricts Windows desktop operation to prevent the end users from using non-listed applications or changing any configuration in order to ensure smooth BHT operat ion. -
Page 139: Initial Setup
6.12.2. Initial setup Enabling the Application Launcher The Application Launche r must be enabled in the System Settings Menu. To enable the Application Launcher , follow the steps below. Enabling takes effect at r eset or full-reset. Step 1 Open the System Properties by tapping 3:System Properties in the System Menu. -
Page 140: User Mode
6.12.3. User mode The Application Launcher automatically starts up in the user mode. In the user mode, only the listed applications determined by the administrator ca n be used. The task bar is not displayed when the adminis trator sets the task bar to “Hide” in the “Settings” menu (screen shown on the left below). -
Page 141: Administrator Mode
6.12.4. Administrat or mode In administrator mode, the administrator has full control of all applications. The taskbar is displayed regardless of the taskbar settings in the Application Launcher Settings menu, however Wind ows CE taskbar settings override this administrator mode function. The taskbar is not displayed w hen “Auto Hide”... -
Page 142: Tracing (Start/Stop Trace)
6.12.5. Tracing (Start/Stop T race) The Start Trace button is used for the administrator to find non-listed application full paths and to add to the application list. An application full path is displayed hen a non-listed application is started up during the trace mo de, then a pop-up dialog is displaye d to prompt t... - Page 143 p 5 Tap the Stop Trace button to stop trace mode. The pop-up message dialog that shows Windows Explorer full path is displayed. Step 6 Tap the Add to List button to add Windows Explorer to the user list. he Add to List screen is displayed. efer to “6.12.6 Adding applications (Add to List)”...
-
Page 144: Adding Applications (Add To List)
6.12.6. Adding applicati ons (Ad d to List) To add applications to the user or admin list, Press the Add to List button in the trace mode, or Press the Add to List button in the admin mode. he screen on the left is displayed, and then follow the steps below. tep 1 Select the User App List or Admin App list radio button whichever applications are added to. -
Page 145: Settings
6.12.7. Settings The Settings menu is used to change the password, font size and other options. The settings are saved to the ini-file w hen the OK button is pressed. Password: Administrator password (Default: no password) Taskbar: Taskbar Hide or Show in the us er mode (Default: Show) Enable 10-key: When checked, the applications start up by pressing the... -
Page 146: Configuration File (Ceadmin.ini)
6.12.8. Configura tion file (CeAdmin.ini) The configuration file called CeAdmin.ini is created in the ¥Flash¥System folder of the BHT when the Application Launcher is opened and closed for the first time. does not exist at default. file is not a registry file and ¥Flash¥system¥CeAdmin.ini The Application Launcher reads the file when started up. - Page 147 Value List Parameter GUI screen Value Common Application Launcher function settings Password Enter the administrator password Maximum 255 characters. Defa ult: “”(blank), No password Taskbar Taskbar Use this parameter to show or hide the taskbar. 0: Hide, 1: Show (Default) TenKey Enable 10-key 0: Disabled (Default), 1: enabled...
- Page 148 Error m essage list Message Problem lution User mode Failed to start application. The listed applicati on could not Replace the ini file with the correct file. be found. (Correct the applic ation path.) Contact your administrator. ong pass word! Passw ord is incorre...
-
Page 149: Error Messages
7. Error Messag Error messages are displayed on the screen if an error occurs when the power is turned ON or while running a rogram. E rror messages, causes and solutions ar e listed below. Error messages are displayed in the language used by the application for the specific country. Message BHT Response Cause... - Page 150 Message BHT Response Cause Solution The screen on the left is The backup battery Replace the backup displayed when the discha rge counter has battery. power is turned ON. exceeded the specified Refer to “C hapter 5. number of times and Maintenance”...
- Page 151 Barcode Handy Terminal/2D code Handy Termin -1361QWB-CE / B T-1361Q-CE BHT-1361BWB-CE / BHT-1361B-CE Software User’s anual d Edition, July,2014 Duplication or reproduction of this manual in part or in full is prohibited without prior consent. The contents of this manual may be subject to change without prior notice. DE N SO WAVE accepts no responsibility for any damage arising out of use of this manual.
Need help?
Do you have a question about the BHT-1361QWB-CE and is the answer not in the manual?
Questions and answers