Advertisement
Quick Links
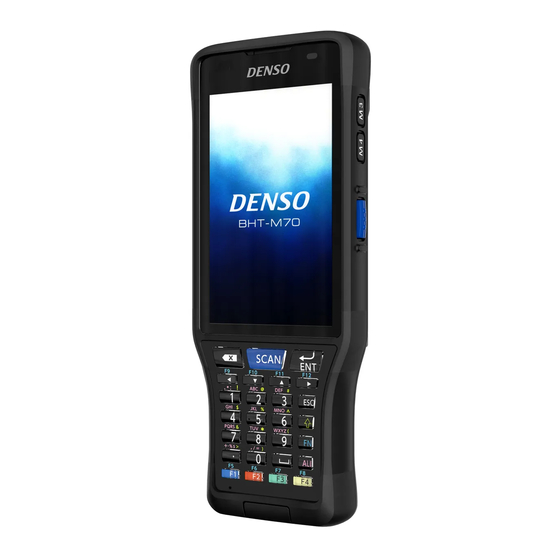
BHT-M70 Series
Operator's Guide
操作指南
Handy Terminal
手持式終端機
BHT-M70-QW (WLAN model)
BHT-M70-QWG (WLAN + WWAN model)
Thank you for using the DENSO WAVE Handy Terminal.
Please read this manual thoroughly prior to operation to ensure full use of the product's functionality,
and store safely in a convenient location for quick reference even after reading.
This manual contains only the basic details required for operation.
Please refer to the User's Manual for further details on general operation.
The User's Manual can be downloaded from the DENSO WAVE Web site.
https://www.denso-wave.com /
感謝您使用 DENSO WAVE 公司的手持式終端機。
為了讓您充分使用本產品的功能,請在開始操作前閱讀本說明書。並且,在閱讀後為了能夠在必要時隨
時參考,請妥善保管本說明書。
本說明書僅記載了操作過程中所需要的基本內容。
關於所有操作的詳細內容,請參考操作說明書。
操作說明書可從本公司網站免費下載。
http://www.denso-wave.com/
1
496996-0930
Advertisement

Subscribe to Our Youtube Channel
Related Manuals for Denso BHT-M70 Series


Summary of Contents for Denso BHT-M70 Series
- Page 1 This manual contains only the basic details required for operation. Please refer to the User’s Manual for further details on general operation. The User’s Manual can be downloaded from the DENSO WAVE Web site. https://www.denso-wave.com / 感謝您使用 DENSO WAVE 公司的手持式終端機。...
- Page 2 The modification of DENSO WAVE’s products by parties other than DENSO WAVE. If it is judged by DENSO WAVE that malfunction of the product is due to the product having been dropped or subjected to impact, repairs will be made at a reasonable charge even within the warranty period.
-
Page 3: Safety Precautions
Product related queries can be sent in by e-mail. E-mail inquiries Please note that these privileges may be subject to change without prior notice. How to Register Access the URL below and follow the instruction provided. https://www.denso-wave.com/... - Page 4 If you register the serial number of the product within one month after your purchase, the warranty of the registered product will be prolonged to three years from the one-year warranty. Please access the URL below to register. https://www.denso-wave.com/ The serial number for registration is found under the QR Code on the name plate. 1.7 Usage Precautions 1.7.1 Usage environment restrictions...
- Page 5 1,500 times Solutions: 70% ethanol/ 10 ppm to 80 ppm hypochlorous acid water/ 70% isopropyl alcohol/ 3% hydrogen peroxide Applicable models: AUTO-ID product models selected by material and posted on the DENSO WAVE’s website. Note - Do not apply any liquid on the reading window or the dust-proof plate.
- Page 6 Chapter2 Component and Functions 2.1 BHT-M70 Upper side Receiver,Speaker Status indicator microphone USB connector Interface connector Lower side Hand belt Rear camera Code reading window Battery cover locks M1 key M2 key Left trigger key Power key M3 key M4 key Right trigger key...
- Page 7 Chapter3 Preparation before use 3.1 Mounting the hand belt 3.1.1 Attach the hand belt to each of the two places as shown in the figure. 3.1.2 Connect the hand belt. 3.1.3 Install the stylus as shown. Select the right or left side of the hand belt.
- Page 8 3.2 Inserting and removing the main battery 3.2.1 3.2.2 Inserting the battery Push the battery in the arrow direction. Insert the battery in the arrow direction. Battery terminal 3.2.3 3.2.4 Removing the battery Pull out the battery with the battery tab held. Push the battery cover locks in the arrow direction.
- Page 9 3.3 Charging the BHT The main battery may not be fully charged for shipment. Please charge the main battery to full before using the handy terminal. You may use the Charging Cradle or USB cable to charge the handy terminal. 3.3.1 Charging Time Main battery The main battery powers the handy terminal to work.
- Page 10 Not light Charging error (Charging stops.) 3.3.5 Using the USB Cable Connect the USB Type-C connector to the connector at the bottom of the BHT. Connect the USB Type-A connector to the USB power adapter. 3.3.6 Using the Charging Cradle Plugging in the cradle Connect the dedicated power adapter, the USB cable and/or USB power adapter to the cradle.
- Page 11 Charging BHT Set the BHT in the cradle upright and gently tilt it away from you. Note: When placing the BHT on the cradle, ensure there is no tangled strap between the device and the cradle. A specific part of the device may get warm while charging depending on operating environment and conditions.
- Page 12 Chapter4 How to Use 4.1 Turning ON the Power To turn on the BHT, press and hold the power button located on the upper side of the device. The OS starts up and the lock screen is displayed. Swipe up from the bottom of the lock screen to display the home screen.
- Page 13 4.2.3 Point the code reading window towards the barcode to scan and press a trigger key on the side of the scanner. Light for scanning is irradiated and the printed barcode is scanned. When the data is successfully scanned and displayed, or the time has elapsed, the light for scanning disappears.
- Page 14 Chapter5 When Unable to Successfully Read Codes Countermeasure Cause Mounting the BHT perpendicular to a code Adjust the position of the BHT may cause specular reflection. This may relative to the code and scan again. lead to no-read results. Specular reflection No-read results can occur if the BHT is Gradually change the mounting...
- Page 15 Chapter6 Troubleshooting Guide 6.1 The BHT is not turned ON ・ Make sure that the battery is properly inserted into the BHT. ・ Check the battery power level and charge the battery if necessary. ・ Wipe any dirt from the battery and BHT terminals. 6.2 The BHT cannot be charged ・...
- Page 16 connection with, the application or use of any product, circuit, or application described herein. If it is judged by DENSO WAVE INCORPORATED that malfunction of the product is due to the product having been dropped or subjected to impact, repairs will be made at a reasonable charge even within the warranty period.
- Page 17 1.1 關於本手冊 因規格改良等原因,本手冊的內容可能會有不經事先通知而發生變更的情況。 未經許可,禁止轉載、複製本手冊的全部或部分內容。 如不慎丟失本手冊,請向我公司諮詢。 對於本手冊的內容,雖然我們盡力追求完美,但萬一發現有可疑之處、錯誤或遺漏,煩請與我公司聯 繫。 1.2 責任範圍 對於因使用或無法使用BHT系統軟件、相關資料而造成的附帶或間接損害(包含因營業利潤損失、業 務中斷、營業信息喪失等造成的損害) ,本公司不承擔任何責任。 為了防止產品侵害他人專利權,本公司採取了適當的措施,但對於因以下(1)~(3)項中任何一種原因 引起的專利權侵害等事件,本公司將無法承擔責任,敬請諒解。 與非本公司提供的零件、產品、裝置、數據處理系統或軟件配套使用時 本公司產品被以預想不到的方法使用時 本公司產品被本公司以外的第三方改造時 如果本公司判斷是因掉落、衝擊造成的故障,即使在保質期內,也將是有償維修。 預存用戶的產品進行修理、解析等時,對於用戶保存在產品內的數據,本公司將無法承擔責任。 1.3 Free/Open source software (FOSS) 本產品中包含Free/Open Source Software(FOSS)。 Denso Wave有提供對應源代碼的準備。詳細情況 請諮詢本公司的銷售門店或者訪問以下網站。 https://www.denso-wave.com/...
- Page 18 包含電池或取決於型號。不包含 詳細信息請參見下圖。 電池類型 型號 產品編號 不包含 104969-465X BHT-M70-QW 104969-466X 104969-468X 104969-470X 不包含 104969-477X BHT-M70-QWG 104969-478X 104969-480X 104969-482X X是介於0和9之間的數字。 1.5 用戶註冊 為了向選購本公司產品的用戶提供更充實的服務和幫助,本公司希望用戶配合進行“用戶註冊”。進行用 戶註冊後可以享受以下特別服務。 發布版本升級通知 發布有關新產品、展覽會以及各種活動等的信息 免費使用網絡信息服務“QBdirect” QBdirect的服務內容 可以獲取各種產品的詳細信息。 信息搜索服務(FAQ) 可以下載BHT系列的最新系統、 下載服務 軟件的修改模塊以及樣品程序。 可以通過電子郵件對產品進行諮詢。 產品諮詢 特別服務的內容會發生變化,敬請諒解。 註冊方法 請訪問以下網頁並按照嚮導進行註冊。 https://www.denso-wave.com/...
- Page 19 1.6 有保證的三年保固 如果您在購買產品後一個月內註冊產品序號,註冊後的產品保固期將從一年延長到三年。 請至以下網址註冊。 https://www.denso-wave.com/ 在銘板上的QR碼下可以找到註冊的序號。 1.7 使用上的注意事項 1.7.1 不能使用的場所 火邊等高溫場所、受陽光直射的場所(有可能會造成故障、發熱、破裂、著火) 。 存放在溫度50 ℃~60 ℃的高溫高濕場所時,請在常溫常濕的場所放置1天以上後再使用。如果在內 部保持高溫的狀態下使用,有可能會造成無法讀取等設備故障。 溫度變化急劇的場所(結露會引起運行錯誤) 從寒冷的地方移動到溫暖的地方時,請放置一段時間後再使用。 會受到強烈衝擊或有大量靜電產生的場所 1.7.2 遠離電波、電磁波、金屬 在以下場所或使用方法下,可能會出現無法進行無線通信的情況。 以下使用2.4 GHz頻段電波的設備的附近(因受電波干擾,會出現無法通信的情況。) ・ 微波爐等工業、科學、醫療用設備 ・ 無線LAN設備 ・ 工廠或倉庫等的物理管理系統 ・ 業餘無線電站等的無線收發器 電腦、電視等產生電磁波的家電產品的附近(電磁噪聲會導致無法通信。) 金屬物的附近、金屬粉多的地方、被金屬壁包圍的房間(因受金屬的影響,會出現無法通信的情 ...
- Page 20 污垢嚴重時,請將布浸入用水稀釋的中性清潔劑中,擰乾後擦拭,最後用乾布擦除水分。 請勿使用香蕉水、酒精等溶劑。否則有可能造成外殼變質或塗料脫落。 液晶屏的污垢 液晶屏容易受傷,請勿用硬物刮劃或敲打。 否則有可能造成表面受傷或破裂。 按鍵的污垢 擦拭按鍵表面的污垢時,請勿強力搓揉或拉拽按鍵。否則可能會造成按鍵損壞。 條碼讀取窗口的污垢 如果條碼讀取窗口的玻璃板上粘有灰塵或垃圾,會影響條碼的讀取。 在灰塵多的地方使用時,請定期檢查讀取窗口的玻璃板上是否粘有灰塵,如果有灰塵,請用空氣刷 將灰塵吹走後,用柔軟的棉花棒等輕輕擦拭乾淨。 有沙粒等硬物粘附時,如果搓揉會造成讀取窗口的玻璃板受傷,所以請用空氣刷將沙粒吹走,或用 毛尖柔軟的刷子將沙粒刷掉。 DENSO WAVE AUTO-ID產品消毒與保養的重要通知。 如AUTO-ID一般產品包裝內的《操作指南》*維護與保養一節所述,嚴禁使用稀釋劑和酒精進行清潔。 由於新型冠狀病毒目前正在爆發大流行,本公司按照自家測試標準,使用70%乙醇或10 ppm至80 ppm的次氯酸水進行擦拭試驗,期望能達到一定的消毒效果。就結果來說,我們肉眼看不出外殼表面上 有任何明顯的變色及褪色。在使用下述的溶液之前,請詳閱並了解以下說明。 測試說明:用機器手臂擦拭產品的外表面1500次(讀取窗口、防塵板和電纜線除外) 溶液:70%乙醇/ 10 ppm至80 ppm的次氯酸水/ 70%異丙醇/ 3%過氧化氫 適用型號:按材料選擇並公佈在DENSO WAVE網站上的AUTO-ID產品型號。 注意 - 請勿在讀取窗口或防塵板塗上任何液體。切勿讓任何液體流入孔和狹縫等狹小空間。 - 務必使用軟布擦拭。如果操作後仍有液體殘留,請用乾的軟布擦拭乾淨。 - 本說明未保證產品之規格。外殼劣化等的產品劣化情況可能會因操作環境變得更明顯。...
- Page 21 2.1 BHT-M70 上側面 揚聲器、接收器 狀態指示燈 麥克風 USB連接器 介面連接器 下側面 手帶 後相機 條碼讀取窗口 電池蓋鎖 M1鍵 M2鍵 左觸發鍵 電源鍵 M3鍵 M4鍵 右觸發鍵...
- Page 22 3.1 手帶安裝。 如圖所示,將手帶分別固定在兩個位置。 連接手帶。 如圖所示安裝觸控筆。 選擇手帶的右側或左側。 也可以將手寫筆存放在手帶中。...
- Page 23 3.2 插入和取出主電池 3.2.1 3.2.2 插入 按箭頭方向壓下電池。 按箭頭方向插入電池。 電池電極 3.2.3 3.2.4 移除 握住電池鎖片,拉出電池。 沿箭頭方向壓下電池蓋鎖。...
- Page 24 3.3 為BHT充電 主電池可能沒有充飽電就出貨。請將主電池充飽電後再使用手持式終端機。您可以使用充電座或 USB 線 為手持式終端機充電。 3.3.1 充電時間 主電池 手持式終端機是由主電池供電以維持其運轉。將空的主電池充飽電大約需要 2.1 個小時。充電時螢幕 上方的狀態指示燈會亮起紅色,充電完成後會變成綠色。 副電池 副電池安裝在主機板上,用途為在更換電池或取出電池時保留資料。 當副電池充飽電後,資料至少可保留 5 分鐘。 安裝完主電池後,可能需要大約十分鐘才能將空的副電池充飽電。請勿取出電池,以便妥善保留資 料。 3.3.2 充電溫度 建議在室溫下(18℃ 至 25℃)為電池充電,以達到最佳性能。請注意,當環境溫度降至 0℃ 以下或 超過 40℃ 時,電池將停止充電。停止充電的溫度可能會因實際操作環境而有所不同。 3.3.3 電池供電的操作 當802.11a/b/g/n/ac、GSM/GPRS/EDGE/WCDMA/UMTS/HSDPA/HSUPA/HSPA+/LTE、v5.1及 v2.1+EDR藍牙和GPS都啟用電池供電時,主電池電量將大幅下降。長時間使用螢幕和連續掃描條碼也會 影響電池電量。 為了避免電池電量過低時系統意外關機,建議您隨時準備好新的電池進行更換,或是將 BHT 連接至外部 電源。 如果長時間不使用BHT,請將電池從BHT或充電座中取出,再存放在陰涼乾燥的地方。 長時間存放充飽電或電力耗盡(無法開啟BHT)的電池,可能會耗損電池的性能和壽命。...
- Page 25 3.3.5 使用USB線 將USB Type-C連接器插入手持式終端機底部的連接器。 將USB Type-A連接器插入USB電源供應器。 3.3.6 使用充電座 將充電座接上電源 使用專用電源供應器或USB線和USB電源供應 器,將充電座接上電源。 將交流電插頭或交流電電源供應器插入電源插 座。 使用電源供應器將CU-M70U接上電源 使用USB電源供應器將CU-M70UQ接上電源 電源供應器 CU-M70U/L 只能使用經電綜核准且通過國家認可測試實驗室(NRTL)認證的ITE(LPS / SELV)電源供應器,其電 氣額定值: 輸出12 VDC,最低 4.16 A,最大環境溫度至少+ 40°C。使用替代的電源供應器會使此裝置的 任何認證失效,並且可能產生危險。 電源供應器 CU-M70UQ 只能使用經電綜核准且通過國家認可測試實驗室(NRTL)認證的ITE(LPS / SELV)電源供應器,其電 氣額定值: 輸出5 VDC,最低 3 A,最大環境溫度至少+ 40°C。使用替代的電源供應器會使此裝置的任何 認證失效,並且可能產生危險。...
- Page 26 給BHT充電 將BHT直立,逐漸向後傾斜。 注意:將BHT放置在充電座上時,請注意不要讓掛繩纏繞在BHT和充電座之間。充電時,BHT的某個特 定部位可能會因工作環境和條件的不同而發熱。這並非故障。 從充電座取下BHT 向前傾斜BHT,並將其拉出。 關於充電座電源連接的注意事項 對於帶有USB介面的CU-M70U,電源供應器和USB線皆可使用。 要為BHT和備用電池充電,可使用電源供應器。 使用USB線充電時,只能為BHT充電。在BHT中安裝大容量電池或在BHT處於工作狀態時充電等情況 下,建議使用電源供應器,因為這些情況可能會導致長時間充電或充電錯誤。使用耗損的電池可能會導 致充電錯誤。在這種情況下,要更換新的電池。...
- Page 27 4.1 開啟電源 電源開啟 要開啟BHT的電源,請按住位於機器上側的電源鍵 。OS啟動並顯示鎖定畫面。從下往上滑動鎖定畫 面,即可顯示主畫面。 注意。為了方便手持式掃描器供電,必須將電池固定在正確位置上。在冷藏室等低溫環境下使用BHT 時,請在正常環境溫度下開機,再將BHT帶到低溫環境中。在低溫下開啟BHT電源,可能無法成功啟動 BHT。由於電池的特性使然,在低溫環境下操作BHT,可能會導致BHT延遲運行或大幅縮短工作時間。 使用前請確認操作條件。 4.2 掃描條碼 按照以下步驟讀取條碼。 4.2.1 按下電源鍵,從睡眠狀態啟動BHT。 4.2.2 點選掃描設定。 打開讀取啟用,點選功能表列上的 ★測試★。 接著測試掃描表格將會開啟,顯示掃描的資料。...
- Page 28 4.2.3 將條碼讀取窗口指向要掃描的條碼,並按下掃描器側面的觸發鍵。 藍色發光 用掃描用的光線進行照射,對列印出來的條碼進行掃描。 成功掃描並顯示資料後,或是經過一段時間後,掃描的燈光會消 失。 4.3 Turn OFF the Power Power OFF 要關閉BHT電源,按住電源按鈕 ,點選彈出的 ★電源關閉★功能表。在點選 ★關閉電源★ 功能表 之前,請確認所有的用戶資料和工作都已儲存。 4.4 電池電量指示燈 可從液晶螢幕右上方顯示的電池圖示確認主電池的電量。由於指示燈顯示的只是主電池電量的粗略估 計,並非準確的剩餘電量,所以請儘早充電。 主電池電量指示燈只顯示電池電量的粗略估計,並非準確的剩餘電量。請閱讀安全注意事項,確保已正 確使用電池。 電池圖示 狀態 100% 100% 略微減少 降至 15% 以下 充電 4.5 長時間不使用BHT後再度使用 如果長時間不使用BHT,BHT中儲存的資料可能會消失或損壞,並且日曆時鐘可能會停止。 ・ 重要的或關鍵的資訊應事先做好備份。 ・ 如果日曆時鐘已停止,則重新設定之。 ・...
- Page 29 對策 原因 當光線從正上方聚焦在條碼的印刷表面時, 改變BHT讀取角度,再試一次。 BHT可能會因鏡面反射而無法讀取條碼。 鏡面反射 如果條碼離BHT讀取窗口太近或太遠,即使 緩慢地將BHT移向或遠離條碼,然後 條碼在讀取區域內,也可能無法讀取。 再試一次。 與條碼之距離 如果其表面極度彎曲,可能無法讀取條碼。 讀取位於條碼讀取窗口中心位置的條 條碼表面曲率 碼。 如果條碼表面有汙垢,可能無法讀取。 抹除條碼上的污垢,再試一次。 條碼表面的汙垢 如果條碼讀取窗口有汙垢,可能無法讀取條 用氣刷吹走所有灰塵,然後用棉籤或 條碼讀取窗口的 碼。 類似的軟物輕輕擦拭讀取窗口。 汙垢 陽光直射或周圍光線的亮度可能會對條碼讀 讀取條碼時要避開陽光直射。在室內 陽光直射、 取產生不利影響。 讀取時,調整周圍光線的亮度。 環境光線...
- Page 30 6.1 BHT電源沒有開啟 ・ 確認主電池已正確插入BHT中。 ・ 檢查電池電量,必要時為電池充電。 ・ 抹除主電池和BHT掃描器上的灰塵。 6.2 BHT無法充電。 ・ 確認已使用專用電源供應器。 ・ 確認主電池已正確插入BHT中。 ・ 確認BHT已被正確放置在充電座中。 當正確放入充電座時,BHT狀態指示燈將變成紅色。 ・ 抹除主電池和BHT掃描器上的灰塵。 ・ 如果主電池充電次數超過300次,或使用時間超過一年,請更換新的電池,以避免因電池劣化而造 成的任何問題。 6.3 BHT意外關閉。 ・ 確認電池已充飽電。如果沒有充飽,請為電池充電。 ・ 檢查是否設定了自動關閉電源。如果設定了自動關閉電源,則在設定的時間內未使用BHT,電源將 自動關閉。 自動關閉電源設定只能透過用戶程式變更。 如果採取上述措施仍未解決,BHT可能已損壞。 通知系統管理員。 如果在操作過程中BHT上顯示錯誤訊息,請參考使用手冊以採取適當的措施。 資料保留 資料位置 保留的資料 內部儲存快閃記憶體 保留的資料 microSD卡 刪除的資料 編輯中的資料...
- Page 31 的其他元件、產品、資料處理系統或裝置或軟體連接或結合使用; (ii)使用DENSO WAVE產品的 方式不符合此產品的用途或設計;或是(iii)由DENSO WAVE以外的他者對 DENSO WAVE產品 所進行的任何改裝。 版權所有 © DENSO WAVE INCORPORATED, 2018 保留所有權利。未經出版商書面許可,不得以任何形式或手段複製本出版物的任何部分。 本文件中所有提及的產品和公司名稱均為其各自持有者所擁有的商標或註冊商標。 QBdirect 是 DENSO WAVE INCORPORATED 的商標。 Android 是 Google LLC 的商標。本文件中提及 的其他產品和公司名稱均為其各自持有者所擁有的商標或註冊商標。 規格如有變更,恕不另行通知。 1 Yoshiike Kusagi Agui-cho, Chita-gun, Aichi 470-2297, Japan https://www.denso-wave.com/ This manual uses recycled paper.
Need help?
Do you have a question about the BHT-M70 Series and is the answer not in the manual?
Questions and answers