ETC Desire Series User Manual
Hide thumbs
Also See for Desire Series:
- User manual (67 pages) ,
- Quick manual (14 pages) ,
- Installation manual (9 pages)

Related Manuals for ETC Desire Series


Summary of Contents for ETC Desire Series
- Page 1 ® Desire Series by ETC D22, D40, D40XT, D60, D60X User Manual Version 1.8.0 Part Number: 7410M1200-1.8.0 Rev: G Released: 2017-11...
- Page 2 ® ET C is a r egist er ed tr ade ma r k of Ele c t ronic The at r e C o n t r o l s , I n c . i n t h e U n i t e d S t a t e s a n d o t h e r c o u n t r i e s .
-
Page 3: Table Of Contents
Table of Contents Introduction ......1 Quick Setups ........1 Vivid, Lustr+, Fire and Ice, Studio HD . - Page 4 DMX Profile Tables ........35 Install Accessories ......39 Desire Series v1.8.0 User Manual...
- Page 5 Software Updates ......80 ETC Technical Support .......80 Routine Maintenance.
- Page 6 Diagnostics Recalibrate Fixture ....91 RDM Commands ....92 Appendix B Desire Series v1.8.0 User Manual...
-
Page 7: Introduction
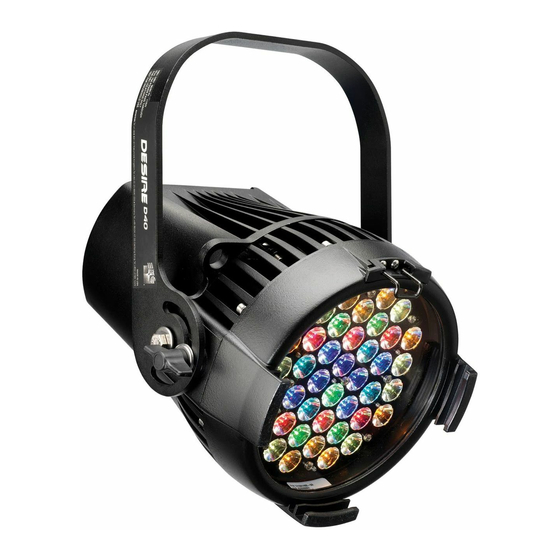
Introduction Desire Series by ETC Congratulations on your purchase of a product. Desire’s x7 Color System™ seven-hue technology produces a light and color quality that conventional LED systems cannot duplicate. This unique color system produces bright, broad- spectrum whites and intense colors equally well, rendering pigments, objects, and skin tones in a natural way. - Page 8 Status indicators Keypad Figure-1.2 Components of the Rear Panel. D40 and D60 shown. Back Light Bulb Enter Home Down Figure-1.3 Keypad Button Functions User Interface Overview page 40 For more information about the user interface, see Desire Series v1.8.0 User Manual...
-
Page 9: Models
Models Each member of the Desire Series product line is unique and optimized for a specific lighting task. All fixtures feature narrow optics for the longest throws. Vivid (D40, D40XT, D60, D60X) • Full 7-color x7 LED array • Optimized for high-output deep pastels and strong saturated colors—an all-around workhorse... -
Page 10: Typography Used In This Guide
Press [ ] to select Sequences and then press [ Safety The Desire series fixtures are intended for professional use only. Read entire User Manual before using equipment. WARNING: • Do not mount the Desire series fixture on or near a flammable surface. -
Page 11: Contacts
Contacts If you have questions about your Desire series fixture that are not answered in this manual, please contact the supplier of your ETC equipment or ETC Technical Services. For general information, your most convenient resources are the references provided in this manual. To search more widely try the ETC web site at etcconnect.com. -
Page 12: Quick Start
WARNING: Do not link more than nine fixtures when using Power Thru (non-dimming, 100 to 240 VAC, 50/60 Hz). Power Thru is not available on all Desire Series fixtures. Up to 32 devices can be daisy-chained together per data run. -
Page 13: Focus
Focus 1: With power supplied, wait for the fixture to boot up. This will take approximately ten seconds. 2: Press [ ] to open the Presets & Sequences menu. 3: Select Focus and then press [ ]. This turns on the LED array to enable focusing. 4: Adjust the fixture’s position as needed. -
Page 14: Quick Setups Menu
• Quick dimming response High • Enables quickest response, simple RGB • Boosted output for maximum intensity Impact control and strobe channel for • Reduced consistency of output maximum effect usage • White point: 5600K Desire Series v1.8.0 User Manual... -
Page 15: Studio Quick Setup
Quick Description Profile Features Setup • For video or film lighting • Enables quick, comprehensive control of white light via DMX or the fixture’s onboard user interface • High-quality white-light output • Linear dimming curve The Studio Quick Setup is operational in •... -
Page 16: Installation And User Interface
16 • 22 Luxeon Rebel LED emitters (D22 Lustr+ and • See Studio HD) • 50,000-hour LED life • 60 Luxeon Rebel LED emitters (D60 Vivid, Lustr+, Fire and Ice, Studio HD, and D60X) Desire Series v1.8.0 User Manual... - Page 17 Optical • Tight primary field angle of 17° • Secondary lenses available for multiple beam (Vivid, Lustr+, Fire and Ice, Studio HD) spread options including round, oblong, and • Tight primary field angle of 24° linear patterns (Studio Daylight and Studio Tungsten) •...
-
Page 18: Typical Power Consumption (D22)
50.9W / 0.276A Studio HD 100V 120V 230V Idle Power / Current 6.7W / 0.095A 6.7W / 0.098A 6.7W / 0.118A 100% Boost Power / Current 55W / 0.555A 54.6W / 0.464A 53.3W / 0.271A Desire Series v1.8.0 User Manual... -
Page 19: Typical Power Consumption (D40 And D40Xt)
Typical Power Consumption (D40 and D40XT) Vivid 100V 120V 240V Idle Power / Current 10.5W / 0.135A 11W / 0.098A 12.7W / 0.078A 100% Boost Power / Current 102W / 1.12A 98W / 0.82A 95.6W / 0.403A Lustr+ 100V 120V 240V Idle Power / Current 10.3W / 0.125A... -
Page 20: Typical Power Consumption (D60)
142.8W / 1.22A 136W / 0.573A Studio Tungsten 100V 120V 240V Idle Power (W) 7.4W / 0.088A 7.5W / 0.083A 9.1W / 0.088A 100% Boost Power (W) 145.8W / 1.49A 143.3W / 1.23A 137.1W / 0.577A Desire Series v1.8.0 User Manual... -
Page 21: Typical Power Consumption (D60X)
Typical Power Consumption (D60X) Vivid 100V 120V 240V Idle Power / Current 4.2W / 0.08A 4.3W / 0.075A 4.1W / 0.067A 100% Boost Power / Current 117.9W / 1.19A 118W / 1A 115.6W / 0.526A Lustr+ 100V 120V 240V Idle Power / Current 4.12W / 0.8A 4.32W / 0.074A 3.85W / 0.063A... -
Page 22: Note About Led Fixtures
All LEDs may exhibit a slight shift in output as they rise to full operating temperature. Desire Series fixtures allow the selection of different power settings in order to balance the competing requirements of thermal stability and brightness. -
Page 23: Installation
4: Insert the yoke locking knob and flat washer and tighten. Installing D22 Canopy and Track For detailed installation information, see the Desire Series D22 Installation Guide. ETC manuals are available for download at etcconnect.com. Installation and User Interface... -
Page 24: Aim Adjustment
The pan is adjusted at the hanging clamp. Please consult the clamp manufacturer’s documentation for instructions on loosening and rotating the yoke at the clamp. WARNING: The safety cable (or other approved safety device) must be securely attached to the safety cable loop before loosening the clamp. Desire Series v1.8.0 User Manual... -
Page 25: D22 Canopy And Track
D22 Canopy and Track The Portable and Track mounted fixtures can tilted up and down and panned to aim the light where it is needed. 1: Pan the fixture to the desired position. The fixture is prevented from rotating completely around to protect the wiring. -
Page 26: Dimensions And Hanging Clearances
235mm 265mm 10.6” 270mm D40 & D40XT 14.1 358mm 16.1” 409mm 9.5” 4.5” 241mm 12.9” 115mm 328mm 4.7” 119mm 6.7” 6.6” 170mm 168mm 9.9” 250mm 11.4” 10.6” 269mm 290mm 12.2” 310mm D60, D60X Figure-2.3 Dimensions Desire Series v1.8.0 User Manual... -
Page 27: Safety Cable
Safety Cable The safety cable (or other approved safety device) should be attached to the fixture housing and wrapped around the hanging structure (pipe). An appropriate attachment loop is provided on the protruding tab of the fixture housing. Take care to leave as little slack as possible in the safety cable to avoid the cable catching the yoke of the fixture. -
Page 28: Power And Data Cabling Requirements
Green Data (D40, D40XT, D60, D60X) The Desire series fixtures operate on a DMX control signal or as stand-alone fixtures. The fixture is supplied with a 5-pin XLR DMX input connector and a 5-pin DMX Thru connector. DMX cables should be acceptable for DMX data transmission (not microphone cable) and should follow the standard pinout. -
Page 29: Data (D22)
• Connection of DMX/RDM thru to the next DMX device. This connection may also be either Belden 9729 or Cat5. Order the appropriate DMX termination kit for the cable type used from ETC (Belden 9729 use part number 4100A1012, or Cat5 use 4100A1013). Termination instructions and the appropriate connector is provided with the termination kit. -
Page 30: Connections
DMX-controlled devices, connect the next DMX cable to the DMX Thru connector. Up to 32 fixtures can be connected together into a data daisy-chain. User Interface Overview page 40 For information about the user interface, refer to Desire Series v1.8.0 User Manual... -
Page 31: D40, D60 Connections
D40, D60 Connections • Connect the AC cable: Align and insert the power connector. Twist the connector clockwise until it locks into place. • Disconnect the AC cable: Slide back the locking tab to unlock, twist the connector counterclockwise, and then pull and disconnect the power connector. •... -
Page 32: Termination
512. Addressing is not required for stand-alone operation. Note: When using RDM with D22 track fixtures, ETC recommends connecting no more than 20 fixtures on a single run. Desire Series v1.8.0 User Manual... -
Page 33: Dmx Profiles
DMX Profiles Desire D22, D40, and D40XT fixtures occupy 1 to 14 DMX channels depending on the profile and which features are turned on. Desire D60 and D60X can occupy up to 15 DMX channels depending on the profile and which features are turned on. The tables that follow describe the order and function of each channel. - Page 34 The RGB profile is optimized for maximum brightness at all settings. Sometimes small changes in RGB values may produce unexpected jumps in brightness. Shifts in brightness may be perceived during color crossfades in cues and presets. Desire Series v1.8.0 User Manual...
- Page 35 Studio The fixture produces only white-type light, which is adjustable from 2725 to 6450K. The Studio profile uses 3 DMX channels to control Intensity, white point, and tint (the green/magenta balance). Tint is adjustable without affecting the white point. All three control parameters are adjustable via DMX as well as onboard with instant access via UI buttons (no menus to scroll).
- Page 36 LEDs from the same production batch. Operating in the Direct Control profile or with Plus Seven settings adjustments bypasses this calibration, and multiple fixtures may produce slightly different outputs when controlled as a group. Desire Series v1.8.0 User Manual...
-
Page 37: Studio Daylight And Studio Tungsten Profiles
Studio Daylight and Studio Tungsten Profiles Direct Control The first DMX channel always controls Intensity from 0 to 100%. Data Channel Control Value Function Fixture address Intensity 0 to 255 Intensity 0 to 100% Fixture address + 1 Strobe 0 to 255 Variable strobe control Fan Control (D60) Only the D60 fixtures have a fan. -
Page 38: Dmx Footprints And Channel Mapping
Plus7 - (5) Plus7 - (5) Plus7 - (6) Plus7 - (6) Plus7 - (6) Plus7 - (6) Plus7 - (7) Plus7 - (7) Plus7 - (7) Plus7 - (7) * When this feature is enabled. Desire Series v1.8.0 User Manual... -
Page 39: D40 (Vivid, Lustr+, Fire, Ice, Studio Hd)
D40 (Vivid, Lustr+, Fire, Ice, Studio HD) Channel HSIC Studio Direct Intensity Color 1 Hue fine Hue fine Green Color temp Color 2 Saturation Saturation Blue Tint Color 3 Intensity Intensity Color 4 Strobe* Strobe* Strobe* Strobe* Color 5 Color temp Color 6 Color 7 Plus7 on/off... -
Page 40: Quick Color (Vivid, Lustr+, Fire And Ice, Studio Hd)
DMX signal to the fixture. For a list of available colors, see the table on page 57 . For additional Quick Color (Vivid, Lustr+, Fire and Ice, Studio HD) page 65 information on Quick Color setup, see Desire Series v1.8.0 User Manual... -
Page 41: Dmx Profile Tables
DMX Profile Tables D40/D40XT (Vivid, Lustr+, Fire, Ice, Studio HD) and D22 (Lustr+, Studio HD) Channel Assignments Notes Profile Channels Vivid, Lustr+ Studio HD 1 - Red 1 - Red 2 - Orange 2 - Orange (White if Lustr+) Direct control of each individual color 3 - Amber 3 - Amber with a separate master intensity... - Page 42 12 - Cyan to fine-tune the color output. 13 - Blue 14 - Indigo Variable strobe control: 0% is no strobe. The fixture output will strobe more Strobe rapidly as the strobe-channel value approaches 100%. Desire Series v1.8.0 User Manual...
- Page 43 D60 (Vivid, Lustr+, Fire, Ice, Studio HD) and D60X (Vivid, Lustr+ and Studio HD) Channel Assignments Notes Profile Channels Vivid, Lustr+ Studio HD 1 - Red 1 - Red 2 - Orange 2 - Orange (White if Lustr+) Direct control of each individual color 3 - Amber 3 - Amber with a separate master intensity...
- Page 44 The ten- 3 - Fan Control channel profile will produce the (D60 only) highest quality color crossfades. 1 - Intensity 2 - Strobe Direct 3 - Fan Control (D60 and D60X) Desire Series v1.8.0 User Manual...
-
Page 45: Install Accessories
For D40 and D40XT, use only secondary lenses or accessories with a 7.5 inch mounting flange. To order glass lenses from ETC, contact your local dealer. •D40 glass lens: ETC part number 7410A4001 •D60 glass lens: ETC part number 7410A4003... -
Page 46: Chapter 3 Basic Menu Navigation
User Interface Overview The Desire Series user interface (UI) consists of an LCD and keypad. All of the basic information is displayed on the LCD and the keypad is used to navigate through the menus. Use the LCD and keypad to program the fixture for your specific application. -
Page 47: Keypad
Keypad Use the keypad buttons to access and navigate the menus on the LCD. Figure-3.2 Keypad Buttons Home Opens the home screen. Back Cancels the current operation and returns to the previous screen. Multiple presses of the back button will eventually take you to the status display. -
Page 48: Keypad Lockout
Vivid, Lustr+, Fire and Ice, Studio HD screen shown. Press [ ] or [ ] to highlight a menu item. Press [ ] to select the item. The asterisk (*) indicates that the item is currently active. Desire Series v1.8.0 User Manual... -
Page 49: Status (Home) Screens
Status (Home) Screens The status (home) screens display when you press [ ] or when there is no activity for a specific time. The home screens display the status of multiple fixture settings. These may or may not include: • Quick Setup •... -
Page 50: Menu Navigation
(:) and a value. The keypad is used to edit specific objects on the operation menu, such as DMX address, Preset and Sequence numbers, fade and delay times, etc. Once an edit has been made, press [ ] to accept the selection. -
Page 51: Operation
Chapter 4 Operation Home Screen Displays Note: This section does not apply to the D60X fixture because there is no user interface screen. See Configure D60X using RDM page 77 for programming information. Depending on the fixture settings, the following are displayed in the system message area on the respective home (status) screens. -
Page 52: Main Menu
2: Press [ ] to select the address number. 3: Use [ ] or [ ] to scroll to the desired address. 4: Press [ 5: Press [ ] to return to the home screen. Desire Series v1.8.0 User Manual... -
Page 53: Quick Setups
Quick Setups Quick Setups are groupings of predefined fixture performance settings based on typical applications. Use the Quick Setups menu to select the desired setup. When a setup is active, the status bar at the bottom of the screen indicates the DMX channels, their functions, and arrangements that the setup uses. -
Page 54: Dmx Settings
] or [ ] to set the desired address. 5: Press [ Note: A change to the DMX start address on this screen will override and update the DMX start address selected on the Home screen. Desire Series v1.8.0 User Manual... - Page 55 DMX Profile The current DMX profile is displayed on the DMX Settings menu. You can customize the setting by DMX Profiles page 27 selecting a different profile. For detailed information about each profile, see 1: On the DMX Settings menu, scroll to DMX Profile. DMX Settings DMX Start Address: Profile:...
- Page 56 2/15 Hue Fine Figure-4.8 Setting the Data Loss Type on the DMX Settings Menu 2: Press [ ] to toggle through the three options. 3: Press [ ] or [ ] to commit the option. Desire Series v1.8.0 User Manual...
- Page 57 On your lighting console, s elect a starting color point for the fixture output using the standard control channels for RGB, HSI, etc. 2: Set the first additional channel to a value between 51 and 100% to activate Plus Seven.
-
Page 58: Led Settings
Protected provides the most consistent output possible with the greatest potential for reduced overall brightness. This is best for outdoor use, changing environmental temperatures, and applications with high requirements for consistency in extreme operating conditions. Desire Series v1.8.0 User Manual... - Page 59 B o o s t Boost provides the brightest possible output with the least guarantee of consistency. This is best for applications with low duty cycles, loose brightness requirements, or where ambient temperature is low. 1: On the Advanced Menu, scroll to LED Settings. 2: Press [ 3: With Output selected, press [ ] to toggle between the options.
- Page 60 Red Shift: White Point: 3200K Figure-4.11 Selecting Curve on the LED Settings Menu 2: With Curve selected, press [ ] to toggle between the options. 3: Press [ ] or [ ] to commit the option. Desire Series v1.8.0 User Manual...
- Page 61 Output Freq Output Frequency is the frequency in Hz at which the LED array pulses, or blinks, as a function of Pulse- Width Modulation (PWM). The frequency is adjustable in order to avoid visible flicker on video and film. When altering the frequency in order to reduce noticeable flicker on camera, often only a small change is required.
-
Page 62: Presets & Sequences
1: From the Advanced Menu select Presets and Sequences or press [ 2: With Focus selected, press [ ] to turn the fixture On. 3: When finished, press [ ] to turn the fixture Off. Desire Series v1.8.0 User Manual... - Page 63 Presets (Vivid, Lustr+, Fire and Ice, Studio HD) A Preset is a single, static look or color mix. The Desire Series fixtures come with 24 default configurations. Only one Preset can be active at a time. You can activate any of the Preset color mixes and customize each one.
- Page 64 Figure-4.17 Selecting Fade Time on the Presets Menu 2: Press [ ] or [ ] to set the desired time in minutes. 3: Press [ 4: Press [ ] or [ ] to set the desired time in seconds. 5: Press [ Desire Series v1.8.0 User Manual...
- Page 65 D e l a y T i m e Delay time is the length of time the fixture waits on the previous setting before initiating the crossfade to the Preset. The default is 0 seconds. 1: On the Presets menu, scroll to Delay Time and press [ Presets Preset: * 23...
- Page 66 Delay Time: 00:00 Edit Color Copy to Other Fixture Save DMX as Preset Figure-4.21 Copy the Preset to Other Fixtures 2: Press [ 3: When asked if you are sure, select Yes and press [ Desire Series v1.8.0 User Manual...
- Page 67 S a v e D M X a s P r e s e t You can take a snapshot of the incoming DMX signal when the fixture is in HSI mode and save it as a preset value. 1: On the Presets screen, scroll to Preset and press [ Presets Preset: * 23...
- Page 68 Copy to Other Fixture Figure-4.25 Selecting Step on the Sequences Menu 2: Press [ ] or [ ] to set the desired Step number. 3: Press [ 4: Press [ ] to scroll to Preset. Desire Series v1.8.0 User Manual...
- Page 69 P r e s e t Preset is the number of a Preset, whether it is a predefined or a custom color mix. 1: On the Sequences menu, scroll to Preset and press [ Sequences Sequence: Action: Not Active Rate: 100% Step: Preset:...
- Page 70 3: When asked if you are sure, select Yes and press [ Note: This option only copies Sequence data; it does not copy changes to the Preset settings or color mixes used within the Sequence. Desire Series v1.8.0 User Manual...
- Page 71 Quick Color (Vivid, Lustr+, Fire and Ice, Studio HD) Quick Color allows you to easily select a color and its intensity from a predefined menu. This feature overrides any presets or sequences previously selected and is only available when there is no external page 57 DMX signal to the fixture.
-
Page 72: Diagnostics
3: Press [ Diagnostics Advanced Menu DMX Settings Current DMX In LED Settings Network Statistics Presets and Sequences Test Diagnostics Recalibrate Fixture Local Settings About Fixture Copy All Settings Figure-4.32 Selecting Diagnostics on the Advanced Menu Desire Series v1.8.0 User Manual... - Page 73 Current DMX In The Current DMX In screen displays the values of the current DMX input by channels. The values dynamically change as the DMX input changes. This screen is a read-only screen, which displays the following: • The Control Input setting •...
- Page 74 7: To stop the test, do one of the following: • Press [ ] or [ ] to select Action and then press [ ] until All Off displays. • Press to return to Action and then press [ ] until All Off displays. Desire Series v1.8.0 User Manual...
- Page 75 I n d i v i d u a l C o n t r o l ( I n d C n t l ) Use Individual Control to select each LED series and then adjust its intensity. 1: On the Test screen, scroll to Action. 2: Press [ ] until the Ind Cntr option displays.
-
Page 76: Local Settings
1: With Backlight selected, press [ ] to select the value. 2: Press [ ] or [ ] to set the desired brightness percentage. The effect can be seen as you make the adjustment. 3: Press [ Desire Series v1.8.0 User Manual... - Page 77 BLght time out You can change the length of time the LCD backlight remains on after a UI button has been pressed. The options are 30 seconds, 1 minute, 5 minutes, 15 minutes, and never. The default is 1 minute. 1: With BLght time out selected, press [ Local Settings Backlight:...
- Page 78 You can restore the fixture to the factory settings. This function clears all custom settings including all changes to Presets and Sequences. 1: With Restore Defaults selected, press [ 2: When asked if you are sure, select Yes and press [ 3: Press [ Desire Series v1.8.0 User Manual...
-
Page 79: Copy All Settings
Copy All Settings When DMX is not applied you can copy all settings, except the DMX address, to all of the other fixtures in the same data chain in one step. This includes everything from Presets and Sequences to Quick Setups and Advanced options. - Page 80 ] or [ ]. Pressing [ increases magenta and [ ] increases green. • To return to the Main Menu, press [ • To return to the Studio status screen from the Main Menu, press [ Desire Series v1.8.0 User Manual...
- Page 81 Studio DMX Control When controlled via DMX, the first three channels adjust the output in the following order. Channel 5 controls strobe. Channel Output Intensity (Brightness) White Point Tint Strobe When adjusting white point via DMX, the full gamut of 2725 to 6450K is available, but common settings of 3200K and 5600K are quickly accessible at the lowest and highest pairs of DMX values, respectively.
-
Page 82: Studio Daylight And Studio Tungsten
], or allow the user interface to time out and automatically return to the status screen. Studio DMX Control When controlled via DMX, the channels adjust the following. Channel Output Intensity (Brightness) Strobe Fan (D60 only) Desire Series v1.8.0 User Manual... -
Page 83: Configure D60X Using Rdm
Connect using a DMX/RDM Gateway page 79 Computer with Net3 Concert or UpdaterAtor DMX/RDM Gadget II gateway Console Junction Desire fixture Junction Desire fixture Junction Desire fixture Up to 32 fixtures Figure-4.47 Architecture of a Desire series fixture network Operation... -
Page 84: Connect Using Gadget Ii
Gadget II provides a connection from a PC to your lighting system’s DMX/RDM devices. Gadget II provides DMX control of level output, configuration, and monitoring for RDM devices including fixtures, dimmers, and more. You can also upgrade software for most DMX-based ETC products using UpdaterAtor or Net3 Concert software. -
Page 85: Connect Using A Dmx/Rdm Gateway
Connect using a DMX/RDM Gateway A DMX/RDM gateway, such as an ETC Gateway, can be used to connect a PC to the DMX/RDM network so that you can configure the fixtures on the network. The Gateway can be connected directly to a PC with an Ethernet cable. -
Page 86: Error Messages
ETC Technical Services or visit etcconnect.com. ETC Technical Support Any time, any day, 15 minute response time—that’s our service commitment. ETC’s Technical Service is unparalleled in the industry. With over 60 service employees worldwide, not to mention our extensive Authorized Service Center network, we are uniquely positioned to be able to help you anywhere, anytime. -
Page 87: Routine Maintenance
Routine Maintenance To ensure optimum performance of your Desire series fixture, you should perform the following inspections and cleaning at least once a year. You may need to inspect or clean the fixture more often, depending on the type and amount of use your fixture experiences during the year. -
Page 88: Appendix A Menu Flow Chart
Quick Setups Advanced Settings Main Menu DMX Start Address: *General Quick Setups Stage Advanced Settings XT Architectural High Impact Studio 2/15 Hue Fine Main Menu DMX Start Address: Quick Setups To Advanced Advanced Settings Menu Desire Series v1.8.0 User Manual... -
Page 89: Home And Main Menus
Home and Main Menus (Studio Daylight and Studio Tungsten) Dir Reg Stnd –– Str Master No Sequence is Active No Preset is Active System OK 1/3 Intensity Main Menu DMX Start Address: Quick Setups Advanced Settings Main Menu DMX Start Address: *Studio Quick Setups Stage... -
Page 90: Advanced Menu
Local Settings OverTemp: Visible Copy All Settings Restore Defaults Advanced Menu DMX Settings LED Settings Presets and Sequences Confirmation Diagnostics Local Settings Copy All Settings Copy All Settings appears only when DMX is not present. Desire Series v1.8.0 User Manual... -
Page 91: Advanced Menu
Advanced Menu (Studio Daylight and Studio Tungsten) Main Menu DMX Start Address: Quick Setups Advanced Settings DMX Settings Advanced Menu DMX Settings DMX Start Address: LED Settings DMX Profile: Direct Presets and Sequences Strobe Mode: Enabled Diagnostics Data Loss: Instant Local Settings Fan Mode: Auto... -
Page 92: Presets (Vivid, Lustr+, Fire And Ice, Studio Hd)
No Sequence is Active Presets Copy Preset Preset: * 23 This Will Copy Status: Active Preset Data Fade Time: 00:02 From This Fixture to Delay Time: 00:00 All other Fixtures Edit Are You Sure? Copy to Other Fixture Desire Series v1.8.0 User Manual... -
Page 93: Presets Menu
Presets Menu (Studio Daylight and Studio Tungsten) Advanced Menu DMX Settings LED Settings Presets and Sequences Diagnostics Local Settings Copy All Settings Copy All Settings appears only when DMX is not present. Presets and Sequences Focus: Presets Sequences Preset 1 is Active No Sequence is Active Presets Preset:... -
Page 94: Sequences And Quick Color Menus
Copy to Other Fixture Sequences Copy Sequence Sequence: This Will Copy Status: Active Preset Data Rate: 100% From This Fixture to Step: All other Fixtures Preset: Are You Sure? End State: Loop Copy to Other Fixture Desire Series v1.8.0 User Manual... -
Page 95: Diagnostics Menu
Diagnostics Menu Advanced Menu DMX Settings LED Settings Presets and Sequences Diagnostics Local Settings Copy All Settings Current DMX In Diagnostics DMX Ch Level Current DMX In Network Statistics Test Recalibrate Fixture About Fixture Diagnostics Diagnostics Current DMX In Network Statistics Network Statistics Overruns: Test... -
Page 96: Diagnostics Test
Current DMX In Test Action: Chase Network Statistics Chase: 15 steps/sec Test Individual Control Recalibrate Fixture About Fixture Diagnostics Test Action: Chase Chase: 15 steps/sec Individual Control Diagnostics Test Action: Ind Cntr Chase: 15 steps/sec Individual Control Desire Series v1.8.0 User Manual... -
Page 97: Diagnostics Recalibrate Fixture
Diagnostics Recalibrate Fixture Advanced Menu DMX Settings LED Settings Presets and Sequences Diagnostics Local Settings Diagnostics Diagnostics Current DMX In Recalibrate Fixture Network Statistics This Will Calibrate Test LED Array Recalibrate Fixture About Fixture Are You Sure? LED Calibration LED 1 ..Pass LED 2 ..Pass... -
Page 98: Appendix Brdm Commands
Identify Device E120_IDENTIFY_DEVICE “0, 1" Start Identify” Reset Device E120_RESET_DEVICE — — “Standard, LED Curve ETC_LED_CURVE “0, 1, 2, 3" Incandescent, Linear, Quick” “Standard, LED Curve ETC_LED_CURVE_DESCRIPTION “0, 1, 2, 3" Incandescent, Description Linear, Quick” Desire Series v1.8.0 User Manual... - Page 99 Parameter Feature Queued RDM Parameter ID Enumerations Values “Disabled, Strobe ETC_LED_STROBE “0, 1" Enabled” “Regulated, Output Mode ETC_LED_OUTPUT_MODE “0, 1, 2" Boost, Protected” “Boost, Output Mode ETC_LED_OUTPUT_MODE_DESCRIPTION “0, 1, 2" Regulated, Description Protected” “Disabled, ETC_LED_RED_SHIFT “0, 1" Red Shift Enabled” “2950K, 3200K, White Pointa ETC_LED_WHITE_POINT...
- Page 100 0 to 32767 — PWM duty cycle Get LED CIE See ETC Manf Tristimulus E120_ETC_LED_TRISTIMULUS — RDM doc values Get LED See ETC Manf E120_ETC_LED_INFORMATION — information RDM doc a) Fire, Ice, Studio, Lustr+ only Desire Series v1.8.0 User Manual...
- Page 102 Tel +852 2799 1220 Service: (Asia) service@etcasia.com Web: etcconnect.com © 2017 Electronic Theatre Controls, Inc. Product information and specifications subject to change. ETC intends this document to be provided in its entirety. 7410M1200-1.8.0 Rev G Released 2017-11 ...
Need help?
Do you have a question about the Desire Series and is the answer not in the manual?
Questions and answers