Flashforge Creator Pro User Manual
Hide thumbs
Also See for Creator Pro:
- User manual (54 pages) ,
- Quick start manual (40 pages) ,
- Start up and instruction manual (27 pages)

Subscribe to Our Youtube Channel
Related Manuals for Flashforge Creator Pro


Summary of Contents for Flashforge Creator Pro
- Page 1 FlashForge Corporation User Guide FlashForge Creator Pro 3D Printer User Guide Creator Pro User Guide | www.FlashForge.com 0579-82273989...
-
Page 2: Table Of Contents
Preface..........................3 Introduction........................4 Notice..........................5 Chapter 1: 3D Printing Technology................8 Chapter 2: About Creator Pro..................10 2.1 About Your Creator Pro.................. 10 Chapter 3: Unpacking....................14 Chapter 4: Hardware Assembly..................17 Chapter 5: Build Plate Leveling................... 21 Chapter 6: About Software................... 22 6.1 Software Installation..................22... -
Page 3: Preface
On the completion of this User Guide, thanks all FlashForge engineers and the FlashForge 3D printer users for their unremitting efforts and sincere assistance. The FlashForge Creator Pro User Guide is designed for the Creator Pro users to start their printing journey with FlashForge Creator Pro. Even if you are familiar with... -
Page 4: Introduction
Introduction Notes: ·Please read FlashForge Creator Pro 3D Printer User Guide carefully before use. ·The User Guide is written based on Windows 7 OS. ·The version of the FlashPrint is the latest. The FlashForge Creator Pro 3D Printer User Guide contains the information needed for you to set up and use this device. -
Page 5: Notice
① Always use the Creator Pro with a properly grounded outlet. Do not refit Creator Pro’s plug. ② Do not use Creator Pro in damp or wet circumstance. Do not expose Creator Pro to burning sun. ③ In case of device damage, please use the power supply provided by FlashForge. - Page 6 20cm, and the distance of the front side space should be at least 35cm. · Filament Requirements Do not abuse the filament. Please make sure you use the FlashForge filament or the Creator Pro User Guide | www.FlashForge.com 400-699-1063...
- Page 7 IMPLIED WARRATIES OF MERCHANTABILITY AND FITNESS FOR A PARTICULAR PURPOSE. FlashForge shall not be liable for errors contained herein for incidental consequential damages in connection with furnishing, performance or use of this material This document contains proprietary information protected by copyright.
-
Page 8: Chapter 1: 3D Printing Technology
Fused Filament Fabrication (FFF) is the most common method of 3D printing. It is also the method that the Creator Pro uses. It works by melting plastic material called filament onto a print surface in high temperature. The filament solidifies after it cools down, which happens instantaneously after it is extruded from the nozzle. - Page 9 SD card. 1.1.3 Build the 3D Model Once the output file has been transferred to your Creator Pro, it will start to turn the 3D model into a physical object by laying down layers of filament. Creator Pro User Guide | www.FlashForge.com...
-
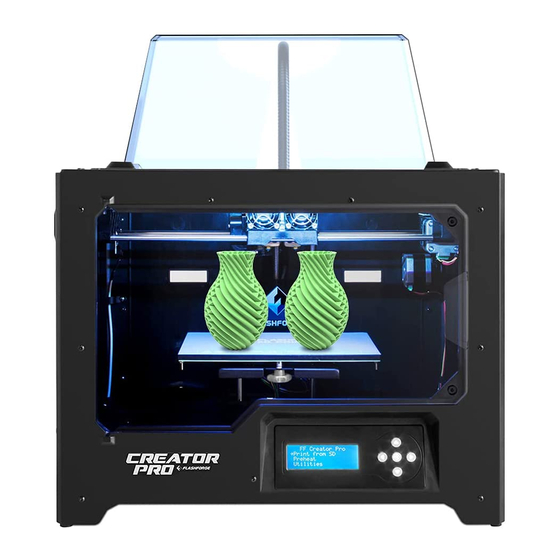
Page 10: Chapter 2: About Creator Pro
17.X-axis guide rod 6.Build platform 18.Filament guide 7.Leveling knob tube buckle 8.SD card slot 19.Spool holder 9.LCD panel 20.Power input 10.Buttons 21.Power switch 11.Cooling fan 22.Reset button 12.Spring presser 23.USB input 24.Spool holder slot Creator Pro User Guide | www.FlashForge.com 400-699-1063... - Page 11 2.1.2 Accessories Along with your Creator Pro 3D printer, the box also contains the followings: On the top of the PE foam sheet, you’ll find: Filament guide tube*2 Quick start guide*1 User guide*1 Build tape*2 Leveling card*1 ...
- Page 12 2.1.3 Terms The surface on which the Creator Pro builds an object. Build Plate The blue tape that covers Creator Pro’s build plate so Build Tape that the object can adhere to the build plate well. The three dimensional amount of space that an object Build Volume will use once it is completed.
- Page 13 Filament Diameter 1.75mm(±0.07) Nozzle Diameter 0.4mm Build Speed 10-200 mm/s Software FlashPrint/Simplify3D/Makerware/RepeliactorG Input:3MF/STL/OBG/FPP/PNG/JPG/JPEG Support Formats Output:X3G Win xp/Vista/7/8/10、Mac OS、Linux Device Size 526*360*403(550)mm NET Weight 14.8Kg AC Input 100V-240V/4.5A-2.5A Connectivity USB Cable, SD Card Creator Pro User Guide | www.FlashForge.com 400-699-1063...
-
Page 14: Chapter 3: Unpacking
Do not remove the wrapping around the nozzle. It consists of a ceramic fiber fabric and heat resistant tape that helps to keep the nozzle at a constant temperature. 1. (3-1)Place your Creator Pro on a clean and stable surface, open the carton and then two filament guide tubes, take the foam sheet out. - Page 15 3. (3-3)The FlashForge Creator Pro and its accessories will be displayed in front of you. Take the dual extruder out and place it onto a clean ground. Note: To avoiding scratching the dual extruder and affecting the printing precision, please do not put the nozzle onto the surface.
- Page 16 6. (3-6)Elevate the build plate to its limit. Take the side protective foam sheets out from the printer. Take the bottom protective foam out from the printer. Congratulations! You’ve finished the unpacking process. (Tip: Save your FlashForge Creator Pro packaging for future transportation and storage. ) Creator Pro User Guide | www.FlashForge.com...
-
Page 17: Chapter 4: Hardware Assembly
Align the screw holes and fasten with the two short silver bolts (see 4-1). Creator Pro User Guide | www.FlashForge.com 400-699-1063... - Page 18 Beside the turbofan bolt hole locates a small hole. You need to insert the bump of turbofan baffle to this hole) Take out a M3 x 6 bolt and a 2.5mm Allen Wrench to secure the turbofan baffle onto the extruder. (4-3)Finally, screw the two turbofan bolts. Creator Pro User Guide | www.FlashForge.com 400-699-1063...
- Page 19 (4-5)The next step goes to the installation of the spool holders. Install one on each side. To install a spool holder, level it and insert the end into one of the openings. Turn down the spool holder to make the holder bottom cleave to the printer back. Creator Pro User Guide | www.FlashForge.com 400-699-1063...
- Page 20 To avoid filament jams, always ensure that any filament spool you mount on the Creator Pro feeds from the bottom of the spool toward the top. Filament mounted on the right spool holder when viewed from the back should always unspool clockwise and filament loaded onto the left spool holder should always unspool counterclockwise.
-
Page 21: Chapter 5: Build Plate Leveling
You should feel somewhat friction on the card but still be able to easil y pass the card between the nozzle and build plate. When you finish leveling the first point, repeat the steps above to finish leveling the rest three points. Creator Pro User Guide | www.FlashForge.com 400-699-1063... -
Page 22: Chapter 6: About Software
Attention! After starting FlashPrint, you need to select the target machine type first. When you start FlashPrint, a dialog box will pop up. Just need to select FlashForge Creator Pro in the machine type list and click [OK]. You can also change the machine Creator Pro User Guide | www.FlashForge.com... - Page 23 [Print]--[Machine type]. Please see graphic 6-2: 6.2.2 Software Introduction Creator Pro User Guide | www.FlashForge.com 400-699-1063...
- Page 24 Load files. Enter into the support edit mode Print it directly with your Creator Pro or export to your USB Stick View FlashPrint home screen from one of six viewing angles Move model around on XY- axis; shift+click to move along Z axis...
- Page 25 Bottom thickness: For tube, canister and lamp to set up bottom thickness Top diameter: For tube, canister and lamp to set up the top diameter Bottom diameter: For tube, canister and lamp to set up the bottom diameter Creator Pro User Guide | www.FlashForge.com 400-699-1063...
- Page 26 Plane 6-5 Tube 6-6 Canister 6-7 Creator Pro User Guide | www.FlashForge.com 400-699-1063...
- Page 27 Method 1: Hold down the left mouse button and drag. Method 2: Hold down the mouse wheel and scroll up and down. Method 3: Hold down the Shift key, hold down the right mouse button and drag. Creator Pro User Guide | www.FlashForge.com 400-699-1063...
- Page 28 [Reset]. ④Show Model Outline Click [View]--[Show Model Outline], it will highlight the yellow border of the object Creator Pro User Guide | www.FlashForge.com 400-699-1063...
- Page 29 In this way, you could make the model rotate on X/Y/Z axis. Method 2: Click the [Rotate] icon on the left, and then enter into rotating angel [Reset] values in X/Y/Z axes positioning. Click to reset rotating angel values. Creator Pro User Guide | www.FlashForge.com 400-699-1063...
- Page 30 6.2.8 Click on the model to select it and click on the icon to set the cut plane. The direction and position are available for setting. ①Draw with Mouse ②X Plane Creator Pro User Guide | www.FlashForge.com 400-699-1063...
- Page 31 ③Y Plane ④Z Plane ⑤Keep Parts in Place 6.2.9 Extruder (6-10) Click the model to select it, then double-click the icon in the left to choose L/R extruder to print . 6-10 Creator Pro User Guide | www.FlashForge.com 400-699-1063...
- Page 32 Creator Pro User Guide | www.FlashForge.com 400-699-1063...
- Page 33 ). Loosen the left mouse button, if support column doesn’t meet with model, then support will be generated on origin and terminal point(the highlighted preview support won’t generate support structure ) Creator Pro User Guide | www.FlashForge.com 400-699-1063...
- Page 34 ⑤Raft: This function will help the model to stick well on the platform. ⑥Wall: During dual color printing, this function will help to clear the leaking Creator Pro User Guide | www.FlashForge.com 400-699-1063...
- Page 35 The combined thickness should not exceed 0.4mm. “Every N layers” is for all the infills while “Every N inner layers” is only for inner infills, which generally can save print time. 6-14 Creator Pro User Guide | www.FlashForge.com 400-699-1063...
- Page 36 Click [Yes] will save the modification, and then click [No] will abandon it. If click [Cancel] or close tool tip, then it will cancel the new project. 6-16 Creator Pro User Guide | www.FlashForge.com 400-699-1063...
- Page 37 6-17 ● Language: The software supports several languages, namely, Chinese (simplified Chinese and traditional Chinese), English, French, Korean, Japanese and so on. ● Font Size ● Auto layout newly-imported model ● Preferred Extruder Creator Pro User Guide | www.FlashForge.com 400-699-1063...
- Page 38 [Edit]--[Select All]. Method 2: Press the shortcut Ctrl+A. ⑤ Duplicate Select the object and duplicate the object through the following two methods: Method 1: Click [Edit]--[Duplicate] Method 2: Press the shortcut key Ctrl+V Creator Pro User Guide | www.FlashForge.com 400-699-1063...
- Page 39 Click and install the relevant installation program. 6-19 Launch the FlashPrint (Now your computer and Creator Pro are connecting with each other), click [Tools] and [Update Firmware], then click [OK] and a dialog box will pop up. Click [Yes] to start firmware update.
- Page 40 ③Check for Updates:Click [Help]--[Check for Update] to detect the available updates online. ④About FlashPrint:Click [Help]--[About FlashPrint], the software information box will pop up. The contents include the current software version and copyright information. Creator Pro User Guide | www.FlashForge.com 400-699-1063...
-
Page 41: Chapter 7: Basic Printing
.stl model file and the object will display on the build area. (7-4)Click the model to select it, then click the icon in the left [Rotate]-- [Surface to Platform] to make your model perfectly positioned on the build area. Creator Pro User Guide | www.FlashForge.com 400-699-1063... - Page 42 Note:If you’ve placed your model in a right place, you can skip the step above. Print (7-5) Click the icon on the top, and you should make some setups for your print job. Creator Pro User Guide | www.FlashForge.com 400-699-1063...
- Page 43 To make the process of feeding or withdrawing the filament easy, please follow the next few steps carefully: After inserting the filament into the filament intake, do not push it further until the Creator Pro User Guide | www.FlashForge.com 400-699-1063...
- Page 44 (7-8) To avoid filament jams, always ensure that any filament spool you mount on the Creator Pro feeds from the bottom of the spool toward the top. Filament mounted on the right spool holder [When viewed from the back] should always unspool clockwise and filament loaded onto the left holder should always unspool counterclockwise.
-
Page 45: Loading The Filament Using The Lcd Panel
7.2 Loading the Filament Using the LCD Panel 1. Turn on the Creator Pro; the display will indicate: ▶ Print from SD Preheat Utilities Utilities 2. Using the directional arrow buttons in the right of the screen, to select then press the OK. The display will show: Monitor Mode ▶... -
Page 46: Unloading The Filament Using Lcd Panel
If you want to change another color filament, first you need to withdraw filament and then load in. Please do as following shown to avoid filament jam. 1) Turn on the Creator Pro, the display will indicate: Build from SD ▶... - Page 47 This will ensure you have withdrawn the filament inside the nozzle successfully. Then, users should 1. Insert your SD card with target x3g file to your Creator Pro. . 2. Turn on the Creator Pro. [Print from SD] 3. Select on the LCD panel.
- Page 48 Chapter 8: About function In this chapter, we will introduce the Creator Pro function to you. We will mainly introduce Utilities function and other available functions in printing process, as Print from SD and Preheat are introduced in prior chapters.
- Page 49 Build plate leveling refers to Chapter 5 ●Home Axes Select it and then press OK. The dual-extruder will move backwards, and the build plate will elevate up. It means Creator Pro is ready for printing. ●Bot Statistics select it and then press ;...
- Page 50 ; the display will indicate: Press Right/Left button change the X/Y/Z axis interface; press Up/Dn button to change the coordinate; press OK button to back. ●Enable steppers select it and then press ; the display will indicate: Creator Pro User Guide | www.FlashForge.com 400-699-1063...
- Page 51 ●Version Information select it and then press ; the display will indicate the basic information of the printer. ●Exit Menu Options during printing process: In the process of printing, we may encounter Creator Pro User Guide | www.FlashForge.com 400-699-1063...
- Page 52 ●Set Lights Off ●Print Statistics select it and then press ; the display will indicate: Print Time (Spent time for printing) Time Left Filament (Accumulated filament length for printing) Auto-level inactive (build plate cannot move) Creator Pro User Guide | www.FlashForge.com 400-699-1063...
- Page 53 After selecting it and pressing OK, the extruder begins heating up. The printer will resume printing when the extruder reaches the target temperature. ●Jog Mode ●Filament Loading ●Change Speed ●Change Temperature ●Change HBP Temp ●Set lights OFF ●Print Statistics Creator Pro User Guide | www.FlashForge.com 400-699-1063...
-
Page 54: Chapter 8: Supports And Service
FlashForge team is on standby and ready to help you with any problems you may have with your Creator Pro. If the issues or questions are not covered in this User Guide, you can seek for solutions on our official website or contact us via telephone. - Page 55 Creator Pro User Guide | www.FlashForge.com 400-699-1063...
Need help?
Do you have a question about the Creator Pro and is the answer not in the manual?
Questions and answers