Flashforge Creator Pro User Manual
Hide thumbs
Also See for Creator Pro:
- User manual (55 pages) ,
- Quick start manual (40 pages) ,
- Start up and instruction manual (27 pages)
Table of Contents
Advertisement
Quick Links
Advertisement
Table of Contents

Subscribe to Our Youtube Channel
Related Manuals for Flashforge Creator Pro


Summary of Contents for Flashforge Creator Pro
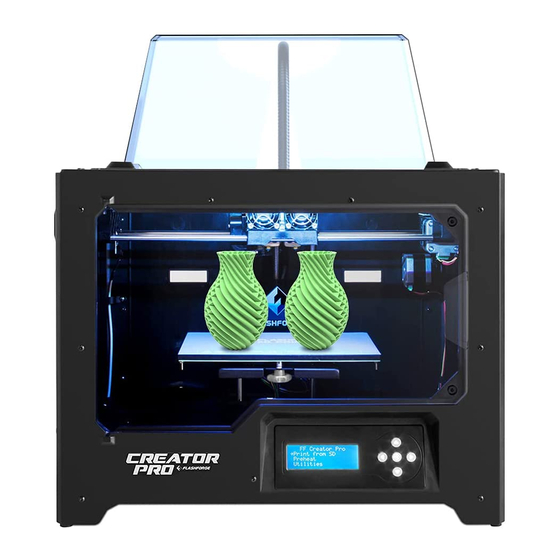
- Page 1 User Guide Creator Pro Desktop 3D Printer...
- Page 2 www.ff3dp.com...
-
Page 3: Table Of Contents
Contents Acknowledgment..........................3 Commitment............................4 PRECAUTIONS...........................5 Chapter 1: What’s in the Box?......................6 Chapter 2: Unpacking...........................7 Chapter 3: Hardware Assembly......................10 Chapter 4:Software Installation......................12 Chapter 5: USB Connection & Temperature Setting................19 Chapter 6: Filament..........................24 6.1 Installing Filament........................24 6.2 Feeding the Filament Using the LCD Screen...............25 6.3 Withdrawing the Filament Using LCD Screen..............26 6.4 Feeding the Filament Using Replicator G Control Panel............. -
Page 4: Acknowledgment
Flashforge machines or 3D printing technology, we still recommend that you read through this guide, as there is lots of important information about the Creator pro for you to get a better 3D experience. Following this guide will ensure your successful first print journey. -
Page 5: Commitment
Flashforge is committing to providing the best 3D printers and best service to each clients and customers. If you can imagine it, you can make it. Together with Flashforge team, let’s turn the sky into limit. -
Page 6: Precautions
PRECAUTIONS Please make sure to read this page carefully prior to setting up and operating the Creator Pro. Ensure that your Creator pro is earthed lest electrostatic interference. Turn off the machine and unplug the power cord before any maintenance or modifications. -
Page 7: Chapter 1: What's In The Box
Chapter 1: What’s in the Box? Along with your Creator Pro 3D printer, the box also contains the followings: On the top of the PE foam sheet, you’ll find: Filament guide tube*2 Quick start*1 Build tape*2 Leveling card*1 Within the accessory PE foam ... -
Page 8: Chapter 2: Unpacking
Flashforge leveling card and one Quick Start Guide. Firmly grasp the two side handles of Flashforge Creator Pro. Lift it out of the box and place it on a stable surface. Then open and remove the transparent covering. -
Page 9: Power
Take the accessory foam container out, within which are lying a power cable, a USB cable, two spool holders, a bag of tools, a SD card, a bag of extruder accessories and turbofan baffle. Slide the X-axis rods to the very back. Take the transparent lid together with two rolls of filament out from the printer. - Page 10 Congratulations! You’ve finished the unpacking process. (Tip: Save your Flashforge Creator Pro packaging for future transportation and storage. )
-
Page 11: Chapter 3: Hardware Assembly
Chapter 3: Hardware Assembly First, you need two M3*8 bolts from the extruder’s accessories kit(including bolts and turbofan baffle), and the 2.5mm Allen Wrench. Lower the build plate as much as possible, hold the extruder by both sides, take it out of the accessory sleeve and position it on the extruder seat with the fan facing forward. - Page 12 To lock the filament guide tube with R-shape buckles and insert another end to the filament intake. To avoid filament jams, always ensure that any filament spool you mount on the Creator pro feeds from the bottom of the spool toward the top. Filament mounted on the right spool holder when viewed from the back should always unspool clockwise and filament loaded onto the left spool holder should always unspool counterclockwise.
-
Page 13: Chapter 4:Software Installation
Method 1: (1)Download the appropriate version of ReplicatorG suitable for your system from: www.ff3dp.com Steps:Support--Downloads--Creator Pro FDM 3D Printer--Software(ReplicatorG&Python) (2) After completing loading, please decompress the RAR. files. (3) First, run Python-2.7.8.amd64 and the Python 2.7.8 and the double click the Replicator G icon to start the software. - Page 14 After opening ReplicatorG software, click on Machine to select your Machine Type(Driver). Choose The Replicator Dual for Creator Pro dual extruder machine. After selecting the appropriate machine type, click on GCode on the top navigation bar, and under GCode Generator, select Skeinforge(50).
- Page 15 The following gives an introduction on how to import files (.STL) into the Replicator G software and then generate Gcode to print your creation. Click File > Open, then browse and select the file (.STL) that you would like to print. Import the file by double-clicking on it.
- Page 16 on the button (Generate GCode) at the bottom of the panel. EXPLANATION OF GCODE SETTINGS A new window will pop up, giving you several options on how the Gcode will be generated: A. Slicing Profile: select Replicator slicing defaults for ABS printing, then select Replicator 2 slicing defaults for PLA printing.
- Page 17 H. Travel feedrate is the extruder speed at while no filament is extruded, and it’s usually set between and 120. For ABS printing, 80℃ is recommended; for PLA printing, 100℃ recommended. I. Print Temperature is the temperature to which the nozzle is heated. This varies between filament types.
- Page 18 Click File > Preferences, then click Select Python interpreter under the Advanced tab. A window will pop up. Navigate to the Python installation directory, and select python.exe and click Open.
- Page 19 Last, click Close on the Preferences menu and you are done! The machine will now work as normal when generating Gcode, and the Python error message will not pop up again.In the next section, we will start a preliminary test on the machine’s connections, and heat the platform and extruder so that the extruder is ready for its first print.
-
Page 20: Chapter 5: Usb Connection & Temperature Setting
Chapter 5: USB Connection & Temperature Setting First, connect the machine and computer with the provided cable. The USB port on the machine is bound by the box in the below image. After connecting the cable, open the ReplicatorG software as we are going to link the computer and printer. Inside the ReplicatorG software, click Machine >... - Page 21 Locate the software driver shown in the blue box above. Double click Replicator, then a dialog box will pop up. Click Driver Software on the top and then and click Update Driver Software.
- Page 22 Click Browse my computer for driver software to find the location of drivers under ReplicatorG0040 on your system. Left click drivers. And then click FTDI USB Drivers in the driver folder before confirmation and click OK. The drivers will then be installed. The next step is to link the printer.
- Page 23 Now we can link the machine to the computer. Click on the printer connect icon highlighted in blue : If the printer connect icon turns dim, as shown in the illustration below, the printer has successfully connected to the computer. Next we need to preheat the extruder and build plate. In the same set of menu, click on the cross-shaped icon and a new interface will appear.
- Page 24 Input the following target values: 220°C for the extruder and 110°C for the build plate, type Enter confirm. After entering the values, the plate will start to preheat. When the extruder temperature reaches 50°C, the cooling fan will be activated and the current temperature value will display to the right as shown below.
-
Page 25: Chapter 6: Filament
Chapter 6: Filament To make the process of feeding or withdrawing the filament easy, please follow the next few steps carefully: After inserting the filament into the filament intake, do not push it further until the extruder temperature reaches 200°C or higher. Once the machine reaches this point, you will feel the filament being pulled into the extruder head. -
Page 26: Feeding The Filament Using The Lcd Screen
There are two ways of feeding the filament into the extruder head, one is using the LCD screen on the printer itself and the other is by using the control panel on the Replicator G software. Feeding the Filament Using the LCD Screen 1. Turn on the Creator Pro; the display will indicate: ▶ Print from SD Preheat Utilities 2. -
Page 27: Withdrawing The Filament Using Lcd Screen
If you want to change another color filament, first you need to withdraw filament and then load in. Please do as following shown to avoid filament jam. 1) Turn on the Creator Pro, the display will indicate: Build from SD ▶... -
Page 28: Feeding The Filament Using Replicator G Control Panel
see: ▶ Start Preheating Right Extruder Left Extruder Platform 4) Press page up key back to Start Preheat, and Press key, you will see: Heating: R Extruder: 033/230C L Extruder: 033/230C Platform: 024 This means the left extruder is heating up, when it reaches 220°C. First push in the filament a little... -
Page 29: Setting Parameters
map. When the actual (Current) temperature reaches 220°C, then click the Forward button, so you can pull the filament out. 6.5 Setting Parameters Before generating Gcode, specific parameters can be set up to customize various aspects of the print. An explanation to each of the settings can be found in the EXPLANATION OF GCODE SETTINGS... -
Page 30: Chapter 7: First Print
Your dual extruder heads should be bolted in place, Your filament guide tubes is connected, Creator Pro has been leveled perfectly before leaving factory. However, it will get unleveled during long Your filament is mounted on the spool holders. distance shipping, please do level the build plate again before starting a print. See below in instruction. - Page 31 · The distance between the extruder nozzles and the build plate should be about the thickness of the leveling card. Note: To view a video of the build plate leveling process, please go to the FF Creator pro video page https://www.youtube.com/playlist?list=PLWfXP01hqgWsEfzZ5Z-sZzifa05iIZb0Q...
- Page 32 Next click Generate GCode, a dialogue box will pop up, after inputting your chosen parameters the Gcode will be generated. Please refer to EXPLANATION OF GCODE SETTINGS. A loading bar will then appear showing the progress of the Gcode generation.
- Page 33 If you have connected Replicator G Creator Pro printer, click the left most button on the green bar near the top of the screen. The Gcode has now been sent to the printer and the object will start printing shortly.
- Page 34 Note : The printer won’t turn on the turbofan automatically if you print the model not sliced by RepliactorG.
-
Page 35: Chapter 8: Dual Extruder Print
Chapter 8: Dual Extruder Print Open ReplicatorG and select Gcode > Merge .stl for Dual Extrusion. You will see following: Click on the first Browse button to locate and select the file for left extruder; and then click on the second Browse button for right extruder. - Page 36 NOTE: Do not check "the 'use raft/support' option. If you want to print dual colors with PLA filament, then perform the following settings: If you want to print dual colors with filament, select Replicator slicing defaults under the Slicing Profile column, and lower the Feedrate Travel Feedrate...
- Page 37 Click on the following button to export .x3g file for SD card print. Note: If you meet some problems, you can go to Flashforge official website:www.ff3dp.com initial help.
-
Page 38: Chapter 9: Other Information
9.1.Supports and Service Flashforge team is on standby and ready to help you with any challenges you may have with your Guider. If the issues or questions are not covered in this User Guide, you can seek for solutions on our office website or contact us via telephone. -
Page 39: References
9.2 References Name Creator Pro Number of Extruder Dual Print Technology Fused Deposition Modeling (FDM) Screen Build Volume 230×150×155mm Layer Resolution 0.1 - 0.2mm Build Precision ±0.2mm Positioning Precision Z axis 0.0025mm; XY axis 0.011mm Filament Diameter 1.75mm Nozzle Diameter 0.4mm...
Need help?
Do you have a question about the Creator Pro and is the answer not in the manual?
Questions and answers