
Related Manuals for Optiview VR Enterprise


Summary of Contents for Optiview VR Enterprise
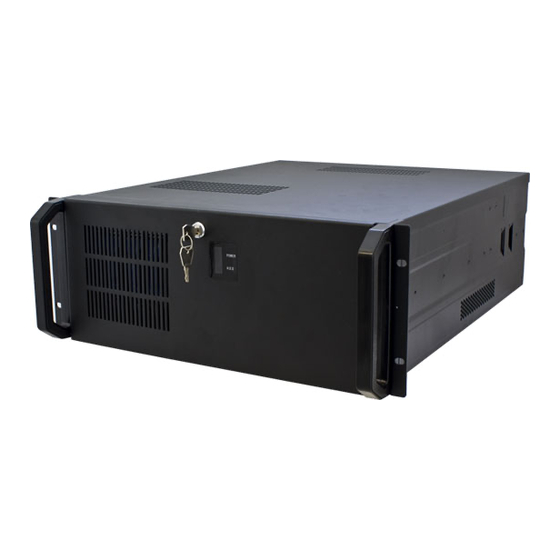
- Page 1 DVR Server Manual ver.6.05/rel.120909 VR Enterprise DVR System DVR Server (ver. 6.05) User Manual...
-
Page 2: Table Of Contents
DVR Server Manual ver.6.05/rel.120909 Contents Chapter1 Start up and Main Interface ······················· 3 Installing ································································ 3 Disk management ······················································ 3 Start up ·································································· 5 Main Interface ·························································· 6 1.4.1 Show tips ···························································································· 6 1.4.2 Screen menu ······················································································· 6 1.4.3 Interface description ········································································ 10 1.4.4 System Menu ····················································································... - Page 3 DVR Server Manual ver.6.05/rel.120909 Camera setup ·························································· 35 2.2.1 Camera setup ··················································································· 35 2.2.2 Group setup ······················································································ 39 Sensor setup ··························································· 41 2.3.1 Sensor setup ····················································································· 41 2.3.2 Group setup ······················································································ 41 PTZ & Linkage setup ················································· 43 2.4.1 PTZ protocol setup ··········································································· 43 2.4.2 Motion detection relay &...
- Page 4 DVR Server Manual ver.6.05/rel.120909 Server setup ···························································· 53 Channel setup·························································· 54 PTZ control ···························································· 56 Sensor setup ··························································· 59 Alarm setup ···························································· 60 Chapter4 Local playback ······································· 62 Main interface ························································· 62 Select playback channel ·············································· 63 4.2.1 Select date ························································································ 63 4.2.2 Select camera ···················································································...
- Page 5 DVR Server Manual ver.6.05/rel.120909 Camera status ·························································· 75 Show files ······························································ 76 Chapter5 ·················································· 78 IE client Functions of IE Client ················································ 78 Main interface ························································· 78 5.2.1 Connection operations ····································································· 79 5.2.2 Connection/Record status ································································ 79 5.2.3 Partition mode ················································································· 79 5.2.4 PTZ Control ·····················································································...
- Page 6 DVR Server Manual ver.6.05/rel.120909 Camera List ···························································· 86 PTZ control ···························································· 87 Chapter7 Appendixes ··········································· 88 Appendix A: Fast key reference ····································· 88 Appendix B: Audio preview ········································· 89 Appendix C: Update drivers of compressed card ················· 90 Appendix D: How to use “Copy File” folder. ····················· 92 Refer to the Tutorial video for other selected topic illustrated in video format.
- Page 7 DVR Server Manual ver.6.05/rel.120909 Introduction and Overview: Thank you for purchasing the VR Enterprise DVR system. This user manual is designed to introduce you the system and explain each function of DVR system for you to set up the system to use effectively, stably, and professionally to meet your security recording needs.
- Page 8 DVR Server Manual ver.6.05/rel.120909...
-
Page 9: Chapter1 Start Up And Main Interface
DVR Server Manual ver.6.05/rel.120909 Chapter1 Start up and Main Interface Installing 1) Before you run DVR server, please check all connectors are firmly connected. 2) By default, the operating system will identify the compressed cards automatically as the new hardware. First, you should install the compressed card and its driver: Appendix C: Update drivers of compressed card... - Page 10 DVR Server Manual ver.6.05/rel.120909 Data Package: Display the residual data package. New Data Package: Select the number of the new data package. You can select the number of the new data package in the drop-down list. The software could calculate the rest space automatically. Notice: the space of the package is 256M as the default, you cannot be changed.
-
Page 11: Start Up
DVR Server Manual ver.6.05/rel.120909 allows three free packages as default; however it is recommended that at least 40 packages are left free. Click the to create the data and index file system. Note: You can‟t delete some files of the _RECORD_DATA_ file folder if the space is not enough, you should delete the whole _RECORD_DATA_ file folder and run the disk manage utility again. -
Page 12: Main Interface
DVR Server Manual ver.6.05/rel.120909 Main Interface Show tips 1.4.1 1. When the mouse moves closely or stops above a button, a text tip will be shown to interpret the function of it immediately. 2. Zoom in/out video image: Left-Double-Click a camera window to zoom in/out of the video image (or press F11 on the keyboard). - Page 13 DVR Server Manual ver.6.05/rel.120909 Camera can only play back instantly in those windows): Select a window, and then Single-Right-Click it to select ―Instant playback‖. Finally, choose a time and the camera you want to playback, and then system will play back video data in current window according to your selection.
- Page 14 DVR Server Manual ver.6.05/rel.120909 this function, you can Single-Right-Click video image area and select ―Pause alarm popup‖. OSD Adjustment Single-Right-Click video image area in main interface and select ―OSD Adjustment‖ to adjust the position of items on the OSD (IP Camera does not have this function;...
- Page 15 DVR Server Manual ver.6.05/rel.120909 OSD includes time and channel name. In this screen you can press time or channel name and drag them to where you want directly, after that you can press button to save and press button to resume time and channel name to default position.
-
Page 16: Interface Description
DVR Server Manual ver.6.05/rel.120909 Interface description 1.4.3 Partition mode Press button to set the partition mode of the main screen. There are many partition levels; the default partition is determined by the total number of channels on the local card, you can select the suitable partition according to the number of video inputs. - Page 17 DVR Server Manual ver.6.05/rel.120909 Image capture Press button to save a still image of selected camera to local hard disk for reviewing or print. Manual record switch Press button to record manually and press it again to stop manual recording for selected camera. Information display panel From the information display panel you can see the current day of the week, the date, time, CPU percentage being used, the amount of HDD space...
- Page 18 DVR Server Manual ver.6.05/rel.120909 System lock Press button to prevent unauthorized users to operate the DVR system. Press this button again; the unlock dialog box will be displayed. Input your User ID and password then press OK to unlock it. Default User ID is ―admin‖, no password.
-
Page 19: System Menu
DVR Server Manual ver.6.05/rel.120909 System Menu 1.4.4 IP Camera Device List Press this bar to add IP Modules to DVR system. - Page 20 DVR Server Manual ver.6.05/rel.120909 Add IP camera device Press button to add an IP Camera device: Figure2— 1 【Server Name】Set a name for the new IP camera device. 【IP Address】Input the address of the IP Camera, it is an IP address or IP alias of an IP camera which is connected through DNS Server.
- Page 21 DVR Server Manual ver.6.05/rel.120909 Modify IP camera Press button to modify IP camera‘s information. The interface is the same as the Add IP Camera interface. Delete IP camera device Click on the IP device that you which to delete and press the button to delete a connected server.
- Page 22 DVR Server Manual ver.6.05/rel.120909 Burn backup data CD Select this function to burn video data to CD/DVD. It is the same function as burning a CD/DVD in Local Playback. Remote chat Select this function to connect a remote Client or Server for a live chat via IP address, but first, you should be sure you have installed an audio card and microphone in each PC.
- Page 23 DVR Server Manual ver.6.05/rel.120909 Open Explorer When keyboard is locked, Users can operate window resource via explorer. Open electron map Select this function to set E-map, Click icon and then Right-Single-Click on the map, the setting picture will appear. You can add or delete sensors and cameras that pointed by the arrow or change the digital map.
- Page 24 DVR Server Manual ver.6.05/rel.120909 If it is set to appear automatically, when the sensor is triggered, the map will appear automatically and the sensor being triggered will be marked. For triggered camera, user can Left-Double-Click it to view video. Open Screen Keyboard This function allows a user to use soft keyboard, you can press this bar to open the screen keyboard.
- Page 25 DVR Server Manual ver.6.05/rel.120909 When system runs ―Playback to TV Wall‖ process, the Matrix card will output recording data. If this process does not run, matrix decode card will output real-time video according to your matrix board setup. Otherwise, when you use matrix card to decode video data from an IP Camera, you can‘t use this function to play back recording video data to TV Monitor but only output real-time video of local board and IP Camera to TV Wall according to your...
- Page 26 DVR Server Manual ver.6.05/rel.120909 1.Add mask/Delete mask Press button to set the area to be shielded. If there are some areas that you don‘t want to show, you can mask those areas with the mouse until they change to black. You can set several covered areas. Press this button again to finish adding Press button to delete all covered areas.
- Page 27 DVR Server Manual ver.6.05/rel.120909 For 4004HC, 4008HC, 4016HC series board model, you can set its work mode. The new DVR board work mode will take effect after rebooting DVR Server software. Keyboard shortcuts setup If you don‘t want to use certain shortcut keys, you can disable the shortcut functions and save the setup.
-
Page 28: Network Panel
DVR Server Manual ver.6.05/rel.120909 Network panel 1.4.5 This panel displays the network configuration of DVR system. Information of network adapter IP address of the system Subnet Mask Net Gate When client is linked, its IP address will be displayed in this window (the current IP only). - Page 29 DVR Server Manual ver.6.05/rel.120909 Relay (On/Off) Control the PTZ cameras internal relay (relay1) or the decoder‘s relay (relay 1). Used to turn on a light or control an access gate. Wiper (On/Off) If using the PTZ cameras corresponding wiper control relay, this toggles the relay/wiper on and off.
- Page 30 DVR Server Manual ver.6.05/rel.120909 Auto tracking (On/Off) Press button to use the PTZ camera tracking the floating object automatically. Speed Dome Press button to operate the speed dome, including Preset Setup, Preset Call and Preset Tour: Preset Setup In this screen you can set the preset position:...
- Page 31 DVR Server Manual ver.6.05/rel.120909 Add/Delete preset In this section you can set the preset name with its sequence number, then you can press button to add/delete a preset, when you want to modify the preset you can press button to confirm your modification. For different cameras, they have different commands to open and set, so you can choose the call mode in the drop-list for different cameras.
- Page 32 DVR Server Manual ver.6.05/rel.120909 Control PTZ via video window On the Image 3, each rectangle area is the effective area of every action. Arrow denotes the direction of the action. Pressing and dragging the mouse to the corresponding area can control the PTZ.
-
Page 33: Color And Audio Adjustment
DVR Server Manual ver.6.05/rel.120909 Color and Audio adjustment 1.4.7 ↑Increase ↓Decrease ① ② ③ ④ ⑤ ① Press the first button and drag to adjust the brightness of the image that you selected, and you can resume its default value by pressing ②... -
Page 34: Di/Do Control
DVR Server Manual ver.6.05/rel.120909 DI/DO Control 1.4.9 DI control Press a number button to check sensors all of the time forcibly even if a user didn‘t setup check sensor in sensor setup. The channel of DI and DO is determined by the setup of DI/DO device you set in System setup. - Page 35 DVR Server Manual ver.6.05/rel.120909 DO control Press number to open/close alarm device relay switch manually. The status of DO has two types: Output channel 1 is close. Output channel 2 is open. When there are no alarms triggered out, a user can press the number button to output an alarm forcibly and the button will show it in green, press it again the output will be closed.
-
Page 36: Chapter2 Local Setup
DVR Server Manual ver.6.05/rel.120909 Chapter2 Local setup The DVR System Configuration and Setup include 7 types configuration setup: System setup Camera setup Sensor setup PTZ & linkage setup Email setup Matrix & display setup User setup... -
Page 37: System Setup
DVR Server Manual ver.6.05/rel.120909 System setup System setup 2.1.1 【Camera Channel】Displays total channels of local board card, the number of IP Cameras is not included. IP Camera are set remotely in Camera setup. 【Sensor Input】 Display number of sensors (DI). 【Sensor output】Display the number of alarms(DO). - Page 38 DVR Server Manual ver.6.05/rel.120909 ***NOTE: When【System Keystroke】is enabled it alters the Windows system file ―newgina.dll‖ in such a way that it may cause any antivirus software installed on the DVR system to trigger that it has detected the ―newgina.dll or nthack trojan‖ virus. If possible please make an exception for this file in your antivirus software or ignore these specific warnings.
-
Page 39: Network Setup
DVR Server Manual ver.6.05/rel.120909 Network setup 2.1.2 【Remote Connection】 Used for network connections. If set to ―disable‖, it will not permit any clients to connect to this DVR system. 【Remote Disp Use Port】Select remote connection port for Clients. 【Net Send Priority】 There are three items for selection. ―Smooth‖ requires that the receiving system has a large buffer. - Page 40 DVR Server Manual ver.6.05/rel.120909 If your DVR has a dynamic IP, you should set your DVR system as follows: DNS server will obtain a domain name and current IP of your DVR, NVR Client can connect to the DVR server through this domain name. NVR Clients obtain the IP of DVR through the DNS server according to its domain.
-
Page 41: Boot Setup
DVR Server Manual ver.6.05/rel.120909 a better video effect, we can set 4 as the maximum permitted videos connected number. Boot setup 2.1.3 【Exit to Windows】 User can exit program and go back to the Windows desktop. 【Exit and Shutdown】User can exit program and shut down computer. 【Auto Shut Down】Set the time to shut down the computer . - Page 42 DVR Server Manual ver.6.05/rel.120909 cameras of the local board card, IP Cameras are not included. For IP Camera, you should set it remotely in IP Camera setup. 【Camera Description】Input descriptions for easy identification. 【Camera Type】Select camera type from drop-down list. Users can choose from PAL and NTSC.
- Page 43 DVR Server Manual ver.6.05/rel.120909 For CIF: Image I frame P frame B frame Max bps quality value value value Best 900000 Good 750000 Medium 600000 450000 Lowest 300000 For DCIF: Max bps = (Max bps/3)*5 Note: Max bps is the CIF‘s value with the same configuration (I P B) For D1: Max bps =...
- Page 44 DVR Server Manual ver.6.05/rel.120909 DCIF DCIF 4CIF Less or Equal to16 DCIF 【OSD Date】Select whether to display the OSD date on the screen or not. When you select ―Not‖, the date will not be displayed on the screen of the corresponding channel.
-
Page 45: Group Setup
DVR Server Manual ver.6.05/rel.120909 rate (fps) and Remote Quality are not in effect, the client‟s parameters will be same as server. 5. Variable digital rate table Image quality record environment occupied disk space (/com/hour) low action, indoor about 45Mb Poorest high action, road about 95Mb low action, indoor... - Page 46 DVR Server Manual ver.6.05/rel.120909 Tips: One block of pane means half an hour. First click record mode icon , then click schedule diagram, hold down the mouse and move it to select large area (Drag & Drop). 1. Normal Record (Green): DVR System will record 24/7. 2.
-
Page 47: Sensor Setup
DVR Server Manual ver.6.05/rel.120909 Sensor setup Sensor setup 2.3.1 【Select Sensor】Select the sensor from the drop-down list in order to set the parameters for it. 【Sensor】 Select this to enable or disable sensor. 【Sensor Position】Enter a description for easy identification. 【Speed Dome Preset】... - Page 48 DVR Server Manual ver.6.05/rel.120909 recording. 【Selected Group】Select group number. 【Sensor Type】Select NC or NO alarm type. 【Alarm Write log】Select to write to alarm log or not. 【Alarm Action】Select system alarm linkage mode when an alarm stops. ―Stop Immediately‖ means the system will stop alarm immediately after the alarm driver stops an alarm.
-
Page 49: Ptz & Linkage Setup
DVR Server Manual ver.6.05/rel.120909 PTZ & Linkage setup PTZ protocol setup 2.4.1 【Selected Camera】Select the camera from the drop-down list to set the parameters. These cameras only include the cameras of the local board card; IP Cameras are not included. 【PTZ Port】Select PTZ connecting port, when you do not use PTZ port, please choose ―------‖. -
Page 50: Motion Detection Relay & Remote Client Alert
DVR Server Manual ver.6.05/rel.120909 2. If there is an (H) after the PTZ protocol, it has the high speed Preset function. If there is no (H), it only has ordinary functions. 3. The PTZ address will be sent as a message option. Take care that some addresses begin at 0. That is to say, when the address number is 1, the real address is 0. -
Page 51: E-Mail Setup
DVR Server Manual ver.6.05/rel.120909 4. Not Check (gray): DVR System will not respond with any alarms during specified times. Note: Check Alarm Setup (including Motion & Video Loss, Motion Alarm and Video Loss) does not take affection to Motion Detect Record. It is only alarm setup. It takes affection to motion detect alarm out and motion detect alarm to network. -
Page 52: Smtp Setup
DVR Server Manual ver.6.05/rel.120909 SMTP setup 2.5.1 【SMPT Server】SMTP server address, eg: mail.jstDVR.com 【SMPT Port】Port that SMTP will listen for a connect request on. 【Auth. Type】Logon mailbox, operator will select ―Simple Login‖ or ―None‖ 【Login User ID】Mailbox‘s ID. 【Login Pass】 Mailbox‘s password. After you have finished setup you can press to test the function. -
Page 53: Digital Matrix Setup
DVR Server Manual ver.6.05/rel.120909 Digital matrix setup Matrix setup 2.6.1 【Matrix Group】System operator can set groups of video images to be sent out through matrix decode card, each group can have a different display mode. Up to 16 groups may be set. 【Video Out Port】... -
Page 54: Display Setup
DVR Server Manual ver.6.05/rel.120909 The total number of channels is not affected by decoding channels. For IP cameras, the system uses hard decoding. The total number of channels is influenced by decoding channels. For different work modes (set in IP Camera list), the channels you can use are different, the local board channels must be the first available channels. -
Page 55: User Setup
DVR Server Manual ver.6.05/rel.120909 User setup User information 2.7.1 【Local Password】 Enable to activate password security mode for local PC DVR, and activate the lock button in main window. Only an authorized user can log into System at User Manage Mode. 【Auto lock time】Inactivity timer. -
Page 56: User Right Setup
DVR Server Manual ver.6.05/rel.120909 Window and edit users. 【Password】Set new user or selected user‘s password. 【Password Confirm】 Confirm password. 【Note】Input a description of this user. 【New User】Press button to edit the user you want to add in the 【User Name】box. Input a User Name, Note Name, Password, and Confirm Password. - Page 57 DVR Server Manual ver.6.05/rel.120909 the cameras of the local board card and IP Cameras. 【Operation Right】Select operational tasks and grant or deny rights. Operational tasks are normally reserved for administrative, privileged accounts. Operators are rarely granted rights to adjust camera color, exit program, explore files etc.
-
Page 58: Chapter3 Ip Camera Setup
DVR Server Manual ver.6.05/rel.120909 Chapter3 IP Camera Setup Note: IP camera alarm and related setup is only available when set remotely, the Local setup available for the PC DVR is not available for IP Cameras except Recording Schedule in Camera Setup Functional buttons There are 5 buttons on each page. -
Page 59: Server Setup
DVR Server Manual ver.6.05/rel.120909 This will adjust the date and time of video server to the current date and time of the local computer or client computer. After setup is finished, click this button to save the setup. Exit setup. Server setup Press button to set server parameters remotely:... -
Page 60: Channel Setup
DVR Server Manual ver.6.05/rel.120909 【Connection configuration and related parameter】 【Use PPPOE】 If system uses PPPOE to connect to the 【PPPOE Login Name】 web, please select it and input the PPPOE 【PPPOE Login Pass】 login ID and password. 【User Pass】Set the user password of VR remotely. Afterwards you should also modify this information in Add / Modify server. - Page 61 DVR Server Manual ver.6.05/rel.120909 【Camera Name】Enter a description for easy identification. 【Frame Rate】Select the record rate of camera from drop-list. 【MasStream】【SubStream】Select MasStream (Main Stream) or SubStream for the current cameras. 【Resolution】Set the resolution at which the video files will be recorded. Choices are DCIF, CIF, QCIF, 2CIF and 4CIF.
-
Page 62: Ptz Control
DVR Server Manual ver.6.05/rel.120909 configuration the same way, you can select the channel number from drop-list, and press button. . The VR system is constantly buffering information and the PostRec time can be set to have the VR record buffered information that happened before the event took place. The PreRe button will continue the recording for the set length of time after the event is over. - Page 63 DVR Server Manual ver.6.05/rel.120909 【Preset position & schedule setup】Define preset position and set time to call preset position automatically. System can add and delete planned times. 【Name】 Set the name for the current preset. 【Preset】 Set the preset number for the current camera Set Up the preset by current configuration.
- Page 64 DVR Server Manual ver.6.05/rel.120909 【Preset】 Adds a preset into the Preset Schedule.【Call Time】【Schedule List】 Set the day and time the preset should be called. Tour Group Add the Preset cameras into the Tour Group and set the Stay Time for one tour group.
-
Page 65: Sensor Setup
DVR Server Manual ver.6.05/rel.120909 Sensor setup Press button to set sensor parameters. 【Sensor NO】Select one sensor to be set. 【Sensor Name】Enter a description of the sensor. 【Type】Select alarm type (sensor type) from ―NO‖(Normally Open) or ―NC‖(Normally Closed). 【Policy】 ―Sensor Alarm Handling‖ handling policies will be available as follows: Audible warning - An audible indicator can be played. -
Page 66: Alarm Setup
DVR Server Manual ver.6.05/rel.120909 day is set, you can copy the parameters to other dates by selecting a day and pressing the copy button. 【Copy to】After finishing any channel, if you want to set any other channels‘ configuration the same way, you can select the channel number from drop-list, and press button. - Page 67 DVR Server Manual ver.6.05/rel.120909 copy the configuration to the other cameras by clicking copy button. 【Alarm Type】Select alarm type: Motion detection, Tempering alarm and Video Loss. 【Level】Select sensibility levels from 0 (the lowest level) to 5 (the highest level) for the alarm. 【Set motion detection areas】Left-click mouse and drag it on the screen to select motion detect area, you can select the whole area or many areas.
-
Page 68: Chapter4 Local Playback
DVR Server Manual ver.6.05/rel.120909 Chapter4 Local playback Main interface Click button in main interface to enter local playback interface. -
Page 69: Select Playback Channel
DVR Server Manual ver.6.05/rel.120909 Select playback channel Select date 4.2.1 Select one window (the 1 one is default), and then click button to show the calendar. The blue dates contain recorded data. The green date is the current date. The gray dates signify no data. Only Blue days can be selected and when they are selected the camera window will appear automatically to show which cameras have recorded data. -
Page 70: Select File
DVR Server Manual ver.6.05/rel.120909 Select file 4.2.3 After selecting the camera to play user can click button to show all the files of this camera. In default playback will begin from the first available file. In this screen you can change the file you want to play by clicking it directly. The camera list below the window will show the recorded data of the day you selected. -
Page 71: Play File And Related Operations
DVR Server Manual ver.6.05/rel.120909 Play file and related operations Press this button to set partition mode, there are 1,4,9 and 16 splits available. To reduce the load on the CPU and get the best effect, you should select the partition mode according to the record channels amount and resolution. -
Page 72: Capture Picture
DVR Server Manual ver.6.05/rel.120909 reverse, the speed is determined by the following playing speed adjustment bar. Play/Pause: This button will alternate between Play and Pause. When it is playing, it will show and while it is paused it will show the play button. -
Page 73: Create Clip File
DVR Server Manual ver.6.05/rel.120909 Create clip file ,there are three items to be selected as shown Click button below; Create file clip 4.5.1 Press to create file clip. 【Select channel and save path】Select channel and save path of the backup file on the top of interface. 【File list and attribute】Select a file and double-click it to play and its attribute will be displayed below the list , including begin time, end time, file size, resolution, frame rate etc. -
Page 74: Backup By Time
DVR Server Manual ver.6.05/rel.120909 【Play control button】User can press and drag slider on to control the player time. 【Beginning and stop position setup】After you select a time, press button to set it as the beginning time, and then drag the bar to select another time and press button to set it as the end time. - Page 75 DVR Server Manual ver.6.05/rel.120909 【Save Path】Select the file path for the backup file. 【Backup Camera】Select the backup camera. User can select more than one camera at one time. 【Select begin time】 【Select end time】Select the beginning and end times of the file to backup. 【Unite File】...
- Page 76 DVR Server Manual ver.6.05/rel.120909 times. 2. Check the backup file value. 3. Backup the file to the temporary file in the last volume if there is enough free space. Otherwise, write backup file to the second volume. 4. Write the data to the buffer. 5.
-
Page 77: View Backup File
DVR Server Manual ver.6.05/rel.120909 View Backup file 4.5.3 a.【Select channel】 Select channel b.【Save Path】Select path of the backup file Select one file from the File List and Double-Click it, this file will be played. The united file is named by ―date + begin time‖... - Page 78 DVR Server Manual ver.6.05/rel.120909 ① ④ ② ③ Area ①: File directory. Area ②: File list. Area ③: The File directory and list that will be burned to CD. ④: Create a new directory in area ③. Icon ② to area ③. : Add all the file from area ②...
-
Page 79: Search Captured Picture
DVR Server Manual ver.6.05/rel.120909 Search captured picture Click to enter the search captured picture window: 【Select pictures from directory and file list】You can select a captured picture from directory list and file list in local disk and the file name will show in the top of the window. -
Page 80: Fast Search
DVR Server Manual ver.6.05/rel.120909 button 【Related operations】 Save the reworked picture. Functional buttons of picture disposal. When the result of disposal is not acceptable click it to restore the default. Print picture, when the image is wider than 400 pixels, it will be printed smaller. -
Page 81: Camera Status
DVR Server Manual ver.6.05/rel.120909 Camera status Click button to show the cameras state. If the number is bright, it means there has record data in this channel. Synchronic play Click button to synchronize all playback channel times. Smart search Function introduction: This function allows users to draw a zone on a video image and do a search for any motions, missing objects, or unattended object events occurred in that zone. -
Page 82: Show Files
DVR Server Manual ver.6.05/rel.120909 ① 1. There is a telephone on the desk (Picture ② 2. But it disappeared now (Picture 3. If you want to know where the telephone is, you can select this area on the image to do a smart search when playback the video. Note: 1. - Page 83 DVR Server Manual ver.6.05/rel.120909 Last frame, Start, Pause, Stop and Next frame First frame of that day, Last min., Next min. and Last frame of that day. Image zoom out. Press this button and then single click the left mouse button on an image to enlarge that quarter of the image. Right click on the image to reset it.
-
Page 84: Chapter5 Ie Client
DVR Server Manual ver.6.05/rel.120909 Chapter5 IE client The client user can view video from the DVR Server through Internet Explorer. The default web server port is 80 and is not required at the end of the address, however if is changed to another port then the port number is required after the address when accessing the Server through Internet... -
Page 85: Connection Operations
DVR Server Manual ver.6.05/rel.120909 Connection operations 5.2.1 to connect to the DVR Server‘s camera video from Press and press will disconnect all connections. If the amount of the DVR Server‘s channel is more than that of the channels that you selected in partition mode, Select the Main Stream or Sub Stream for the current cameras, you can use... -
Page 86: Ptz Control
DVR Server Manual ver.6.05/rel.120909 PTZ Control 5.2.4 Most functions of PTZ control are same as PTZ Control panel in DVR Server. Quit program 5.2.5 Press button to shut down the IE Client. Local search Press button to enter local search: Display setup Playing operation area... -
Page 87: Remote Search
DVR Server Manual ver.6.05/rel.120909 Display setup and data information In this area, you can select display partition mode, date, video channel and its video file named according to time. Playing operation area In this area, you can operate video playing: 【Video-playing time adjustment】Press and drag slider bar to adjust video-playing time 【Information display panel】Displays current window name, camera... -
Page 88: Fast Download Record Data
DVR Server Manual ver.6.05/rel.120909 When you playback remotely, click button to save video of current channel you selected. When finished the system will display the save path. Fast download record data 5.4.1 In the playback mode, select one camera that has record data, open file list panel, select one record data file, and click button, the selected data file will downloaded. - Page 89 DVR Server Manual ver.6.05/rel.120909 NOTE: While using IE client to view the DVR server a four partition blue window will be displayed. If connect fails, the reasons possibly are: ①. The Web server port has been used by another program. ②.
-
Page 90: Chapter6 Mobile Client
DVR Server Manual ver.6.05/rel.120909 Chapter6 Mobile Client Recommended Mobile Telephone Requirements ① Before you run Mobile Client, please ensure your mobile phone supports JAVA and complies with the following applicable standards: CLDC version: CLDC-1.0 MIDP version: MIDP-2.0 ② Your mobile telephone should have GPRS or CDMA to transport data. ③... -
Page 91: Install And Connect
DVR Server Manual ver.6.05/rel.120909 Install and connect Installation 6.3.1 You can install the mobile client as a java game on your smart phone. To install the mobile client on your smart phone directly (download the program via WAN or LAN) or use the application supplied by the manufacturer of your smart phone to install the mobile client. -
Page 92: Camera List
DVR Server Manual ver.6.05/rel.120909 Press ―Login‖ button to connect to the DVR server. Camera List The MobileDvr will enter the Camera List after you connect the DVR server successfully. Select the Camera you want to browse and press the ―preview‖ button to get the image from the server. -
Page 93: Ptz Control
DVR Server Manual ver.6.05/rel.120909 PTZ control Press the ―Options‖ button and select the ―PTZ‖ button to enter the PTZ control interface. 【Orientation control】 : Select the button and press “OK” , it will change into . After that, by pressing and holding the up, down, right and left buttons, the PTZ camera will move up, down, right and left. -
Page 94: Chapter7 Appendixes
DVR Server Manual ver.6.05/rel.120909 Chapter7 Appendixes Appendix A: Fast key reference Please refer to shortcuts keyboard setup This color key denotes PTZ control. This color key is other function control. PTZ control: Function ↑ ↓ Down Left(in the status of preview) ←... -
Page 95: Appendix B: Audio Preview
DVR Server Manual ver.6.05/rel.120909 Enter C、—、 Num0-9 Presets Control Operation Other controls: Function System Help Switch the camera channel Next screen Down Page Previous screen Page All cameras recording 30 Sec emergency Zoom in/out the single camera view Switch to Full screen mode (Equivalent to pressing space key except Instant Playback mode) Ctrl + 0 Enter local playback... -
Page 96: Appendix C: Update Drivers Of Compressed Card
DVR Server Manual ver.6.05/rel.120909 NOTE: Sometimes there is no preview sound, Solution: double click the volume control on the taskbar, open the properties dialog box, and check AUX control. Appendix C: Update drivers of compressed card If you first install the card or upgrade the DVR software, you should install or update the card driver. - Page 97 DVR Server Manual ver.6.05/rel.120909 A dialog will show on the screen. Click ―Install or Update Driver‖ button, a prompt UI will inquire you, click ―yes‖, the program will continue the installation. If the driver installed successfully, the program will show you a prompt, click OK, the install driver program finished.
-
Page 98: Appendix D: How To Use "Copy File" Folder
DVR Server Manual ver.6.05/rel.120909 Appendix D: How to use “Copy File” folder. In installation CD, there is a file named ―CopyFile‖ If you want to replace some files in the installation directory, you can copy new files into ―CopyFile‖, when you finish the installation, the new files will replac the old files. If you want to replace some files in sub directory of the installation directory, you can create the same directory in ―CopyFile‖...
Need help?
Do you have a question about the VR Enterprise and is the answer not in the manual?
Questions and answers