
Related Manuals for Infinity Chimp 100


Summary of Contents for Infinity Chimp 100
-
Page 1: User Guide
User Guide ENGLISH Chimp 100 / 300 v1.03 Ordercode: 55000 / 55010 Highlite International B.V. – Vestastraat 2 – 6468 EX – Kerkrade – the Netherlands... -
Page 2: Table Of Contents
Features ..................................13 Optional accessories ............................13 3 About this Guide ..............................14 Text Conventions ..............................14 4 Console Backpanel ............................... 14 Chimp 100 Backpanel ............................14 Chimp 300 Backpanel ............................16 5 The Frontpanel ............................... 17 Frontpanel ................................17 Playback Faders ..............................18 Programming Section ............................19 Executor Buttons ..............................19... - Page 3 Infinity Chimp Series 7.2.1 The different Split Widgets ............................... 31 7.2.2 Pool Split Widgets ................................33 7.2.3 Fixture Pool ..................................34 7.2.5 Group Pool ..................................35 7.2.6 Preset Pool ..................................36 7.2.7 Cuelist View ..................................37 7.2.8 (Virtual) Executors ................................38 7.2.9 Cuelist Pool ..................................
- Page 4 Infinity Chimp Series 11.2.5 Change Fixture Type ..............................77 11.2.6 Clone Fixtures .................................. 78 11.2.7 Delete Fixtures ................................. 81 12 Setting up Default Timings and Speed Master Options ................... 82 Cue Timing ................................83 Speed Master Settings ............................84 Fade Master Settings ............................84 13 Setting up Inputs and Outputs ..........................
- Page 5 Infinity Chimp Series 15.4.2 Remove Fixture(s) from Group using the Commandline Interface ..............101 Replace a Group ............................102 15.5.1 Replace Fixture(s) from a Group using Group Split Widget .................. 102 15.5.2 Replace a Group using the Commandline Interface ................... 102 Selecting and Deselecting Groups ......................
- Page 6 Infinity Chimp Series Fanning Values (spreading values across different fixtures) ..............114 16.5.1 Fan any value using the Encoders: ........................... 114 16.5.2 Fan Intensity Values using the Keypad........................114 Adjusting how Fannings are applied using the Fan Mode Toolbar ............115 16.6.1 Changing the Fan Direction ............................
- Page 7 Infinity Chimp Series 18.11.2 Merge to Prog ................................144 18.11.3 Load to Prog ................................144 19 Working with Cuelists ............................145 What is a Cuelist ............................... 145 Storing Cues in a Cuelist ..........................145 19.2.1 Storing a Cuelist to a Master or Executor Button ....................145 19.2.2 Storing a Cuelists using Cuelist Split Widget ......................
- Page 8 Infinity Chimp Series Basics .................................. 160 20.1.1 Difference between Masters and Master Faders ....................160 Linking Objects to a Master ........................... 160 20.2.1 Linking a Global Master .............................. 160 20.2.2 Linking Groups (Creating a Group Dimmer Master) ....................160 20.2.3 Linking Cuelists ................................161 Moving a Master ..............................
- Page 9 Infinity Chimp Series 24.2.2 Update Online ................................183 24.2.3 Calibrate Touchscreen(s) ............................185 25 Hotkeys ................................186 General ................................186 Programmer ..............................186 Library Editor ..............................186 External Keyboard ............................186 Infinity Chimp Series...
-
Page 10: Warning
Infinity Chimp Series 1 Warning Unpacking Instructions Immediately upon receiving this product, carefully unpack the carton and check the contents to ensure that all parts are present, and have been received in good condition. Notify the dealer immediately and retain packing material for inspection if any parts appear damaged from shipping or the carton itself shows signs of mishandling. - Page 11 If your Infinity device fails to work properly, discontinue the use immediately. Pack the unit securely (preferably in the original packing material), and return it to your Infinity dealer for service.
-
Page 12: Operating Determinations
Infinity Chimp Series Operating Determinations This device is not designed for permanent operation. Consistent operation breaks will ensure that the device will serve you for a long time without defects. The maximum ambient temperature ta = 40°C must never be exceeded. -
Page 13: Return Procedure
Infinity Chimp Series Return Procedure Returned merchandise must be sent prepaid and in the original packing, call tags will not be issued. Package must be clearly labeled with a Return Authorization Number (RMA number). Products returned without an RMA number will be refused. Highlite will not accept the returned goods or any responsibility. -
Page 14: Description Of The Device
Infinity Chimp Series 2 Description of the device Features The Chimp is a hybrid programmer based tracking console. Hybrid means it may be used to either control conventional or moving light fixtures in the same easy-to- use way. Being a programmer based Console, you always have the chance to override the Chimps output manually, as the programmer always has precedence. -
Page 15: About This Guide
If you are using one Touchscreen and one regular screen without touch fascilities, connect the touchscreen monitor to this port. Make sure both displays support 1920 by 1080 pixel resolution. Connect both monitors prior to booting the console. Fig. 1 Chimp 100 Backpanel Desklight Connector Power Connector Ethernet Port Audio Input USB 2.0 Ports... - Page 16 Infinity Chimp Series Infinity Chimp Series...
-
Page 17: Chimp 300 Backpanel
Infinity Chimp Series Chimp 300 Backpanel Please make sure the external screen you are about to connect to the console, supports 1920 by 1080 pixels of resolution. Connect it before booting the console. Fig. 2: Chimp 300 Backpanel Desklight Connector... -
Page 18: The Frontpanel
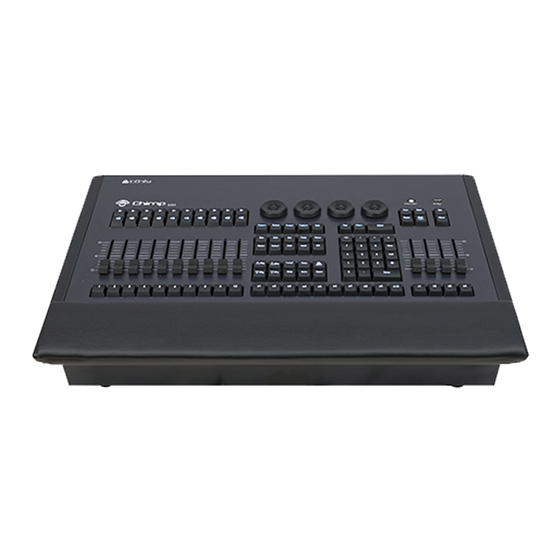
Infinity Chimp Series 5 The Frontpanel Frontpanel The frontpanel contains all the necessary buttons and faders for operation. The Frontpanel looks exactly the same across both products. Here is a quick overview: Fig. 3: Chimp 100 Frontpanel Infinity Chimp Series... -
Page 19: Playback Faders
Infinity Chimp Series Playback Faders The Chimps frontpanel consists of multiple playback fader controls, each consisting of a fader and flash, go, pause/back buttons. These may contain Cuelists, Groups or Special Masters, like Speedmasters. These are pageable and the button functions are assignable. The buttons below the faders are labeled 1 to 10. -
Page 20: Programming Section
Infinity Chimp Series Programming Section This part of the Chimps frontpanel contains all keys needed for programming. Take a few moments to familiarize yourself with the buttons found here. It may seem like a lot to learn, but don't worry. You’ll be training your muscle memory over time. -
Page 21: Special Faders
Chimp. It features an easy and intuitive to use graphical user interface. The Chimp 100 Console does not have an built-in screen, and needs to be connected to an external screen with full-HD resolution (1920 by 1080) as the userinterface is optimized for that resolution. The Screen may be a touch screen as well. -
Page 22: Basic Concepts
Infinity Chimp Series 6 Basic Concepts Hybrid Console The Highlite Chimp is a hybrid console. This means it is not limited to control of a specific fixture type only. It equally treats Dimmer Channels and Movinglights. Fixtures vs. Channels The Chimp does not distinguish between channels or fixtures. It only knows about “Fixtures”. This is to allow more flexibility. -
Page 23: Priority Stacks
Infinity Chimp Series 6.3.2 Priority Stacks The consoles maintains so called „Priority Stacks“ which are used to figure out which values have been last set by which playback to calculate output values accordingly. There is a “Low Priority” stack, as well as a “High Priority”... - Page 24 Infinity Chimp Series #3: Gobo High Gobo 1 #4: Gobo and Color Blue Gobo 2 The next table will show you what the results would be: Dimmer Color Gobo Gobo 1 As you can see, the „High Priority“ option is only affecting LTP channels.
-
Page 25: Tracking
Infinity Chimp Series Tracking 6.4.1 Basic Idea When a sequence of cues is programmed, the lighting console can store the information in one of two ways: either it records the settings for all attributes of all the fixtures used in the cuelist, or it is only recording the values that have changed. - Page 26 Infinity Chimp Series Cue 2 100% Cue 3 100% Cue 4 If the intensity has not been changed or touched, then no value is recorded for that attribute. During playback, if Tracking is enabled, attributes remain at their last assigned level, i.e.: Fixture 4 remains at 50% intensity while cue 2 is played back, because no change was recorded into cue 2.
- Page 27 Infinity Chimp Series Track Thru End Sometimes it is desirable to track values from the last cue in the cuelist to the first cue. A real live example for this is a looping cuelist that creates a color chase, that when you run it first should set the fixtures intensity to 100% cue by cue.
-
Page 28: The Graphical User Interface
Infinity Chimp Series 7 The Graphical User Interface The console utilizes an easy to use and intuitive graphical user interface (GUI). The following sections explain the basics of finding your way around the GUI, in the internal as well as the external display. -
Page 29: Main View Buttons
Infinity Chimp Series 7.1.1 Main View Buttons The Main View buttons provided in the top toolbar switches the Content Areas contents between various predefined views. Please note the programming interface (the programmer) is only available in “Programming”. Fig. 10: Main View Buttons 7.1.2 Status Buttons... -
Page 30: Setup / Backup / Lock Console And Quicksave Buttons
Infinity Chimp Series 7.1.3 Setup / Backup / Lock Console and Quicksave Buttons buttons show the corresponding menus to patch fixtures, setup preferences or to Setup Backup back up your show to an USB key. To lock the user interface of the console to unauthorized personell, click on the button. -
Page 31: The "Content Area
Infinity Chimp Series The “Content Area” The Content Area is used to display context sensitive windows and widgets, based on the selection made from the top toolbar. It also displays dialogs which may be opened using the hard buttons on the frontpanel of the console. -
Page 32: The Different Split Widgets
Infinity Chimp Series 7.2.1 The different Split Widgets Lets call any of the split items in the Content Area a “Split Widget”. Each of the Split Widgets behaves in the same way. They do have a Menu bar on the left (or right, dependant on the position of the widget). - Page 33 Infinity Chimp Series The Title Bar of a Split Widget may also contain some buttons that toggle between contents of the widget, or are used to trigger specific functions in the console. Fig. 16: Split Widget Title Bar Infinity Chimp Series...
-
Page 34: Pool Split Widgets
Infinity Chimp Series 7.2.2 Pool Split Widgets The so-called “Pools” are used throughout the console to provide a quick and easy way to interact with Fixtures, Groups, Presets and Cuelists. If a single object within a Pool is referred to, we will often refer to it as a “Item”. -
Page 35: Fixture Pool
Infinity Chimp Series 7.2.3 Fixture Pool There are two big differences regarding the fixture pool that differentiate it from the other pools: It only shows Fixtures that have been added to the Show, instead of showing empty Items – and – it provides an overview of the fixture values that are being output. -
Page 36: Group Pool
Infinity Chimp Series 7.2.5 Group Pool The Group Pool is used to show and select fixture Groups. Groups store the selection order and selected fixtures. Fig. 19: Group Pool Infinity Chimp Series... -
Page 37: Preset Pool
Infinity Chimp Series 7.2.6 Preset Pool Preset Pools, as opposed to Groups and Cuelists, are divided into Sub Pools, which filter Preset contents by attribute Group (In example: All, Intensity, Position, Color, Beam). When a Preset is stored into the Color Preset Pool, only the Color information will be recorded into this Preset. -
Page 38: Cuelist View
Infinity Chimp Series 7.2.7 Cuelist View The Cuelist View is used to alter names and timings of cues, and to provide overview about the current, next and previous cues. Fig. 22: Cuelist View To alter the name or timings of a cue, select the appropriate cells and press the [Set] key on the console frontpanel. -
Page 39: Virtual) Executors
Infinity Chimp Series 7.2.8 (Virtual) Executors Virtual Executors provide another method to playback cuelists or quickly select groups during a live show. They behave exactly the same way as the physical Executor buttons, with the only difference being they are shown on the screen. -
Page 40: Cuelist Pool
Infinity Chimp Series 7.2.9 Cuelist Pool Cuelist Pool Items have a status indicator that shows the current Cue (or, if the Cuelist is not running, the Cue that would be started) and status of the Cuelist. Fig. 24: Cuelist Pool Cuelist Items of Cuelists that are played back are displayed using a green background color. -
Page 41: The "Bottom Toolbar
Infinity Chimp Series The “Bottom Toolbar” The Bottom toolbar is used to show fader labels on the left side, encoder labels as well as executor labels on the center part, and the align settings, sub-selection and master faders on the right side. - Page 42 Infinity Chimp Series Furthermore, the Fader Item shows the name of the object, and the value of the fader. Cuelists also show more detailed information about their state, like the previous, current and next cue. The background color of the label indicates following cuelist states:...
-
Page 43: Encoder Labels
Infinity Chimp Series 7.3.2 Encoder Labels The “Encoder Labels” show encoder function and values. Clicking on the labels or the pushing the encoder either shows the “select slots / keypad” dialog or toggles between a set of common values. In the programmer screen, labels will not show values. Instead, the programmer window is used to display values. -
Page 44: Executor Labels
Infinity Chimp Series 7.3.3 Executor Labels Executor labels give you a quick overview of executor assignments, current cuelist states and much more. The look of the executor labels varies a little depending on the executors contents. Fig. 28: Executor Labels... -
Page 45: Toolbars
Infinity Chimp Series 7.3.4 Toolbars Toolbars are context sensitive aid and provide quick access to multiple different functions. They are shown in the same position as the Executor Labels, when applicable. Fig. 29: Selection Toolbar Here is a quick overview over the available toolbars. - Page 46 Cuelists, to reset all Sub (Fixture & Group Masters)- or assigned Grandmasters back to 100%. The console will ask for confirmation when any of the “Reset” or “Release” buttons is pressed. However you may omit the Confirmation Screen by holding the [Infinity] button pressed while clicking on any of these buttons.
-
Page 47: Commandline
Infinity Chimp Series 7.3.5 Commandline Whenever you enter commands on the consoles front panel they are written into the Command Line Interface. Fig. 35: Commandline It will also check if the command entered is a valid command. If the command is invalid (or incomplete), the CLI will show a warning sign. -
Page 48: Fan Options / Selection Buttons
Infinity Chimp Series 7.3.7 Fan Options / Selection Buttons Clicking on the button will open the Align Toolbar which is used to alter the way the Fan- Fan Options Function works. Clicking on the button will open the Selection toolbar that contains several shortcuts for fixture Selection sub selection (like Odd / Even, Half / Half, etc). -
Page 49: Special Master Fader Labels
Infinity Chimp Series 7.3.8 Special Master Fader Labels Executor labels give you a quick overview of executor assignments, current cuelist states and much more. The look of the executor labels varies a little depending on the executors contents. Fig. 39: Special Master Faders... -
Page 50: Dialog Windows
Infinity Chimp Series Dialog Windows Dialog Windows are used throughout the console to pull your focus towards a specific task. Dialog windows block the remaining GUI, so they need to be closed or accepted first. Dialog Windows may either be closed by clicking the button in the top right corner, or by using the appropriate buttons found in the bottom row of the dialog. -
Page 51: Keypad Dialogs
Infinity Chimp Series 7.4.1 Keypad Dialogs Whenever a Keypad Dialog is shown, the keypad on the faceplate of the console may be used to set values. The Keypad may be used to directly enter values or to increment / decrement values using the [+], or [-] Key. -
Page 52: On-Screen Keyboard
Infinity Chimp Series 7.4.2 On-Screen Keyboard You may enter values and names using an external USB Keyboard connected to the console whenever the On-Screen Keyboard is shown. For added convencience, starting to type when the keyboard is shown will erase the old text without the need to press backspace first. -
Page 53: Operation
Infinity Chimp Series 8 Operation To Begin Using the Console 8.1.1 Unpack Console and Accessories Before you can use the console, unpack it and its accessories from the shipping carton. Note: Before connecting any accessories to the Chimp Lighting Control Console, the console must be located on a sturdy and flat surface in a dry, dust free environment. -
Page 54: Boot Up The Console
Infinity Chimp Series 8.1.3 Boot up the Console Once the system is ready to use, the Welcome screen will appear. Once the Welcome Screen is shown, you may either start a new show file, or load an existing one. Fig. 44: Welcome Screen... -
Page 55: Working With Shows
Infinity Chimp Series 9 Working with Shows Showfiles contain all your show related settings like fixture schedule and patching, input settings, groups, presets, cues, master assignments, etc. Multiple shows may reside on the console and the amount of shows is only limited by hard disk memory. However, we advise to regularly backup old shows to a USB key and delete them off the consoles memory. -
Page 56: Loading A Show
Infinity Chimp Series Loading a Show Within the touchscreen display, simply select the show you would like to open up from the drop-down menu. After you selected the desired show to load, hit the Open button. Fig. 46: Welcome Screen - Loading a Show... -
Page 57: Saving The Showfile
Infinity Chimp Series Saving the Showfile We recommend to save your show every once in a while. You may do this from within a show by hitting the Show Quicksave button on the Top-Toolbar. Fig. 47: Show Quicksave Button Enable / Disable the “Autosave” -function For added convenience, you may enable the „Autosave“... -
Page 58: Saving As New Showfile
Infinity Chimp Series Saving as new Showfile We recommend to periodically save your show file as a new file. The „ “ button will create a copy of the showfile you are working on at the moment (with a Save Show as given name) and will automatically continue with the new showfile, preventing further changes to the previous show file. -
Page 59: Import Shows From Usb
Infinity Chimp Series Import Shows from USB Plug the USB Key into one of the Chimps USB Ports and head over to the Backup Menu. Select Manage Shows from the Side Menu. When the Manage Shows screen is shown, click on Import Show. -
Page 60: Export Shows To Usb
Infinity Chimp Series Export Shows to USB Plug the USB Key into one of the Chimps USB Ports and head over to the Menu. Backup Select Manage from the Side Menu. Shows From within the Manage Shows screen, select all shows to be exported from the list. Click on Export Shows when done. -
Page 61: Deleting Shows From The Consoles Built-In Memory
Infinity Chimp Series Deleting Shows from the Consoles built-in Memory From the top toolbar hit the button. Backup Head over to the Screen. Manage Shows You will now be presented with a list of shows. Select the show(s) you would like to delete and hit the Delete Show(s) button found in the title bar. -
Page 62: Show Related Settings
Infinity Chimp Series 10 Show related Settings The Chimp Lighting Console keeps different options that are related to the Showfile reduced to a minimum. However, this section will cover the different customization options. All Showfile related settings (Including Fixture Schedule and Patch) are defined in the... -
Page 63: Auto-Fix Faders / Executors On Page Change
Infinity Chimp Series Auto-Fix Faders / Executors on Page Change Autofix is a convenience function that is used to carry over running playbacks to the new fader or executor page. This particular playback will be “on top” of other playbacks and hiding the playback in the same spot on that page until it is switched off. -
Page 64: Set Desklight Brightness
Infinity Chimp Series Set Desklight Brightness To set the desklight brightness, head over to the screen and use the buttons of Show Settings Plus Minus text field accordingly. Desklight Fig. 55: Show Settings - UI Brightness Infinity Chimp Series... -
Page 65: Enable Button Led Backlight
Infinity Chimp Series Enable Button LED Backlight To enable or disable the Backlighting of Keys found on the faceplate, head over to the Show Settings screen and Enable or Disable the Backlight Fig. 56: Show Settings - Enable Button Backlight... -
Page 66: Change Desklock Pin
Infinity Chimp Series Change Desklock PIN To change the PIN Code requested to unlock the console, head over to the screen and fill in Show Settings the current PIN code (If you already changed it). Enter the new PIN in the fextfields. -
Page 67: Fixture Setup
Infinity Chimp Series 11 Fixture Setup Add Fixtures to the Show In order to add and patch fixtures, please press the Setup Button on the Chimps top-menu bar. A menu will be opened on the touchscreen display, presenting you several options. Choose Patch. From within the Patch Window, select Add Fixtures. - Page 68 Infinity Chimp Series A new dialog screen will be shown. For training purposes, we are going to pick “Infinity” as the manufacturer. Now select iS-400 Spot in Advanced Mode from the list. You may also use the full text search provided.
- Page 69 Infinity Chimp Series The next screen is used to patch our fixtures to the DMX-Universes. There are three different options available: No Patch – The fixtures will be added but not patched. Manual Patch – The fixtures will be added and patched to the address and universe you specify Auto Patch –...
-
Page 70: Configuring Existing Fixtures
Infinity Chimp Series Configuring existing Fixtures Should you desire to modify the User Number, Fixture Name, Options, Patch or Type for fixtures that have already been added to the show, press the Setup Button on the Chimps top-menu bar. Choose Patch from the left-hand side menu. The Patch Screen, listing all your fixtures, will be shown. -
Page 71: Change User Id
Infinity Chimp Series The header of the Patch screen table shows the following information: Fig. 64: Patch Table - Header Caption Description User ID This column shows the User ID of the fixture Manufacturer This is the Manufacturer of the Fixture Type... -
Page 72: Change Fixture Name
Infinity Chimp Series Fig. 66: Change User Number Dialog 11.2.2 Change Fixture Name To change the Fixture Name for one or multiple fixtures at once, open the Patch window as described in section Configuring existing Fixtures. Select the fixtures in question and hit the button from the Patch Screens title bar. - Page 73 Infinity Chimp Series Fig. 68: Set Fixture Name On Screen Keyboard Notice the button next to the Fixture Name Textfield Auto Number If Auto Number is active, Chimp will automatically append numbers to the Fixture Name based on the selection order.
-
Page 74: Inverting Pan / Tilt And Defining If A Fixture Reacts To The Grandmaster Fader
Infinity Chimp Series 11.2.3 Inverting Pan / Tilt and defining if a Fixture reacts to the Grandmaster Fader Sometimes it may be necessary to invert the direction of a fixture’s Pan or Tilt attribute or define if a fixtures Dimmer should react to the Grandmaster. - Page 75 Infinity Chimp Series The Change Fixture Options dialog consists of multiple dropdown menus, where the default setting of each menu is “keep”. This ensures that only modified values are applied to the fixtures. Select if a fixture’s Pan or Tilt should be inverted or not, and if the selected Fixtures should react to the Chimps grandmaster fader.
-
Page 76: Change Dmx-Patch
Infinity Chimp Series 11.2.4 Change DMX-Patch To change the DMX-Patch for a single or multiple fixtures at once, select the fixtures you would like to patch and click on Change Patch within the Patch Screen. The Patch Fixtures dialog will be opened. - Page 77 Infinity Chimp Series Within the Patch Fixtures Dialog you are presented with several options. Fig. 72: Change Patch Dialog Unpatch Unpatch will remove any patch information from the fixtures. However, the fixtures and all of their programming will be kept within she showfile.
-
Page 78: Change Fixture Type
Infinity Chimp Series 11.2.5 Change Fixture Type To change the Type of a single or multiple fixtures at once, select the fixtures you would like to change the type of and click on Change Type within the Patch Screen. Fig. 73: Change Fixture Type Button A dialog window will be opened, asking you to select the new fixture type from the Show Library. -
Page 79: Clone Fixtures
Infinity Chimp Series Fig. 74: Select New Fixture Type Dialog After selecting the fixture from the show library, click on Next. The console will now ask for confirmation on the fixture replacement, displaying a brief summary of the changes to be made. Click Ok to proceed. - Page 80 Infinity Chimp Series Fig. 75: Clone Fixtures Button Infinity Chimp Series...
- Page 81 Infinity Chimp Series The console will now ask for the number of fixtures to be added and for the types of programming to be cloned. Keep in mind that cloning Cuelists only makes sense if you clone Presets as well, since cuelists that are programmed using presets may exhibit unpredictable behavior, otherwise.
-
Page 82: Delete Fixtures
Infinity Chimp Series 11.2.7 Delete Fixtures Should you wish to delete fixtures and all of their programming from the showfile, head over to the Setup Menu Select the Patch widget and, slect the fixtures you would like to delete using the keypad or fixture groups. -
Page 83: Setting Up Default Timings And Speed Master Options
Infinity Chimp Series 12 Setting up Default Timings and Speed Master Options Default timings and Speed Master settings are configured from within the Setup screen. Open the Setup screen by clicking on the Setup Button on the top toolbar and select Timings from the left hand side menu. -
Page 84: Cue Timing
Infinity Chimp Series Cue Timing The Cue Default Timings may be altered on the left hand side of the screen. These timings will be used for all new Cues that are recorded afterwards. Fig. 79: Default Cue Timing The Cue Default Timings will be stored as part of the Showfile. Cue Default Timings may be overridden by temporary Timings which can be set using the [Time] button prior to recording a Cue. -
Page 85: Speed Master Settings
Infinity Chimp Series Speed Master Settings The Speed Master Settings may be altered on the right hand side, top part of the screen. Fig. 80: Speed Master Settings Each Speed Master may be configured to either count in seconds or BPM. For each setting a Minimum and a Maximum value can be set. -
Page 86: Setting Up Inputs And Outputs
Infinity Chimp Series 13 Setting up Inputs and Outputs Setup ArtNET Output 13.1.1 ArtNet Basics What is ArtNet ArtNet is a protocol for transmitting the lighting control protocol DMX512 over Ethernet. It uses UDP for data transmission. The protocol was developed by Artistic Licence Engineering (UK) Ltd and is open for implementation without charge. -
Page 87: Enable Dmx Output Over Ethernet
Infinity Chimp Series 13.1.2 Enable DMX Output over Ethernet To set up DMX Output over Ethernet, open the Screen, head over to the Input Output Page and Setup select DMX Output from the Tabs shown in the center of the screen. -
Page 88: Dmx Input
Infinity Chimp Series DMX Input To set up DMX Input, open the Screen, head over to the Page and select from Setup Input Output DMX Input the Tabs shown in the center of the screen. Fig. 84: DMX Input Settings When using the DMX Input, the last available DMX Universe on the Console will be switched in direction and may be used as an Input. -
Page 89: Midi Input
Infinity Chimp Series Midi Input To set up MIDI Input, open the Screen, head over to the Page and select from Setup Input Output MIDI Input the Tabs shown in the center of the screen. Enable the MIDI Input by ticking the Checkbox. -
Page 90: Sound Input
Infinity Chimp Series Sound Input To set up Sound Input, open the Screen, head over to the Page and select Setup Input Output Sound Input from the Tabs shown in the center of the screen. The Chimp provides 6 independently configurable Sound triggers. - Page 91 Infinity Chimp Series lets this trigger skip beats, you could, for example configure it in a way it will only trigger Skip Counter after every second or fourth beat. Further more, the encoders are used to specify the frequence range of the trigger, as well as sound level thresholds: ...
-
Page 92: Timecode Input
Infinity Chimp Series Timecode Input To set up Timecode Input, open the Screen, head over to the Page and select Setup Input Output Timecode from the Tabs shown in the center of the screen. Input Fig. 88: Timecode Input 13.5.1 Timecode Setup Internal Timecode Should you wish to use the internal Timecode, set the Timecode Source to Internal Generator. -
Page 93: Working With Fixtures
Infinity Chimp Series 14 Working with Fixtures Selecting Fixtures Before you can start altering any values or programming, you need to select the fixtures you would like to work with. There are four different ways to select your fixtures. 14.1.1 Selection Order The order in which you select fixtures determines how sub-selection and fanning are applied to them. -
Page 94: Select And Deselect Fixtures Using The "Fixture Pool" -Window
Infinity Chimp Series 14.1.3 Select and Deselect Fixtures using the “Fixture Pool” –window Open a fixture split widget by clicking on the Fixtures button in any of the split widget side menus. You may now select or deselect fixtures by simply clicking on them. -
Page 95: Select Fixtures Using The "Selection" -Toolbar
Infinity Chimp Series 14.1.5 Select Fixtures using the “Selection” –toolbar From within the bottom toolbar, click on the button that reads Selection. Fig. 92: Selection Button toolbar will now be shown. Selection If you have fixtures selected, it may be used to further alter the current fixture selection (See “Fixture Sub- Selection”... - Page 96 Infinity Chimp Series Fig. 93: Selection Toolbar Invert Selection Clicking on Invert Selection, will invert the current selection. Invert extends to either the previous selection set, or, if no fixtures have been selected before using any of the subselect features, extends to all fixtures contained in the showfile.
-
Page 97: Stepping Through Fixtures Using Last & Next Fixture
Infinity Chimp Series 1. Select Fixture 501 thru 510. 2. Press the Even Odd button on the selection toolbar. 3. To select all odd fixtures of the overall selection set (1 thru 10), press the Even Odd button again. Half If no selection has previously been made, Half will, on the first press of the button, select the first half of the selected fixtures contained in the showfile. -
Page 98: Selecting Fixture X Out Of Y
Infinity Chimp Series 14.1.9 Selecting Fixture X out of Y. The console offers a built in modulo sub-selection function which will select every Xth fixture out of Y. The syntax is quite easy: We use [/] for the “out of” part of the command. -
Page 99: Assigning Names To Fixtures
Infinity Chimp Series Assigning Names to Fixtures You may decide between different ways should you wish to rename your fixtures to make them more identifiable within the Fixture Pool, programmer and fixture configuration dialogs: 14.2.1 Assign Name using the Fixture Pool Open a Fixture Split Widget. -
Page 100: Edit Fixture Window
Infinity Chimp Series Edit Fixture Window The “Edit Fixture” –Window may be used as a quick way to read a fixtures DMX Universe / Address, Fixture type and set options like inverting Pan / Tilt, changing the User Number or Fixture Name. -
Page 101: Working With Groups
Infinity Chimp Series 15 Working with Groups About Groups Groups are meant as a programming aid and are a quick way to access specific groups of fixtures. They store information about fixture selection and selection order. Recording Fixture Groups To record your first group, start out by selecting fixtures 1 through 12 by using the Keypad (refer to "... -
Page 102: Merge Fixture(S) Into Group Using The Commandline Interface
Infinity Chimp Series Fig. 96: Record Toolbar - Merge Select the Group you would like to merge the selected fixtures into. If you did not select an option from the Record-Toolbar, a dialog window asking you what to do will open up. -
Page 103: Replace A Group
Infinity Chimp Series Select the Remove Option in the Record-Toolbar. Now type the number of the group you would like to remove the Fixtures from on the console’s keypad, in example, [1] followed by [Enter]: [Rec] [Group] [1] [Enter] If you did not select an option from the Record-Toolbar, a dialog window asking you what to do will be shown. -
Page 104: Selecting And Deselecting Groups
Infinity Chimp Series Selecting and Deselecting Groups 15.6.1 Selecting Fixture Groups Using Group Split Widget Open a Group Pool Split widget by selecting from a split widgets side menu. Now you can simply Groups select and deselect fixture groups by clicking on them. -
Page 105: Move A Group
Infinity Chimp Series Move a Group 15.9.1 Move Groups using the Group Split Widget Select from a split widgets side menu. The Group Split Widget will be shown. Groups Press the [Move] key. Now select the Group you would like to move, followed by the destination Pool Item. -
Page 106: Edit Group Window
Infinity Chimp Series Edit Group Window The “Edit Group” –Window may be used as a quick way to rename a group and all of the contained fixtures. To open the Edit Group Window, select from a split widgets side menu. Press the [Edit] –key. -
Page 107: Working With Fixture Values
Infinity Chimp Series 16 Working with Fixture Values Altering fixture parameter values is only possible from within the Programming Window. The programmer is shown in the bottom right part of the screen. It behaves very similar to the group split widgets –... -
Page 108: What Is The Programmer
Infinity Chimp Series What is the programmer? The “Programmer” is the place where all of the programming happens. As soon as you modify a fixtures attribute value by using any of the value input methods described below, it will show up in the programmer. -
Page 109: Programmer Title Bar Buttons
Infinity Chimp Series Programmer Title Bar Buttons Fig. 101: Programmer Title Bar Buttons 16.2.1 Highlight Function Pressing the Highlight key or Softbutton temporarily sets the selected fixtures to a “Full on, open white” state, and will set attributes like Gobo, etc to open. This function may be useful when you need to see the beam of a fixture on stage, while focusing positions for example. -
Page 110: Blind Function
Infinity Chimp Series 16.2.2 Blind Function With Blind turned on, any change made in the programmer will not be output live. This enables you to prepare a look for later use, or make changes to a different cue that is not yet played back. -
Page 111: Alter Fixture Parameters
Infinity Chimp Series Alter Fixture Parameters 16.3.1 Altering Intensity (Dimmer Values) Using Keypad Dimmer Levels may be applied directly to selected fixtures using the keypad by typing [@] followed by either [Full] or the intensity value (in percent) followed the [Enter] key. -
Page 112: Alter Parameters Using The Encoders
Infinity Chimp Series 16.3.2 Alter Parameters using the Encoders To be able to alter fixture parameter values, Ie. set Dimmer values, you first need to select some fixtures. Go on by selecting Fixture Group 1. For example, in order to adjust the Dimmer level, select Intensity from the side menu. The programmer will now alter Dimmer and Shutter values and the encoder labels will read the selected features. -
Page 113: Alter Color-Values Using The Color-Picker
Infinity Chimp Series 16.3.4 Alter Color-Values using the Color-Picker To open up the color picker, press the Color button found in the programmer side menu. Select Color Picker from the menu bar. Fig. 105 16.3.5 Alter Color-Values using Color Faders To control color values using HSI or different faders (for RGB and CMY), no matter the color mixing system of the fixture , press the Color button found in the programmer side menu. -
Page 114: Setting All Fixture Attribute Values To The Fixtures Default Value
Loading Values from other sources 16.4.1 Loading all Values from Current Output To grab all values that are currently being output for the selected fixtures, hold down the [Infinity] key and press the [Load] key simultaneously. This will grab all values from the console’s playback engine, but before any Group or Fixture Master Dimmers are calculated. -
Page 115: Fanning Values (Spreading Values Across Different Fixtures)
Infinity Chimp Series Fanning Values (spreading values across different fixtures) Fanning is a very useful function used to spread values across a range of fixtures. Fanning of values may be applied to any fixture attribute, and to most effect attributes. -
Page 116: Adjusting How Fannings Are Applied Using The Fan Mode Toolbar
Infinity Chimp Series Adjusting how Fannings are applied using the Fan Mode Toolbar The default Fan-Settings should have most situations covered, but they may be changed using the Mode Toolbar To open the Fan Mode toolbar, hit the button from within the right hand side of bottom Menu Fan Mode Bar. -
Page 117: Fanning With Groupings
Infinity Chimp Series Center (default): As described in section “Fan any value using the Encoders:”, the middle fixture remains unchanged, while the values for the first and last fixtures' change most, in opposite directions. For example: Before Fanning: 50 %... -
Page 118: Removing Values From The Programmer
Infinity Chimp Series Removing Values from the Programmer Sometimes you just want to remove attribute values from the programmer, either for a fixture, a group of fixtures or a specific attribute only. This section will provide you with the information necessary. -
Page 119: Untouch / Deactivate Individual Attributes In The Programmer
Infinity Chimp Series Untouch / Deactivate Individual attributes in the programmer This can be useful to have fixtures output a certain value on an attribute, but not record it into cues or presets. To Untouch values for a certain attribute, press on the Encoder Label or the Encoder and select... -
Page 120: Working With Effects
Infinity Chimp Series 17 Working with Effects Effect Basics You can use effects to create a mathematical function that is used to alter attribute values in a repeating fashion. Effects are applied to attributes using an effect table that applies mathematical functions (such as a sine- or cosine wave) to values against time. -
Page 121: The Effect Attributes
Infinity Chimp Series The Effect Attributes 17.2.1 “Type” Effect Attribute Listed below are all supported different effect shapes: Fig. 114: Different Effect Forms Infinity Chimp Series... -
Page 122: Fixtures" Effect Attribute
Infinity Chimp Series 17.2.2 “Fixtures” Effect Attribute attribute is used to indicate how many fixtures are included in this effect row. Double clicking Fixtures on this cell or selecting it and pressing the [Set] button will open the dialog. Set Effect Fixtures Fig. -
Page 123: Size" Effect Attribute
Infinity Chimp Series 17.2.3 “Size” Effect Attribute The effect size determines the size of the effect, relative to the base point. The base point is always at the center of the selected waveform with the size defining how large it is. The effects size is given in percent. -
Page 124: Speed" Effect Attribute
Infinity Chimp Series 17.2.4 “Speed” Effect Attribute The speed effect attribute defines how fast one complete cycle of the effect will be. Its format is CPM, Cycles per minute. Adjusting the effect speed increases or decreases the number of cycles it completes per minute. When combining effects on different attributes, you can use the rate attribute to build a specific look. -
Page 125: Offset" Effect Attribute
Infinity Chimp Series 17.2.5 “Offset” Effect Attribute The “Offset” effect attribute shifts the start and end point for each fixture in the effect, so they can be spread. The effect offset is assigned in degrees, where 0° means the start and end points are not shifted, whereas 360°... -
Page 126: Duty Cycle" Effect Attribute
Infinity Chimp Series 17.2.6 “Duty Cycle” Effect Attribute The “Duty Cycle” attribute defines how long the duration of the effect within a cycle is. It is assigned as a percentage. It may be used to build chases and more. Best way to see how it works is to select a few lights, add the Dimmer Wave predefined effect and play with the duty cycle. -
Page 127: Gouping" Effect Attribute
Infinity Chimp Series 17.2.7 “Gouping” Effect Attribute The “Grouping” attribute divides all fixtures running the effect into a specified number of groups. For example, a tilt wave across 10 fixtures without grouping may look like this: Fig. 120: Grouping Atrribute - No Groping With Grouping set to a value of three, the effect will look like this: Fig. -
Page 128: Buddying" Effect Attribute
Infinity Chimp Series 17.2.8 “Buddying” Effect Attribute The “Buddying” attribute treats a given number of fixtures as if they were the same fixture. For example, a tilt wave across 10 fixtures without buddying may look like this: Fig. 123: Buddying Attribute - No Buddying With Buddying set to a value of two, the effect will look like this: Fig. -
Page 129: Wings" Effect Attribute
Infinity Chimp Series 17.2.9 “Wings” Effect Attribute The “Wings” attribute will divide the effect into multiple groups, whereas each group is mirrored to one another. For example, a tilt wave across 10 fixtures without wings may look like this: Fig. 126: Wings Attribute - No Wings With two Wings, the effect will be mirrored in the center and look like this: Fig. -
Page 130: Direction" Effect Attribute
Infinity Chimp Series 17.2.10 “Direction” Effect Attribute The “Direction” specifies the direction of the effect. will result in a continues effect in either direction. Forward Reverse will result in an effect that starts with the specified direction, Forward Bounce Reverse Bounce alternating directions with each cycle. - Page 131 Infinity Chimp Series Fig. 130: FX Programmer Table Effects will either use the Programmer Value as a “Base” Value, or if no programmer value is set for an attribute that is being modified by an effect, the effect will use the current value determined by the playback (during playback time) as the base value for the given effect.
-
Page 132: Adding An Effect
Infinity Chimp Series 17.3.1 Adding an Effect To add an Effect to the effect programmer, simply select the fixtures you would like to be included in the effect and click on in the Effect Editors top toolbar. Add FX Fig. 131: Add FX Button A dialog will be shown asking you if you would like to add an pre-created effect or a specific effect table operating on one of the parameters. - Page 133 Infinity Chimp Series Adding an Effect Table The second tab ( ) is used to create your own effects based on mathematical functions. Custom Effect To add an effect, first select the Parameter from the list on the left hand side, and choose the effect table that should be used on this parameter.
-
Page 134: Deleting An Effect
Infinity Chimp Series 17.3.2 Deleting an Effect To delete Effects from the effect programmer, simply select the effect(s) you would like to delete by toggling the button in the first column in the editor and click on in the Effect Editors top toolbar. -
Page 135: Modifying An Effect
Infinity Chimp Series 17.3.3 Modifying an Effect For each effect row the effect attributes may be changed by selecting one of the cells and pressing the [Set] key, or by using the encoders. When using the encoders all selected Effect Rows will be changed. Effect rows may be selected or deselected by toggling the button in the first column of the effect row. -
Page 136: Stopping An Effect
Infinity Chimp Series 17.3.4 Stopping an Effect In order to stop an effect, you need to add an “Off” Effect Table for the desired parameters. This may be done at any time (even if the effect is not being output) by selecting the fixtures you would like to stop the effect and clicking on in the Effect Editors top toolbar. -
Page 137: Working With Presets
Infinity Chimp Series 18 Working with Presets Presets aid to simplify the programming process by allowing user-defined ‘elements’ to be created and then used as a toolkit to build your cues. Once you created a Preset, such as a couple of moving lights pointing at a particular position on stage, you may recall those settings at any point, and record them into cues. -
Page 138: The Preset Split Widget
Infinity Chimp Series The Preset Split Widget Once you selected the Presets button in one of the Split Widget Menus, this particular split widget will change to “Preset” mode. Fig. 138: Preset Split Widget By default, the preset widget will only show presets of the attribute group that is selected in the programmer. -
Page 139: Record A Preset Using The Preset Split Widget
Infinity Chimp Series 18.2.1 Record a Preset using the Preset Split Widget Once you have made a look you would like to store as a preset, Press the [Rec] key found in the programming section of the frontpanel and select an empty item from a Preset Split Widget. -
Page 140: Selecting Presets
If you select Presets this way, they will be recorded into Cues as a ‘hard’ value, rather than being referenced by the Cue. To select a Presets “Hard Value”, press and hold the [Infinity] button while selecting the preset. 18.3.3 Selecting a Preset ‘Live’ without a fixture selection You may also directly select presets while running a show for all fixtures contained in the preset as soon as the Split Widget is in “Direct Action”... -
Page 141: Deselecting ("Knocking Out") A Preset
Infinity Chimp Series Fig. 141: Direct Action Button 18.3.4 Deselecting (“Knocking Out”) a preset To deselect a Preset, click on it again or press the [Off] Key followed by the Preset. Naming a Preset you may label any item by pressing the [Name] key on the faceplate of the console. The commandline will read “Name”. -
Page 142: Removing Contents From A Preset
Infinity Chimp Series Removing Contents from a Preset Sometimes it is necessary to remove unwanted content from a Preset. There are a few ways to remove values from a preset, but the method described below is the one with the most control over what will be removed. - Page 143 Infinity Chimp Series Once you changed your values accordingly to update a previously stored preset, press the [Rec] key and select the preset you would like to update from the Split Widget, i.e. Preset 1 A window asking you what to do will be opened. Select...
-
Page 144: Copy A Preset
Infinity Chimp Series Copy a Preset Press the [Copy] key and select the Preset you would like to copy, followed by the destination Item. Copying a Preset will create a new preset, wheras the new preset has no reference to the source Item. -
Page 145: Set Preset Name
Infinity Chimp Series 18.11.1 Set Preset Name Clicking on the Set Preset Name button will open up an on-screen keyboard allowing you to rename this particular Preset. 18.11.2 Merge to Prog Clicking on the Merge to Programmer button will load the presets contents without referencing to the preset into the programmer. -
Page 146: Working With Cuelists
Infinity Chimp Series 19 Working with Cuelists What is a Cuelist Cuelists are the backbone of your programming and show. They may contain one or more cues, whereas each cue might have a different fade and wait time applied. Faders, Executors and Virtual Executors all rely on Cuelists. -
Page 147: Additonal Options While Recording A Cue
Infinity Chimp Series Additonal Options while recording a Cue 19.3.1 Store a Cue including timing You may also use addiditonal command line options to store a Cue including Timing, or to give a Cue a specific Cue Number by typing. -
Page 148: Updating Cues In A Cuelist
Infinity Chimp Series [Delete] [Cuelist] [1] [Enter] Updating Cues in a Cuelist Sometimes it is necessary to update previously recorded cues by adding (merging) or removing content. Remember, only values that are touched and active will be recorded. This state is indicated by the background color of the value in the programmer. -
Page 149: Replacing A Cue
Infinity Chimp Series You may also use the commandline approach by, press the [Rec] key followed by the [Cuelist] key. Type the number of the cuelist you would like to remove values from to - i.e., [1]. Before executing the command, make sure you selected from the record toolbar. -
Page 150: Copying A Cue
Infinity Chimp Series Press the [Rec] key followed by the [Cuelist] key. Type the number of the cuelist you would like to insert a cue in - i.e., [1]. Before executing the command, make sure you selected from the record Insert toolbar. -
Page 151: Assigning Cuelists To Masters
Infinity Chimp Series Assigning Cuelists to Masters 19.7.1 Assigning a Cuelist to a Master / Executor Using Cuelist Split Widget To assign a Cuelist (in the Cuelist Pool) to a Master, press the [Link] key, tap on the Cuelist you would like to assign to the master followed by the either a master’s Play or Pause / Back Key or an Executor... -
Page 152: Cuelist View Window - Title Bar Buttons
Infinity Chimp Series 19.8.2 Cuelist View Window – Title Bar Buttons Fig. 154: Cuelist View - Title Bar Buttons links the Cuelist shown in the Cuelist view to the selected Cuelist. Link Selected automatically scrolls the windows contents if the current Cue is advancing the end of the Auto Scroll active display area. -
Page 153: Changing Cue Names, Timings And Other Settings
Infinity Chimp Series Changing Cue Names, Timings and other Settings To change Cue Names and Timings, you first need to open up a Cuelist Window as described previously. As soon as the Cuelist View for the appropriate Cuelist has been opened up, select the cell with the value you would like to change. -
Page 154: The Different Trigger Types That Are Available Per Cue
Infinity Chimp Series 19.9.1 The different Trigger types that are available per Cue Each Cue might have different triggers that may or may not affect how the Trig Time Column is used. This section will provide you with an overview of these triggers. -
Page 155: Edit Cuelist Window
Infinity Chimp Series Sound Triggers When a Cues trigger is set to be one of the Sound Triggers, then this Cue will be played back as soon as the Sound Trigger reaches its trigger threshold and the Cue with the trigger is the next one after the current Cue. -
Page 156: Loading Options From Default
Infinity Chimp Series 19.10.2 Loading Options from Default Cuelist Options may be loaded from the default state by clicking onto the Load Default button. Fig. 158: Load Default Button Altering Cuelist Options In order to alter Cuelist settings like Off-Time, Priority, Playback order, etc, you need to open the “Edit Cuelist”... - Page 157 Infinity Chimp Series This setting will always override values contained in "LTP" priority lists, even if those have been started after the List set to "High Priority". - All values being stored in that cuelist will be compared to others by the "Latest Takes Dimmer HTP Precedence"...
-
Page 158: Settings For Cuelists Only
Infinity Chimp Series Please not that the Effect Speed will also depend on other Faders such as the Cuelist Speed Master. Effect Size Master The Effect Size Master Combobox select the global Effect Size Master for a Cuelist. Use this function to scale the Effect Size according to one of the 3 global Effect Size Master Faders. -
Page 159: Playing Back Cuelists
Infinity Chimp Series The Chaser behavior intentionally differs from Cuelists behavior regarding Speed Masters. If the user whishes to change the Chaser behavior to match the Cuelist behavior, then it is also possible to configure a Chaser to Sync to its trigger source. The Chaser therefore has a custom setting “Sync to Source” to brigde the gap between Cuelist and Chaser trigger behavior. -
Page 160: The Off Window
Infinity Chimp Series 19.14.3 The Off Window The Off Window may be used to easily switch off running cuelists and to get an overview of the current Playback state. Fig. 160: Off Window To open the Off Window, press the [Off] button and select Off Window from the Off Toolbar. -
Page 161: Working With Masters And Executors
Infinity Chimp Series 20 Working with Masters and Executors Basics “Masters” and Executors work like remote controls – you may assign different objects to Masters and configure them independently in terms of Button and Fader configuration. These assignments are stored for each master and are not linked to the Object the master is connected to. -
Page 162: Linking Cuelists
Infinity Chimp Series A window will open, asking you which object to assign. Make sure the Tab is selected and select Groups the appropriate item to this master. 20.2.3 Linking Cuelists To assign any Cuelist to any of the faders, press the [Link] key, followed by a Masters Go / Back Button. -
Page 163: Configuring Fader And Button Functions
Infinity Chimp Series Configuring Fader and Button functions Each fader and button function may be customized on a “per master” basis in order to provide maximum flexibility when it comes to operating a show. To edit a masters Go, Pause / Back and fader function, press [Edit] followed by the [Go], or [Pause/Back] key of the master you would like to customize. -
Page 164: Button And Fader Functions
Infinity Chimp Series Example With Fetch Mode: You are on Page 1 and Master 1 contains a Group Master that has the fader set to 48%. You change to Fader-Page 2, where a different object is assigned to Master 1, and move the fader to 100%. You switch... - Page 165 Infinity Chimp Series Switches off the Cuelist using the Off time to fade out given in the Cuelist options. Instant Off Switches off the Cuelist ignoring the Off time set in the Cuelist options. Assert Will bring the Cuelist “Up Front” in the priority stack but does not advance through the Cuelist.
-
Page 166: Working With Fader And Executor
Infinity Chimp Series 21 Working with Fader and Executor Pages About Pages Pages store all assignments of Cuelists, Fixture- and Groupmasters, to enable them to be quickly recalled at a later time. Pages do not store Levels of the faders and Cuelist states. -
Page 167: Editing Fader-Pages
Infinity Chimp Series Editing Fader-Pages 21.4.1 Adding Pages Open the Fader Page Directory window and click on Append to add a new page behind the last one, or click on Insert to insert a page in front of the one you have selected in the directory window. -
Page 168: Configure System-Wide Settings
Infinity Chimp Series 22 Configure system-wide settings Before you start using the console, it is advised to make sure all basic settings are setup to your liking. This includes the USB Keyboard Layout, Time and Date as well as Network Settings. These settings are system- wide, and not saved within a show-file. -
Page 169: Change The Usb-Keyboard Locale
Infinity Chimp Series Change the USB-Keyboard Locale From within the System Settings Page, you may change the systems locale to match your USB-Keyboard. Select the appropriate locale from the dropdown box. You may use the “Test” –Textfield to test the new locale. -
Page 170: Set Date And Time
Infinity Chimp Series Set Date and Time You may set Date and Time from within the System Settings Page. Click on one of the numbers and use the plus and minus button to adjust accordingly. Fig. 170: Set Date and Time Network Settings From within the Setup screen, select Network Settings to open the “Change Network Settings”... -
Page 171: Changing The Ip Address
Infinity Chimp Series 22.3.1 Changing the IP Address DHCP or Manual Here you may set if the Chimp should get its IP Address settings from a Server on the LAN, or if you DHCP wish to assign IP Addresses manually. IP Address and Subnet Mask are mandatory if set to... -
Page 172: Configure (Optional) Wdmx Transmitter
Infinity Chimp Series Configure (optional) WDMX Transmitter If you have a WDMX Transmitter installed in your console, you may trigger the Link / Unlink functions from within the Setup Screen. Fig. 172: Link / Unlink WiFi Receivers Infinity Chimp Series... -
Page 173: Edit The Fixture Library
Infinity Chimp Series 23 Edit the Fixture Library This chapter is set to help you, should you wish to change a fixture type’s dmx footprint or default values, or in case you create a new fixture that is not yet contained in the library. -
Page 174: The Library Editor
Infinity Chimp Series The Library Editor This section explains the Library Editor which is used throughout the library creation or edit process. The Library Editor consists of two different Pages, one that contains the General Setup of a fixture (like Name, Short Name, Mode and Pan / Tilt Range), and one that contains the Parameter Mapping. -
Page 175: Select Parameter Menu
Infinity Chimp Series Values will be output once the Grand Master of the Console has been set to 0%. Blackout : Highlight Values will be output when the Highlight Button on the Consoles frontpanel is active. Highlight Usually Highlight temporarily sets the Dimmer Channel to 100% and removes all color and gobo information from a fixture. -
Page 176: Edit Ranges Menu
Infinity Chimp Series Click on OK when done. 23.2.3 Edit Ranges Menu is used to specify how a Channels functions are mapped to the corresponding DMX Edit Ranges Menu Values, enabling you to show the name or even icons for a specific range of values within the Programmer and the Select Range popup that opens when you push on an encoder. - Page 177 Infinity Chimp Series Deleting a Range To delete a Range, select it from the list of Ranges and click on the button. Delete Range Infinity Chimp Series...
-
Page 178: General Setup Mode
Infinity Chimp Series 23.2.4 General Setup Mode In General Setup Mode, the Fixture Manufacturer, Category (such as LED or Movinglight), Type (Fixture Name), Short Type, Mode and Author Name. Pan & Tilt degree Values may be set using the Encoders. -
Page 179: Add A New Fixture To The Library
Infinity Chimp Series Add a new Fixture to the Library To add a new fixture to the User or Show library, first pick the Library type from the Fixture Library Page by selecting the appropriate tab. Click on New Fixture contained in the Menu Bar of the Window. You may now choose to start a fixture from scratch, or to use an existing fixture as a Template. -
Page 180: Start A Fixture Using An Existing Fixture Type As A Template
Infinity Chimp Series 23.4.2 Start a Fixture using an existing Fixture Type as a template A screen asking a few questions in regards to the new fixture will be shown. You need to specify the Manufacturer, Fixture Type, Short Type and Fixture DMX Mode. -
Page 181: Transfer Fixtures Between Libraries
Infinity Chimp Series Transfer Fixtures between libraries Sometimes the need to transfer fixtures between the different library types may arise. In order to do so, head to the Fixture Library Page within the Setup Menu, select the fixture type you would like to transfer between libraries and hit Transfer Fixture. -
Page 182: Maintenance
When creating the folder structure yourself, make sure it is spelled in lowercase letters. Fig. 183: Usb Folder Structure The main folder “infinity” needs to be in the root directory of the USB Key. This directory is containing the following folders: import_export: Reserved for later use. -
Page 183: Update Software
24.2.1 Update USB In order to update the software on the Chimp, make sure you have downloaded the appropriate software from the Highlite Infinity website. Copy the downloaded file (with the file extension .swu) into the folder “infinity\Software_update” on your USB Key. -
Page 184: Update Online
Infinity Chimp Series 24.2.2 Update Online In Setup menu click on Maintenance from the Side Menu. Click on Online Update in the middle of the screen. Fig. 185: Online Software Update The select software update popup-screen will appear. Click on Refresh List to check for the latest software updates. - Page 185 Infinity Chimp Series Then click on the latest available software update and start downloading by clicking on the download icon. A wizard will lead you through a few steps and will ask you to reboot the console when done. Do not loose power or switch off the Chimp during the update process. This may render...
-
Page 186: Calibrate Touchscreen(S)
Infinity Chimp Series 24.2.3 Calibrate Touchscreen(s) menu click on from the Side Menu. Setup Maintenance Click on in the middle of the screen. Calibrate Internal Calibrate External In case your screen calibration is off by too much, you may use the shortcut [Infintiy] + [S1] to calibrate the internal screen, or [Infintiy] + [S2] to calibrate the external. -
Page 187: Hotkeys
Infinity Chimp Series 25 Hotkeys General [Infinity] + [Off] = Release all Cuelists, clear Programmer and reset all Fader values back to 100% [Off] + [Cuelist] = Release all Cuelists [Infinity] + = Copy Preset contents for all selected fixtures to programmer instead of...
Need help?
Do you have a question about the Chimp 100 and is the answer not in the manual?
Questions and answers