Table of Contents
Advertisement
Quick Links
Download this manual
See also:
User Manual
Advertisement
Table of Contents

Related Manuals for Infinity Chimp 100


Summary of Contents for Infinity Chimp 100
- Page 1 Quickstart Guide ENGLISH Chimp 100 / 300 v1.0 Ordercode: 55000 / 55010 Highlite International B.V. – Vestastraat 2 – 6468 EX – Kerkrade – the Netherlands...
-
Page 2: Table Of Contents
Features ..................................7 Optional accessories ............................. 7 3 About this Guide ..............................8 Text Conventions ..............................8 4 Console Backpanel ..............................8 Chimp 100 Backpanel ............................8 Chimp 300 Backpanel ............................9 5 The Frontpanel ............................... 10 Frontpanel ................................10 Playback Faders ..............................10 Programming Section ............................11... - Page 3 Productomschrijving Select Fixtures using a Group Split Widget ....................26 12 Create Fixture Groups ............................27 Record a Group ..............................27 12.1.1 Store a group using the “Group Pool” –window ...................... 27 12.1.2 Store a group using the command line interface ....................27 12.1.3 Select Fixtures using the “Group Pool”...
-
Page 4: Warning
Save the carton and all packing materials. In the event that a fixture must be returned to the factory, it is important that the fixture be returned in the original factory box and packing. Your shipment includes: Infinity Chimp Controller IEC to Schuko power cable 1,5 m ... - Page 5 If your Infinity device fails to work properly, discontinue the use immediately. Pack the unit securely (preferably in the original packing material), and return it to your Infinity dealer for service.
-
Page 6: Operating Determinations
Productomschrijving Operating Determinations This device is not designed for permanent operation. Consistent operation breaks will ensure that the device will serve you for a long time without defects. The maximum ambient temperature ta = 40°C must never be exceeded. ... -
Page 7: Return Procedure
Productomschrijving Return Procedure Returned merchandise must be sent prepaid and in the original packing, call tags will not be issued. Package must be clearly labeled with a Return Authorization Number (RMA number). Products returned without an RMA number will be refused. Highlite will not accept the returned goods or any responsibility. Call Highlite 0031-455667723 or mail aftersales@highlite.nl and request an RMA prior to shipping the fixture. -
Page 8: Description Of The Device
This is default behavior, however you still have the option to set cuelists to a “Non-Tracking” mode on a per cuelist basis. Chimp 100 Chimp 300 On-board Screen 22”... -
Page 9: About This Guide
If you are using one Touchscreen and one regular screen without touch fascilities, connect the touchscreen monitor to this port. Make sure both displays support 1920 by 1080 pixel resolution. Connect both monitors prior to booting the console. Fig. 1: Chimp 100 Backpanel Desklight Connector Power Connector Ethernet Port Audio Input USB 2.0 Ports... -
Page 10: Chimp 300 Backpanel
Productomschrijving Chimp 300 Backpanel Please make sure the external screen you are about to connect to the console, supports 1920 by 1080 pixels of resolution. Connect it before booting the console. Fig. 2: Chimp 300 Backpanel Desklight Connector Power Connector Ethernet Port Audio Input USB 2.0 Port... -
Page 11: The Frontpanel
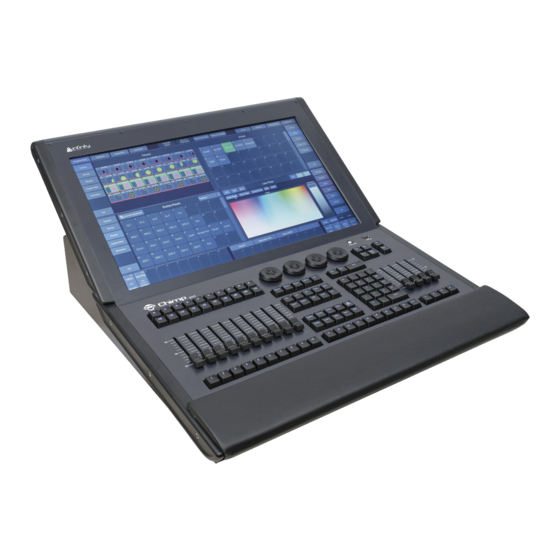
Productomschrijving 5 The Frontpanel Frontpanel The frontpanel contains all the necessary buttons and faders for operation. The Frontpanel looks exactly the same across both products. Here is a quick overview: Fig. 3: Console Frontpanel Playback Faders The Chimps frontpanel consists of multiple playback fader controls, each consisting of a fader and flash, go, pause/back buttons. -
Page 12: Programming Section
Productomschrijving Programming Section This part of the Chimps frontpanel contains all keys needed for programming. Take a few moments to familiarize yourself with the buttons found here. It may seem like a lot to learn, but don't worry. You’ll be training your muscle memory over time. -
Page 13: Special Faders
Chimp. It features an easy and intuitive to use graphical user interface. The Chimp 100 Console does not have an built-in screen, and needs to be connected to an external screen with full-HD resolution (1920 by 1080) as the userinterface is optimized for that resolution. The Screen may be a touch screen as well. -
Page 14: Graphical User Interface
Productomschrijving 6 Graphical User Interface The Screen Layout The Screen Layout of the Chimp Consoles is divided into three different parts: The Top Toolbar, the Content Area and the Bottom Toolbar. The Top Toolbar the Top Toolbar provides access to the different configuration and programming / playback views. -
Page 15: The "Content Area
Productomschrijving 6.1.2 The “Content Area” The Content Area is used to display context sensitive windows and widgets, based on the selection made from the top toolbar. It also displays dialogs which may be opened using the hard buttons on the frontpanel of the console. -
Page 16: Navigating In The Graphical User Interface
Productomschrijving Navigating in the Graphical User Interface You already learned that the top menu bar is used to navigate through the different predefined windows which are used to setup, program or playback your show. Let’s take a closer look the the buttons found in the left part of the Top Menu bar. -
Page 17: Context Sensitive Graphical User Interface
Productomschrijving The Menu on the left (or right) is used to switch the type of that particular Split Widget to a different type. Different Types are, for example: Fixtures, Groups, Presets, a Cuelist View Widget, Virtual Executors – and if you look closely you may notice a Button that says 1/2. -
Page 18: Connect Periphals To The Chimp
Productomschrijving 7 Connect periphals to the Chimp Connect all peripherals like a USB Keyboard, mouse, touchscreen and similar to the Chimp. If you are using ArtNet for data output, also connect the network cable to the Chimps network port. Use the supplied AC cable to connect the Chimp to a power socket. -
Page 19: Starting A New Show Or Loading An Existing Showfile
Productomschrijving 9 Starting a new Show or loading an existing Showfile The Chimp will now start to boot and shortly after you will be seeing a bootmenu which auto-continues the boot process after a few seconds. Additionally, the boot menu offers some test and maintenance utilities. -
Page 20: Creating A New Show
Productomschrijving Creating a new show Within the touchscreen display, hit the New Show button. This will open up a keyboard dialog to enter the name of the show to be created. You may also enter the Name using an attached USB-Keyboard anytime the keyboard dialog is shown. As soon as you hit the enter button a new show with the name you just entered will be created. -
Page 21: Saving The Showfile
Productomschrijving Saving the Showfile To save your Showfile hit the Show Quicksave button within the touchscreen displays Top Toolbar, Fig. 21: Show Quicksave Button Series... -
Page 22: Add & Patch Fixtures
Productomschrijving 10 Add & Patch Fixtures In order to add and patch fixtures, please press the Setup Button on the Chimps top-menu bar. A menu will be opened on the touchscreen display, presenting you several options. Choose Patch. From within the Patch Window, select Add Fixtures. - Page 23 Productomschrijving A new dialog screen will be shown. For training purposes, we are going to pick “Infinity” as the manufacturer. Now select iS-400 Spot in Advanced Mode from the list. You may also use the full text search provided. Hit the Ok button as soon as you are done.
- Page 24 Productomschrijving The next screen is used to patch our fixtures to the DMX-Universes. There are three different options available: No Patch – The fixtures will be added but not patched. Manual Patch – The fixtures will be added and patched to the address and universe you specify Auto Patch –...
-
Page 25: Selecting Fixtures
Productomschrijving 11 Selecting Fixtures There are four different ways to select your fixtures. Select Fixtures using the keypad To select fixtures on the keypad, simply do so by typing their user numbers, which you defined previously during the “Add Fixtures” process. You may use the [Thru], [+] and [-] keys to further extend your selection. Fig. -
Page 26: Select Fixtures Using The Fixtures Split-Window
Productomschrijving Select Fixtures using the Fixtures Split-Window Once you selected the Fixtures button in one of the Split Widget Menus, this particular split widget will change to “Fixtures” mode. Now simply click on an item to select it. Selected Items will be indicated by a green background color. Fig. -
Page 27: Select Fixtures Using A Group Split Widget
Productomschrijving The “Selection” –toolbar can either be used if you do not have a current fixture selection – Selection will then be applied to all fixtures. Alternatively, it may be used to alter the current fixture selection, ie. provide quick access to “Even/Odd” fixture selection and allow you to quickly select all fixtures which have been in your selection set before using and of the functions of the toolbar. -
Page 28: Create Fixture Groups
Productomschrijving 12 Create Fixture Groups Groups are meant as a programming aid and are a quick way to access specific groups of fixtures. To record a group, first select fixtures 1 thru 12 by using the Keypad. Record a Group There are different ways to record groups. -
Page 29: Select Fixtures Using The "Group Pool" -Window
Productomschrijving 12.1.3 Select Fixtures using the “Group Pool” –window Once you selected the Groups button in one of the Split Widget Menus, this particular split widget will change to “Groups” mode. Now simply click on an item to select it. Selected Items will be indicated by a green background color. Fig. -
Page 30: What Is The Programmer
Productomschrijving The Chimp groups fixture parameters in a sense full way by dividing them into seperate groups like Intensity, Position, Color, Gobo, Beam, Shaper (Blades or Knifes in Profile Lights), Control, Macro and Special. You’ll see one more group called Effects, which is used to open the Shape Generator / FX Engine. What is the programmer? The “Programmer”... -
Page 31: Alter Fixture Parameters
Productomschrijving Alter Fixture Parameters 13.2.1 Alter Parameters using the Encoders To be able to alter fixture parameter values, Ie. set Dimmer values, you first need to select some fixtures. Go on by selecting Fixture Group 1. In order to adjust the Dimmer level, select Intensity from the side menu. The programmer will now alter Dimmer and Shutter values and the encoder labels will read the selected features. -
Page 32: Alter Color-Values Using Color Faders
Productomschrijving 13.2.3 Alter Color-Values using Color Faders To control color values using HSI or different faders (for RGB and CMY), no matter the color mixing system of the fixture , press the Color button found in the programmer side menu. Select Color Faders from the menu bar. -
Page 33: Recording And Using Presets
Productomschrijving 14 Recording and using Presets Presets are a huge programming aid and a quick way to recall previously stored positions. Additionally, presets will be used as a reference if you used them in later programming. Cues, which have been programmed using a preset, will automatically update their contents if you update the preset later on. -
Page 34: Select A Preset Using The Preset Split Widget
Productomschrijving 14.1.2 Select a Preset using the Preset Split Widget Once you selected the Presets button in one of the Split Widget Menus, this particular split widget will change to “Preset” mode. As soon as you select fiixtures, Chimp will figure out which of your presets can be applied to all or only some of your fixtures, and which can not be applied as well. -
Page 35: Record Cuelists
Productomschrijving 15 Record Cuelists Cuelists are the backbone of your programming and show. They may contain one or more cues, whereas each cue might have a different fade and wait time applied. Faders, Executors and Virtual Executors all rely on Cuelists. Record a Cuelist to a Master After setting up a look, press the [Rec] -key followed by the either a faders [Go], [Pause/Back] or an [Exec] - key Or just select a virtual Executor from an Executor Split Widget. -
Page 36: Change Cuelist Timings
Productomschrijving 16 Change Cuelist Timings To change cuelist timings, you need to do so in the “Cuelist View”. Opening the “Cuelist View” To open the cuelist view for a Cuelist that is assigned to a Fader or Executor Button, press [Open] followed by either a faders [Go], [Pause/Back] or an [Exec] key;... -
Page 37: Create Speed Masters For Cuelists
Productomschrijving 17 Create Speed Masters for Cuelists Once you assigned one or multiple cues to a speedmaster, you may want to control the speed by using a fader and a tap sync button. To create a “Speed Master” which may be used to control playback speed for multiple cuelists at once, simply press the [Link] –key followed by a masters [Go] or [Pause/Back] –key or a button below any of the four master Faders. -
Page 38: Change Cuelist Behaviour
Productomschrijving 18 Change Cuelist Behaviour In order to alter Cuelist settings like Outfade time, Priority, Playback order, etc, you need to open up an Cuelist Settings –Window. Best way to do so is by opening a Cuelist View for the Cuelist, and selecting the Settings Button from that Cuelist Views titlebar. -
Page 39: Change Fader & Button Behaviour
Productomschrijving 19 Change Fader & Button behaviour To change the behaviour of faders and buttons, press the [Edit] key followed by either a faders [Go], [Pause/Back] or an [Exec]-key or a Master Executors softbutton. Once the dialog opened up, you may change the action of each of the buttons and of the fader. There are several configuration options available for different kinds of assigned objects. -
Page 40: Maintenance
When creating the folder structure yourself, make sure it is spelled in lowercase letters. Fig. 47: USB Key Folder Structure The main folder “infinity” needs to be in the root directory of the USB Key. This directory is containing the following folders: import_export: Reserved for later use. -
Page 41: Update Software
In order to update the software on the Chimp, make sure you have downloaded the appropriate software from the Highlite Infinity website. Copy the downloaded file (with the file extension .swu) into the folder “infinity\Software_update” on your USB Key. -
Page 42: Export Shows To Usb
Productomschrijving Export Shows to USB Plug the USB Key into one of the Chimps USB Ports and head over to the Backup Menu. Select Manage Shows from the Side Menu. From within the Manage Shows screen, select all shows to be exported from the list. Click on Export Show when done. -
Page 43: Export Fixture Libraries To Usb
Productomschrijving Export Fixture Libraries to USB Plug the USB Key into one of the Chimps USB Ports and head over to the Setup Menu. Select Fixture Library from the Side Menu. Click on Export Fixture(s). Fig. 50: Setup Menu – Fixture Library - Export Library to USB Chimp will open a wizard guiding you through the progress. -
Page 44: Import Shows From Usb
Productomschrijving Import Shows from USB Plug the USB Key into one of the Chimps USB Ports and head over to the Backup Menu. Select Manage Shows from the Side Menu. When the Manage Shows screen is shown, click on Import Show. Fig. -
Page 45: Import Libraries From Usb
Productomschrijving Import Libraries from USB Plug the USB Key into one of the Chimps USB Ports and head over to the Setup Menu. Select Fixture Library from the Side Menu. Select the library type you would like to import these fixtures into by selecting the appropriate tab. Factory Library is read only, hence fixtures may only be imported into the User Library or Show Library. - Page 46 Productomschrijving Series...
- Page 47 Productomschrijving Series...
- Page 48 ©2016 Infinity...
Need help?
Do you have a question about the Chimp 100 and is the answer not in the manual?
Questions and answers