Sign In
Upload
Download
Table of Contents
Contents
Add to my manuals
Delete from my manuals
Share
URL of this page:
HTML Link:
Bookmark this page
Add
Manual will be automatically added to "My Manuals"
Print this page
×
Bookmark added
×
Added to my manuals
Manuals
Brands
Dascom Manuals
Printer
DT-210
User manual
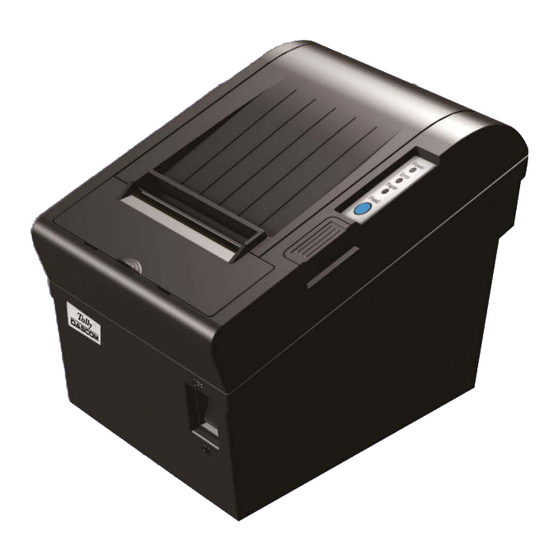
Dascom DT-210 User Manual
Thermal receipt printer
Hide thumbs
1
2
3
Table Of Contents
4
5
6
7
8
9
10
11
12
13
14
15
16
17
18
19
20
21
22
23
24
25
26
27
28
29
30
31
32
33
34
35
36
37
38
39
40
41
42
43
44
45
46
47
48
49
50
51
52
53
54
55
56
57
58
59
60
61
62
63
64
65
66
67
68
69
70
71
72
73
74
75
76
77
78
79
80
81
82
83
84
85
86
87
88
89
90
91
92
page
of
92
Go
/
92
Contents
Table of Contents
Troubleshooting
Bookmarks
Table of Contents
About this Manual
Table of Contents
1 Product Overview
Features
Unpacking
Product Configurations
Part Names and Functions
Power Switch
Control Panel
LED Indicators
2 Setup
Flow of Setup
Installing the Printer
Changing the Paper Width
Attaching Power
Adjusting the Paper Near-End Sensor
Loading Roll Paper
Installing Optional Kits
3 Installing Driver
Installation Driver for Ethernet and Wi-Fi Interface
Connecting to Computer
For USB Interface
For Cash Draw Interface
For Serial Interface
For Parallel Interface
For Ethernet Interface
For Wireless LAN Interface
Get IP Address
Wlan Setup - AP Mode
Wlan Setup - STA Mode
Return to Factory Setting
Connecting to Bluetooth
Installing Bluetooth Adapter Driver
Changing Printer Port
Changing Baud Rate of the Printer
4 Setting/Checking Modes
Self-Test Mode
Hexadecimal Dumping Mode
5 Setting Dip Switches
Setting Procedure
For Serial Interface (RS-232C)
For Parallel and USB2.0 Interface
Selecting the Print Density
Auto Cutter Enable/Disable Selection
6 Troubleshooting
Error Status
Removing Jammed Paper
Cleaning Thermal Head
7 Specifications
Printer Specification
External Dimension and Mass
Interfaces
USB Interface
Cash Drawer Interface
Serial Interface
Parallel Interface
Ethernet Interface
Wi-Fi Interface
Power Adapter
Paper Specification
Printable Area
Printing and Cutting Positions
8 Character Code
Common to All Pages (International Character Set: USA)
International Character Sets
User-Defined Page]
PC437: USA, Standard Europe]
PC850: Multilingual]
PC852: Latin2]
PC858: Euro]
PC860: Portuguese]
PC863: Canadian-French]
PC865: Nordic]
PC866: Cyrillic #2]
KU42: Thai]
TIS11: Thai]
TIS18: Thai]
PC720: Arabic]
PC864: Arabic]
WPC1256: Arabic]
9 Printing Control Command Sets
Fcc Statement
Dascom Representatives
Advertisement
Quick Links
Download this manual
User Guide
DT-210/230 Thermal Receipt Printer
Table of
Contents
Previous
Page
Next
Page
1
2
3
4
5
Advertisement
Table of Contents
Need help?
Do you have a question about the DT-210 and is the answer not in the manual?
Ask a question
Questions and answers
Related Manuals for Dascom DT-210
Printer Dascom DT-230 User Manual
Thermal receipt printer (92 pages)
Printer Dascom DP-520 User Manual
Desktop printer (12 pages)
Printer Dascom DP-510 Operator's Manual
Thermal printers (19 pages)
Printer Dascom DP-330 Series Operator's Manual
(26 pages)
Printer Dascom DP-330L Operator's Manual
Dp-330 series (26 pages)
Printer Dascom Tally PrintekMobile DP-541 Series Operator's Manual
(36 pages)
Printer Dascom DC-7600 User Manual
(101 pages)
Printer Dascom DC-3300 User Manual
(71 pages)
Printer Dascom DC-2300 User Manual
(70 pages)
Printer Dascom DC-8600 User Manual
(89 pages)
Printer Dascom DC-240 User Manual
(64 pages)
Printer Dascom DST-85 User Manual
(92 pages)
Printer Dascom DC-340 User Manual
Card printer (64 pages)
Printer Dascom 2610 User Manual
(133 pages)
Printer Dascom TALLY MIP480 Quick Start Manual
(2 pages)
Printer Dascom DC-7600 Assembly Instructions
Assembling the hardware to make the lamination station (5 pages)
This manual is also suitable for:
Dt-230
Table of Contents
Print
Rename the bookmark
Delete bookmark?
Delete from my manuals?
Login
Sign In
OR
Sign in with Facebook
Sign in with Google
Upload manual
Upload from disk
Upload from URL


Need help?
Do you have a question about the DT-210 and is the answer not in the manual?
Questions and answers