Table of Contents
Advertisement
Advertisement
Table of Contents
Troubleshooting

Subscribe to Our Youtube Channel
Related Manuals for Dascom DC-7600


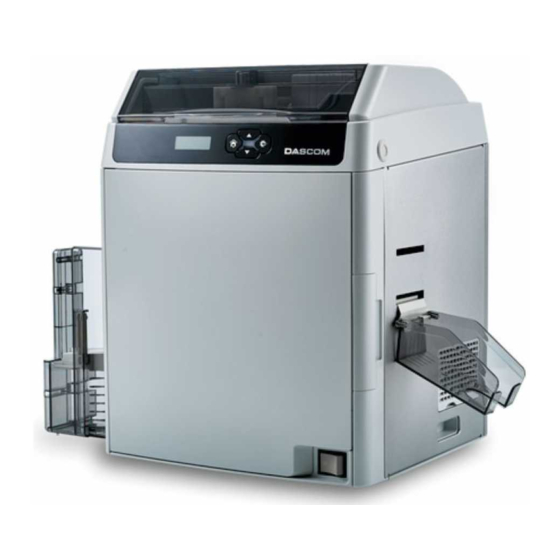
Summary of Contents for Dascom DC-7600
- Page 1 User Manual DC-7600 Card Printer...
- Page 2 Read the following instructions thoroughly before starting up your printer. •The device and power supply must all times be easily accessible. •Never carry out maintenance or repair work yourself. Always contact a Dascom qualified service technician. •Keep this user guide in a place which is easily accessible at all times.
- Page 3 Dascom DC-7600 User Guide V1.0 Wichtige Sicherheitshinweise (German) Lesen Sie bitte diese Sicherheitshinweise durch, bevor Sie den Drucker in Betrieb nehmen. • Das Gerät und die Netzsteckdose müssen jeder Zeit leicht zugänglich sein. • Führen Sie Wartungsarbeiten und Reparaturen keinesfalls selbst aus, sondern verständigen Sie immer einen qualifizierten Servicetechniker.
- Page 4 Dascom DC-7600 User Guide V1.0 Consignes importantes de sécurité (French) Lire attentivement les instructions suivantes avant de mettre l’imprimante en service. • Le dispositif et la prise principale doivent toujours être accessibles facilement. • Ne jamais effectuer soi-même les travaux d’entretien et de réparations. Contacter toujours un dépanneur qualifié.
- Page 5 Dascom DC-7600 User Guide V1.0 Indicazioni di sicurezza importanti (Italian) Prima di mettere in funzione la stampante, leggere attentamente le seguenti indicazioni. • Il dispositivo e la presa di corrente devono essere sempre facilmente accessibili. • Non eseguire mai da sé gli interventi di manutenzione e riparazione, ma rivolgersi sempre a un tecnico di assistenza qualificato.
- Page 6 Dascom DC-7600 User Guide V1.0 Instrucciones de seguridad importantes (Spanish) Lea las siguientes instrucciones con esmero antes de poner la impresora en servicio. • El dispositivo y la toma de corriente deben estar ubicados de forma que sea fácil acceder a ellos.
- Page 7 Dascom DC-7600 User Guide V1.0 . (Russian) Правила по технике безопасности Прочитайте, пожалуйста, инструкцию по технике безопасности перед включением в работу принтера. • Устройство и розетка должны быть всегда легко доступна. • Не выполняйте технические работы и ремонт техники самостоятельно, но сообщайте о...
- Page 8 Dascom DC-7600 User Guide V1.0 Instruções Importantes sobre Segurança (Portuguese) Leia as instruções de segurança antes de usar a impressora. • A impressora e a tomada devem ser facilmente em todos os momentos acessíveis. • Consulte sempre um técnico qualificado para executar uma reparação .
- Page 9 Dascom DC-7600 User Guide V1.0 Önemli Güvenlik Talimatları (Turkish) Lütfen, yazıcıyı işletime geçirmeden önce bu güvenlik talimatlarını bütünüyle dikkatle okuyun. • Cihaz ve elektrik prizinin her zaman kolayca erişilebilir olması gerekir. • Bakım ve tamir çalışmalarını kesinlikle ve hiçbir surette kendi başınıza yapmayın; her zaman kalifiye bir uzman servis-teknisyenine haber verin.
- Page 10 Dascom DC-7600 User Guide V1.0 TRADEMARK ACKNOWLEDGEMENTS “IBM” is a trademark of International Business Machines Corporation. “EPSON” is a trademark of Epson America Incorporated. “DEC” is a trademark of Digital Equipment Corporation. “Centronics” is a trademark of Centronics Data Computer Corporation.
- Page 11 Dascom DC-7600 User Guide V1.0 About This Manual This manual provides information to operators of DC-7600 to describe basic operation to enable safe and correct use of the printer. Symbol Description The symbols in this manual are identified by their level of importance, as defined below. Read the following carefully before handling the product.
-
Page 12: Table Of Contents
Dascom DC-7600 User Guide V1.0 TABLE OF CONTENTS CHAPTER 1 INTRODUCTION ......................... 1 1.1 Unpacking ............................1 1.2 Operating the Printer Safely......................4 1.3 Printer Components ........................7 1.3.1 The front side of the printer ....................7 1.3.2 The profile of printer........................ 9 1.3.3 The rear side of the printer .................... - Page 13 5.3.2 Clear Jammed Card ........................ 82 5.3.3 Change the Print Head ......................84 5.4 Technical support ..........................84 5.4.1 DASCOM partner network ..................... 84 5.4.2 More information ........................85 CHAPTER 6 SPECIFICATION ........................86 Appendix I: FCC STATEMENT ........................87...
-
Page 14: Chapter 1 Introduction
User Guide V1.0 CHAPTER 1 INTRODUCTION Thank you for choosing Dascom® DC-7600 card printer. You can print high-quality cards of different colors and styles with this printer. The printer should use the consumables and accessories provided by Dascom. For more details, please visit our websiteWWW.DASCOM.COM. - Page 15 Dascom DC-7600 User Guide V1.0 Package Contents: Printer 1 unit Card cassette 1 unit Reject bin 1 piece Output tray 1 piece Power cord 1 piece USB cable 1 piece Cleaning Card 1 piece Standard Cleaning roller 1 unit Graphic installation...
- Page 16 Dascom DC-7600 User Guide V1.0 Remove the packaging Remove protective material as shown below before the printer power on. ① Pinch the box locker, loosen and remove it (2 in front, 2 in the back, 4 in total) ② Hold the handles on both sides of the box and then pull up the box.
-
Page 17: Operating The Printer Safely
Dascom DC-7600 User Guide V1.0 1.2 Operating the Printer Safely The following precautions must be observed to assure safe operation of your printer. Do not do anything that is not described in this manual. Doing so could cause an unexpected failure. - Page 18 Dascom DC-7600 User Guide V1.0 Power supply Use a dedicated power cable and do not use an extension cord with multiple outlets. Be sure to remove any dust from the plug and electrical outlet. Humidity produces a micro-current on the surface causing overheating.
- Page 19 Dascom DC-7600 User Guide V1.0 Do not place heavy items on the printer and do not lean on the printer. While the printer is operating, do not turn off the power, unplug the power cable, or look inside (open) the printer.
-
Page 20: Printer Components
Dascom DC-7600 User Guide V1.0 1.3 Printer Components 1.3.1 The front side of the printer Printer components and their functions are shown as below:... - Page 21 Dascom DC-7600 User Guide V1.0 Component Name Function Top cover Open when loading cards or cleaning the feeding roller. Includes the keys, the LCD Panel, and LED indicator for operating the Control panel printer. Open when changing print ribbons and retransfer film, and when Front cover cleaning the Cleaning Roller.
-
Page 22: The Profile Of Printer
Dascom DC-7600 User Guide V1.0 1.3.2 The profile of printer Component Name Function Output slot Ejects correctly printed cards. Output tray Catches / collects correctly printed cards Reject bin Cards with errors are placed here... -
Page 23: The Rear Side Of The Printer
Dascom DC-7600 User Guide V1.0 1.3.3 The rear side of the printer Component Name Function Up to 250 0.76mm / 30-mil cards can be loaded at a time. You can adjust the gate gap to match card thickness. Card cassette Factory default is set so the gap corresponds to feeding of cards of 0.76 mm / 30-mil cards. -
Page 24: Control Panel
Dascom DC-7600 User Guide V1.0 1.3.4 Control Panel There are four buttons. Logo Name Function Enter or exit current setup 【Menu/Exit】 key SET Key Confirm current setting ▲/▼ Choose between or navigate settings 【Up/Down】 keys Status LED and buzzer There’re two LED lights: blue means ready, red means error;... -
Page 25: Attaching Power
Dascom DC-7600 User Guide V1.0 1.4 Attaching Power Make sure the printer and the computer are powered off. Connect the power cord to the printer. Connect the power cord to the power socket. Ensure the power cord is securely connected. Turn on the printer power button. -
Page 26: Connecting To Computer
Dascom DC-7600 User Guide V1.0 1.5 Connecting to Computer The standard config ports of this printer are USB port and Ethernet port. All the ports are behind of the printer, please choose the proper port. Ensure your printer is switch off. -
Page 27: Installing Windows Driver
Dascom DC-7600 User Guide V1.0 1.6 Installing Windows Driver The driver is the connection and transformation platform between the card printer and the computer operating system to achieve the interactive processing of the information. User can set up relevant settings, get print status and etc. via driver. We load the driver on the attached CD. - Page 28 Dascom DC-7600 User Guide V1.0 (2) Select the diver selection and port selection, click “Next”. (3) Set up the printer name, click “Start”.
- Page 29 Dascom DC-7600 User Guide V1.0 (4) Waiting for the installation. (5)Finish the installation,click the “Finish”.
-
Page 30: Installing Windows Driver Via Ethernet
Dascom DC-7600 User Guide V1.0 1.6.2 Installing Windows Driver via Ethernet Connect the Ethernet cord to the computer, put the CD-ROM into the computer, then choose print diver program manual. The program will guide you to finish the whole installation. - Page 31 Dascom DC-7600 User Guide V1.0 (3) Choose you printer, click “Modify printer”. (4) You can modify the Printer name, IP address acquisition mode,IP address, Subnet mask. Click the “OK” when you finish.
- Page 32 Dascom DC-7600 User Guide V1.0 (5) Return to the Ethernet port configuration page, wait for a few seconds, you can see the updated Ethernet information. (6) Select you printer, click “Choose”, the corresponding IP address information is displayed at the bottom left. Start the installation when you click the “OK”.
- Page 33 Dascom DC-7600 User Guide V1.0 (7) Select the diver selection and port selection, click “Next”. (8) Set up your printer name, click “Start”.
- Page 34 Dascom DC-7600 User Guide V1.0 (9) Waiting for the installation. (10) Finish the installation, click the “Finish”.
-
Page 35: Chapter 2 Installation
Dascom DC-7600 User Guide V1.0 CHAPTER 2 INSTALLATION 2.1 Installing Cards Cards can be loaded automatically from the card cassette or manually from the manual feed slot. The card cassette can hold a large quantity of cards making it convenient for mass or large- scale printing. -
Page 36: Setting The Card Thickness
Dascom DC-7600 User Guide V1.0 2.1.2 Setting the Card Thickness Install the card to the Card cassette. (1) Push the slot button to the right, the slot cover will be released. Open the slot cover backwards; ○ M ove the card block lever to the left;... - Page 37 Dascom DC-7600 User Guide V1.0 Please put the card carefully. Ensure that magnetic stripe CARDS and contact smart CARDS are properly placed in the card feeder. If the card is inserted in the wrong direction, the code selection may not work properly.
-
Page 38: Adjust The Card Inlet According To The Thickness Of The Cards
Dascom DC-7600 User Guide V1.0 2.1.3 Adjust the card inlet according to the thickness of the cards The factory default supports 0.76mm (30mil) card thickness. Confirm the correct thickness setting before installing new cards to the card cassette. (1) Open the printer top cover. Remove the card cassette. -
Page 39: Face Up/Down Stacking For Output Cards
Dascom DC-7600 User Guide V1.0 2.1.4 Face Up/Down Stacking for Output Cards User can set up the output cards face up or down. Face Up: Correctly printed cards are arranged with the printed surface facing up after printing. Face Down: Correctly printed cards are arranged with the printed surface facing down after printing. -
Page 40: Managing Rejected Cards
Dascom DC-7600 User Guide V1.0 2.1.6 Managing Rejected Cards This printer is equipped with left and right slots to separate correctly printed cards from rejected ones. By default, rejected cards are ejected from the right slot. However, the two slots are interchangeable for your preference. - Page 41 Dascom DC-7600 User Guide V1.0 Direct touching contaminates the ribbon/retransfer film and causes • uneven print quality. Avoid excessive impact on the ribbon/retransfer film when replacing them. • Using non-genuine products may cause poor print quality and printer • malfunction.
- Page 42 Dascom DC-7600 User Guide V1.0 Open the front cover: Hold the handle and open front cover. Turn the ribbon lock clockwise to unlock the ribbon cartridge and pull out the whole cartridge.
- Page 43 Dascom DC-7600 User Guide V1.0 To load a new ribbon onto cartridge, place or engage orange spoolof ribbon to feeding hub of the cartridge. While unwinding the ribbon film, route the film around three guiding poles. Finally engage the black spool to the ...
-
Page 44: Replacing The Retransfer Film
Dascom DC-7600 User Guide V1.0 Close the front cover to its original position. Press the SET key when the LCD screen displays [Please press SET key]. 2.3 Replacing the Retransfer Film You should replace the retransfer film when the LCD shows [FILM END] warning. - Page 45 Dascom DC-7600 User Guide V1.0 Please contact your local reseller for ribbons not listed above. Direct touching contaminates the ribbon/retransfer film and causes • uneven print quality. Avoid dropping or stressing the ribbon/retransfer film when replacing • them. Using non-genuine products may cause poor print quality and printer...
- Page 46 Dascom DC-7600 User Guide V1.0 malfunction. Quality and reliability of non-genuine products are not guaranteed. • Even within the warranty period, fees may be charged on servicing the • printer using non-genuine products. Hold the handle and open the front cover...
- Page 47 Dascom DC-7600 User Guide V1.0 Turn the retransfer film lock counter-clockwise to unlock the retransfer film cartridge and pull out the whole cartridge. To load new retransfer film onto the cartridge, engage the green spool of the retransfer film to the feeding hub of the cartridge.
- Page 48 Dascom DC-7600 User Guide V1.0 As shown in the right diagram, push in the retransfer film cartridge to the far end until a “click” is heard to indicate correct insertion. Avoid the film touching the printer compartment during insertion.
-
Page 49: Replacing The Cleaning Roller
Dascom DC-7600 User Guide V1.0 Return the front cover to its original position. Press SET key when the LCD screen displays [Please press the Set key]. 2.4 Replacing the Cleaning Roller One cleaning roller is shipped with each ribbon in a package. IMPORTANT: Replace cleaning... - Page 50 Dascom DC-7600 User Guide V1.0 Open the front cover: Hold the handle and open the front cover.
- Page 51 Dascom DC-7600 User Guide V1.0 Directly pull out the cleaning cartridge release it from lock position. Pull the lock to release the spindle. Remove the old cleaning roller. Sleeve a new cleaning roller into the spindle.
- Page 52 Dascom DC-7600 User Guide V1.0 Peel protective Sheet or coating. Pull the lock and drop the roller to its original position in the cleaning cartridge. After the replacement procedure, restore the cleaning cartridge until you hear a “click” sound.
-
Page 53: Installing The Output Tray
Dascom DC-7600 User Guide V1.0 2.5 Installing the Output Tray Hook the output tray to the opening next to the output slot. -
Page 54: Installing The Reject Bin
Dascom DC-7600 User Guide V1.0 2.6 Installing the Reject Bin Hook the reject bin to the opening next to the ejection slot. -
Page 55: Print Card
To understand the card layout and its format and print configuration, you are advised to refer to the following example. Software Card Editor is used to support DASCOM card printers. Users can quickly generate and edit content that needs to be printed. - Page 56 Dascom DC-7600 User Guide V1.0 Button 4: Wizard, user can add black ground, images, barcode and text when creating a new card. Button 5: Quit, click this button to quit CARDEDITOR. (2) After click “new” button, user can choose the card type he/she wants. Select “CR80” in “card type”...
- Page 57 Dascom DC-7600 User Guide V1.0 Click “ emplate” on the right side of the user interface, then user can see many default templates as follow: The detailed instruction can be found as below picture:...
- Page 58 Dascom DC-7600 User Guide V1.0 (4) Double clicks the model you want to edit, when you finish click the “print” on the “file” menu. (5) You can print the card directly.
- Page 59 Dascom DC-7600 User Guide V1.0 (6) If you want to modify the driver settings, such as card direction, single side or double-sided printing, card modification or processing, you can click "advanced option" to change the driver. As for popup print Settings, and then click "ok" to save Settings. Then click "print".
- Page 60 Dascom DC-7600 User Guide V1.0...
- Page 61 Dascom DC-7600 User Guide V1.0 “Graphic Setting” Tabs • Color setting User can get the proper color via settings. User can also adjust the color brightness, contrast and chroma. • Settings of Black ribbon using User can print black via print K color or YMC secondary colors and K color. As well as, user can choose monochrome printing, color printing, set the black valid area and the black invalid area.
- Page 62 Dascom DC-7600 User Guide V1.0 Set up the valid area of K color printing, the area is from the top left corner (0Pixel,0Pixel)to the lower right corner(2112Pixel,1324Pixel) on the card. Use width and height to set the length and width of the invalid...
- Page 63 Dascom DC-7600 User Guide V1.0 “Graphic setting (the reverse side)” Tabs • Color setting User can get the proper color via settings. User can also adjust the color brightness, contrast and chroma. • Settings of Black ribbon using User can print black via print K color or YMC secondary colors and K color. As well as, user can choose...
- Page 64 Dascom DC-7600 User Guide V1.0 “Maintaining” Tabs • Printing test Print the test content. • Printer information User can check the printer DPI, the maximum printing area and minimum printing area. Printer parameter setting • User can read the detailed printer parameter.
- Page 65 Dascom DC-7600 User Guide V1.0 “Printer parameter settings” • User mode User can read the printer information, options state and various of configuration information. The printer information parameters and options state parameters only support readable. Configuration information support can read and write (reference 3.2 user mode) •...
- Page 66 Dascom DC-7600 User Guide V1.0 In service mode, user can modify the print position, print density, system settings, print head, option state and configuration. Please don’t random change them, it may lead to poor printing effect.
-
Page 67: Firmware Update
Before updating, please contact DASCOM dealer for advice on the implementation of the upgrade. In general, updates are required only when a problem or failure is explicitly identified in DASCOM. To download the update, please visit WWW.DASCOM.COM: The steps to update firmware: (1) Select the control panel on the start key in the lower left corner of the Windows taskbar. - Page 68 Do not interrupt the transmission between the computer to the printer during the download. (Such as switch off the printer or computer power, unplug the cable, etc.). Otherwise, printer might not restart. In case of such failure, please contact DASCOM dealer.
-
Page 69: Chapter 3 Normal Mode And User Mode
Dascom DC-7600 User Guide V1.0 CHAPTER 3 NORMAL MODE AND USER MODE You can change between Normal and User Modes when the printer is operating. This section outlines the differences between these two modes and how to switch from one to the other. -
Page 70: User Mode
Dascom DC-7600 User Guide V1.0 3.2 User Mode User Mode allows changing the parameters and checking the status. Steps to change from Normal Mode to User Mode: 1) After LCD displays [READY], press Menu/Exit Key for 1 second then release it. The LCD changes its display to [Printer Info.], which is the entry menu in User Mode:... - Page 71 Dascom DC-7600 User Guide V1.0 Function of four keys in User Mode: Menu/Exit Key: back to its parent menu, i.e. one level up in the menu hierarchy. ▲ Key: previous item. ▼Key: next item. SET Key: an affirmative response to the second line in the LCD.
- Page 72 Dascom DC-7600 User Guide V1.0 Moving between menus in the same level Section 3.3 lists out eleven menus in the same level, from Printer Info, Version Info, ... to Reset User Default. Consecutively pressing ▼/▲ keys leads to your designated menu. For...
- Page 73 Dascom DC-7600 User Guide V1.0 SET Key Menu/Exit Key Version Info Main Version SET: >> 1.0.10.0 Consecutively press Menu/Exit Key until the LCD shows [Quit the Menu]. Then press SET Key to return to Normal Mode: Ready Quit the Menu? SET Key SET Key must be pressed to save the newly changed value.
-
Page 74: The Major Menus
Dascom DC-7600 User Guide V1.0 3.3 The major menus Printer Info Head Info Version Info Printer Setup Card Setup Ribbon/Film Setup Image Setup Interface Setup Option Cleaning Reset User Default 3.3.1 Sub-menus for Printer Info... - Page 75 Dascom DC-7600 User Guide V1.0 View the print head information in two sub-menus: Print Count Print head S/N Record the new print head serial number after replacement; otherwise, failure to do so affects print quality and voids the warranty for this print...
-
Page 76: Sub-Menus For Version Info
Dascom DC-7600 User Guide V1.0 3.3.3 Sub-menus for Version Info View the latest version(s) in this printer: Main Version Sub Version FPGA Version Main Boot Sub Boot 3.3.4 Sub-menus for Printer Setup View and change operation parameters: ... -
Page 77: Sub-Menus For Card Setup
Dascom DC-7600 User Guide V1.0 3.3.5 Sub-menus for card setup View and change card properties: Card type: PVC/PET/PET-G/card 1/ Card 2/ card 3 Decurl Time(Front):0-5 (need to understand these numbers) Decurl Time(Back) : 0-5 Std card exit:... - Page 78 Dascom DC-7600 User Guide V1.0 Error card exit: LEFT SIDE\RIGHT SIDE Magnetic/IC Pos: Front\Back Eject Face: Auto\Front Up\Back Up Card Feed Mode: card cassette\Right(Manual)\Right(Auto) Card thickness: thick\thin Card Type Valid Settings Details PVC (Default) Apply optimized retransfer conditions for standard PVC cards.
- Page 79 Dascom DC-7600 User Guide V1.0 Card loading fac IC /Chip card loading) Valid Printing Surface Rear Side Settings (when singled-side printing) (when singled-side printing) Standard Contact IC ISO chip (Default) back ISO chip Contact IC...
-
Page 80: Sub-Menus For Ribbon/Film Setup
Dascom DC-7600 User Guide V1.0 Eject Face: Valid Settings Details Standard(Default) Back Up Front Front Up Back Back Up Card Feed Mode: Valid Settings Details card cassette Cards are automatically fed from the card cassette. feed cards After receiving the printing data 0~13 seconds, the printer feeds cards automatically on the right side. - Page 81 Dascom DC-7600 User Guide V1.0 Film Type: Valid Settings Product Code Normal Special When the unused amounts of ribbon/retransfer film reaches the values specified in Ribn near end(%) and Film near end(%), respectively, the LCD displays warning messages: “Check Ribbon” or “Check Film”.
-
Page 82: Sub-Menus For Image Setup
Dascom DC-7600 User Guide V1.0 3.3.7 Sub-menus for Image Setup View and manage the color settings: Yellow Balance: ±64 Magenta Balance: ±64 Cyan Balance: ±64 Black Balance±32 Color Brightness: deep, medium, shallow, customer setting 3.3.8 Sub-menus for Interface Setup View and change the interface settings: ... -
Page 83: Chatper 4 Cleaning
Dascom DC-7600 User Guide V1.0 CHATPER 4 CLEANING 4.1 Cleaning with a Cleaning Card Use the Cleaning Card provided to clean the Card Transport Roller if cards do not feed smoothly. We recommend cleaning the rollers after printing 1,000 cards. -
Page 84: Cleaning The Cleaning Roller
Dascom DC-7600 User Guide V1.0 4.2 Cleaning the Cleaning Roller You can clean the Cleaning Roller before printing. Clean the cleaning roller if cards are printed with missing colors or if there are foreign objects on them. Please refer to section 2.8. - Page 85 Dascom DC-7600 User Guide V1.0 ④ Load the Card Feeder Cassette. ⑤ Close the Top Cover. Wait for 2minutes, if you want to use the printer. You can clean the feeding roller of the secondary transfer part at the bottom of the top cover when you find the printing position on the printed card is beyond the scope of adjustment or there is a blank on the edge of the printed area.
-
Page 86: Cleaning The Transport Roller
Dascom DC-7600 User Guide V1.0 4.4 Cleaning the Transport Roller ① Turn off the power. ② Open the top cover, and remove the Card Feeder Cassette. ③ Open the Front Cover and Top Access Cover. ④ Lift the decurl section. -
Page 87: Filter Cleaning
Dascom DC-7600 User Guide V1.0 4.5 Filter Cleaning If the filter becomes clogged or dirty, dirt may enter the printer. It is recommended the filter be cleaned monthly. ① Turn off the power. ② Remove the filter cover on the rear of the printer. -
Page 88: Chatper 5 Troubleshooting
Dascom DC-7600 User Guide V1.0 CHATPER 5 TROUBLESHOOTING 5.1 Warning Messages and Troubleshooting This printer is designed for minimal user intervention. Occasionally, the LCD displays messages to advise users to take corrective actions. After clearing an error, press SET to initialize the printer and [Ready] will be displayed. - Page 89 Dascom DC-7600 User Guide V1.0 initialization. Film Jam Probable Cause: Retransfer film winding problem. Action: Do not turn off power. Refer to Section 2.3 to reload the retransfer film. Press SET Key to clear this warning and the printer will resume previous printing after initialization.
-
Page 90: Valuable Help From You For Troubleshooting
Dascom DC-7600 User Guide V1.0 Display Solution If the fault is not cleared after initialization, turn the rollers manually to clear jammed card Printer Card Do not turn off power. Open the front cover. Turn the rollers to clear jammed card. -
Page 91: Troubleshooting
Dascom DC-7600 User Guide V1.0 5.3 Troubleshooting Do not attempt to use any tool to fix any problem. This may cause serious damage to the printer. 5.3.1 Faults Related to Printing No print out? ① Check the printer driver Check compatible printer driver for Microsoft Windows Check if this printer is the default driver in Microsoft Windows. - Page 92 Dascom DC-7600 User Guide V1.0 Blank card ejected? ① Check the ribbon and retransfer film Check if ribbon/ retransfer film run out or are damaged. Replace them if necessary. ② Check if print head is damaged. Print test pattern. If failed to print the test pattern, contact local reseller for support.
- Page 93 Dascom DC-7600 User Guide V1.0 Faults Probable Cause Corrective Actions Check that card surfaces are clean and dust • free. Dirty Card Surface Use new, clean cards. • Defective Spots Clean the transport rollers • Cleaning Roller Check the proper installation of the ribbon Ribbon not properly and retransfer film.
- Page 94 ⑥ Check print head If a straight white line(s) travels across the length of your card, the print head may be dirty or defective. If the problem persists after cleaning, please contact your Dascom reseller. Card bent? ① See Chapter 3 to change from Normal Mode to User Mode.
-
Page 95: Clear Jammed Card
Dascom DC-7600 User Guide V1.0 ⑤ Press SET Key to save bending correction setting. The factory default value is “0”. You may use the driver to configure this parameter as well. Improper secondary retransfer parameters can overheat and cause card bending as well. - Page 96 Dascom DC-7600 User Guide V1.0 ④ Replace jammed card back to the card cassette. ⑤ Close the card feed cover and the printer covers. ⑥ Press the SET Key. The error message disappears from the LCD display and the printer restarts.
-
Page 97: Change The Print Head
If you still can't solve the problem, you can get detailed information and help via the DASCOM partner network. 5.4.1 DASCOM partner network If you have any problem can’t be solved, please contact the DASCOM dealer. If you don’t know any DASCOM dealer, please visit WWW.DASCOM.COM to tell us your problems. -
Page 98: More Information
WWW.DASCOM.COM, and find information about the use and troubleshooting of DASCOM printers in the driver and support section. You can download the latest version of firmware, print driver and use manual, DASCOM printer usage and maintenance related video, and FAQ (FAQ) section. -
Page 99: Chapter 6 Specification
Dascom DC-7600 User Guide V1.0 CHAPTER 6 SPECIFICATION Function Double-sided printing (full color) Printing system Indirect retransfer system Printing material Material: PVC, PET, PET-G 0.48 ~ 1.10mm Card thickness ISO CR-80 – ISO7810 (53.98 x 85.60mm) Card size 600dpi (23.6 dots/mm)... -
Page 100: Appendix I: Fcc Statement
This equipment generates uses and can radiate radio frequency energy and, if not installed and used in accordance with Dascom instructions, may cause harmful interference to radio communications. However, there is no guarantee that interference will not occur in a particular installation. -
Page 101: Appendix Ii: Dascom Representatives
Dascom DC-7600 User Guide V1.0 Appendix II: DASCOM REPRESENTATIVES GERMANY UNITED KINGDOM DASCOM Europe GmbH DASCOM GB Ltd Heuweg 3 Hart House,Priestley Road, D-89079 Ulm Basingstoke, Hampshire Deutschland RG24 9PU, England Tel.: +49 (0) 731 2075 0 Phone: +44 (0) 1256 355130...
Need help?
Do you have a question about the DC-7600 and is the answer not in the manual?
Questions and answers