
Related Manuals for Leica CM1860


Summary of Contents for Leica CM1860
- Page 1 Instructions for Use CM1860/CM1860 UV - Cryostat Leica CM1860/CM1860 UV, V1.6 RevI – 10/2016, English 14 0491 80101 RevI Order no.: Always keep this manual with the instrument. Read carefully before working with the instrument.
- Page 3 Leica reserves the right to change technical spec- state-of-the-art technology as we understand it ifications as well as manufacturing processes following thorough investigation in this field. We without prior notice.
-
Page 4: Table Of Contents
Maintenance ............................... 15 Technical Data ............................16 Setting up the Instrument ........................18 Installation site requirements ........................18 Unpacking instructions for the cryostat CM1860/1860 UV ..............19 Standard delivery—packing list ......................22 Assembling the handwheel ........................23 Instrument Setup ............................ 24 Electrical connection .......................... - Page 5 Possible sources of error, causes and remedies ................. 57 8.3.1 Changing the battery ..........................61 Cleaning, Disinfection, Maintenance ....................62 Cleaning ............................... 62 Spray disinfection with Leica Cryofect ....................63 Maintenance ............................... 64 9.3.1 General maintenance instructions ......................64 9.3.2 Replacing the fuses ...........................
-
Page 6: Important Information
Important Information Symbols in the text and their meanings Symbol for labeling electrical and elec- tronic equipment in accordance with Warnings Section 7 of the German Electrical and appear in a gray box and are marked Electronic Equipment Act (ElektroG). by a warning triangle ElektroG is the law governing how electrical and electronic equipment... - Page 7 60 ° or more, the blue quartz sand flows into the arrow-shaped indicator window and sticks there per- manently. Improper handling of the shipment is immediately detectable and can be proven definitively. Leica CM1860/CM1860 UV – Cryostat...
-
Page 8: Qualification Of Personnel
The instrument is not designed for unsupervised storage of specimen material. The instrument may only be operated within the scope of its designated use as described above and as per the instructions given in these Instructions for Use. The Leica CM1860/CM1860UV is also suitable for IVD (in vitro diagnostics). -
Page 9: Safety
The protective devices on both instrument and components must neither be removed nor modi- fied. Only service personnel qualified by Leica may repair the instrument and access the instru- ment's internal components. -
Page 10: Safety Devices
Leica CM1850UV, CM1860UV and CM1950 cryostats at -20 °C ( Table 1, see I. Maier certificate). For powerful disinfection, we recommend irradiation for three hours (CM1850UV/CM1860UV/ CM1950). Vegetative bacteria including Mycobacterium tuber- culosis, bacterial endospores (Bacillus sp.) and fungi are killed... - Page 11 UVC irradiation cannot be a replacement for regular chemical dis- infection of the cryostat chamber. For current information about certificates and recommendations, visit: http://www.LeicaBiosystems.com/products/total-histology/cryo- sectioning/details/product/leica-CM1860-uv/downloads/ Leica CM1860 /CM1860UV – Cryostat...
-
Page 12: Locking/Unlocking The Handwheel
Safety 2.3.1 Locking/unlocking the handwheel Rotate the handwheel only if the refrigeration system is on and the cryochamber is cold. 12 o'clock position Always lock the handwheel prior to making modifications to the knife or specimen, changing the specimen, or taking a break. 6 o'clock position To lock the handwheel, move its handle to the 12 or 6 o'clock position. -
Page 13: Operating Conditions
• This waiting period is necessary to allow the compressor oil, which may have been displaced during transport, to return to its original position. Failure to comply with this may cause damage to the instrument. • No additional extension cable may be used. Defrosting • The quick freeze shelf can become very hot during the defrosting process. Therefore, do not touch it! Leica CM1860 /CM1860UV – Cryostat... -
Page 14: Operating The Instrument
Remove section waste after EVERY change of specimen. Do not start disinfection until you have done this! Each new specimen is a potential source of contamination. The use of flammable sprays within the cryostat chamber is permitted only with the Leica Cryofect tested by us. -
Page 15: Removing The Microtome
Safety • Do not use organic solvents or other aggressive substances for cleaning. Use only disinfectants listed in these Instructions for Use, such as Leica Cryofect (alcohol or other common alcohol-based disinfectants). Please contact Leica Biosystems for further details on adequate disinfection measures. Removing the microtome • The microtome is encapsulated and therefore does not require removal by the user. -
Page 16: Technical Data
Technical Data Type CM1860 / CM1860 / CM1860 / CM1860 / CM1860/ CM1860 UV CM1860 UV CM1860 UV CM1860 UV CM1860 UV Test symbol c_CSA_us Nominal voltage 100 VAC 120-127 VAC 220-230 VAC 220-230 VAC 240 VAC ±10 % ±10 % ±10 %... - Page 17 1140 mm Observe item 4.1, "Installation site Weight requirements". (incl. microtome, without specimen cooling) approx. 135 kg All CM1860/CM1860 UV instrument variants need the following secondary fuses: F1: T0.25A L250V Type FST 6.3x32 Brand: SCHURTER F2: T1.6A L250V Type FST 6.3x32 Brand: SCHURTER F3: T1.0A...
-
Page 18: Setting Up The Instrument
Setting up the Instrument Installation site requirements Do not operate in rooms with explosion hazard! To ensure proper function of the instru- ment, it must be set up with a minimum distance on all sides from walls and furniture (see "Transport and installation"). The place of installation must meet the following requirements: - The instrument requires an installation area of approx. -
Page 19: Unpacking Instructions For The Cryostat Cm1860/1860 Uv
Setting up the Instrument Unpacking instructions for the cryostat CM1860/1860 UV • W hen the instrument is delivered, check the tilt indicators on the pa- ckaging. • I f the arrowhead is blue, the shipment was transported laying flat, was tilted at too great an angle or fell over during transport. - Page 20 Setting up the Instrument Transport grip points Fig. 7 Fig. 8 • Lift and remove the wooden edge (6, Fig. 7). • Remove the ramp (5, Fig. 8) on the front side of the pallet (see Fig. 6) and correctly attach it to the back (see Fig. • Properly insert the ramp. Make sure that the ramp components designated "L"...
- Page 21 To do so, unscrew both adjusting feet (1) using the provided open-end wrench (No. 13). When subsequently transporting the instru- ment any further on wheels, screw them back in all the way. 2 (not visible) Fig. 9 Leica CM1860 /CM1860UV – Cryostat...
-
Page 22: Standard Delivery-Packing List
Compare the delivered components with the parts list and your order. Should you find any discrepancies, please contact your Leica sales office without delay. A choice of different knife holders is available for the CM1860/ CM1860UV. Instructions for Use V 1.6 RevI – 10/2016... -
Page 23: Assembling The Handwheel
• Attach the spring washer (3) to the screw (4) as shown in Fig. 10. • Tighten the screw (4) using an Allen key (6 mm). • Attach the cover disk (self-adhesive - not pictured). To dismount, proceed in reverse order. Rotate the handwheel only if the refrigeration system is on and the cryochamber is cold. Leica CM1860/CM1860 UV – Cryostat... -
Page 24: Instrument Setup
(Fig. Use only the power cable provided by Leica. Failure to observe this causes an immi- nently hazardous situation that may result in death or serious injury to the operator or other personnel. -
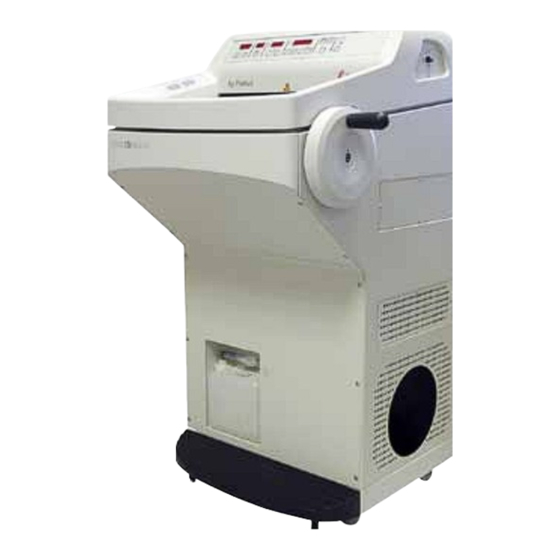
Page 25: Overview Of The Leica Cm1860/Cm1860 Uv
Instrument Setup Overview of the Leica CM1860/CM1860 UV Fig. 11 Leica CM1860/CM1860 UV – Cryostat... - Page 26 Instrument Setup Cryostat CM1860/ CM1860 UV Waste container Control panel 1 Control panel field 2 Storage shelf, left Storage shelf, right Circuit breaker Quick freeze shelf Peltier element Parking station (optional) Stationary heat extractor (optional) Holder for heat extractor (optional)
-
Page 27: Power Switch And Circuit Breaker
Time: 00:00 Defrost time: 23:45 Chamber cooling: (Indication of the temperature) Peltier element: (Display "PE") • Program the desired values as described under 6.2.1 to 6.2.3. In normal operation, a pressure compensation shortly before the compressor starts up might lead to a hissing sound. Leica CM1860 /CM1860UV – Cryostat... -
Page 28: Operating The Instrument
Operating the Instrument Control panel 1 Fig. 14 Function keys Lamp button ON/OFF switch for cryochamber illumination. Manual defrost button To activate and deactivate manual defrosting. Key button To lock and unlock the control panel to protect the entered parameters from unintended modifications. - Page 29 The LEDs for the short and long disinfection modes illuminate alternately, and the UVC lamp is off. This status is displayed as soon as the service life of the UVC lamp (9000 hours) has been reached. For replacing the UVC lamp, refer to Chapter 9.3.3. Leica CM1860/CM1860 UV – Cryostat...
- Page 30 Operating the Instrument After replacing the UVC lamp, its service life counter must be reset. To do so, press and hold the UVC button for longer than 30 seconds. The counter has been reset successfully if the LED for the long disinfection goes out while the button is being pressed.
-
Page 31: Programming The Desired Values
You can now set the desired value using these buttons. Pressing the button for more than 1 sec. increases or decreases the chamber tem- perature continuously. Fig. 17 The actual value will be indicated 5 seconds after finishing the programming. Leica CM1860 /CM1860UV – Cryostat... -
Page 32: Activation Of The Peltier Element (Option)
Operating the Instrument 6.2.4 Activation of the Peltier element (option) The Peltier element provides additional cooling for the freezing stations. Upon activation of the Peltier element, the compressor of the cooling system is started after 40 seconds to reinforce the thermal conductivity effect. Display "PE"... -
Page 33: Manual Defrosting Of The Cryochamber
When switching on the instrument (in the initialization phase), you have to press the key. If the handwheel is at the 6 o'clock position or the specimen head is "down", the yellow LED next to RETRACT is not illuminated and remains off even during sectioning. Leica CM1860 /CM1860UV – Cryostat... -
Page 34: Display Lock
Operating the Instrument Display lock After the display is locked using the key button (press and hold for 5 sec.), set values can no longer be changed. Only the UV disinfection can still be enabled/disabled by pressing the UV key. Push the key button once more for 5 seconds to unlock the display. -
Page 35: Daily Use Of The Instrument
• Place the specimen disc in one of the holes of the quick freeze shelf and freeze the specimen at a low temperature. • Once the specimen is frozen, insert the speci- men disc (Fig. 25) with the specimen into the specimen head (Fig. 25) and start sectioning. Fig. 24 Leica CM1860/CM1860 UV – Cryostat... -
Page 36: Stationary Heat Extractor (Optional)
Daily Use of the Instrument 7.1.2 Stationary heat extractor (optional) • Fasten the support (1, Fig. 24) of the heat extractor (2, Fig. 24) to the left side panel of the cryochamber using two screws in the provided holes. Insert the heat extractor. • Lower the heat extractor cylinder on the specimen surface. After ap- proximately 30 seconds, the specimen should be completely frozen. -
Page 37: Sectioning
Inserting the blade holder CE 3. Push the upper part of the blade holder onto the base. Clamp the blade holder into place using an Allen key (No. 4) on the left side (23). Fig. 27 Leica CM1860/CM1860 UV – Cryostat... - Page 38 Daily Use of the Instrument Inserting the blades into blade holder CE Caution! Microtome blades are extremely sharp! The blade holder CE can be used either for the low-profile, narrow-band and high-profile, broad-band blades. Inserting the high-profile blades The safety gloves included in the stan- dard scope of delivery must be worn when inserting the blade! ...
- Page 39 To do so, fold the clamping lever (10) down- wards counterclockwise (Fig. 33). Fold the anti-roll guide system (4) to the left. Guide the brush with magnet to the blade and lift it upwards and out. Fig. 33 Leica CM1860/CM1860 UV – Cryostat...
- Page 40 Daily Use of the Instrument The safety gloves included in the stan- dard scope of delivery must be worn when disposing of the blade! 5. Once the blade has been removed from the blade holder, it is disposed of into the dis- penser container (storage compartment in bottom, Fig.
- Page 41 Allen screw (23). If the sectioning results are not satisfactory, increase the clearance angle in 1° increments until you achieve optimum Fig. 36 results. Settings of 1° - 2° (blade holder CE) are well suited for most applications. Leica CM1860/CM1860 UV – Cryostat...
- Page 42 Daily Use of the Instrument Adjusting the anti-roll guide system You can adjust the height of the anti-roll guide system using the knurled nut (8): • If you turn the nut counterclockwise, the anti-roll guide system moves toward the blade. • If you turn the nut clockwise, the anti-roll guide system moves away from the blade. If the anti-roll guide system is in the wrong position relative to the blade, the following problems will result: Fig.
-
Page 43: Blade Holder Ce-Tc
7.3.2 Blade holder CE-TC The blade holder CE-TC is designed only for dis- posable carbide metal blades (tungsten carbide - TC65). The handling of this holder is identical to that of the blade holder CE. Fig. 39 Leica CM1860/CM1860 UV – Cryostat... -
Page 44: Knife Holder Cn
Daily Use of the Instrument 7.3.3 Knife holder CN Inserting the base 1. To insert the blade/knife holder base (1), move the lever (2) to the back. Slide the base onto the T-piece (3) of the baseplate. When inserting the blade/knife holder base, you have to overcome the resis- tance of a spring (located in the foot of the knife holder) by applying a little... - Page 45 NEVER place it onto the work both are tight. surface next to the instrument! • To remove the knife, follow these instructions in opposite order. Open the wingscrews by turning them coun- terclockwise and then pull the knife out to the side. Fig. 43 Leica CM1860/CM1860 UV – Cryostat...
- Page 46 Daily Use of the Instrument Knife guard/lateral movement for knife holder CN The knife guard (18) is fixed and integrated into the clamping jaws. The knife guard has handles (19) that allow it to be moved. The knife guard is suit- able for knife lengths up to 16 cm.
- Page 47 (caution: washers) and feed it into the adjacent hole (6). Tighten the screws from the underside of the segment arc. Repeat on the left side. Now use the longer knife back rest provided. Fig. 47 Leica CM1860/CM1860 UV – Cryostat...
-
Page 48: Knife Holder Cn-Z With Anti-Roll Guide
For disinfection, commercially available, mild cleaners and disinfectants can be used – we recommend Leica Cryofect (not available in the USA). Wear gloves during cleaning to prevent frostbite. Instructions for Use V 1.6 RevI – 10/2016... - Page 49 Dry each part thoroughly before reassembly and insertion into the cryostat. Occasionally oil the moving parts such as the axes (37) and (38) and the slot (39) with a drop of cryostat oil (Type 407). Leica CM1860/CM1860 UV – Cryostat...
-
Page 50: Installing The Shelf (Movable) (Optional)
Daily Use of the Instrument Trimming the specimen Take care when handling microtome knives and disposable blades. The cutting edge is extremely sharp and can cause serious injuries! For that reason, always wear the cut- resistant safety gloves included in the standard scope of delivery! Always clamp the specimen block BEFORE clamping the knife or the blade. -
Page 51: Temperature Selection Chart (In Minus °C)
Testicular Thyroid Tongue Uterus curettage The temperature values given in this table are based on experience, however, these are only approximate values, as any tissue may require particular adjustments. Leica CM1860/CM1860 UV – Cryostat... -
Page 52: Defrosting
Daily Use of the Instrument Defrosting Defrosting the cryochamber actually means defrosting the evaporator to prevent excessive frost buildup. The evaporator is flushed with hot gas during defrosting. The cryochamber virtually is frostfree and does not need to be defrosted. The condensation water that is produced during defrosting is collected in a container, which is located at the front of the cryostat cabinet. -
Page 53: Manual Defrosting Of The Quick Freeze Shelf
• Remove all the specimens from the cryostat. • Attach the cover for the freeze shelf (standard scope of delivery). • Remove the plug and close the sliding window. • Switch off the chamber illumination and start the UV disinfection. • Lock control panel field 1 (Fig. 14) using the key button. • Do NOT switch off the instrument using the circuit breaker, as otherwise no cooling takes place. Leica CM1860 /CM1860UV – Cryostat... -
Page 54: Shutdown For A Longer Period
Daily Use of the Instrument 7.6.2 Shutdown for a longer period If you do not intend to use the instrument for several weeks you may turn it off. Please note, however, that it may take up to several hours to cool the cryochamber down to very low temperatures after turning the instrument on again. -
Page 55: Troubleshooting
• After 17,610 hours, "HELP" is output in the real-time display to indicate the need for service mainte- nance. The display alternates between "HELP" and the real-time display. The note is acknowledged by pressing a key on the keyboard. The "HELP" display reappears for a shorter period. Leica CM1860/CM1860 UV – Cryostat... -
Page 56: Temperature Control Button
Troubleshooting Temperature control button On the back of the cryostat cabinet there is a temperature control button (1, Fig. 53). If the temperature of the cryochamber exceeds 60 °C the switch is automatically activated and turns the instrument off. Possible causes and remedies: • Temperature of the direct surroundings is constantly higher than 40 °C. -
Page 57: Possible Sources Of Error, Causes And Remedies
- Anti-roll plate poorly aligned with - Align correctly. knife edge. - Incorrect clearance angle. - Slightly increase knife/blade angle. - Knife/blade blunt or damaged. - Use different part of the cut- ting edge or replace. Leica CM1860/CM1860 UV – Cryostat... - Page 58 Troubleshooting Problem Cause Remedy Sections not properly flattened - Knife/blade and/or anti-roll plate - Clean with dry cloth or brush. despite correct temperature and dirty. - Replace plate. correctly aligned anti-roll plate - Edge of anti-roll plate damaged. - Use different part of the cut- - Blunt knife/blade.
- Page 59 - Blunt cutting edge. - Use different part of the cut- ting edge or replace. - Incorrect clearance angle. - Slightly increase clearance angle. - Dried specimen. - Prepare new specimen. Leica CM1860/CM1860 UV – Cryostat...
- Page 60 Troubleshooting Problem Cause Remedy Tissue adheres to the anti-roll - Dried specimen. - Cool down anti-roll plate or guide. - Anti-roll plate is too warm or reposition correctly. incorrectly positioned. - Remove static electricity. - Static charge. - Remove fat with alcohol. - Fat on the corner or edge of anti- roll plate.
-
Page 61: Changing The Battery
7 years at the latest. All settings (time, defrost time, section thickness etc.) are lost when the instrument is switched off. There is no danger for the instrument. However, the customer must re-enter the setting values after changing the battery. Leica CM1860/CM1860 UV – Cryostat... -
Page 62: Cleaning, Disinfection, Maintenance
Wear safety gloves at all times when cleaning, to prevent contact with contaminated substances! Use only disinfectants listed in these Instructions for Use, such as Leica Cryofect (alco- hol or other common alcohol-based disinfectants). • Drain the cleaning liquid through the hose after the prescribed reagent time is over and collect it in the waste container (1). -
Page 63: Spray Disinfection With Leica Cryofect
Allow the cryochamber to reach the previously selected temperature. Once the selected temperature is reached, either 5a. Spray the surfaces to be disinfected with a uniform coat of disinfectant (when using Leica Cryofect, a maximum of 10 sprays are allowed - see 2.6. -
Page 64: Maintenance
Leica. • Enter into a service contract at the end of the warranty period. For further information, please contact your local Leica service center. Fig. 55 • Clean the instrument every day. Weekly: Before the following parts can be oiled, all section waste and deposits must be carefully removed. - Page 65 Do not carry out any repairs on your own as this will invalidate the warranty. Repairs may only be carried out by qualified service engineers authorized by Leica. The germicidal UV lamp is a simple and safe means of minimizing pathogens, which consider- ably reduces the risk of infection.
-
Page 66: Replacing The Fuses
Cleaning, Disinfection, Maintenance 9.3.2 Replacing the fuses Turn the instrument off and disconnect the power plug before replacing the fuses! Use only the fuse types specified in Chapter "3. Technical Data. Failure to comply with this can cause severe damage to the instrument and its surroundings and a risk of fatal injury! On the back of the instrument there is a fuse box with 5 fuses: • Unscrew the fuse cap with a screwdriver. - Page 67 (5). • Replace the sliding window. • Connect the instrument to the power supply again and switch it on. If any metallic mercury is released, handle it carefully and dispose of it properly! Fig. 62 Dispose of the UVC lamp separately! Leica CM1860/CM1860 UV – Cryostat...
-
Page 68: Replacing The Fluorescent Lamp
Cleaning, Disinfection, Maintenance 9.3.4 Replacing the fluorescent lamp • Switch off the instrument at the circuit breaker. • Disconnect the power plug. • Slightly lift the sliding window (1) holding it by the grip (2) and pull it out to the front. • For lamp data, refer to Chapter 3, "Technical Data". If the lamp breaks, it is mandatory to call Technical Service for replacement. -
Page 69: Ordering Information, Components And Consumables
Leica high-profile disposable blades, Type 818, 10 packs of 50, ........... 14 0358 38383 Leica low-profile disposable blades - Type 819, 1 pack of 50 ..........14 0358 38925 Leica low-profile disposable blades, Type 819, 10 packs of 50 ..........14 0358 38382 Reusable knives Knife, 16 cm length, profile c ...................... - Page 70 Ordering Information, Components and Consumables Embedding well bar, 4 x 18 mm....................14 0201 39120 Embedding well bar, 4 x 24 mm....................14 0201 39121 Embedding well bar, 3 x 30 mm....................14 0201 39122 Embedding well bar, 2 x 20 x 6 mm, 2 x 20 x 9 mm ..............14 0201 46662 Embedding well bar, 2 x 24 x 6 mm, 2 x 24 x 9 mm ..............
- Page 71 Embedding medium for cryosectioning, tissue freezing medium, 125 ml ......14 0201 08926 Cryostat oil - Type 407, 250 ml ...................... 14 0336 06100 Leica Cryofect - low-temperature disinfectant, 4 x 350 ml ............ 14 0387 42801 Safety gloves, cut-resistant, size S ..................... 14 0340 40859 Safety gloves, cut-resistant, size M ...................
- Page 72 Ordering Information, Components and Consumables Knife/blade holder base, for knife holder CN, blade holder CE Order No..........14 0491 47875 Fig. 66 Knife holder CN, for standard microtome knives or magnetic blade rails. Clearance angle adjustment and knife height adjustment.
- Page 73 Order No..........14 0419 33992 Fig. 70 Blade holder CE-TC, for carbide metal disposable blades. Particularly suitable for sectioning harder materi- als, such as tissue, bone or cartilage. Order No..........14 0491 47874 Fig. 71 Leica CM1860/CM1860 UV – Cryostat...
- Page 74 Ordering Information, Components and Consumables Blade holder pressure plate, 22°, for high-profile microtome blades Order No..........14 0491 48004 Fig. 72 Anti-static kit, blade holder CE Order No..........14 0800 37740 Fig. 73 Knife support for knife holder CN, for short knives Order No.
- Page 75 Ordering Information, Components and Consumables Disposable blades Leica TC-65, Leica TC-65 microtome, disposable blade system for sectioning hard specimen materials. The Leica TC-65 carbide metal disposable blades were specially developed for the requirements in labs where hard, blunt materials are routinely sectioned.
- Page 76 Ordering Information, Components and Consumables Knife, 16 cm length, profile c (flat on both sides, for wax and frozen sections) Note: including knife case 14 0213 11140 Order No..........14 0216 07100 Profile Fig. 78 Knife, 16 cm carbide metal blade, profile c Note: including knife case 14 0213 11140 Order No.
- Page 77 - 4 heat extractors - 1 container for specimen stages - 16 dispensing slides - 1 sectioning board/freezing griddle - 1 heat extractor, elevated - 1 embedding forceps, angled Fig. 83 Order No..........14 0201 40670 Leica CM1860/CM1860 UV – Cryostat...
- Page 78 Ordering Information, Components and Consumables Cryoembedding system, complete consisting of: - 3 embedding well bars with recesses, in three sizes: 18 mm, 24 mm, 30 mm - 6 specimen stages, small - 4 specimen stages, large - 4 heat extractors - 1 container for specimen stages - 16 dispensing slides - 1 sectioning board/freezing griddle...
- Page 79 Order No..........14 0201 46662 Height: 25.4 mm with 2 recesses, size 24 x 6 mm, stainless steel with 2 recesses, size 24 x 9 mm, stainless steel Order No..........14 0201 46663 Leica CM1860/CM1860 UV – Cryostat...
- Page 80 Ordering Information, Components and Consumables Specimen stage, rectangular, stainless steel, small - 28 mm Pack of 1. Order No..........14 0201 39123 Specimen stage, rectangular, stainless steel, large - 36 mm Pack of 1. Order No..........14 0201 39124 Fig.
- Page 81 55 mm specimen disc (14 0477 40046) pack of 10. Order No..........14 0477 43251 Red O-ring, for color-marking the 55 mm specimen disc (14 0477 40046) pack of 10. Order No..........14 0477 43252 Leica CM1860/CM1860 UV – Cryostat...
- Page 82 Ordering Information, Components and Consumables Toolset for cryostats, consisting of: - 1 brush, narrow 14 0183 28642 - 1 Leica brush with magnet 14 0183 40426 - 1 key with handle, No. 5 14 0194 04760 - 1 Allen key, No. 2.5 14 0222 04137 - 1 Allen key, No.
- Page 83 Fig. 95 Color: green pack of 6 Order No..........14 0712 40152 Color: Yellow pack of 6 Order No..........14 0712 40153 Color: Blue pack of 6 Order No..........14 0712 40154 Leica CM1860/CM1860 UV – Cryostat...
- Page 84 Ordering Information, Components and Consumables Specimen disc, 20 mm ........Order No. 14 0370 08636 25 mm ..........14 0416 19275 30 mm ..........14 0370 08587 40 mm ..........14 0370 08637 55 mm ..........14 0419 26491 50 x 80 mm .......... 14 0419 26750 Fig.
- Page 85 Enlarged detail - Storage space for both transfer blocks 4 - Shelf, movable (optional) 5 - Blade holder CE with anti-roll guide (a) – anti- roll guide also acts as knife guard (optional) 6 - Brush shelf Leica CM1860/CM1860 UV – Cryostat...
- Page 86 Ordering Information, Components and Consumables Transfer block for specimen discs, large (13 holes) Order No..........14 049147786 Fig. 98 Transfer block for specimen discs, small (5 holes) – combinable with transfer block for specimen discs, large Order No..........14 0491 47787 Fig.
- Page 87 - Metal frame for exchangeable glass inserts CE - 100 µm spacer - Recommended section thickness 5 µm-50 µm For blade holder CE: (14 0491 47873, 14 0419 33992) Fig. 104 Order No..........14 0419 33980 Leica CM1860/CM1860 UV – Cryostat...
- Page 88 Ordering Information, Components and Consumables Anti-roll guide system CE, glass - 70 mm For specific application consisting of: - Glass insert 70 mm - Metal frame for exchangeable glass inserts CE - 50 µm spacer - Recommended section thickness up to 4 µm For blade holder CE: (14 0491 47873, 14 0419 33992) Order No.
- Page 89 Clear, 9 x 118 ml, Order No......3801480 Blue, 9 x 118 ml, Order No......3801481 Both media may not be available in your country. Please contact your local Fig. 111 distributor. Leica CM1860/CM1860 UV – Cryostat...
- Page 90 Leica Cryofect, Low-temperature disinfectant, 4 350 ml bottles. For temperatures down to -20 °C. Order No..........14 0387 42801 Leica Cryofect is not available for use in the U.S.A. Fig. 113 Cut-resistant safety gloves, 1 pair, size S Order No..........14 0340 40859...
- Page 91 UV fluorescent tube Order No..........14 047140422 Fig. 116 Storage system, movable for installation in the front part of the cryostat for cooled storage of preparation aids Order No..........14 0491 46750 Fig. 117 Leica CM1860/CM1860 UV – Cryostat...
-
Page 92: Mobile Heat Extractor - Application
Ordering Information, Components and Consumables 10.2 Mobile heat extractor – application Specimen freezing with the freezing shelf can be accelerated by the ad- ditional use of a heat extractor. • Store the heat extractor in the cryochamber. • Place it on the specimen surface to accelerate freezing. • Remove it once the specimen is entirely frozen. Fig. 118 Recommendation: It is recommended to precool the heat extractor in liquid nitrogen or other refrigerant. -
Page 93: Warranty And Service
Leica Biosystems Nussloch GmbH guarantees that the contractual product delivered has been subjected to a comprehensive quality control proce- dure based on the Leica in-house testing standards, and that the product is faultless and complies with all technical specifications and/or agreed characteristics warranted. -
Page 94: Decontamination Certificate (Master)
Dear Customer, Any product that is to be returned to Leica Biosystems or serviced on site, must be cleaned and decontaminated in the appropriate manner. Since it is not possible to decontaminate for prion diseases, such as CJD, BSE, CWD etc., equipment exposed to specimens containing prion diseases cannot be returned to Leica Biosystems for repair. - Page 95 If no**, please indicate why not: Decontamination Certificate (master) Such equipment must not be returned without the written agreement of Leica Biosystems. The equipment has been prepared to ensure safe handling/transportation. Whenever possible, please use the original transportation case/box. Important - to avoid refusal of shipment: Place one copy in the unit prior to packaging, or hand it over to the service engineer.
- Page 96 Notes Instructions for Use V 1.6 RevI – 10/2016...
- Page 98 Leica Biosystems Nussloch GmbH Heidelberger Straße 17-19 D- 69226 Nussloch Tel.: +49 - (0) 6224 - 143 0 Fax: +49 - (0) 6224 - 143 268 Web: www.LeicaBiosystems.com...
Need help?
Do you have a question about the CM1860 and is the answer not in the manual?
Questions and answers