
Related Manuals for Leica CM1100


Summary of Contents for Leica CM1100
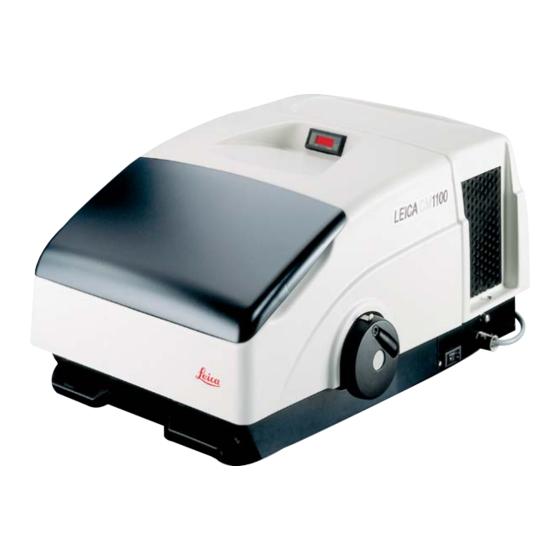
- Page 1 Leica CM1100 Cryostat Instructions for use Leica CM1100 V1.3 RevB English – 09/2012 Order-No.: 14 0469 80101, RevB Always keep this manual near the instrument! Read carefully prior to operating the instrument!
-
Page 3: Important Information
These are determined only by the contract provisions agreed between our- selves and our customers. Leica reserves the right to change technical specifi- cations as well as manufacturing processes without prior notice. Only in this way is it possible to continu- ously improve the technology and manufacturing tech- niques used in our products. -
Page 4: Table Of Contents
Starting a manual defrost cycle ................................24 Trouble sh ooting ............................... 25 Cleaning and disinfection ............................28 10.1 Cleaning ........................................28 10.2 Spray disinfection with Leica Cryofect ..............................28 10.3 Removal of the microtome ..................................29 10.4 Reassembly of the microtome ................................30 Maintenance ................................31 11.1... -
Page 5: Safety Instructions For Handling The Instrument
• Rotate the handwheel until the handle (1) is posi- tioned in the upper turning point. • To lock, push the lever (2) towards the housing. • To unlock, pull the lever (2) away from the housing. Leica CM1100 – Cryostat... - Page 6 Safety instructions for handling the instrument Transport and installation Connection to mains power • The instrument must be transported in an • Please refer to the 'Technical data'! upright position only, or at an angle of max. 30 °! • The instrument must be connected to a grounded mains power outlet socket.
- Page 7 • Do not use organic solvents or any other aggressive substances for cleaning and disinfection! We strongly recommend the use of Leica Cryofect disinfectant spray! Only use alcohol or common disinfectants based on alcohol! • For spray disinfection follow the instruc-...
-
Page 8: Technical Data
Technical data Operating temperature range: 18 °C to 35 °C. All specifications related to temperature are valid only for an ambient temperature up to 22 °C and for an air humidity lower than 60%! Type CM 1100-1 CM 1100-3 CM 1100-11 Nominal voltage 230 V AC ±10% 120 V AC ±10%... -
Page 9: General Description
Leica CM 1100 Overview Control unit Cryochamber Handwheel with retractable countersunk handle Carrying handles Lever Mains switch for locking the handwheel Fig. 9.1 Compressor ventilation Cryochamber grids Coarse feed wheel with retractable countersunk handle Fig. 9.2 Leica CM1100 – Cryostat... -
Page 10: Product Description
General description Product description The Leica CM1100 is a portable compact cryostat for rapid freezing and manual sec- tioning of tissue specimens. Two carrying handles on the front and rear of the housing make it easy for two persons to transport the instrument. The counterbalanced handwheel is lockable in the top po- sition of the handle. -
Page 11: Unpacking And Installation
• Hold the instrument at the carrying handles (9) at the front and rear and lift it from the pallet. • Take the insert (10) out of the accessory box (4) and remove all accessories. Fig. 11 Leica CM1100 – Cryostat... -
Page 12: Site Requirements
Unpacking and installation Site requirements Transport to the installation site The instrument must be transported in an up- Do not operate in rooms with explosion haz- right position only, or at an angle of max. 30 °! ard! Do not carry or reposition the instrument by To ensure an adequate cooling capacity, the holding it at parts of the housing or at the instrument has to be set up with at least 10... -
Page 13: First Use Of The Instrument
• Place the brushes in the location holes (6) of the quick-freeze shelf. • Place all tools needed for specimen preparation in the cryochamber for precooling. • Replace the lid. Leica CM1100 – Cryostat... -
Page 14: Switching On
First use of the instrument Switching on Functions of the control unit After transporting, wait at least 4 hours be- fore turning the instrument on. This waiting period is necessary to allow the compressor oil, which may have been dis- placed during transport, to return to its origi- nal position. -
Page 15: Setting User Definable Parameters
'00'. In this mode the entry of a code number is re- quired. Since coded parameters are reserved for service personnel only, press 'P' again to return to set temperature indication, or wait 30 seconds un- til the display resets to actual temperature indica- tion. Leica CM1100 – Cryostat... -
Page 16: Temperature Selection Chart (In Minus °C)
First use of the instrument Temperature selection chart (in minus °C) Tissue 10 - 15 15 - 25 25 - 30 ❉ ❉ Adrenals ❉ Bone marrow ❉ Brain ❉ Bladder ❉ Breast- fatty ❉ Breast - little fat ❉ ❉... -
Page 17: Daily Operation
Specimen freezing can be accelerated by ad- ditionally using a mobile heat extractor, which is available as an optional accessory (see Chapter 12. ‘Optional accessories‘). • Once the specimen is frozen, fix the specimen disc in the specimen head and start sectioning. Leica CM1100 – Cryostat... -
Page 18: Knife Holder Ce
Daily operation Knife holder CE 8.2.2 Adjusting the rear pressure plate The rear pressure plate (5) sits on two screws which The knife holder CE is equipped with a pres- permit height an parallel adjustment of the pressure sure plate for low profile blades on delivery. plate. -
Page 19: Adjusting The Front Pressure Plate
• Reposition the anti-roll guide on the blade. actually exerts pressure on the blade. A visible gap must remain. When the pressure plate is clamped tightly, this gap will disappear. Leica CM1100 – Cryostat... -
Page 20: Lateral Displacement
Daily operation 8.2.5 Lateral displacement 8.2.6 Adjusting the anti-roll plate If the sectioning results start lacking quality, the knife holder can be displaced laterally to use another blade Parallel adjustment of the anti-roll plate and blade position. It may be necessary to align the front edge of the anti- roll plate parallel to cutting edge of the blade. -
Page 21: Replacing The Glass Anti-Roll Plate
After installation, the anti-roll guide needs to be read- height with the knurled knob (9, Fig. 20.2). justed as described at 8.2.6. The glass anti-roll guide is resistant to ac- etone. For cleaning the knife holder, domestic deter- gents can be used. Leica CM1100 – Cryostat... -
Page 22: Coarse Feed Wheel
Daily operation Coarse feed wheel Trimming The coarse feed wheel is located on the left side of the • Remove the anti-roll guide from the cutting edge. housing. It has a retractable countersunk handle. The coarse feed wheel always rotates during sectioning •... -
Page 23: Sectioning
• Remove the anti-roll guide from the knife for remov- ing and applying a section to a microscope slide. The section can be transferred either to a precooled microscope slide or to a microscope slide at room tem- perature. Leica CM1100 – Cryostat... -
Page 24: Defrosting
Daily operation Defrosting 8.7.1 Programming an automatic defrost cycle The Leica CM 1100 provides both programmable auto- An automatic defrost cycle is programmed by enter- matic and manual defrosting. ing the defrost time via the control unit (see 7.4.3). During a defrost cycle, whether automatic or manual, the evaporator is flushed with hot gas to remove frost 8.7.2 Starting a manual defrost cycle... -
Page 25: Trouble Shooting
Readjust correctly. specimen return movement beyond the cutting edge and scrapes on the specimen surface. Ridged sections Cutting edge damaged. Use different part of cutting edge, or replace blade. Edge of anti-roll plate damaged. Replace anti-roll plate. Leica CM1100 – Cryostat... -
Page 26: Trouble Shooting
Trouble shooting Problem Possible causes Remedies Chatter during sectioning Specimen insufficiently frozen onto Refreeze specimen onto the disc. the specimen disc. Specimen disc not clamped tightly. Check disc clamping. Blade not clamped tightly enough. Check clamping. Specimen has been sectioned too Refreeze specimen onto the disc. - Page 27 Remove obstruction or remove or covered. dust with brush or vacuum cleaner. Instrument has regularly been Start a manual defrost cycle. switched off overnight; therefore an automatic defrost cycle did not take place. Compressor defective. Call technical service. Leica CM1100 – Cryostat...
-
Page 28: Cleaning And Disinfection
Do not use organic solvents or any other ag- ery day! gressive substances for cleaning and disin- fection! Effectiveness of the disinfectant down to -20 We strongly recommend the use of Leica °C experimentally tested. Cryofect disinfectant spray! Only use alcohol or common disinfectants based on alcohol! Highly flammable (VbF: B)! Flash-point: 18 °C (DIN 51755) -
Page 29: Removal Of The Microtome
Risk of frost bite! Or wait until the microtome has reached room temperature. • Pull the microtome to the front to disengage it from the plastic coupling (4) connecting the two shafts, and take it out of the cryochamber. Leica CM1100 – Cryostat... -
Page 30: Reassembly Of The Microtome
10. Cleaning and disinfection 10.4 Reassembly of the microtome The microtome must be completely dry before reinstallation. Humidity inside will condense and freeze in the cold cryostat and thus may cause malfunctions or damage. The handle of the handwheel should be placed in the lowest position so that the specimen clamping head is at its lowest position. -
Page 31: Maintenance
To ensure reliable and trouble-free operation over sev- eral years, we recommend the following: • Have the instrument inspected by a qualified ser- vice engineer authorized by Leica at least once a year. • Enter into a service contract after the warranty pe- riod;... -
Page 32: Optional Accessories
Optional accessories 12.1 Mobile heat extractor 12.2 Thermal block The thermal block (8) facilitates the removal of the fro- Specimen freezing on the quick-freeze shelf can be ac- zen specimen from the specimen disc. celerated by the additional use of a heat extractor. Keep the thermal block outside the cryocham- ber at room temperature. -
Page 33: Warranty And Service
Warranty Leica Biosystems Nussloch GmbH guarantees that the contractual product delivered has been subjected to a comprehensive quality control procedure based on the Leica in-house testing standards, and that the product is faultless and complies with all tech- nical specifications and/or agreed characteristics warranted. -
Page 34: Decontamination Certificate (Master)
(master) Dear Customer, any product that is to be returned to Leica Microsystems or serviced on site, must be cleaned and decon- taminated in the appropriate manner. Since it is not possible to decontaminate for prion diseases, such as CJD, BSE, CWD etc., equipment exposed to specimens containing prion diseases cannot be returned to Leica Microsystems for repair. -
Page 35: Information For The People´s Republic Of China
15. Information for the People´s Republic of China Leica CM1100 – Cryostat... - Page 36 Notice Instructions for use V1.3 RevB – 09/2012...
Need help?
Do you have a question about the CM1100 and is the answer not in the manual?
Questions and answers